
DIY Video Studio is supported by its readers who use the affiliate links or ads on this site. As an Amazon Associate, I earn from qualifying purchases. Thank your support if you use any of the links.
Backyard bird photography can be a lot of fun and help develop your wildlife photography skills. It’s also a great way to discover whether bird photography is for you.
One of the best things about it is that it’s convenient. Your subject, the birds, are literally on your doorstep. You can also get started cheaply, without spending a fortune on super telephoto lenses and pro cameras.
How is that possible?
Simple. Because many of the common birds in your yard will be quite tame, you can get close. That way the birds will look large in your shots without the need of a large telephoto lens.
OK. You may not get shots of exotic species, but with these backyard bird photography tips you will gain the experience you’ll need to get those shots in the future.
This is a comprehensive backyard bird photography setup guide, so I apologize for the length. If you want a specific section, please use the Table of Contents to jump to that part.
So, let’s see what you need to do to start and to enjoy better backyard bird photography.
Backyard Bird Photography Setup
I’ve broken the setup into 9 steps, from the gear you need to adding the polish to your images on your computer.
- Camera with at least a short telephoto lens
- A location with an attractive background
- A feeding station to attract birds into the yard
- A perch setup for a good bird pose
- Somewhere to sit and take your photographs
- Reduce the feeding and perching options on the day you shoot
- Choose your camera settings
- Getting the right bird pose
- Post process your images
Those are the steps in my backyard bird photography basics, and I’ll take you through each one. But first, let me explain why backyard bird photography can be rewarding.
Make your images sparkle and pop with DeNoise AI, GigaPixel AI and Sharpen AI from Topaz Labs. Try the applications FREE for 30days. No commitment or providing credit card details necessary. Use the links below.


Why try backyard bird photography?
You might think that you need to get out into forests or nature reserves to photograph wild birds. Sure, you can do that, but you’ll be amazed at the shots you can get in your backyard.
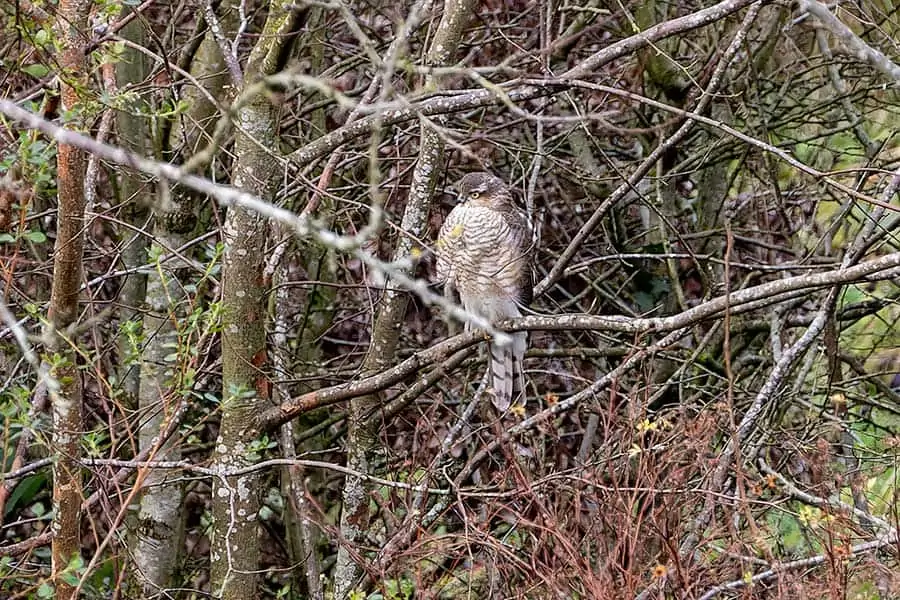
During lockdown I counted two and a half dozen species visiting my suburban backyard or garden in SW Scotland. I hadn’t realized there were so many, from tiny wrens and finches to large crows and gulls. Even a Sparrowhawk visited several times, attracted by the smaller birds.
In addition, I found other animals visited, including bats, butterflies, hedgehogs, squirrels, and many types of insects and bees.
With so much wildlife visiting an average suburban backyard, you’ve got your subject coming to you. And in your yard, you can control the environment in ways that’s impossible out in wild places. Therefore, you will have the opportunity to experiment, make mistakes, and learn what works for you. Your backyard can be the perfect bird photography academy.
After a year of practice in your yard you’ll have taken shots in all seasons, light, and weather. You’ll have developed important skills and started to build an attractive collection of bird images. And all from the convenience and comfort of your own home.
Backyard bird photography equipment for beginners
There are nine things you need in this setup. Some involve equipment, while others are procedures. By the end of the process you should be able to get some good images of the birds visiting your yard.
Camera with at least a short telephoto lens
When it comes to photography, it really does pay to get the best camera gear you can afford, particularly good lenses.
You could start by using a recent smartphone, one that includes a telephoto-lens camera. Don’t use the “pinch to zoom” digital zoom, you need quality of the phone’s telephoto lens. A lot of models offer 2x or 3x zoom, but phones like the Samsung Galaxy S21 Ultra offers a 10x zoom.
For more reach, as bird photographers call it, you could also try a clip-on 2-3x telephoto lens. The idea is to make the bird look larger in the frame without getting too close.
In my opinion, a better setup is a DSLR or mirrorless camera with a short telephoto lens of at least 200mm focal length. If you get a crop sensor camera (ASPS-C) you’ll get more apparent focal length out of the lens. The bird will look about 1.5x (1.6x on Canon) larger on a APS-C camera than if you used the same lens on a full frame camera. I’m a Canon R and R6 user and have used both for bird photography. The R5 would be even better, but expensive.
Regarding lenses, a good starting point would be a used lens of around 200-400mm. Fast prime lenses are meant to be sharper than zooms, but they are also more expensive. A really good option would be something like a Canon EF 400mm f5.6 L USM lens. I have seen some examples selling for around the same price as a new Canon RF600mm f11.
If you’re a Canon user and have a mirrorless R series camera, remember you can mount both RF and EF lenses, although you will need an adapter for EF lenses. If you do want to buy new, you could give Canon’s RF 600mm or 800mm f11 lenses a go. They’re an an entry level wildlife lens but have quite long minimum focusing distances of 4.5 and 6m respectively. Another alternative is the Sigma 150-600mm f5-6.3 Contemporary. If money is not a concern, the Canon RF100-500mm f4.5-71 is excellent.
But if your lens budget is much smaller, like under $100, you could adapt an old vintage lens onto a digital camera. A manual 70-210mm zoom can be picked up for around $30 on eBay or a flea-market. You’ll also need an adapter to mount the lens on your digital camera, again about $20-$30. You might even try picking up a used vintage 1.4x or 2x extender for around $30-$60, that will increase the focal length of your lens (and hence the size of the bird in the frame).
If you take the vintage lens route you might end up spending $50-$100 on glass, an improvement on the hundreds or thousands that good modern autofocus lenses sell for.
Obviously, if vintage lenses were the perfect solution for bird photography everyone would be using them, but they don’t, and here’s why.
Although some vintage glass can produce attractive images with digital cameras, you won’t have modern autofocus that can track the bird. Focus will be a strictly manual affair. Plus, setting the exposure will at best be a combination of you and the camera working together. Even so, the results can be good, you’ll learn a lot, and it’s a cheap way to get started.
Here are some examples I took using a 1970s or 80s Vivitar 70-210mm zoom lens on my Canon EOS R mirrorless camera (the cheaper Canon RP would probably have performed just as well). These show that you can do bird photography in your yard on a small budget.

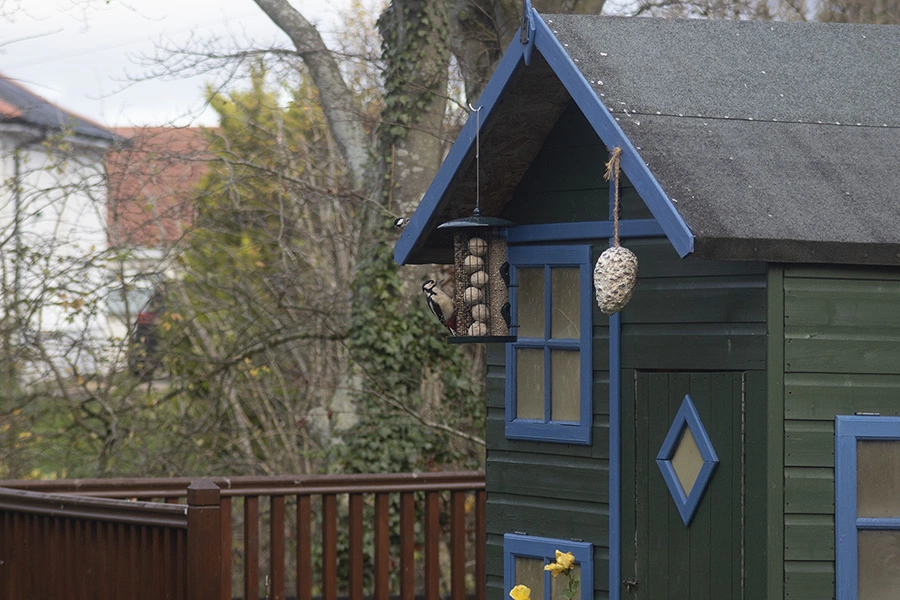
A location with an attractive background for your bird images
When you’re just starting in bird photography you probably won’t care about the background, just getting sharp images of birds sitting on a feeder will be a thrill. But sooner or later you’ll want to get shots like the ones you see on countless YouTube videos. In other words, you want the bird to be isolated on a perch in front of an uncluttered and blurred background.
Therefore, thinking about your background now will save you time and the bother of changing your set up later.
Many photographers like to have an almost uniform tone and brightness across the background of their images.
Try to avoid a background that’s too “busy” with visual distractions. These include objects with highly contrasting shades or colors, and criss-crossing twigs and branches. Here are a few things you could use as backgrounds.
Backgrounds for photographing backyard birds
EVERGREEN SHRUBS: Evergreen hedges and shrubs make good backgrounds. The foliage will remain on the plant throughout the year and be a pleasing colour in winter or summer.
TREES: Trees can also good, especially conifers since, like evergreen shrubs and hedges, they don’t lose their leaves in the fall.
FENCE PANELS: A fence is a possibility, provided it’s the type with overlapping boards and not with gaps. Fences are often black or dark brown, which is fine if you want a dark background. But I prefer slightly lighter backgrounds since they contrast well with the plumage of most birds.
ARTIFICIAL GRASS: If you have an unsuitable background, you could cover it with a roll of artificial grass or similar material. I’ve tried this and it works well, although you may consider it too uniform looking when blurred.
CAMOUFLAGE NETTING: This type of material, both flat and 3D, is easily available on Amazon![]() . You can get it in a range of colors, simulating various terrains, from woodland to desert, so choose the one you prefer.
. You can get it in a range of colors, simulating various terrains, from woodland to desert, so choose the one you prefer.
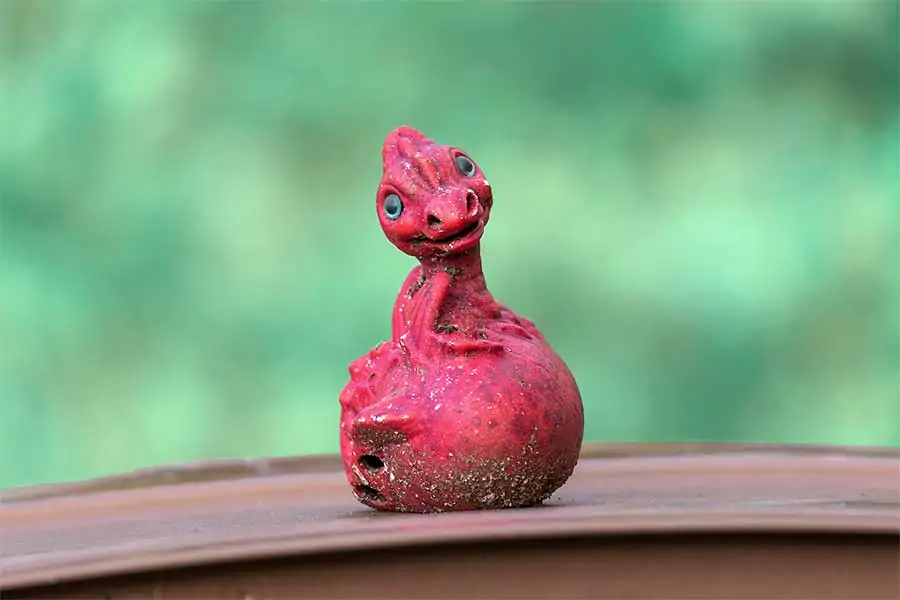
STUDIO BACKDROP: If nothing else works, try hanging a studio backdrop on a wall or fence. Make sure it is secure so that it does not flat about in the breeze. I have more muslin green screen cloths than I need in the studio, so adapted one for a bird background. I used a painting sponge and applied patches of other shades of green and brown paint that I had. The finished background looked a little like camouflage and produces pleasing results, as you can see in image below of a dragon garden ornament a few feet in front of the backdrop. With the benefit of hindsight, it would have been cheaper to buy a set of kids camouflage bed sheets![]() off of Amazon.
off of Amazon.
Blurring your backyard bird background
With a suitable background in place, the next step is to get it to look blurred in your images.
Some photographers will tell you that only lenses with large apertures, or small f-numbers, will produce blurry backgrounds. But that’s not the whole story.
The focal length of the lens, your distance to the subject and how far the background is behind the subject all play a part. Here’s how they affect the bokeh (background blur).
- LENS APERTURE: The larger your aperture the better, but don’t get too hung up about this. You can get nice creamy bokeh even at f/11.
- FOCAL LENGTH: The longer the focal length the easier it is to blur the background.
- SUBJECT DISTANCE: The closer you are to the subject the easier it is to throw the background out of focus.
- BACKGROUND DISTANCE: Having the background further behind the subject the better, in terms of making the background look blurry.
Background Blur Rule of Thumb: At normal shooting distances, your distance to the background should be twice your distance to the subject
This is only a general rule of thumb when you are about 20-40ft from the subject. If you can get closer to the bird, especially with a longer focal length lens, you’ll find that even a nearby background will easily get blurred.
Here is an image of a feeding bird taken from 14ft. You can clearly see that the background, even close behind the bird is blurred.
Attract birds into your yard with a feeding station
Now that you’ve selected a spot in your yard with a suitable background, the next stage is start attracting birds.
Try to understand the type of birds you’re likely have nearby, then provide the kind of food they’ll find attractive.
Not all birds feed on the same type of food or in the same place. Some birds prefer insects and bugs, while others stick to a menu of seeds, fruit, and nuts. Because those foods can occur in different places, those environments will attract certain species.
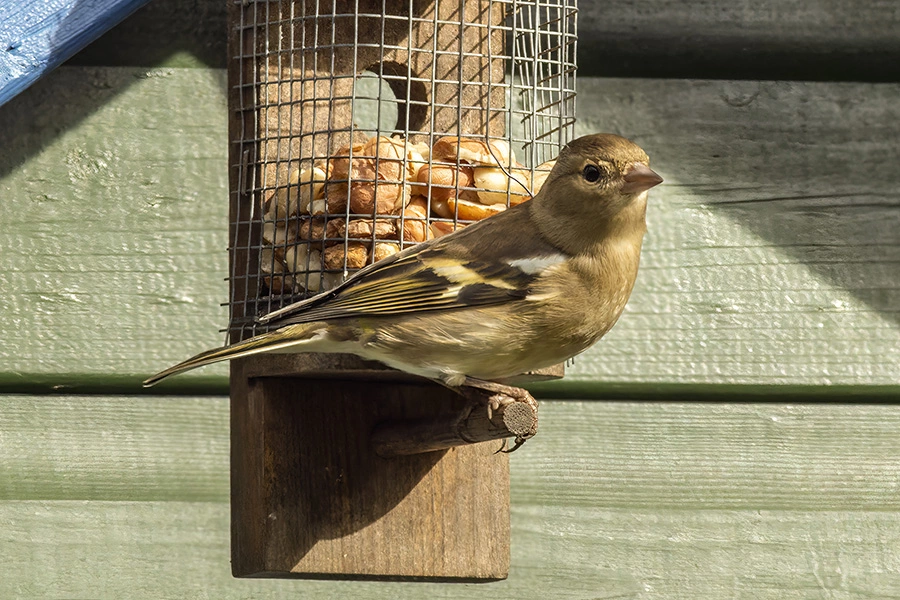
For instance, if you have plenty of trees, hedges, and bushes beside your property, they’ll be a supply of bugs, berries, and fruit that will attract birds like tits, finches, nuthatches, and woodpeckers. However, you’ll find blackbirds and song thrushes are ground feeders because they’re looking for worms.
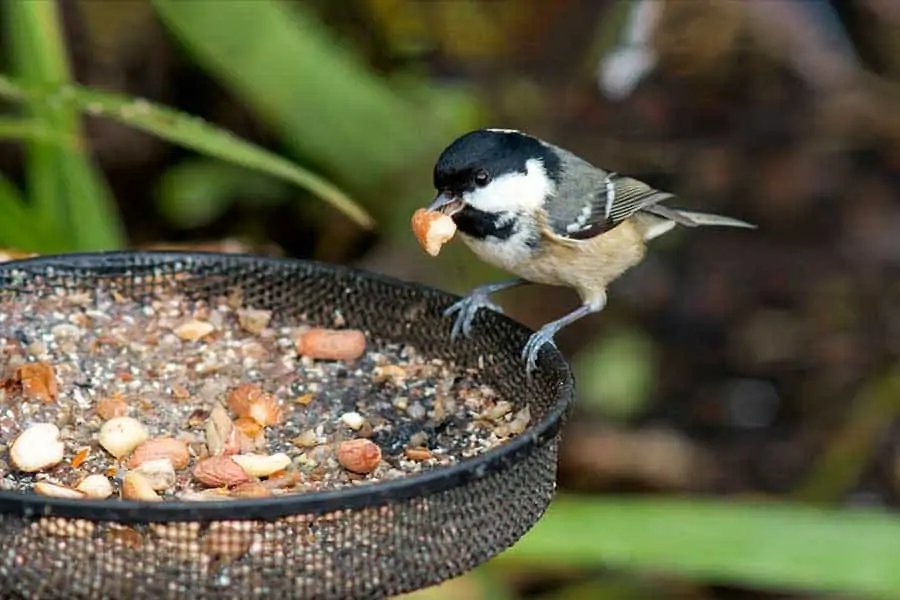
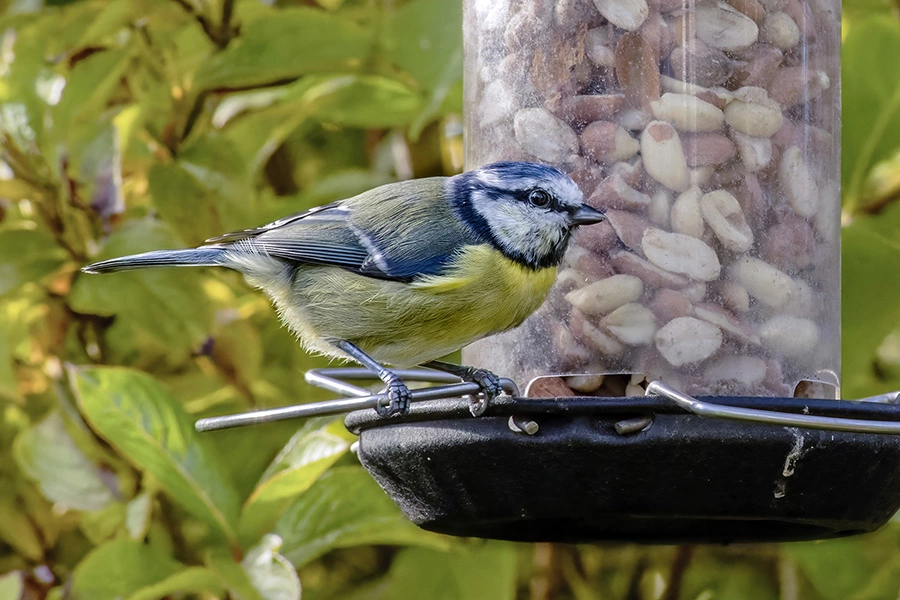
Feeding stations normally have a several hooks from which to suspend hanging feeders, plus a mesh tray for loose food, a water bowl, and even a suet cage.
This ensures you can provide a variety of bird food to attract many species of birds. In the initial phase of attracting birds, have multiple handing feeders and use the mesh tray and suet cage. But when it comes to taking photographs, you’ll make a slight change. More on that later.
The Yosager 91″ x 23″ bird feeding station kit has everything you need to locate up to four hanging feeders in one place. There are four hooks, a metal suet feeder, a water dish/bird bath, and a mesh food tray. The feeder pole has a 5 prong stake base to keep the feeder secure in the ground. It’s highly popular and well regarded.

- HIGH QUALITY - A bird feeding station is an area of your yard where you have bird feeders set up to...
- ALL IN ONE - Package include watering and bathing solution for garden birds and will help to attract...
- GREAT DESIGN - 5 Prongs for more stability than normal 3 prongs station kit. Bonus metal stake base...
- PERFECT GIFT - Allowed you watch bird activity in your yard. Bird lovers will excited to receive our...
Last update on 2025-10-20 / Affiliate links / Images from Amazon Product Advertising API
Set up a perch where you want the bird to land
For some reason, those many people who judge photography competitions discount images where “the hand of man” is apparent, and that means birds on feeders. That has trickled down to most photographers who aim to get shots of isolated birds on perches. You might think this might be difficult to get a shot of, but in fact it’s not if you exploit natural bird behaviour.
Setting up a perch for bird to land on
Generally, birds do not fly directly to feeders. They approach in short stages, pausing each time to check whether it is safe to proceed. Finally, they’ll make the final flight of about 12-18-inches (30-45cm) to the feeder. The position just before they go to the feeder is your opportunity to get the shot of the bird on a perch.
To get birds to land on a perch and pose for you, set up the perch about 12-18-inches (30-45cm) from the feeding station. Have the perch either pointing at an angle and slightly behind the feeder. When the bird lands it will most likely be in profile or a slight angle and facing the feeder. This will give a clear view of the bird’s side, head, and eye. This setup will also help reduce the frequency of birds landing with their backs toward you.
Tree prunings are a good source of perches, especially if they have autumn berries still attached or if they have been left to become gnarled, weathered, or covered in lichen or moss.
To mount the perch, drill holes in a post and insert the end of the perch, alternatively, screw the perch into place using small wood screws.
Other props for backyard bird photography
You could use a rock or log as an alternative to branch perches. These look great, especially if covered with lichen or moss. If you want to grab shots of woodpeckers, tree creepers, and nuthatches in a natural setting consider getting a long log or branch about 4-6 inches (10-15cm) in diameter. Use it instead of the post and mount it vertically. Drill several holes into it and pack them with a suet and seed mixture.
Rocks, logs, and posts can be kept in place using something like a Black and Decker Workmate portable workbench, which is available on Amazon and other online sites. A post can be secured between the jaws of the workmate, while rocks and logs can be laid on top. In the latter case, dress the scene with moss, bark, or natural ground litter from the forest floor (make sure you are allowed to remove these items).
Choose somewhere for you to sit and take photographs
Once the birds become regular visitors to the feeding station you’ll need somewhere to sit and shoot images or video footage. Depending on bird species, this can be quite simple, or you may need to use a little stealth.
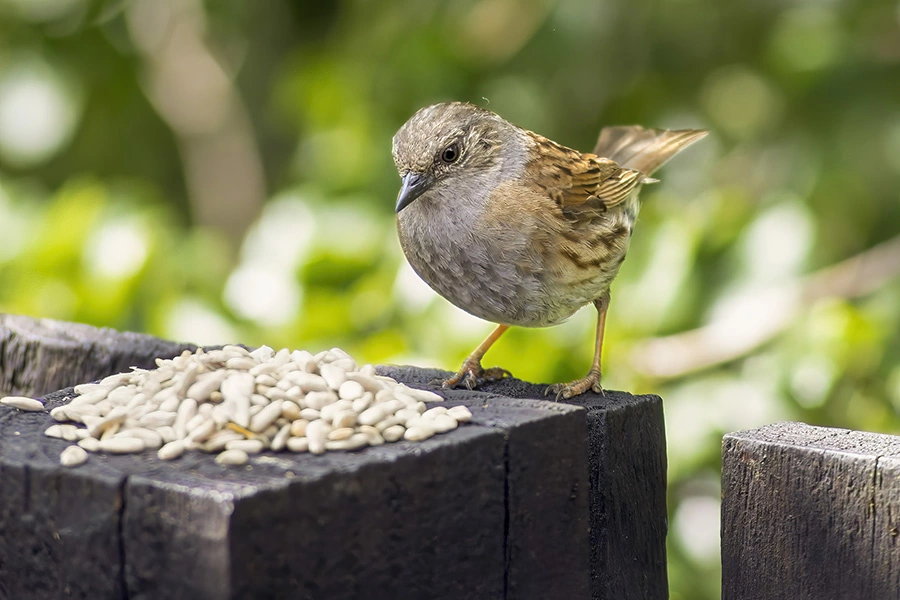
Small birds like Blue Tits, Great Tits, Coal Tits, Siskins, Green Finch, Gold Finch, and Robins can be quite tame and approachable. With relatively tame birds it’s possible to get close without spooking them.
Consider how high off the ground the bird is
You’ve probably heard the advice that when photographing children, you should get down and shoot from their height. The same kind of thing applies to photographing birds. You don’t want to be pointing up into the branches where you can only see the underside of the bird. Nor do you want to be looking down onto the top of the bird.
You don’t have to be exactly at the same level, but the angle above or below level shouldn’t be to great.
Hiding yourself from the birds
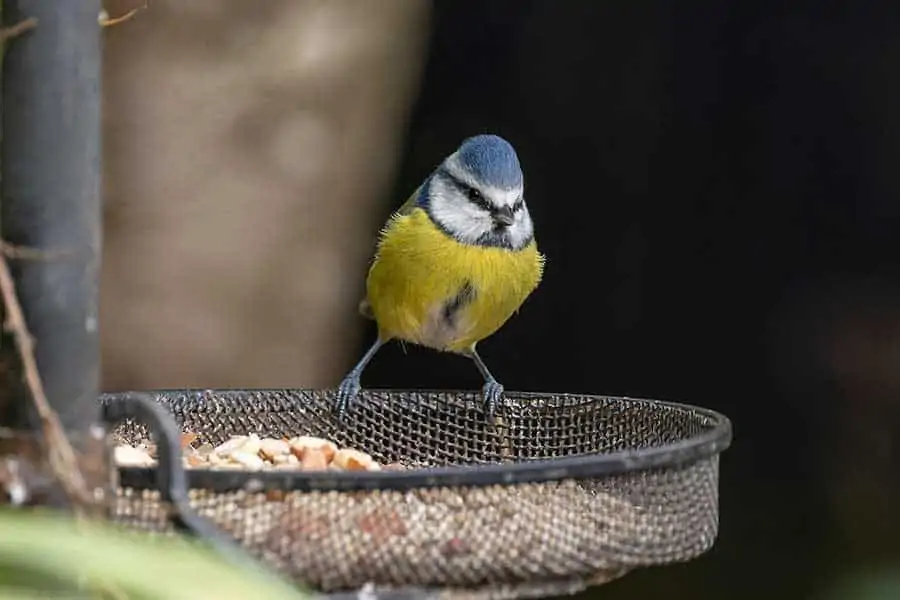
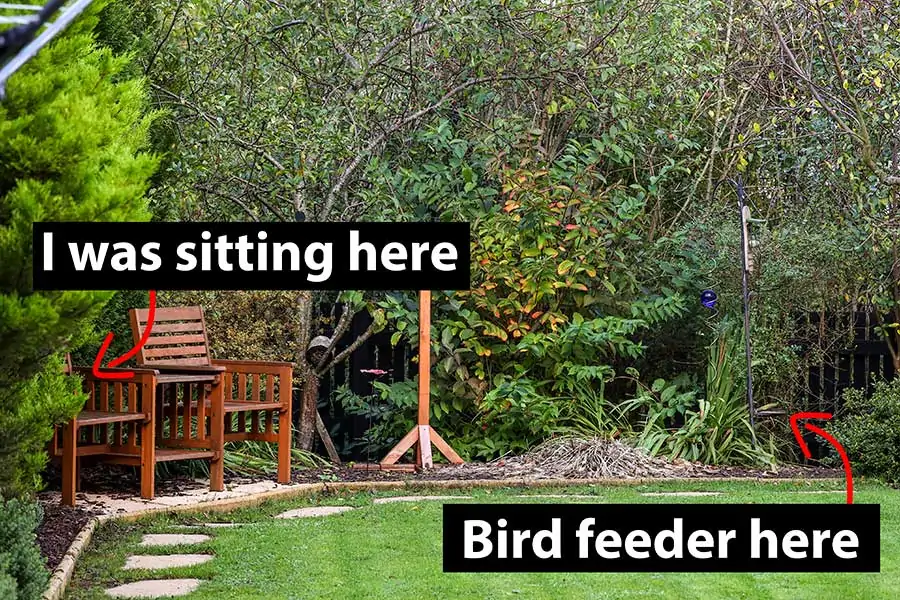
When I first started imaging garden birds, I was happy to forget about setting up a perch and would photograph the birds on a feeder. I would sit on a garden bench next to a hedge and just 14ft (4.2m) from the bird feeding station. You can see the position of the seat and the low tray feeder on the feeding station in the following image.
You can see the type of result you can get when you are close to the subject in the following image. Many Tits and even Robins seem to be quite brave in backyards, and if you are fairly still and don’t make sudden movements they’ll tolerate you being nearby. If you can get close to your subject you will get better quality shots, but please don’t disturb the birds, especially when they are nesting.
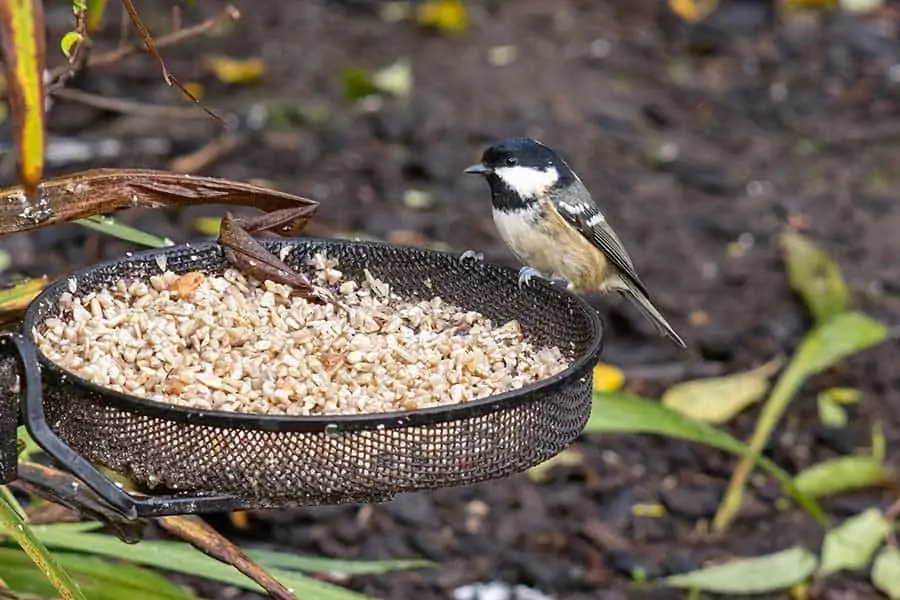
The Coal Tit in the image allowed me to get quite close, but some birds won’t come and feed if they can see you. If the feeding station is close to a window or patio door you could sit inside your house. But don’t shoot through the glass of the window or door, since that will degrade the image quality.
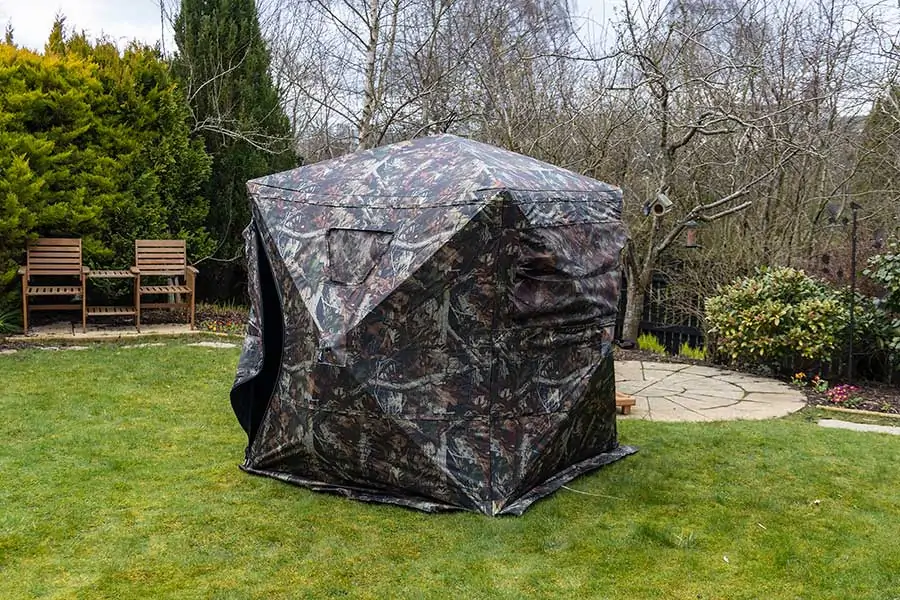
Other alternatives are to sit inside a shed close to the feeding station or use a blind (hide). You can get camouflaged hides that slip over you while sitting on a stool or chair. I prefer the larger type of blinds, since there is plenty of room for a few extra items, such as food and drink plus, extra gear, etc.
Consider the position of the sun or light
One thing you should consider when deciding where to set up your blind is the position of the sun. You want the birds to be well illuminated and not have their shadow side toward you. So, ensure the sun will be behind you, or to either side.
Generally, you don’t want the sun to be behind the bird.
Reduce the feeding and perching options on the day you shoot
On the day of your shoot, you need to make a few changes around the feeding station. Remove all the bird feeders except for the feeder nearest to the perch. The aim is to have all the bird traffic to go to this one feeder from the perch.
Since most bird feeders have more than one entrance hole, tape up all but the one opposite the perch. The intention is to get the birds approaching only from the perch side.
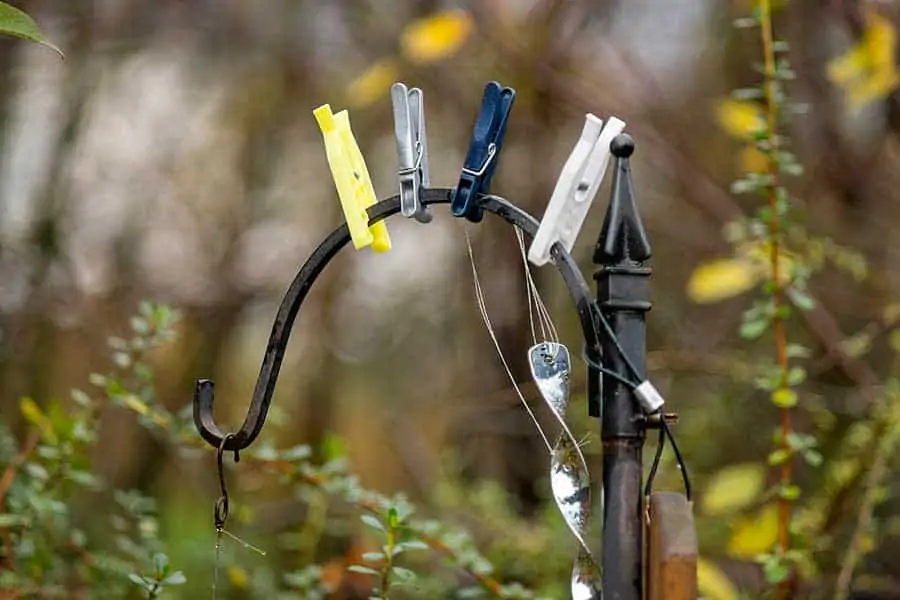
Also, remove or cover any other perches that are close to the feeder the birds can land on. An obvious place to start is the top of the feeding station. This is where the metal bends over and around to form hooks for the feeders hang on. Bird will often use this as a staging post. I’ve tried clipping several clothes pins onto the top of the feeding station, and although it’s not 100% effective, many birds seem to avoid the area and use the perch instead.
Choose your camera settings
SHOOT RAW: If you don’t already do so, I recommend you set your camera to save images as RAW files. This will allow your camera to save the maximum amount of data from each image. Although it increases the amount of storage required it will give you more latitude when you process your images.
CHOOSE MANUAL: If you don’t already use Manual, don’t worry. It’s not going to be scary at all. You’ll also need your camera’s histogram display to check you aren’t blowing out any highlights.
BACKYARD BIRD PHOTOGRAPHY APERTURE: Selecting a low f-number may give you creamy bokeh but make sure you have enough depth of field to get most of the bird in focus. Somewhere between f/4 and f/8 should be fine. With a recent camera you might even be able to go to f/11 or maybe higher.
However, if the light is poor, you’ll need to open-up the aperture. Failure to do so will mean the ISO has to increase or the shutter speed needs to do down.
SELECTING THE CORRECT SHUTTER SPEED: With bird photography the usual advice is to use a high shutter speed to avoid any motion blur and get sharper shots. This means bumping it up to 1/1000sec or higher. But unless you’re trying to capture bird movement or you have a serious problem holding your camera still, you could go lower.
When standing on the perch birds move in short sudden bursts, so you can get those in-between moments using relatively low shutter speeds. Start at 1/500sec and see if you can go lower. For stationary birds I often use shutter speeds of around 1/200 to 1/320sec but have gone much lower in low light conditions.
CHOOSING ISO: Although you’re shooting in manual you can set your camera to auto ISO. At relatively low shutter speeds, and reasonable lighting, your ISO should stay in a comfortable region to keep noise down.
Generally, you want to keep the ISO as low as possible to avoid noise in the image. However, newer cameras, like the Canon R5 and R6 can handle high ISOs without too much noise.
When using auto ISO do check your images to check you’re not blowing out any white areas. If you are, either switch to manual ISO or use exposure compensation alongside auto ISO.
USE ANIMAL EYE-AF IF AVAILABLE: With bird photography you’ll usually want to use your camera’s autofocus capability so you can concentrate of framing the shot.
Single point focus is a good choice, preferably placed on the bird’s eye. This is the main thing you’ll want to be sharply in focus. If your camera has Animal Eye-AF use it, since it will improve your chance of getting sharp images.
Back-button focus is also a good way to setup your camera. Use one button for single point AF and another for eye-AF.
TURN ON IMAGE STABALIZATION: If you’re shooting handheld turn on the lens/camera image stabilization (if you have it on your lens or camera). But if you’re doing your backyard bird photography using a tripod, turn IS off since it can sometimes introduce motion blur.
Finally, put your camera in high-speed burst mode, so you can rattle-off several shots each time you shoot. It’s the old spray and pray idea. If you miss focus on some exposures, hopefully you’ll nail it in most of the others. In other words, you’re increasing your chance of getting more keepers.
Getting the best bird pose
Not all bird images are equal, with some being far more engaging for the viewer than others. In this section I’ll try and help you create more engaging images that you and your friends will enjoy.
Get a bird pose that engages with the viewer
Above all else, you want to capture a bird pose where you can see the bird’s eye. You don’t want shots of the bird with its back toward the camera, unless the head is turned, and we can see the bird’s face and eye.
You want a sense of eye contact between the bird and the viewer. Although that does not mean the bird has to be looking forward and directly into the camera. The bird should be approximately facing and looking toward the camera rather than away.
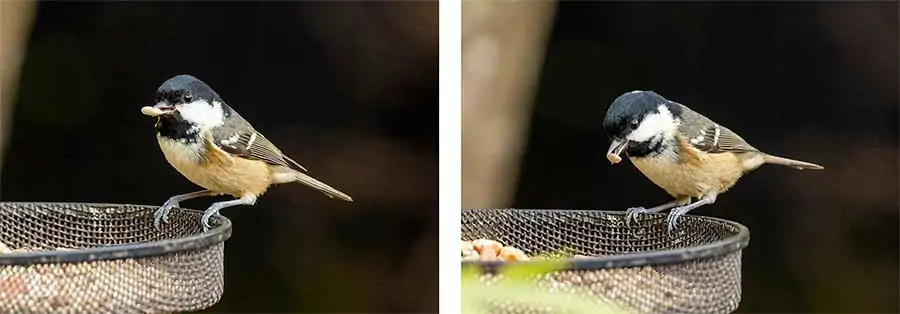
In these two shots of a Coal Tit, the bird has its body angles toward the camera in more-or-less the same way. But only in the left-hand shot is there a sense of engagement because the bird seems to be looking at you. The second image is not bad and good as a behavioural shot, but the eye doesn’t connect with you.
Grab the catchlight in the bird’s eye
Engagement with the bird is a big thing, but we also need to see some life in the bird’s eye. If the side of the bird’s head is slightly in shadow, we may be able to see its eye and features but there will not be any sparkle in the eye.
In photographic terms that sparkle of light is called a catchlight, and just like in human portraiture, it’s that catchlight that brings life to the image. I also feel with birds, especially ones with dark plumage, that the catchlight also helps to define the bird’s eye.
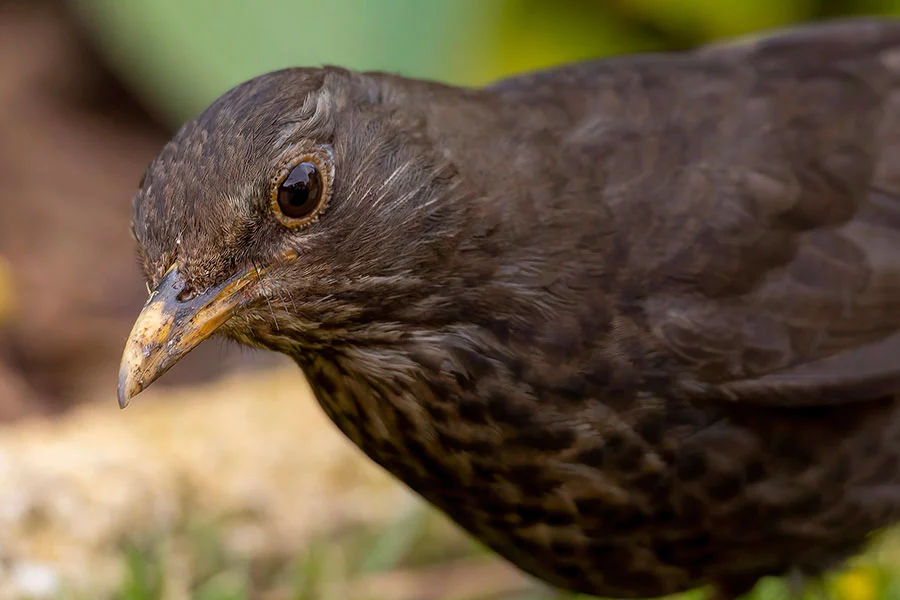
If you look carefully at the bird’s eye in an image that catchlight isn’t just the reflected sparkle of the sun but something larger, it’s an image of the sky. Look more carefully and you’ll see the bottom edge is the outline of your house roof, trees, or whatever forms the boundary with the sky. Take a look at the eye of the blackbird in the next image and you’ll see the outline of my house roof.
To capture the catchlight in the bird’s eye you need the sun behind you or at the side. Even on a cloudy day, a bright or light sky will create those catch lights in the bird’s eye. But if the sun is too far to the right or left and the bird’s head is turned away from the sun, the eye will be in shadow, and you won’t get the catchlight and even lose the form of the eye.
Post process your images
I would encourage you to consider post processing your images since this can make a big difference to the final image. Even if you don’t want to post process your images, consider your camera’s picture style and settings if you want finished jpg images straight out of the camera.
Whether you want finished images straight from the camera or intend editing your image on a computer, you can do a lot before you pack up your gear at the end of the shoot.
Go through your images and delete the ones that are obviously poor. If you shot in burst mode, you’ll most likely have some shots that you’ll never use, so delete them now. If you don’t, you’ll only have to do it later after importing your images onto your computer.
If you prefer going through your images on your computer that’s fine. You’ll at least see more detail on your computer monitor than the bac of your camera. But I would urge you to be ruthless in deleting poor images. You’ll never use them, and they’ll rapidly fill up your hard disk and memory cards.
If you’re serious about bird photography, you’ll want to process your images. Popular software includes Adobe Lightroom and Photoshop. The adobe software is available on a monthly charge rather than a one-off payment.
These programs will allow you to do everything you need to make the images pop, from correcting exposure and white balance through to removing unwanted items or compositing two or more images.
If you really get into bird photography and decide you want to have sharp focus from front to rear of the bird by using focus bracketing, then these Adobe programs will allow to stitch your images together into one finish photo.
However, if you want to go one step further, look at Topaz Lab’s software. I really like GigaPixel AI, DeNoise AI, and Sharpen AI, although I would get Topaz DeNoise first. These programs can be used standalone or as filters in Adobe Photoshop, which is how I use them.
Topaz DeNoise AI is one of the best ways to clean up the noise in your images, doing a much better job than Lightroom or Photoshop. But it also sharpens the image, revealing much more detail in your images, or at least rescue an unusable image. Here’s an example image of a Great Spotted Woodpecker.
It’s a poor-quality image because everything was wrong when I rushed to snatch the shot.
- I was too far away and shooting through a double-glazed window.
- I was shooting handheld with no image stabilization on the lens or camera.
- The lens on my camera was a vintage zoom, so everything was manual, and I didn’t have time to get all the settings right.
- It was a dull overcast day, so I had to shoot with a wide open aperture and a high ISO.
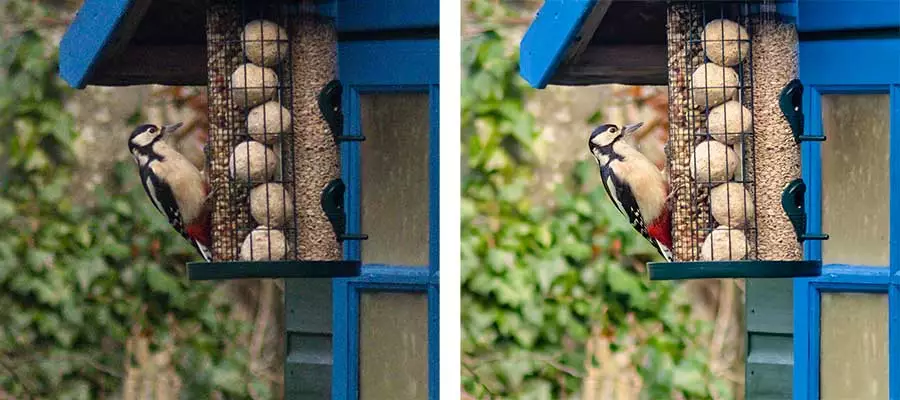
In post-processing, I cropped significantly to make the bird look larger, and as expected, the image without any post-processing (left) didn’t look good.
However, on the right, you can see the same crop but after processing the original RAW image with Photoshop, Topaz GigaPixel AI, and Topaz DeNoise AI.
The processed image still has flaws, but it’s useable. The noise in the image has been removed, detail has been recovered and sharpened, and some color grading has made the image more attractive.
In other words, image post-processing can make poor images acceptable and good images even better.
Try Free Topaz Labs DeNoise AI, GigaPixel AI, and Sharpen AI
If you would like to see interactive examples of how Topaz Lab’s DeNoise AI, GigaPixel AI, and Sharpen AI can clean up high ISO noise, recover detail, and scale-up your images use the following links. Topaz Labs offer a totally free 30-day trial on all their applications, so why not download and try them. They’re unrestricted, so no annoying watermarks etc. No commitment or credit card details are required to download the apps.
I tried them all, and they very quickly became part of my standard workflow. Although I’ve become a better bird photographer over the last couple of years, these apps are the final polish to my images. Once you try them, I genuinely believe that once you’ve tried them, you’ll want to keep them in your image editing toolbox.
Source: List of bird names![]()
Tosh Lubek runs an audio and video production business in the UK and has been using the Canon EOS R since it was released in the Autumn of 2018 and the Canon EOS R6 in 2020. He has used both cameras to shoot TV commercials broadcast on Sky TV, promotional business videos, videos of events and functions, and YouTube creator content. He has also won several international awards for his advertising and promotional work. You can meet him by visiting his “video booth” at HashTag Business Events across the country.
Recent Posts
Most people use sandbags the wrong way. Here’s how to hang them properly on a light stand for maximum stability and safety — plus what to fill them with.
You're Using the Canon RF 50mm f/1.8 WRONG! Here’s How to Fix It
If you’ve recently picked up the Canon RF 50mm f/1.8 STM—affectionately known as the Nifty Fifty—you might be confused by that strange switch on the side of the lens. It doesn’t say AF/MF...