
DIY Video Studio is supported by its readers who use the affiliate links or ads on this site. As an Amazon Associate, I earn from qualifying purchases. Thank your support if you use any of the links.
I frequently used FiLMiC Pro![]() when filming myself on my iPhone and the sound quality always seemed to be OK. But when I used the rear camera to film someone else the sound was never as good. The solution, of course, was to think about using a FiLMiC Pro external microphone setup. Since I had never used an external mic with an iPhone before, I decided to do a little online research and experiment with my own gear.
when filming myself on my iPhone and the sound quality always seemed to be OK. But when I used the rear camera to film someone else the sound was never as good. The solution, of course, was to think about using a FiLMiC Pro external microphone setup. Since I had never used an external mic with an iPhone before, I decided to do a little online research and experiment with my own gear.
So, what FiLMic Pro external microphone setup should you use to record good audio? Unless you do “run and gun” iPhone videography, DO NOT place your external microphone on or next to your iPhone. You will only get the best sound quality if the microphone is close to your mouth. You also want to configure FiLMiC Pro so you are using the best audio settings.
But which external mics will work well for you with an iPhone, and how do you set them up in FiLMiC Pro? I’ve found out what other iPhoneographers have done. I then checked whether it works well. And finally, I’ve written about it below as your shortcut to a good FiLMiC Pro External Microphone setup.
Choosing an iPhone external mic for videos
There are many types of microphones you can use to record good quality audio with FiLMiC Pro on your iPhone. Assuming you are recording YouTube videos it’s most likely you’ll be recording a piece to camera, so I’ll cover the most likely microphone types you might use.
Although you can record with many types of microphones, in this article my aim is to talk about recording good quality audio on an iPhone. For that reason, I’m restricting the type of microphones to what you might use if you’re making videos for YouTube or your own business. So, this will include Headsets, Lavaliers, On-Camera microphones, and some USB microphones.
Headset microphone
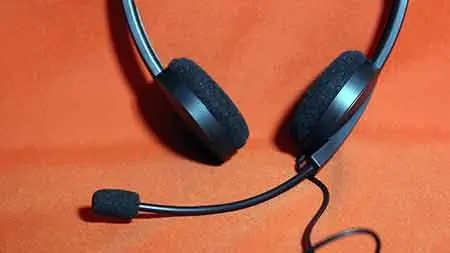
If you are a yoga or dance instructor, using headset microphones may make sense. It probably doesn’t matter that the headset mic is visible. Also, the mic capsule can be kept close to your mouth and remain in the same spot as you move your head around.
However, try to get the ear hook type of headset. They’ll appear less distracting for the viewer but also give you a high degree of mobility. For technical reasons, I wouldn’t suggest a Bluetooth headset mic if you are looking for high-quality sound since FiLMiC Pro will only use sample rates of up to 16kHz. But, if that is OK for your planned application why not try it.
Lavalier microphone
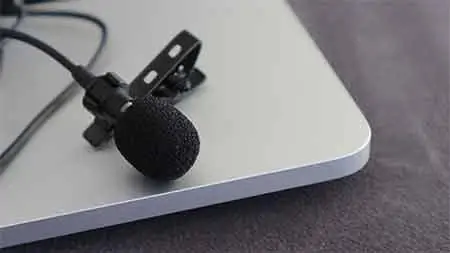
The reason you would use a lavalier is that it can be worn close to your mouth, look discrete, and allow you a good amount of movement. It’s the type of microphone you regularly see News and TV presenters wearing. A lav mic can also be hidden under clothing if required.
Most lavalier microphones are omnidirectional, meaning they are sensitive to sound from all directions. That’s why you might see some TV presenters wearing them upside down.
For our purposes, there are basically two types of lavalier mic, wired and wireless. The wired types are much cheaper because there are few components. The mic capsule with a tie bar crocodile clip, a cable and 3.5mm jack or Lightning connector. Wireless lavs, however, will also include a bodypack transmitter, a receiver, and a cable to the camera or recorder.
With a lav mic, you will pick up more of the room sound than with a headset mic, purely because the mic capsule will be further from your mouth. You may also pick up some clothing noise because there is more opportunity for the mic capsule and cable to rub against clothing.
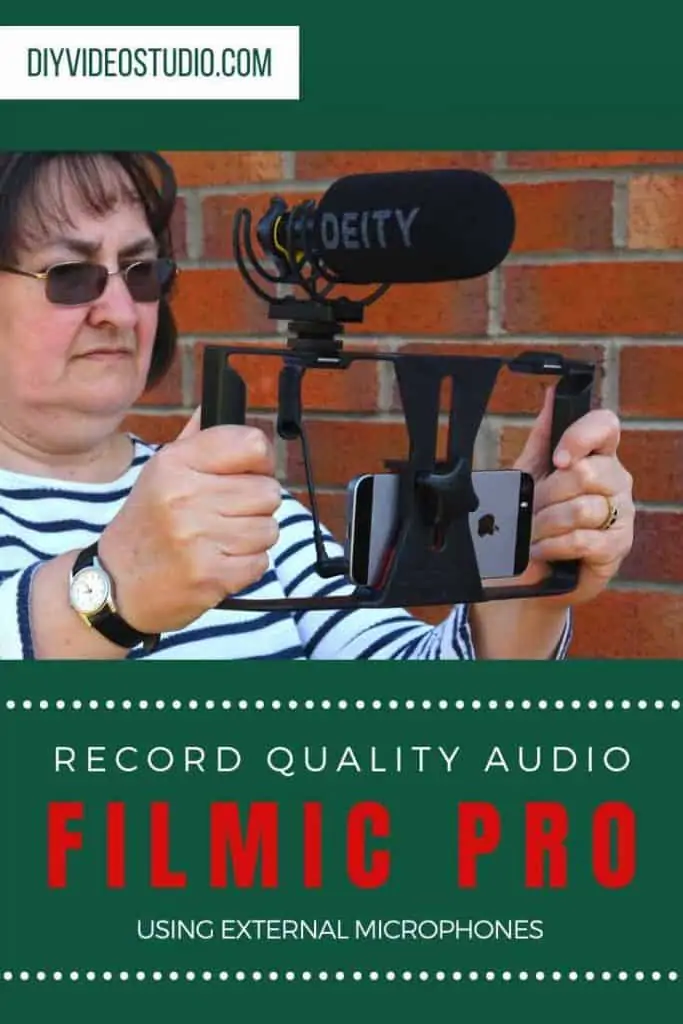
On-Camera Microphone
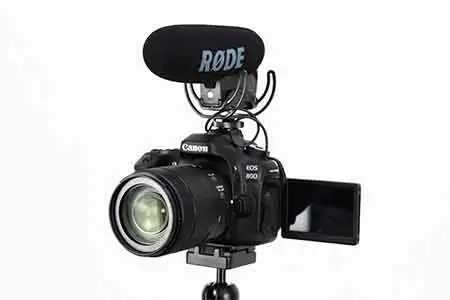
Here I’m talking about microphones like the Rode VideoMicro, VideoMic GO, VideoMic Pro+, Movo VXR10, Deity V-Mic D3 & D3 Pro, etc.
They vary in size, but they are sold with the expectation that they sit on or near to the camera. Under some circumstances that might be fine, but you will get much better results by moving any of these microphones closer to you or your talent. I guarantee you’ll be amazed at the difference in sound quality by reducing the microphone-to-mouth distance, even if it’s a directional or shotgun mic.
These mics can be mounted in several ways. Although you’ll probably need a cold shoe adapter. Whichever method you choose, get the microphone as close as possible to the mouth, while staying just out of frame.
Since most of these microphones claim to be shotgun mics or directional, using them close to your talent is likely to give you better results than a lav mic. They will produce a “closer” sound than a lav mic.
USB Microphones
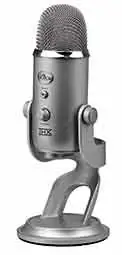
These tend to be large condenser microphones like the Blue Yeti, Blue Snowball, Audio-Technica AT2020USB+, etc.
In many cases, these microphones are less directional than many on-camera microphones. So, if you are making videos at your desk and need more freedom to move, these could well be an excellent choice for you. The main problem is that an iPhone does not have a USB socket.
Well, that’s not as much of a problem as you might think. An Apple Lightning to USB3 Camera Adapter will allow you to connect your USB mic to your iPhone. If you get an error message telling you that your device requires too much power, try adding a powered USB hub in the chain between your mic and the adapter.
How do I select the microphone on my iPhone in FiLMiC Pro?
By default, FiLMiC Pro uses the rear microphone on your iPhone. This matches up with the rear camera since it’s the camera you are most likely to use for quality video recording.
But you can change which microphone FiLMiC Pro uses by going into the FiLMiC Pro settings and then choosing the Audio option. The first option in the list is the Microphone Selector. This enables you to choose which of the iPhone’s microphones you will record from. However, you probably won’t need to do this.
When you plug an external microphone into your iPhone, FiLMiC Pro should automatically select it and disable the iPhone’s internal microphones.
To double-check, you can go into your audio settings. The Microphone Selector should show that the “Headset Microphone” is selected. If that’s the case, which it should be, you’re good to go with your recording.
Quick Tip: External microphones should be connected after launching FiLMiC Pro.
How to change your audio settings in FiLMiC Pro
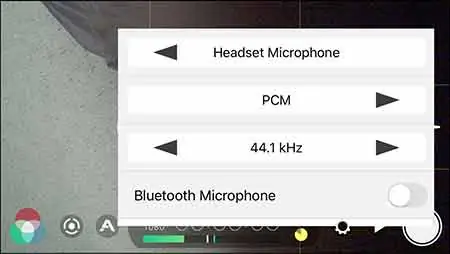
To access the audio settings on FiLMiC Pro tap the cogwheel to the right of the time counter, and then tap Audio (it’s in the middle of the top row).
In the menu that opens, the first row is the microphone selector. If you have already connected your external microphone to either the headphone (pre-iPhone 7) or Lightning port (iPhone 5 onwards) it should automatically be set to Headset Microphone, disabling the iPhone’s internal microphones.
The second row of the menu is where you can select the audio encoding format. You can choose between, AIFF, PCM, and ACC. AIFF and PCM are both uncompressed formats for high-quality but large files. AIFF was developed by Apple, so if you will be editing on an Apple device you may wish to select this format. If editing on a PC, you may wish to choose PCM. ACC is an audio standard for lossy digital audio compression and will result in excellent quality but smaller files.
The third row allows you to change the audio sampling rate. The film and video industries use 48kHz as their default sampling rate. I would advise using this sampling rate since it will help avoid problems with audio/video synchronization when editing footage on your computer. But FiLMiC Pro also allows you to record at the audio industry standard of 44.1kHz. If you have connected a compatible microphone that offers a sampling rate of 96kHz, FiLMic Pro will also provide this option.
The fourth and fifth rows enable/disable Bluetooth microphones and record mute video. Make sure Video Only is NOT enabled, otherwise you will not record any audio from your external microphone.
The sixth row should be disabled. Since you’re using an external microphone to record high-quality audio, you do not want to use Automatic Gain Correction (AGC). The recording level should be set either with the FiLMiC Pro gain control slider or the gain control on your microphone if it has one. You might only want to use AGC in a run-and-gun situation, but otherwise, leave it disabled.
The last row is for Voice Processing. This applies an EQ preset to the audio to enhance the sound of the human voice, making it more prominent than background sounds. If you will be editing your footage on a computer, you should leave Voice Processing disabled. That gives you more flexibility to apply the audio processing you want in post.
How do you set up a microphone for iPhone video recording?
Depending on the setup you choose, you may need to include an audio extension cable between your microphone and iPhone.
On-Camera Setup
If you are vlogging with your iPhone at no more than arm’s length, then it might be OK to have your external microphone on or next to your iPhone. Although this is not my preferred setup it certainly is the easiest.
The simplest way to mount your external microphone is to use one that plugs into your Lightning socket and angled so it points in your direction. Not only are there no wires to worry about, but the Lightning connector also holds the mic in place. Examples of suitable mics would be the Shure MV88 iOS Digital Stereo Condenser Microphone and Movo LPM100 Cardioid Microphone.

If I were going to place a microphone I would use a smartphone rig or hand grip. These allow you to mount your iPhone, microphone, and other accessories together securely. You can then handhold the rig/grip or mount it on a tripod. There are two that I would recommend. The Movo PR-1 Smartphone handle grip rig![]() and the ULANZI U Rig
and the ULANZI U Rig![]() .
.
Lavalier Mic Setup
Lavalier microphones normally come with a tie-bar clip. This can be used to clip the microphone on to a tie, lapel, or another convenient part of your clothing.
However, a lav mic can also be attached underneath clothing using gaffer tape, surgical tape, or mole-skin tape. Note that gaffer tape should not be used to attach anything to human skin since the adhesive is NOT approved for such purposes.
So a lav mic can either be visible to the viewer or hidden under clothing. When placed under clothing, although some higher frequencies may be attenuated, the microphone capsule will be protected from wind noise.
Usually, lav mics are placed on the chest, about 8 to 12 inches (20-30cm) from the mouth. The connecting cable is then fed underneath clothing to either a wireless bodypack or back to the iPhone.
Boom Mic Setup
Using a boom mic is my preferred FiLMiC Pro external microphone setup. It can be used whether you remain in a fixed position or move around. However, because you are likely to use a directional mic with this setup, if you move around you will need the assistance of a boom operator.
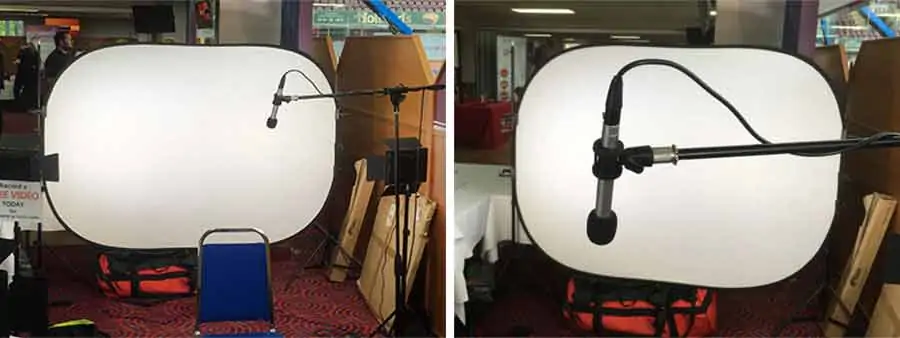
When filming by yourself, mount your microphone on a boom arm mic stand. Keep the mic stand out of shot and extend the boom arm. Secure the arm so that the microphone is above and a little in front of you. Obviously, the microphone should also be just out of shot so it’s not seen. Point the microphone at a spot between your mouth and the bottom of your chest. That way the microphone will still pick up your voice even if you move slightly forward. But remember. Typically boom mics are directional, so only move a little otherwise your sound will vary.
If you are filming yourself at your desk, consider a microphone boom scissor arm stand or gooseneck stand. They can be attached to the edge of your desk and moved into any position without the need for a counterbalance. Depending on how wide a shot you are planning, and how informal you want your setup to look, the microphone and stand can either be kept out of the shot or left in view.
Since the cable that came with your microphone is likely to be short, you will most probably require an audio extension cable to link the microphone to your iPhone. Try to keep the cable run as short as possible to avoid the risk of picking up any electrical interference.
You should also be aware of a potential safety issue. With the boom arm extended the mic stand is likely to be unstable. To prevent it from falling over add a counterbalance weight to the boom arm or add a “sandbag” to the base of the mic stand.
When filming with a boom operator, mount your mic on a boom pole. You can buy purpose-made boom poles but since you are probably going to use a small and light-weight microphone you could improvise a boom pole by using a monopod or even a selfie stick. If you are working on a small budget, it’s always good if you can use your equipment for more than one purpose.
Your boom pole operator should position the mic so that it points at a spot between your mouth and the bottom of your chest. They can adjust the position of the microphone as you move around in front of the iPhone camera. If you want total freedom of movement, you will also need someone to operate your iPhone.
One thing you probably will need when using a boom-mounted microphone is a good shock mount. This will help to reduce pole handling and cable noise.
Mini Tripod Microphone Stand
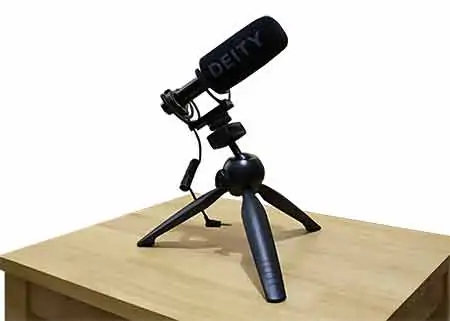
This is a neat solution if you are using a small condenser or pencil microphone. The microphone and mic stand can be placed on the desk in front of you. The microphone can be mounted using either a microphone clip holder or a shock mount. A shock mount will help reduce the pick-up of any sounds passed through the desktop.
Provided you do not go for the professional heavy-duty pillar mic stands with a cast iron base, the mini tripod mic stands should be relatively inexpensive.
QUICK TIP: Avoid tapping or knocking your desktop if your mic stand or boom arm is in contact with your desk. The apparent light taps will appear as loud knocks on your recording.
How far should I be from my microphone?
When recording our voice, adopt the general rule of thumb of the closer the microphone is to your mouth the better. But the type of microphone you are using, and whether it matters if the microphone appears in the shot will also be important considerations.
Most of the time the microphone should be 6 to 12 inches (15-30cm) from your mouth. At most, you want to keep the distance to no more than 2 feet (60cm).
Do not believe the videos on YouTube that suggest shotgun microphones will allow you to record good quality audio at a distance. If it were the case film sound production would be a simple case of setting up one shotgun microphone next to the camera. Unfortunately, this is seldom the case.
Naturally, there are exceptions to having the microphone 6 to 12 inches (15-30cm) from your mouth. For instance, a headset microphone may be just 2 to 3 inches (2.5 – 5cm) from your mouth. A normal lavalier microphone will usually be 6 to 10 inches (15-25cm). Meanwhile, handheld microphones may be held at 6 to 18 inches (15-45cm) from your mouth.
But generally, the rule of thumb is to have 6 to 12 inches (15-30cm) between your mouth and the microphone. And within that range, the closer the mic is to your mouth the clearer you will sound and the less background noise you will hear in your recording.
Setting the audio level with the FiLMiC Pro gain control slider
Assuming your microphone does not have a built-in gain control the audio level can be adjusted by using the FiLMiC Pro input gain control slider. The slider is the white vertical line incorporated into the Time Code Medalion.
The input level can be increased by dragging the line to the right and decreased by dragging the line to the left.
You can judge whether the recording level is correct by looking at the audiometer. Notice that each time the meter rises it leaves a “peak” indicator line that remains at the highest audio level that was reached. If the peak level was too high the peak indicator line will be red. If it is high but still OK, it would be yellow. And if the peak level is safe the line will be green. You want to aim for the line to be often green and sometimes in the yellow.
If your audio level peaks into the red or goes completely to the right of the meter, your audio will be distorted and clipped.
Although slight audio clipping can sometimes be repaired, it is much better to set your levels correctly before starting to record. This way you can make sure the audio is neither too quiet nor too loud.
Quick Tip: If an external microphone is disconnected during recording it will result in audio sync issues.
Checking your audio recording with FiLMiC Pro audio monitoring
Unlike many other recording apps, FiLMiC Pro allows you to monitor your audio as it is being recorded.
It’s possible to monitor your audio on wired headphones or with Bluetooth headphones. Although I say you can monitor your audio there is a caveat. It doesn’t work with all external mics and you will need adapters depending on the microphone and your iPhone.
My cheapest microphone, the Speedlink SPES lav mic, which has a 3.5mm TRS jack, worked flawlessly with both wired headphones and Bluetooth headphones.
But with my Deity V-Mic D3 microphone I only had partial success. Using my iPhone SE, which has a headphone socket, the Deity D3 worked properly and I was able to monitor the audio with my Bluetooth headphones.
However, there was a significant problem if I was recording myself. The latency introduced a huge delay, making it almost impossible to speak normally because I was hearing myself delayed by perhaps half a second. Bluetooth monitoring would only work if you are going to be recording someone else.
Everything changed when I used the Apple headphone to Lightning adapter to connect the Deity D3 to my iPhone’s Lightning connector. The Bluetooth headphone went dead. The good news was that my ordinary headphones worked when plugged into the headphone socket on my iPhone SE. The even better news is that the delay on my voice was very slight. I was able to speak normally while monitoring my voice.
The main problem is that on any iPhone after the iPhone SE this will not work since there is no headphone jack. So the best advice is to try Bluetooth monitoring to see if it would work with your setup. If it does, great. If not, make sure you set your audio levels and do a test before starting to record.
Quick Tip: Do not use a Bluetooth microphone if you want to record the best quality audio. Currently FiLMiC Pro only supports sample rates of up to 16 kHz. Samples rates of 44.1 kHz and higher from Bluetooth mics are not supported.
Related Questions
How do I record video using Bluetooth mic?
First, enable Bluetooth and pair your microphone with your iPhone. Next, in FiLMiC Pro tap on the cogwheel to open the settings and choose Audio. The fourth line down will show “Bluetooth Microphone”. Use the radio button to enable your Bluetooth mic in FiLMiC Pro.
Is FiLMiC Pro free?
FiLMiC Pro![]() is not a free app. It is priced at $14.99 and is available from the Apple App Store (for iOS devices) and on Google Play (for Android devices). It is also available bundled with FiLMiC Remote as the FiLMiC Pro Remote Control Camera Kit
is not a free app. It is priced at $14.99 and is available from the Apple App Store (for iOS devices) and on Google Play (for Android devices). It is also available bundled with FiLMiC Remote as the FiLMiC Pro Remote Control Camera Kit![]() for $19.99.
for $19.99.
Can you edit in FiLMiC pro?
FiLMiC Pro only allows simple editing. You can only trim the beginning and end of your clips in the FiLMiC library. In the library tap on the clip, you wish to trim, pause it, tap on the scissor icon, drag the clip start and end handles to the desired position, and tap Trim.
How do I transfer files from FiLMiC pro?
To transfer video clips from FiLMiC Pro, connect your iOS device to a computer and launch iTunes. With your device selected click on File Sharing and then click on FiLMiC Pro. Select the clips you want and click on Save to save your files to your computer.
Tosh Lubek runs an audio and video production business in the UK and has been using the Canon EOS R since it was released in the Autumn of 2018. He has used the camera to shoot TV commercials for Sky TV, promotional business videos, videos of events and functions, and YouTube creator content. He has also won international awards for his advertising and promotional work. You can meet him by visiting his “video booth” at HashTag business events across the country.
Recent Posts
Most people use sandbags the wrong way. Here’s how to hang them properly on a light stand for maximum stability and safety — plus what to fill them with.
You're Using the Canon RF 50mm f/1.8 WRONG! Here’s How to Fix It
If you’ve recently picked up the Canon RF 50mm f/1.8 STM—affectionately known as the Nifty Fifty—you might be confused by that strange switch on the side of the lens. It doesn’t say AF/MF...
