
Author: Tosh Lubek Published: 19th July 2023
DIY Video Studio is supported by its readers who use the affiliate links or ads on this site. As an Amazon Associate, I earn from qualifying purchases. Thank your support if you use any of the links.
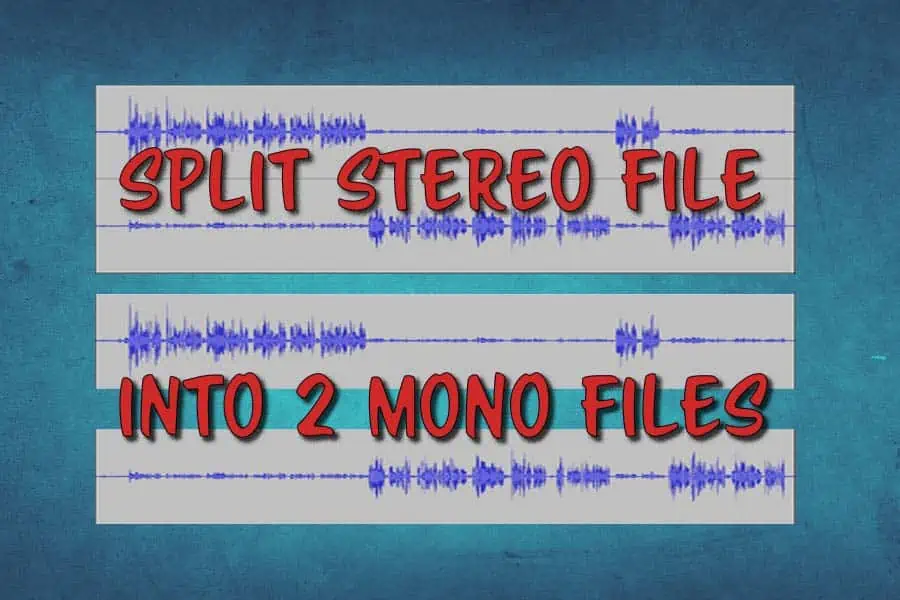
If you record podcasts with a portable recorder or record online audio interviews for your podcast, you’ll probably end up with stereo audio files with each speaker on a separate channel or track.
Although you can use the stereo audio as it is, your finished podcast will sound much better, and the audio will be easier to process and edit, if you first split the stereo file into two mono files.
In this article, I’ll show you how to split a stereo recording into two mono tracks using Audacity and Adobe Audition. You can watch it as a video tutorial, or carry on reading, where I give step-by-step instructions.
How to split a stereo track into 2 mono tracks in Audacity
To split a stereo recording into 2 mono files in Audacity, open your stereo recording.
Step 1: Click on the down arrow to the right of the file name in the top left of the recording.
Step 2: In the menu click on Split Stereo to Mono. The stereo track will split into two tracks.
Step 3: Click on the upper track’s Solo button. This will mute the lower track.
Step 4: Click File in the menu bar.
Step 5: In the menu that opens, click Export to open the Export menu, then choose Export WAV as the file type.
Step 6: The Export Audio panel will open. Navigate to where you want to save the track, give it a name, and finally click the Save button.
Step 7: The Metadata tags panel may open. If it does you can add or remove any metadata tag details and then click OK.
Step 8: Unsolo the upper track and solo the lower track. This will mute the upper track.
Step 9: Click File in the menu bar.
Step 10: In the menu that opens, click on Export to open the Export menu, then choose Export WAV as the file type.
Step 11: The Export Audio panel will open. Navigate to where you want to save the track, give it a name, and finally click the Save button.
Step 12: The Metadata tags panel may open. If it does you can add or remove any metadata tag details and then click OK.
You should now have split the stereo file into two mono files and saved them as two new files. These can now be processed separately. You will also have your original file, if you are sure that you will no longer need it, you can delete the file. However, I prefer to keep all my original source files since I may need to access them again later.
It’s worth noting that in the menu where you chose Split Stereo to Mono there is another option that sounds similar. It is Split Stereo Track and allows you to “split” the left and right channels and process each independently, for instance applying noise reduction, compression, and loudness normalization. Once you are finished you can save all the changes back to the original stereo file or a new stereo file.
How to split a stereo track into 2 mono tracks in Adobe Audition
Splitting a stereo file into 2 mono files is very easy in Adobe Audition.
Step 1: With the file open go to the menu bar and click Edit to open the Edit drop-down menu.
Step 2: In the drop-down menu click on Extract Channels to Mono Files. Left mono and Right mono files will be created and added to Adobe Audition’s File Panel list.
Step 3: Click on the Right mono file in the file panel list.
Step 4: Click on File on the main menu bar, and then click Save As…
Step 5: In the Save As… window that opens, click the Browse button and navigate to where you wish to save the file. Finally, click OK to save the file to your computer.
Step 6: Click on the Left mono file in the file panel list.
Step 7: Click on File on the main menu bar, and then click Save As…
Step 8: In the Save As… window that opens, click the Browse button and navigate to where you wish to save the file. Finally, click OK to save the file to your computer.
If you followed these steps, you will have split the stereo file into two mono files and saved them to your computer. When you extract the two channels into mono files, Adobe Audition will name them based on the filename of the original stereo filename. So, if your stereo file was “filename.wav”, the two mono files created by Adobe Audition will be called “filename_R.wav” and “filename_L.wav”.
You can now process the two channels separately. As mentioned before, you can delete your original file. However, I prefer to keep all the original source files in case I need them later.
Why split a stereo track into 2 mono tracks
When you record an interview or podcast, it’s best to keep the audio inputs on separate channels.
Here’s an example of a recording where I’ve plugged two dynamic microphones into XLR Inputs 1 & 2 on a Zoom H4n recorder.
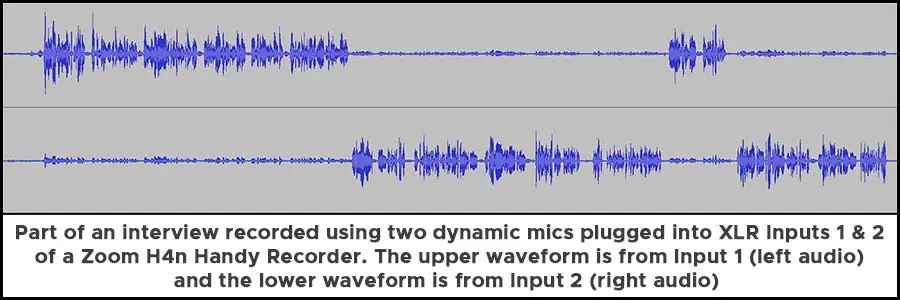
The top waveform (left track) is my voice, and the lower waveform (right track) is my guest.
Because the voices are on separate channels (tracks), it’s possible to process them independently. In my example above, the audio level on each channel is basically correct, both peak at approximately the same level and sound about as loud as each other on playback.
However, if my guest had spoken quietly and I hadn’t adjusted the recording level accordingly, the bottom waveform would not be as high, and when played back my guest would sound quieter than me.
Also, notice on the recording that when I’m speaking my guest’s channel is not entirely silent, and vice versa. Because I was recording outdoors, both of our microphones were picking up some background noise. Also, even though my guest and I were about 5ft (1.5m) apart, each of our mics picked up the sound of each other speaking, even if very quietly.
By splitting the stereo file into two separate mono files it’s easy to process each one independently. For instance, normalizing both channels, so they sound equally loud, is now easy to do. Also, we can clean up background noise with little effort, either by using a DeNoise plugin or simply by selecting a section and reducing the volume.
A further reason why you might want to split the tracks is because you want to replace the interviewer’s voice. This can occur when the podcast’s normal presenter is unavailable, and someone else, perhaps a producer, steps in to conduct an interview with a guest. With the two voices on separate tracks, it’s easy for the podcast’s present to replace the producer’s voice later.
Here’s a big ask from me: If you liked this article, please share it.
It will mean a great deal to me if you share this post because a few seconds of your time will seriously help my blog grow. The share buttons are below the “About Author” section.
Thanks. 🙂

About the author: Tosh Lubek is a multi-award-winning broadcaster, writer, and video producer, with 40 years of experience in professional broadcasting and has been using Canon video and stills cameras since 2010. He has worked with radio and TV broadcasters, advertising agencies, and direct clients on a variety of projects including radio and television advertising, online video production, corporate videos, award ceremony motion graphics, and theme park sound design. Tosh has won numerous awards, including a Radio Academy Awards Gold Sony, a Gold, Silver, and Bronze World Medals in the New York Festivals International Advertising Awards. Since about 2007 he has been creating YouTube videos. Tosh has been a sponsor of the “video booth” at HashTag Business Events across the UK.
Recent Posts
Most people use sandbags the wrong way. Here’s how to hang them properly on a light stand for maximum stability and safety — plus what to fill them with.
You're Using the Canon RF 50mm f/1.8 WRONG! Here’s How to Fix It
If you’ve recently picked up the Canon RF 50mm f/1.8 STM—affectionately known as the Nifty Fifty—you might be confused by that strange switch on the side of the lens. It doesn’t say AF/MF...