
Author: Tosh Lubek Published: 13th August 2023
DIY Video Studio is supported by its readers who use the affiliate links or ads on this site. As an Amazon Associate, I earn from qualifying purchases. Thank your support if you use any of the links.
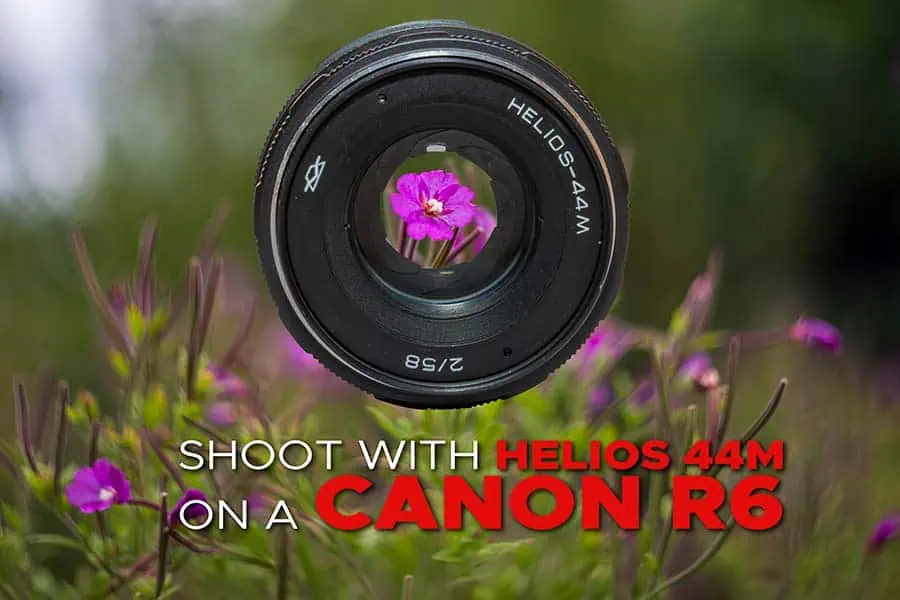
As the title suggests, this article is about using the vintage Helios 44M 58mm f2 lens on a modern mirrorless camera, specifically the Canon EOS R6. However, if you have a Canon R series camera the details of this article will also apply to your camera. As far as the Helios 44N lens is concerned, it’s the one I bought off eBay.
Furthermore, I’ll show you some test images and a short cinematic-style video shot in my backyard using the Helios 44M adapted onto my Canon R6.
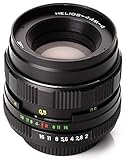
But first, let me introduce my Helios 44M vintaged lens.
My copy of the Helios 44M
My Helios 44M is what the Retro Foto House YouTube channel refers to as the 44M Type 6.
It was made by the KMZ plant (Krasnogorski Mekhanicheskii Zavod or Krasnogorsk Mechanical Works) in Krasnogorsk, as indicated by their prism and light ray logo on the ring around the front lens element.
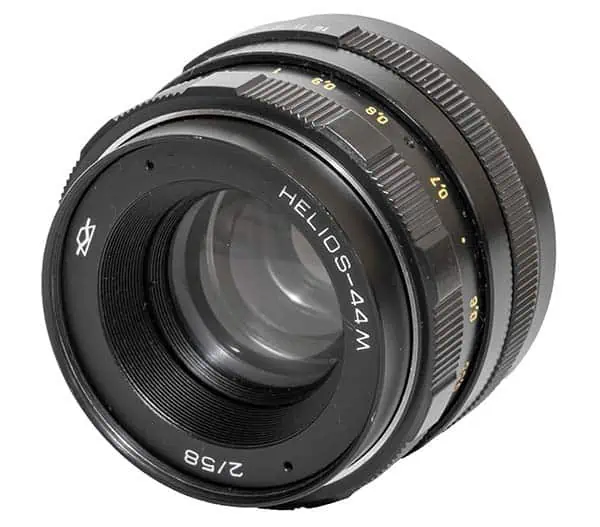
The serial number of the lens is 8211054 and is printed in green on the opposite side of the lens barrel to the depth of field guide. The first two digits of the serial number indicate the year of manufacture, so my lens was made in 1982.
This type of Helios 44M was manufactured in huge quantities at the KMZ plant. The build quality is good, the lens feels solid without any looseness or free play in its various part. The focus ring turns smoothly, with the scale in meters and printed in yellow. The f-stops are printed in white, as is the text on the front ring, which uses Latin and not Cyrillic characters.
The Helios 44M compared to Canon RF lenses
When you compare this vintage lens to Canon’s RF lenses you notice a lot of differences, after all, the designs are 40 or 50 years apart. The Helios 44M is all metal and glass, while Canon’s RF lenses have replaced a lot of that metal with plastic. But if you place the Helios 44M beside a Canon RF you’ll notice how small the Helios is, and the Helios isn’t unique in this regard. In the following image, I’ve put the Helios 44M beside an Olympus OM Zuiko 50mm f1.8 (also from the 1980s) and the smallest Canon RF lens I own, the RF35mm f1.8.
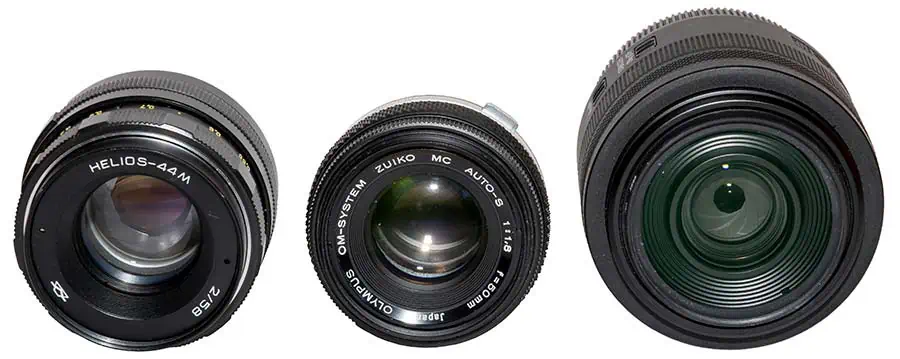
But of course, the RF lens also contains electronics, an electric motor for focusing, and whatever is necessary for optical stabilization. Modern lenses need to be bigger because they do much more than vintage lenses.
Take focus for instance. My RF35mm f1.8 can communicate with the camera, which works out how much the lens elements need to move to bring an image into focus, the camera passes this information to the electric motor in the lens, which carries out the instruction. The camera checks the results and repeats the process until the image is sharply in focus.
To focus with the vintage lens, I look at the LCD screen, my hand turns the focus rings, and I stop when everything looks sharp. All the computing, feedback and motive force are supplied by me. Hence the vintage lens can be much smaller because it doesn’t need to contain all those extra parts.
I like the diminutive size of the Helios 44M. When attached to my EOS R6 the combination seems balanced. Compare this to when I replace the Helios with my Canon RF14-35mm f4.
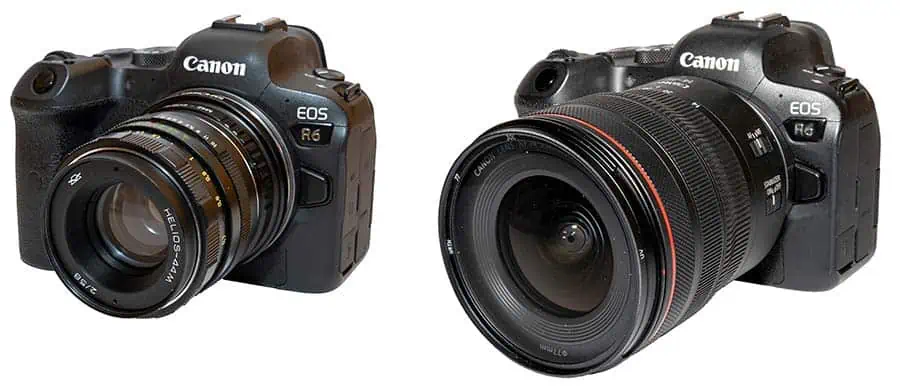
There’s no disguising that this is serious photography gear and not what you want if you don’t want to draw attention to yourself.
Apart from the overall size, the main difference between vintage and modern lenses must be performance. The optics on a modern lens will in principle be better at producing sharp images that are free of the “character” vintage lenses can provide. Modern lenses will also focus automatically and quickly, allowing amateur photographers to capture some images that only highly skilled professionals could have shot in the past.
How to adapt the Helios 44M onto a Cano EOS R camera
The Helios 44M lens has a standard M42 screw mount. Obviously, this will not fit directly onto a camera body that uses the RF lens mount.
Although there are numerous lens adapters available that will let you attach an M42 lens to a camera with an RF mount, the one I prefer is the K&F Concept M42 to EOS R adapter. Make sure you don’t get the M42 to EOS, since that is for Canon’s EF DSLRs.
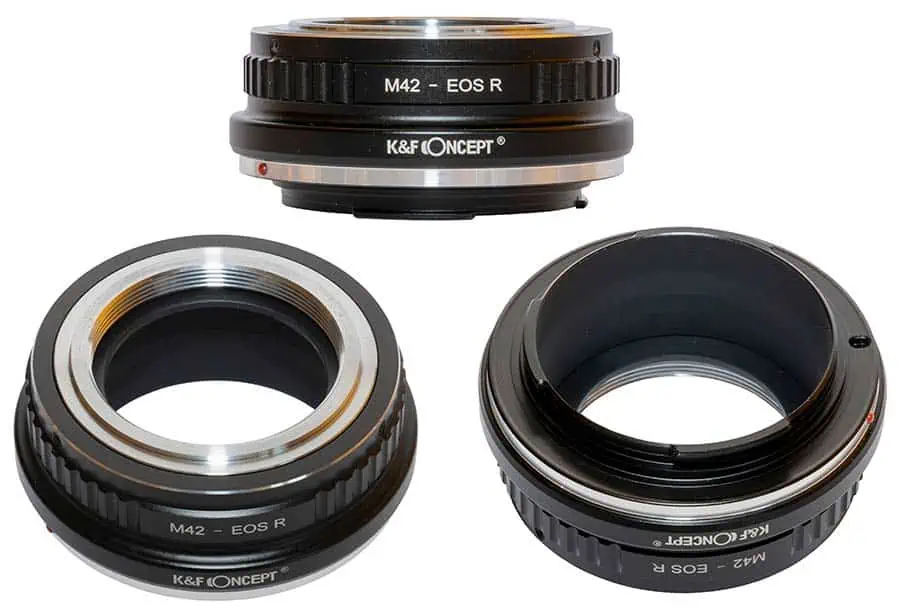
I’ve had a good experience using K&F Concept lens adapters when using vintage Olympus OM-System Zuiko lenses on my Canon R and R6 cameras. Their M42 to EOS R adapter performs just as well as their OM to EOS R adapter. They are solidly made from metal and connect securely to the camera’s lens mount. They don’t appear loose, are easy to put on and take off, and I’ve never had any issues such as light leaks. Furthermore, unlike some lens adapters, these allow you to focus to infinity.
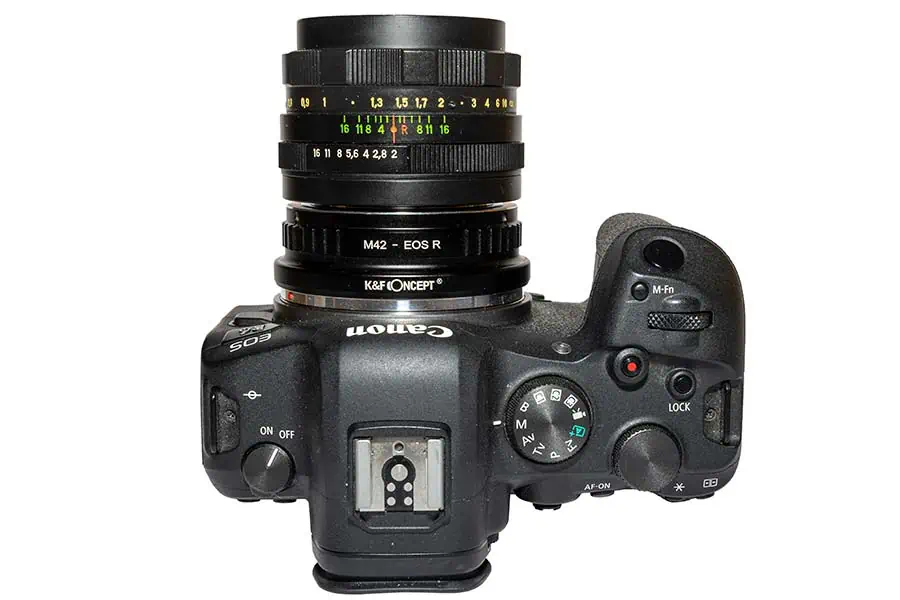
The barrel part of the K&F Concept lens adapter is about the same diameter and color as the Helios 44M lens. If it weren’t for a 1.5mm gap between the two, you could almost imagine they were one, which gives a pleasing aesthetic. You can see what I mean in the following image, looking down on the adapted Helios 44M on my Canon EOS R6.
This adapter comes with an Allen key, so you to adjust the position of the threaded ring in the adapter. This ensures you can position the red aperture and focus datum line on the lens barrel, so it faces upward.
The adapter is very simple to use, but just in case you need to know, this is what you need to do.
- Screw the Helios 44M lens into the threaded end of the K&F Concept adapter. Don’t over-tighten, but ensure the lens is securely screwed onto the mount.
- Locate the three small screws around the front rim of the adapter and use the Allen key to partly loosen them. It is easier, and the screws are less likely to get lost if you do not remove them from the adapter barrel. While doing this, hold the lens and adapter in your other hand to ensure the two don’t come apart once the screws have been loosened.
- Rotate the lens so the red datum line is at the top and roughly in line with the white printed “dash” between M42 and EOS R on the adapter.
- Retighten the three screws with the Allen key so everything is secure.
- Line up the red dots on the edge of the lens adapter and the camera’s lens flange, then insert the lens adapter and twist clockwise until you hear it click and lock into place.

- 【 Material】High-quality copper and aluminum alloy ;High precision and durable.
- 【Features】Red dot mark, accurate alignment, Install and remove smoothly;
- 【Manual Focus】Full manual control, Diaphragm control of the lens is set manually. Supports…
- 【Please note】 when using the adapter ring for the first time, please turn on the “release…
Last update on 2025-10-20 / Affiliate links / Images from Amazon Product Advertising API
Can I use the Helios 44M on both full-frame and crop sensor cameras?
My Canon EOS R and R6 are both full-frame cameras, but even if I had a Canon EOS R series crop sensor camera, I could still mount the Helios 44M onto it with the K&F Concept M42 to EOS R lens adapter. It will fit any Canon R series camera.
But should I?
You need to remember that the Helios 44M, along with all the other Helios 44 lenses, were made for 35mm film cameras, or the equivalent of today’s full-frame cameras.
On a full-frame EOS R series camera, the Helios 44M forms an image circle whose size matches the size of the full-frame sensor.
However, the sensor in a crop sensor camera is much smaller than a full-frame sensor. So, a lot of the image circle formed by the lens will fall outside the edges of the sensor. That means that you’ll miss out on the soft-focus edges and some of the swirly bokeh.
To get the full character of this vintage lens in your images and videos you should use it on a full-frame camera. But there is nothing stopping you from matching your crop sensor camera body.
Last update on 2025-10-20 / Affiliate links / Images from Amazon Product Advertising API
Preparing your Canon EOS R6 to shoot with a Helios 44M lens
If you’ve never used a manual lens on your Canon EOS R camera before, you’ll notice that the aperture setting displayed on the screen is F00.
By displaying F00, your camera is telling you that a manual lens, or even no lens, is attached. Manual lenses, like the Helios 44M, cannot communicate electronically with the camera, so the camera has no way of knowing the current aperture setting.
You’ll also notice that when you press the shutter button, almost nothing happens, apart from most of the icons on the LCD screen disappearing.
That’s because the camera’s shutter won’t fire if the camera doesn’t detect that a lens is attached. To get the camera to work with the Helios 44M go into the C.Fn4 page of the orange custom function menu. If you’re not using a Canon R6, you might need a different page in the custom function menu. Look for Release shutter w/o lens. Change it from OFF to ON. Once changed, the shutter will fire when pressing the shutter button.
Setting the aperture on the Helios 44M
The aperture setting on the Helios 44M is less confusing than the Helios 44-2. In the previous design of the lens, you had to use two different aperture ring settings. But the Helios 44M, like conventional manual lenses, only uses one aperture ring.
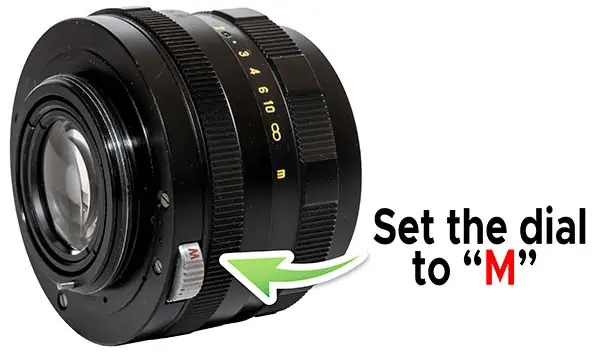
First, make sure the silver dial at the rear of the lens is set to M. You will now find that as you turn the aperture ring on the lens, the aperture blades move to the required setting.
If you’re using the Helios 44M for its renowned ability to produce swirly bokeh, set the aperture ring to f2. If swirly bokeh is not important, you can stop down the aperture as far as f16.
Focusing with the Helios 44M on a Canon EOS R6 camera
Since the Helios 44M is a manual lens, you won’t be able to use any of the camera’s autofocus features. Nor will you be able to use the focus guide, which can be activated on page 2 of the AF menu.
To focus, use the focus ring at the front of the lens. This is marked in meters from the minimum focus distance of 0.55m to infinity. My experience with the Helios 44M is that the distance markings are approximate but will get you close to the correct focus.
When you look at the back of the screen or through the EVF the image can appear to be in focus when it is not quite there yet.
Fortunately, the Canon EOS R6, and other Canon cameras, have a couple of tools that will help you nail your focus. In fact, you will be able to get your focus much sharper than photographers could when the Helios 44M was used on SLR film cameras. These are Focus Peaking, which must be activated in the AF menu, and the ability to magnify the image.
Focus Peaking: Turn on Focus Peaking in the pink/purple AF2 page of the camera menu and choose the level and color. Any contrasty edges in the image that are in focus will be highlighted in the color you chose on the AF2 menu page. I normally choose Red, but you can also choose Blue or Yellow.
With Focus Peaking turned on, look at the camera’s LCD screen or into the EVF. Areas that are in focus will have an overlay of the color your chose in the Focus Peaking settings. Your subject will be in focus when the color intensity over the subject is greatest.
Image Magnify: Press the magnifying glass button (above the INFO button) once for 5x magnification and twice for 10x magnification. You can move the zoomed-in point by either using the camera’s joystick or dragging with your finger on the touch screen. Now rotate the focus ring on the lens until you see that the subject is in focus.
Sample Images shot with a Helios 44M on a Canon EOS R6 camera
Bokeh with the Helios 44M: The Helios 44 family of lenses has a wide-open aperture of f2, so you’d expect it to be able to blur backgrounds. In that respect, it does not disappoint. Here is an image of a dandelion flower growing on my lawn. It was shot at 55cm, the minimum focus distance of the lens. You can see two things in this image. The Helios 44M at f4 has a narrow depth of field. Also, it doesn’t necessarily always produce swirly bokeh.

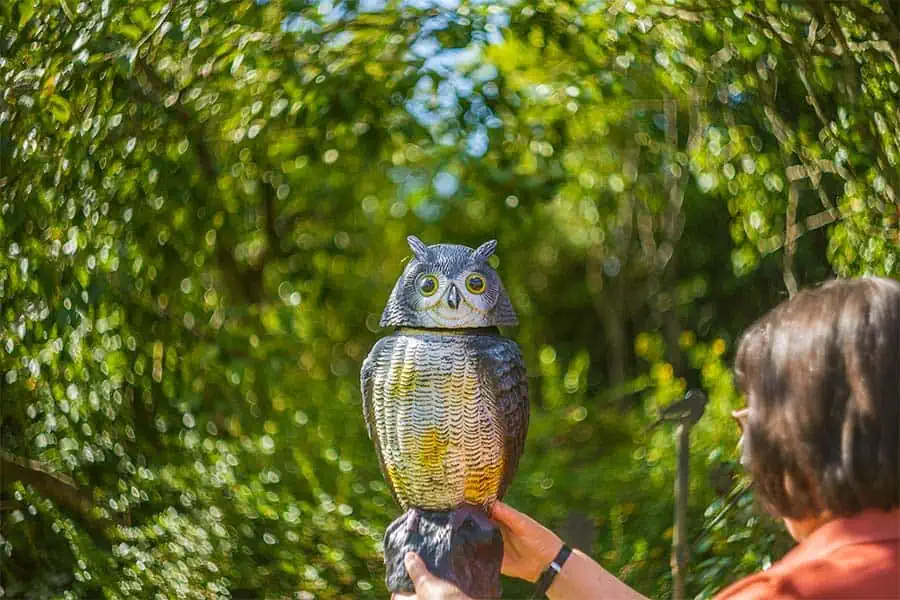
Helios 44M swirly bokeh: The reason most people buy a Helios 44 series lens is because of the swirly bokeh it is renowned for. However, the conditions must be right for those swirls to appear. And even when you think you’ve got all those conditions checked, those swirls can’t be relied upon.
For instance, compare this image of an owl bird scarer, where the bokeh swirls are obvious, with the previous image where the grass is blurred but no swirls are apparent.
I go into the details in my article, How to create swirly bokeh with a vintage Helios 44M (44-2) lens on a Canon R6.
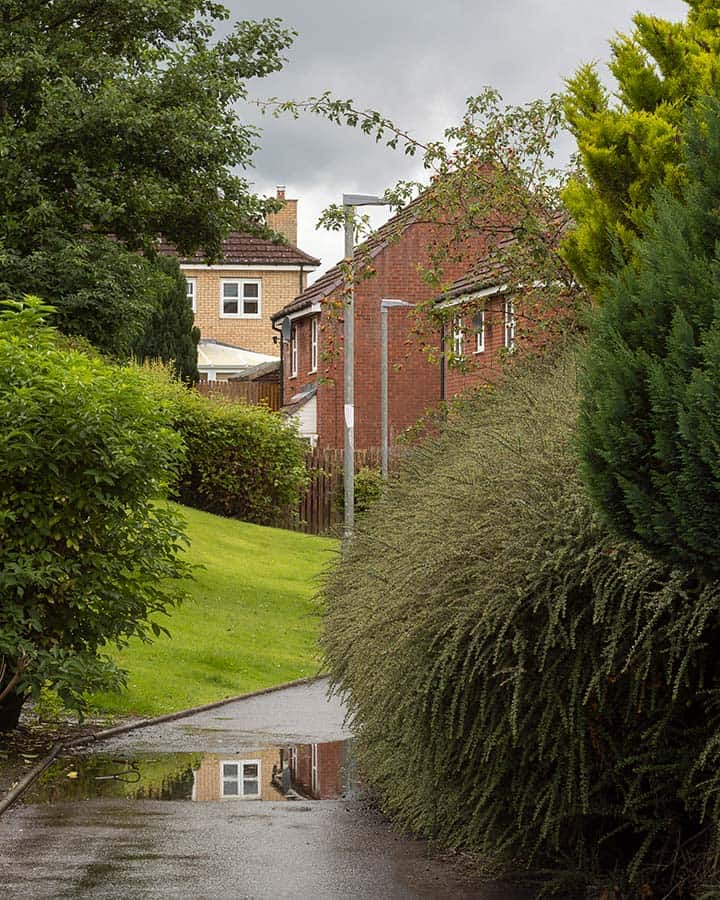
The Helios 44M is not a one-trick pony: This lens can also do non-swirly images, as I’ve already alluded to above. I was able to use my Helios 44M to shoot images close to my home that could have been taken with any ordinary vintage nifty fifty. You can get shots with no swirls, acceptable sharpness across the frame, and not too much chromatic aberration. The secret is to stop down the lens. The following two street shots were taken with the lens at f11.

Panoramas with a Helios 44m
I’ve read online people arguing that the Helios 44 series of lenses cannot be used for landscape shots because of the edge softness of the lens. That of course assumes you would want to take landscape shots with the lens wide open. In my experience, landscape photographers shoot with f-stops of between f8 and f22, and most frequently at around f11.
As you will have seen in the previous couple of images, at f11 the Helios 44M produces reasonable edge sharpness. So, I tried a pano from my backyard at sunset. Unfortunately, I don’t have beautiful mountain vistas, but I do have several trees that would need stitching together, along with pink clouds in the sky. The following image is a 5 shot pano, without about a third of an overlap between frames.

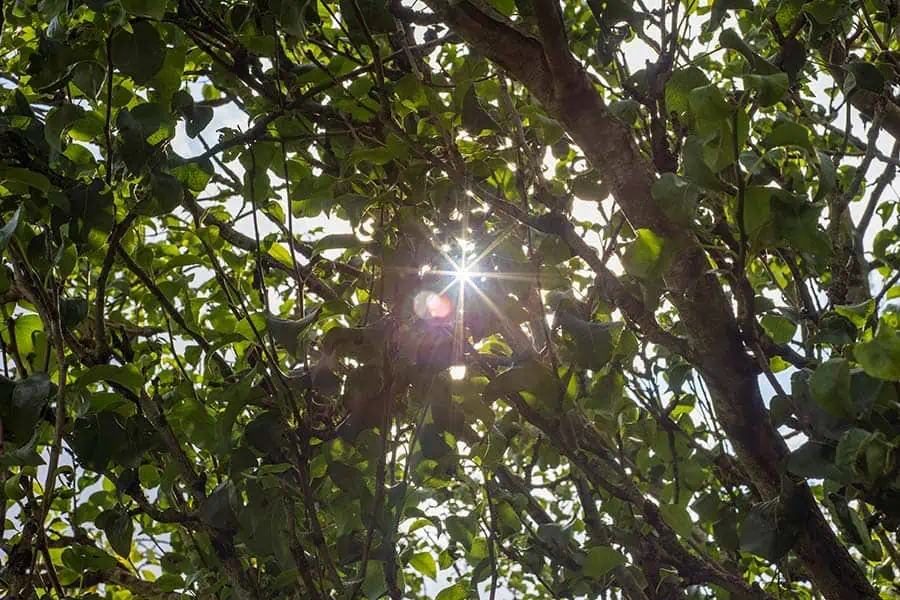
Sunbursts with the Helios 44M: I said this lens isn’t a one-trick pony, and to emphasize the point, I tried capturing some sunbursts. The lens can be prone to low-contrast images and flaring (the fact that the aperture blades are not very black probably doesn’t help), but I still managed to set some sunbursts by stopping down to f16 and shooting the sun as it appeared between the leaves of a tree. However, shooting the sun in a clear sky wasn’t very successful.
Summary
As it turns out, the Helios 44M lens is easy to adapt onto a Canon EOS R mirrorless camera, and it’s also easy to use. Like conventional manual lenses, it has a single aperture ring, unlike the more complicated arrangement on the Helios 44-2. Undoubtedly you will get this lens because of its ability to produce swirly bokeh, but it will happily perform as an ordinary nifty-fifty when stopped down. Admittedly, it isn’t outstanding in this respect, but neither is it bad. But considering you can buy a good copy of the Helios 44M for around $40, it’s worth adding one to your gear.
You might also like…
Social Media request
Here’s a big ask from me: If you liked this article, please share it.
It will mean a great deal to me if you share this post because a few seconds of your time will seriously help my blog grow. The share buttons are below the “About Author” section.
Thanks. 🙂

About the author: Tosh Lubek is a multi-award-winning broadcaster, writer, and video producer, with 40 years of experience in professional broadcasting and has been using Canon video and stills cameras since 2010. He has worked with radio and TV broadcasters, advertising agencies, and direct clients on a variety of projects including radio and television advertising, online video production, corporate videos, award ceremony motion graphics, and theme park sound design. Tosh has won numerous awards, including a Radio Academy Awards Gold Sony, a Gold, Silver, and Bronze World Medals in the New York Festivals International Advertising Awards. Since about 2007 he has been creating YouTube videos. Tosh has been a sponsor of the “video booth” at HashTag Business Events across the UK.
Recent Posts
Most people use sandbags the wrong way. Here’s how to hang them properly on a light stand for maximum stability and safety — plus what to fill them with.
You're Using the Canon RF 50mm f/1.8 WRONG! Here’s How to Fix It
If you’ve recently picked up the Canon RF 50mm f/1.8 STM—affectionately known as the Nifty Fifty—you might be confused by that strange switch on the side of the lens. It doesn’t say AF/MF...