
Author: Tosh Lubek Published: 10th July 2023
DIY Video Studio is supported by its readers who use the affiliate links or ads on this site. As an Amazon Associate, I earn from qualifying purchases. Thank your support if you use any of the links.
Although I’ve been a professional videographer for well over a decade, I’ve only been doing landscape photography for a couple of years. But in that time, I’ve learned that the best accessory for me is a tripod. Sure, I can take handheld shots because my Canon mirrorless camera body and RF lenses have stabilization. But a tripod comes in handy for long exposures and focus stacking.
Tripod guide for better landscape photography
These tripod photography tips are based on my experience of going out with my Canon EOS R and R6 cameras to shoot landscape images, first locally and then further afield. I realized early on that I couldn’t justify spending a lot of time and money on visiting honey-pot locations until I had learned the basics. Taking shots at fantastic locations doesn’t automatically mean you’ll end up with jaw-droppingly beautiful images. There’s a lot to be learned along the path before you get to those scenic vistas, and knowing how to get the best from your tripod is one of them.
So, let’s dive into my seventeen tips on using a tripod for landscape photography.
Invest in a sturdy tripod
You do not need to buy the most expensive tripod to capture sharp landscape images, however, it does need to be sturdy enough to keep your camera solidly in place. Consider the weight of your camera and lens before choosing a tripod. It’s best if the tripod can support their combined weight, plus a good bit more as a safety margin. You also need to consider what type of lens you will be using on your camera body. If you only shoot at wide-angle focal lengths, you can work with a lighter tripod. But if you use a telephoto or super telephoto lens, then the extra magnification will accentuate any tiny movements. This is where a sturdy tripod will pay dividends.


Last update on 2025-10-20 / Affiliate links / Images from Amazon Product Advertising API
Use a tripod that’s comfortable to carry
Tripods are usually made of either an aluminum alloy or carbon fiber. Both are excellent materials for tripods but for the same size of a tripod, one made of carbon fiber will be about 30% lighter.
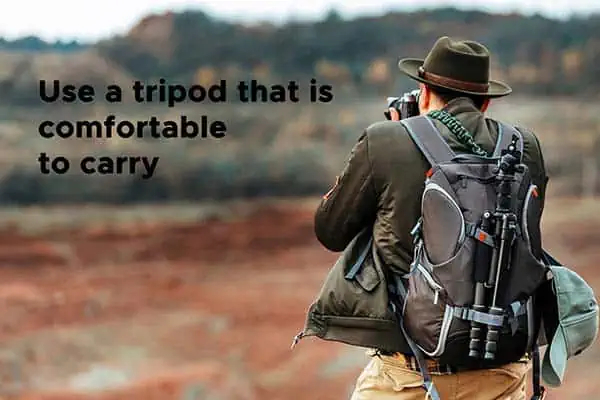
So, if you hike long distances or want to keep the weight down, it might be worth paying the extra for a carbon fiber tripod. Another consideration is the maximum height when collapsed. I like a tripod that can be made small enough to either fit inside my backpack or easily attach to the outside.
Take your time
Don’t set up your tripod as soon as you arrive at your photo location. Take some time to scout around and determine your composition. This may involve putting the camera to your eye to frame the scene as you want it to appear.
Remember, the most interesting composition isn’t necessarily going to be shot from your full standing height. Finding your composition can mean looking from different heights as well as moving laterally. For instance, you might be able to add depth to your composition by lowering the camera and tilting it down to include foreground interest.
Once you’ve found the exact spot where you want to place the camera, you will then know where to set up your tripod.
Get a secure footing
Most tripods have rubber feet, while others have metal spikes. Some have both, where a rubber foot can be screwed upward to reveal a metal spike. The choice of foot will depend on the terrain you are working on.
For instance, at the margin of a field or footpath long grass and vegetation can form a springy mass underfoot. Here I’d prefer to use a spiked foot since it will more easily pass through the grasses and seat itself on firm ground. But if I set up on smooth rocks or boulders, I prefer rubber feet. Since the rubber is compressible, there will be more surface area in contact with the ground and less chance of splitting.
Of course, you need to be mindful of where you set up and not cause any damage. For instance, to get shots of Turnberry Lighthouse![]() , on the Ayrshire coast, you might need to shoot from a golf green. It is unacceptable to sink the tripod feet into a perfectly manicured green. A flat pad under each tripod foot would prevent any damage.
, on the Ayrshire coast, you might need to shoot from a golf green. It is unacceptable to sink the tripod feet into a perfectly manicured green. A flat pad under each tripod foot would prevent any damage.
Spread the tripod legs for more stability
A tripod delivers stability by having three points of contact with the ground that are sufficiently far apart. The further apart you have the tripod feet, compared to the height of the tripod, the more secure the tripod will be. If you imagine the triangle defined by the tripod feet, you want that triangle to be as large as possible.
Many tripods have legs where both their length and outward angle can be adjusted. I aim to keep the triangle defined by the feet to be as large as possible. If I only extend one or two leg sections, I’ll increase the leg angle and keep the tripod feet apart. But with the tripod legs fully extended, the feet will naturally be far apart, and the leg angle can be reduced.
But don’t unduly reduce the leg angle merely to gain the maximum height. This will lead to poor stability and the risk of toppling over will increase.
Ensure your tripod legs are long enough
Some locations are easier to work in if your tripod legs are a bit longer, in other words, your tripod has more height. This can be the case when you are on a steep slope or among rocks.
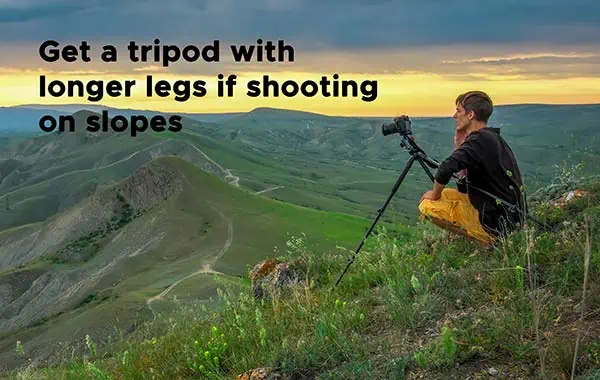
If you favor these types of locations, you might benefit from getting a slightly higher tripod. This will let you securely place each foot of the tripod in a position that will allow your camera to be supported well and kept level. It’s not just a case of getting the camera in the correct spot. A tripod that makes it easier to work on the chosen terrain also means you are also safer.
Avoid extending the center column
The whole point of using a tripod is to reduce camera movement or camera shake. By extending the center column the camera can move due to the slight flexing or bending of the column. Effectively, the camera no longer enjoys the stabilizing effect of the tripod’s three points of contact with the ground. It now has one point, where the column joins the rest of the tripod, around which the column can flex.
If you need the extra height, you can slightly bring together the tripod legs or get a tripod with longer legs.
Compensate for windy conditions
At some point, you’ll experience windy conditions while taking landscape photographs. This could be when low down on a beach or high up on a hillside, but the result will be the same, camera shake and blurry images. Longer lenses and lens hoods will behave as sails in windy conditions, causing the lens and camera to be buffeted about and producing blurred images.
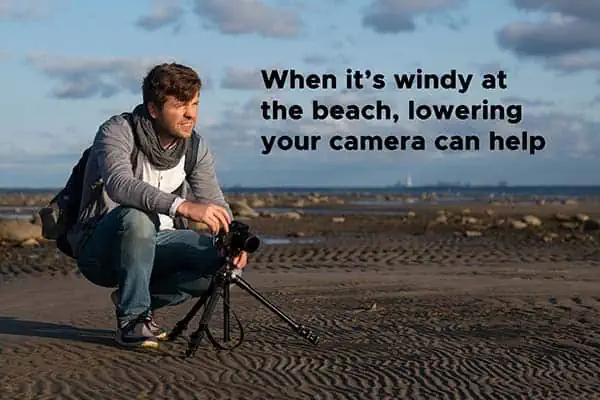
So, the first thing to do is to remove the lens hood and use a shorter focal length. Another option is to use a faster shutter speed to help “freeze” the motion of the lens caused by the wind.
There are two further things you can do. The first is to lower the height of the tripod and spread out the tripod legs. The second is to use a windbreak. This can be a natural feature in the landscape where you can shelter, although this isn’t always feasible. If there are no natural windbreaks, you can use your body as a windbreak. Better still, hold your coat wide open and stand behind the tripod on the windy side to provide some shelter for your gear. The downside of this technique is that you might attract strange looks and laughter from nearby onlookers!
Add weight to your tripod
Many tripods have a hook on the bottom of the central column from which you can hang a weight. The additional downward force can help keep the tripod firmly in place and reduce any camera shake. However, the last thing I want to do when hiking to take photographs is to carry extra weight.
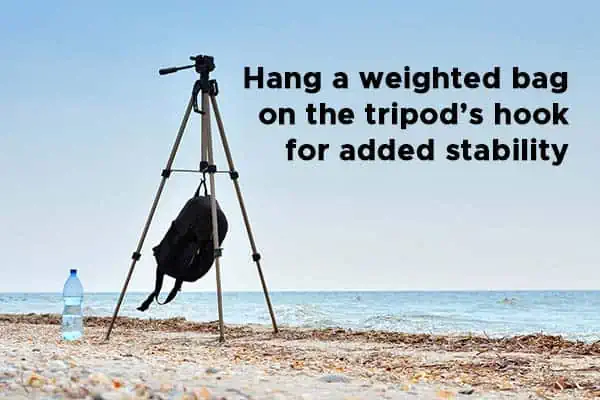
Instead, I often carry a small empty bag to hang off the tripod. I’ll then add my water bottle or a few handy stones. The weight is usually enough to help keep everything in place. If my tripod has been fully extended, I’ve even used my camera bag as a weight. But obviously, the tripod must be capable of handling the extra weight.
Level the tripod
Once you set up your tripod, make sure the head is level. Most tripods have a built-in bubble level you can use. Your camera might also have its own level tool. It usually appears on the screen as a green horizontal line if the camera is level and red if not level. If your tripod and camera do not have built-in levels, you can get a spirit level that will slot into the camera’s hot shoe.
Ensuring your tripod head is level has two advantages. It avoids slanted horizons and if you try to create a panorama, your final shot won’t appear lower at one end and higher at the other.
Upgrade your tripod head
Most landscape photographers use a ball head since this allows free movement in any direction. However, if you want to make micro-adjustments to your composition using a ball head can be a problem.
Although you might only want to shift the view in one axis, with a ball head, you also need to keep the other axes the same. Furthermore, if you have a heavy lens on your camera, after framing the scene and tightening down the ball head, the camera may sag slightly, changing the framing. You then end up having to compensate for the sag in your framing, which can become a frustrating guessing game.
A better option is to upgrade to a geared tripod head. This will give you precise movement in all three axes, allowing you to perfectly frame the shot in-camera.


Last update on 2025-10-20 / Affiliate links / Images from Amazon Product Advertising API
Get an L-bracket
Not all landscape images are best when shot in landscape mode. Portrait or vertical orientation can be a better option for some subjects, a waterfall being just one example. Although you can frequently turn a ball head 90° on its side, your gear will be unbalanced and if shooting panoramas, the camera will be rotating around a small circle rather than through one axis.
By fitting an L-bracket to your camera you can keep the camera over the tripod’s central axis. An additional benefit of using an L-bracket is that your camera shouldn’t need to be re-leveled after changing the orientation. While using a ball head, when you turn it on its side, you’ll need to level the camera again.
So, using an L-bracket on your camera makes changing orientation a breeze. Just loosen the quick-release screw, turn your camera through 90°, and retighten. Job done!
Turn off camera/lens stabilization
I’ve read and watched YouTube videos where the advice is to turn off the stabilization built into your lens and/or camera body.
The reasoning is that the optical stabilization can “fight” against the stabilization provided by the tripod, which can introduce its own form of camera shake and cause blurring in your images.
To be honest, I’ve never experienced any problems when using my Canon RF lenses and R-series camera bodies. However, on a few occasions I’ve experienced the frame move several pixels between shots, possibly because the camera has detected some kind of movement in the scene. This has never caused any blurring issues.
Even if focus or exposure stacking, this slight drift hasn’t been a problem because I always use the auto-align images in Photoshop. Nonetheless, you might find it worthwhile turning off stabilization on your camera and lens.
Use a remote shutter or delay timer
You’re now ready to take the shot, but there are still procedures you can follow to ensure you get the full benefit of mounting your camera on a tripod. The first is to ensure the image isn’t affected by the vibration introduced when touching the camera’s shutter button.
There are at least three ways to do this. Use the camera’s built-in shutter delay. Use a remote shutter release. Or fire the shutter using the camera’s phone app.
I’ve used all three methods and my least favourite is using Canon’s Camera Connect app. Turning on the wifi or Bluetooth connection is an additional drain on battery power that I can do without when away from home. In my experience, it’s also unreliable with me wasting a lot of time getting my device and camera to communicate.
Using a wired remote shutter release or timer works well, especially if you’re using bulb mode, but it’s one extra thing to carry or take up space in your bag.
The built-in shutter delay method is the one I use most. I don’t need anything extra, and I can choose between a 2sec or 10sec delay (on my Canon camera). I’ll use 2sec when shooting with a wide angle or short telephoto focal length lenses. But the additional magnification and size of a telephoto lens require longer for any vibration to die down, so this is where a 10sec delay is perfect.
Mirror lock-up
If you’re using a DSLR camera, use the mirror lock-up feature. This will reduce vibrations caused by the mirror flipping up. In doing so, you’ll get sharper images, especially when using longer focal lengths. But mirrorless systems don’t utilize a mirror, so this won’t be a concern.
Don’t always trust Autofocus
Getting to the location may have come at a great cost, either monetary, time, or physical cost. So, the last thing you want is to get home, open the images on your computer, and realize that the focus was slightly off. Consequently, use autofocus as the first step in nailing the focus. After your camera’s AF has latched on, press the magnify button and use manual focus to ensure the focus is tack sharp.
Clean your tripod
Dust, dirt, and debris can accumulate on your tripod over time which might cause a malfunction. Furthermore, saltwater deposits can lead to corrosion of metal parts. Therefore, you’d be wise to regularly clean your tripod to maintain its performance. After all, you might need to replace more than just the tripod if it fails when you’ve got a camera and lens fitted on top.
Summary
The photography accessory that made the most impact on my landscape photography was the tripod. I would recommend getting an excellent sturdy model, although it does not need to be expensive. The main purpose of the tripod is to keep the camera still and prevent camera shake. Not only can it help prevent blurring of the image, but it’s also beneficial when taking multiple exposures of the same scene for exposure or focus stacking. Furthermore, depending on the design, a tripod allows you to place the camera up high, close to the ground, or even facing directly at the ground. I have shared several tips on the use of the tripod in landscape photography, however, I’m confident that there are also others for you to discover.
Here’s a big ask from me: If you liked this article, please share it.
It will mean a great deal to me if you share this post because a few seconds of your time will seriously help my blog grow. The share buttons are below the “About Author” section.
Thanks. 🙂

About the author: Tosh Lubek is a multi-award-winning broadcaster, writer, and video producer, with 40 years of experience in professional broadcasting and has been using Canon video and stills cameras since 2010. He has worked with radio and TV broadcasters, advertising agencies, and direct clients on a variety of projects including radio and television advertising, online video production, corporate videos, award ceremony motion graphics, and theme park sound design. Tosh has won numerous awards, including a Radio Academy Awards Gold Sony, a Gold, Silver, and Bronze World Medals in the New York Festivals International Advertising Awards. Since about 2007 he has been creating YouTube videos. Tosh has been a sponsor of the “video booth” at HashTag Business Events across the UK.
Recent Posts
Most people use sandbags the wrong way. Here’s how to hang them properly on a light stand for maximum stability and safety — plus what to fill them with.
You're Using the Canon RF 50mm f/1.8 WRONG! Here’s How to Fix It
If you’ve recently picked up the Canon RF 50mm f/1.8 STM—affectionately known as the Nifty Fifty—you might be confused by that strange switch on the side of the lens. It doesn’t say AF/MF...