
DIY Video Studio is supported by its readers who use the affiliate links or ads on this site. As an Amazon Associate, I earn from qualifying purchases. Thank your support if you use any of the links.
In other videos, I’ve talked about creating timelapse movies using an intervalometer with a Canon EOS R series camera, but this video is about the much easier method of using the camera’s Time-lapse Movie mode.
I’ll demonstrate the method with my EOS R and R6, but the method is similar to that on the Canon EOS R, RP, R3, R5, R6, R6 Mark 2, R7, or R10.
It’s important to note that you will not be able to use zoom during time-lapse movie recording as this can cause problems, such as the focus shifting in the final video.
Also, you may need to disable certain features to make the Time-lapse movie recording mode available. It will be grayed out in the menu if you have C-Log selected, are connected to a computer with the interface cable, or if an HDMI cable is connected.
By the way, you don’t have to worry about whether stabilization should be on or off, your camera automatically disables stabilization when you shoot in Time-lapse Movie mode.
Step-by-step Canon Time-lapse movie recording
So, let’s get into the details of using Time-lapse movie recording.
1: Select your camera’s movie mode.
On the EOS R6, and other cameras with a mode dial, turn the mode dial so the movie camera lines up with the white line. If your camera has a MODE button, press it, then change from Stills to Movie mode by pressing the INFO button, then press the MODE button again.

2: Press the MENU button.
Press the MENU button to enter the camera’s menu system.
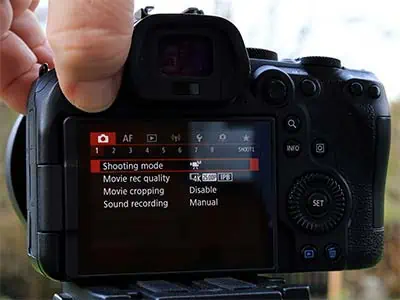
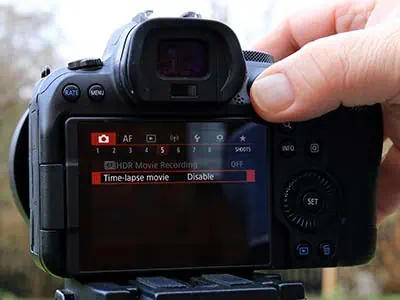
3: Navigate to the red Shoot 5 screen.
Navigate to the red Shoot5 screen (Shoot2 on EOS R and RP). With Time-lapse movie highlighted, press the SET button to enter the Time-lapse menu screen.
(If Time-lapse movie is grayed out it may be because you have C-log turned on.)
4: Select Time-lapse.
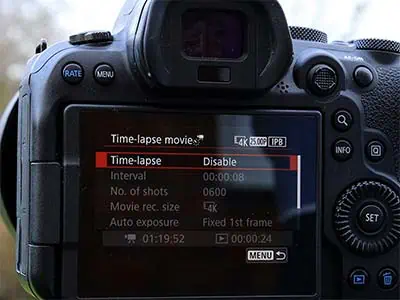
On the Time-lapse movie screen, you should see that Time-lapse is highlighted but the other items are grayed-out.
Press the camera’s SET button.
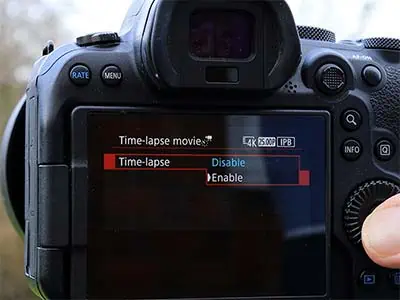
5: Enable Time-lapse.
You will see that you can choose to Enable or Disable Time-lapse. Select Enable, then press the camera’s SET button. You will be returned to the previous screen but the previously grayed-out items should now be available.
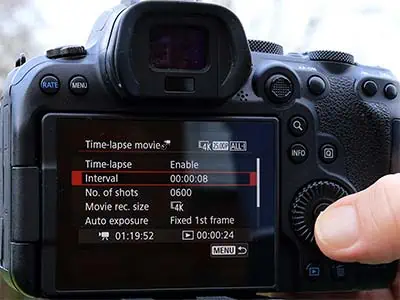
6: Go to the Interval screen.
On the Time-laspe movie screen, select Interval and press the SET button.
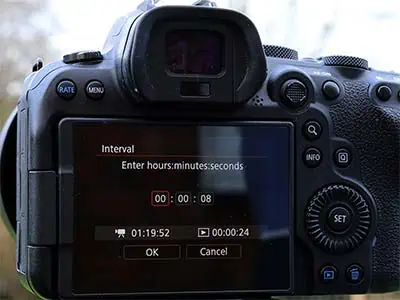
7: Choose the shooting interval.
On the Interval screen, enter a time value in hours, minutes, and seconds for the interval between shots. The minimum interval is 2sec. Once you’ve entered your desired interval, select OK and press the SET button. The interval will be registered and you’ll be returned to the Time-lapse movie screen.
8: Select No. of shots
Choose No. of shots and press the SET button.
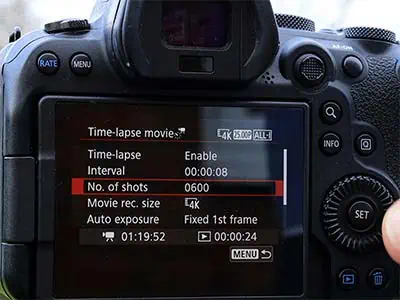
9: Enter the number of shots to take.
Enter the number of shots you want the camera to take, then select OK and press the SET button to register the value. You will then be returned to the Time-lapse movie screen.
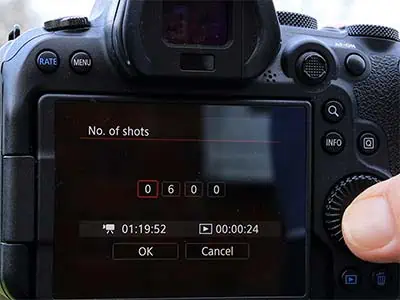
NB: There are two timings near the bottom of the screen. The one on the left, beside the movie camera icon, is how long the time-lapse will take to record. The one to the right, beside the play triangle, is the duration of the finished timelapse video. In both cases, the timing is in hours, minutes, and seconds.
If the playback time is displayed in red, there is not enough space on the memory card for the number of shots you have selected. Although it is possible to start the recording, the camera will stop the timelapse once the memory card is full.
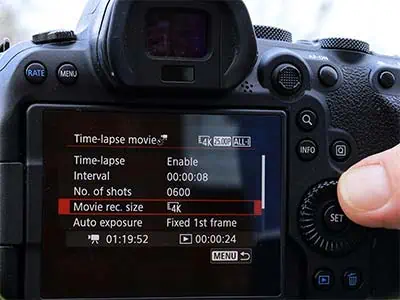
10: Select Movie rec. size.
Choose Movie rec. size then press the SET button the enter the Movie rec. size screen.
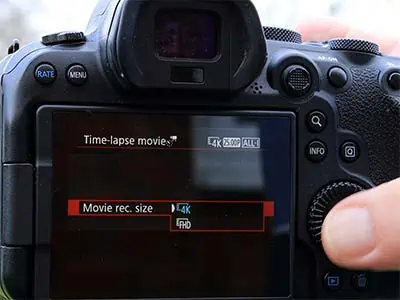
11. Choose the movie resolution.
Choose between FHD or 4K then press the SET button. You’ll then be returned to the previous screen.
(If you are using a Canon EOS R5 you will also have the option of creating 8K video.)
NB: The time-lapse video will be ALL-I, have an aspect ratio of 16:9, and, depending on your video setting, a frame rate of either 25.00 (PAL) or 29.97 (NTSC).
12: Select Auto exposure.
Select Auto exposure and press the SET button.
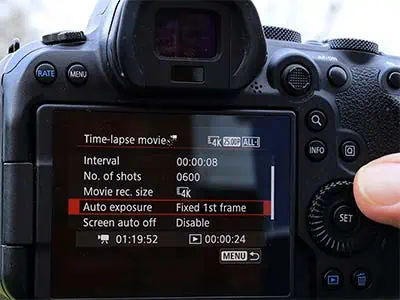
13: Decide how Auto exposure is applied.
There are two choices, Fixed 1st frame or Each frame.
With Fixed 1st frame the camera judges the correct exposure for the first frame and then applies the same exposure settings to every subsequent frame in the recording.
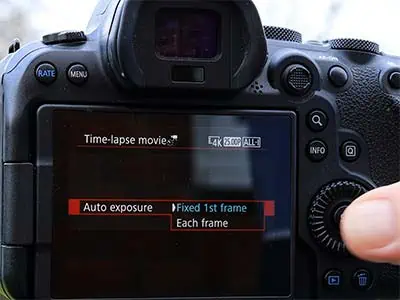
With the Auto exposure set to Each frame, the camera will adjust the exposure for each shot, trying to maintain the overall brightness of the scene. Once you have made your selection press the SET button.
N.B.: If you want to use Auto exposure Each frame you will need to put your camera into a movie auto exposure mode, such as Movie AV. However, the EOS R6 does not have Movie AV. You will have to go to the red Shoot1 screen and change the Shooting mode to Movie Auto Exposure (movie camera+ icon).
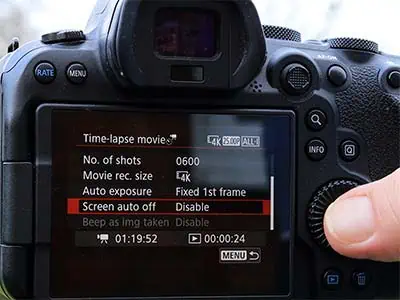
14: Choose Screen auto off.
The next menu item is Screen auto off, which can be set to either Disable or Enable to help conserve the battery life.
Highlight Screen auto off and press the SET button.
15: Enable or Disable the feature.
You can choose between Disable and Enable. Highlight your choice and then press the SET button. You will be returned to the previous screen.
When set to Disable, the image will be displayed on the screen between shots but go blank when a shot is taken.
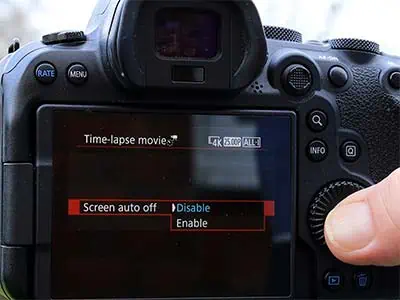
N.B. Even if you choose to disable auto screen off, the screen will go blank after about half an hour of recording. If you choose to Enable Screen auto off, the screen will go blank about 10sec after the recording has begun. At any time during recording, you can toggle the screen on or off by pressing the INFO button.
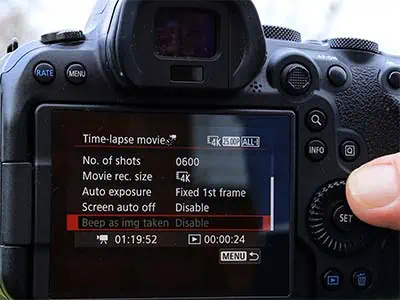
16: Camera Beep on or off.
The last item in the list is Beep as img taken. Hearing the beep can be reassuring to hear when you start creating time-lapse videos, however, it can become annoying or unwanted.
If Beep has been disabled globally this option will be grayed out.
17: Return to the shooting screen.
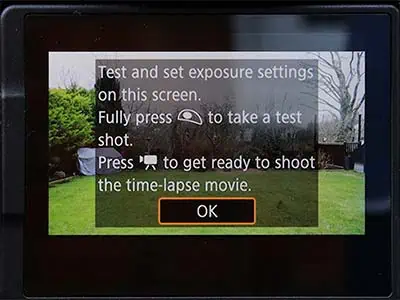
Exit the camera menu by pressing the Menu button twice. You will be returned to the shooting screen with a text message overlayed.
The message will prompt you to set the exposure and take a test shot.
First, half-press the shutter button to focus.
To take a test shot, fully press the shutter button.
To get ready to start the time-lapse recording press the red movie button. Once you are happy with the exposure press the shutter button fully to take a test shot.
Preview the test shot. If it seems OK, press the red movie button (this does not start the recording).

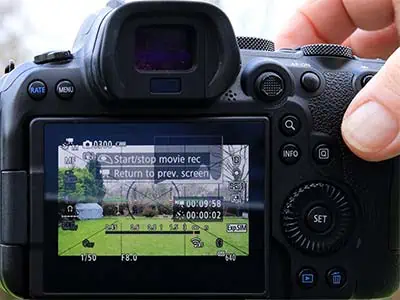
18: Get ready to start recording.
“Shutter button Start/stop movie rec”
“Movie button to prev. screen”
To start the time-lapse recording, press the shutter button.
If you want to stop the recording at any time, press the shutter button again.
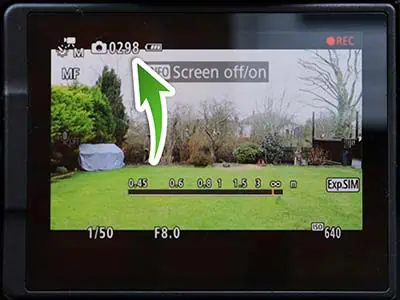
The number of shots that remain to be taken will be displayed beside a camera icon in the top left of the screen.
If you’re using the EOS R or R5, the remaining number of shots will also be displayed on the top LCD screen.
How to disable Time-lapse movie mode
After the time-lapse video has finished recording, remember that the camera is still in Time-lapse movie mode. To exit the mode repeat steps 2-5, but choose Disable in the Time-lapse screen.
A faster way of disabling Time-lapse movie mode is to turn off the camera. When you turn the camera back on, the camera will be back in normal movie mode.
Post-production of your timelapse video
The cool thing about using the Time-lapse movie recording on a Canon EOS R series camera is that your video is ready straight out of the camera. But that doesn’t mean it can’t be improved.
Import the MP4 file into your video editing software for any necessary editing and adjustments. For instance, you might want to work on things like colors, contrast, highlights, and shadows. Once you’ve got the video looking good it’s time to export your final timelapse in a format that’s suitable for sharing on social media or using in your other video projects.
Uncropped 4K Time-lapse video on the Canon EOS R
Although this article has concentrated on the EOS R6, the instructions are mostly the same for the EOS R. When the EOS R was launched in 2018 there was a lot of fuss about its 4K video being severely cropped. In fact, the crop is about 1.74x. However, when you shoot in 4K time-lapse movie mode the EOS R will use approximately the full width of the image sensor.
What this means is that your time-lapse footage will not look as if it is zoomed in, as it does in normal 4K video footage shot on the EOS R camera.
To let you see what I mean, the lefthand image below is a still from a 4K movie shot on an EOS R camera. On the right, there is a still from a 4K time-lapse movie shot on an EOS R. In both cases the focal length and the distance to the clock are the same.

Final thoughts
You now know how to use the Time-lapse movie recording feature on EOS R series cameras. I’ve even mentioned what will prevent you from getting access to this feature, like having C-Log enabled. But I’ll mention a couple of other things you should know.
The first is that you should watch out for recording time-lapse movies where there are flickering lights. The results will probably not work well. The other thing is that although the camera produces a video for you, there won’t be any audio. Sound is not recorded for time-lapse movies.
You might also like…
Here’s a big ask from me: If you liked this article, please share it.
It will mean a great deal to me if you share this post because a few seconds of your time will seriously help my blog grow. The share buttons are below the “About Author” section.
Thanks. 🙂

About the author: Tosh Lubek is a multi-award-winning broadcaster, writer, and video producer, with 40 years of experience in professional broadcasting and has been using Canon video and stills cameras since 2010. He has worked with radio and TV broadcasters, advertising agencies, and direct clients on a variety of projects including radio and television advertising, online video production, corporate videos, award ceremony motion graphics, and theme park sound design. Tosh has won numerous awards, including a Radio Academy Awards Gold Sony, a Gold, Silver, and Bronze World Medals in the New York Festivals International Advertising Awards. Since about 2007 he has been creating YouTube videos. Tosh has been a sponsor of the “video booth” at HashTag Business Events across the UK.
Recent Posts
Most people use sandbags the wrong way. Here’s how to hang them properly on a light stand for maximum stability and safety — plus what to fill them with.
You're Using the Canon RF 50mm f/1.8 WRONG! Here’s How to Fix It
If you’ve recently picked up the Canon RF 50mm f/1.8 STM—affectionately known as the Nifty Fifty—you might be confused by that strange switch on the side of the lens. It doesn’t say AF/MF...