
Author: Tosh Lubek Published: 2nd August 2023
DIY Video Studio is supported by its readers who use the affiliate links or ads on this site. As an Amazon Associate, I earn from qualifying purchases. Thank your support if you use any of the links.
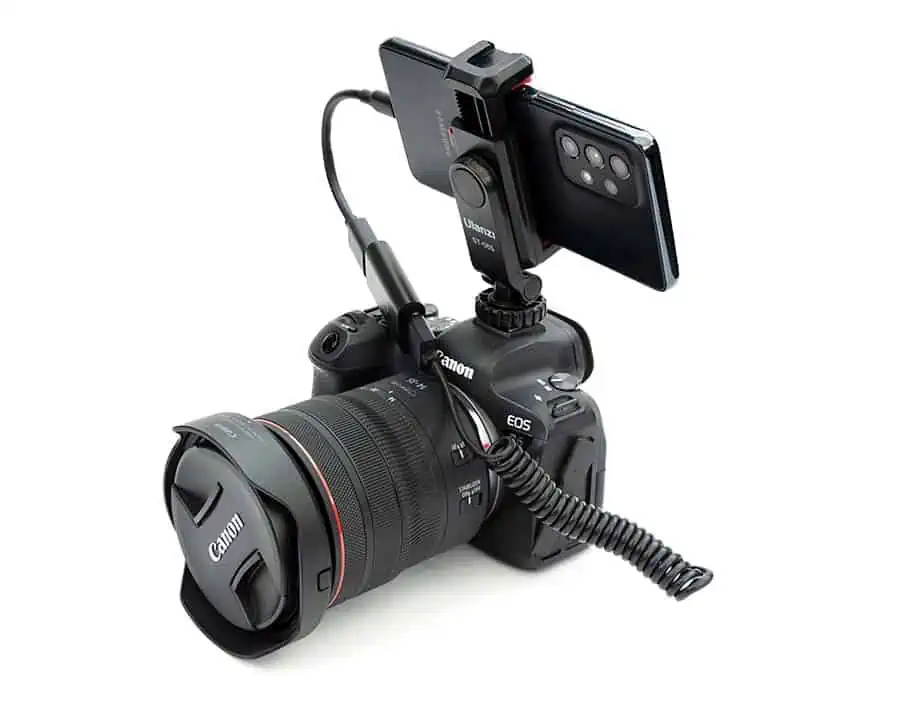
If you’ve been looking for a field monitor for your video camera, DSLR, or mirrorless camera, don’t buy one until you’ve read this article. I’ll show you how to use the HDMI output from your camera and display it on your Android phone or tablet.
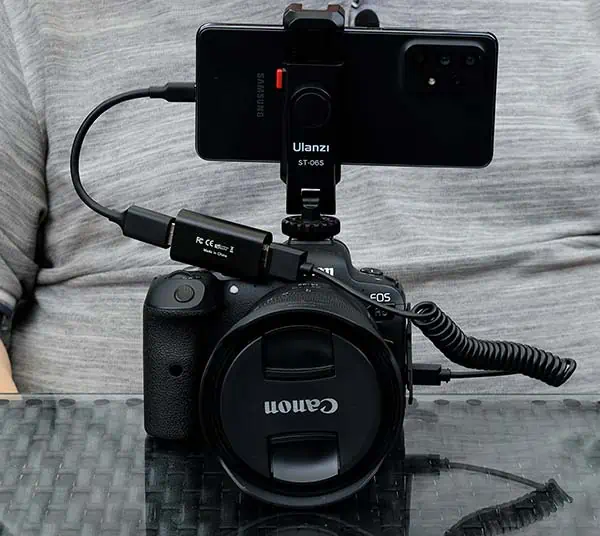
I’ll show you how I set up a Samsung A53-5G phone as a field monitor for my Canon EOS R6 mirrorless camera. However, this should also work with other Android phones that support OTG devices and any camera with an HDMI output.
By the way, not only will you be able to monitor what your camera is “seeing”, but you’ll also be able to record the footage or images on your phone.
The parts required to use your Android phone as a camera monitor
Here is the complete list of parts to use an Android phone or tablet as a field monitor for your camera. It is based on my original setup using a Samsung A53-5G phone and a Canon EOS R6 camera. After testing with a few other Android devices, I’m reasonably confident it should work with any Android device that supports USB OTG devices.
- Camera with HDMI output
- Android phone or Tablet with USB-C socket/USB OTG support
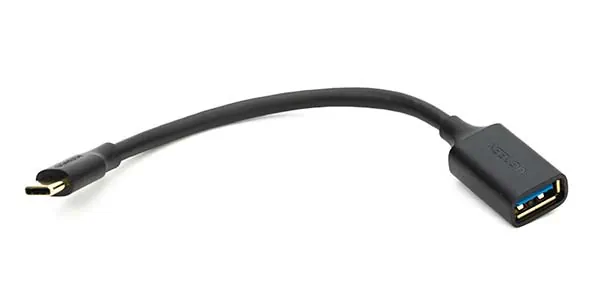
- A short USB-A to USB-C adapter cable

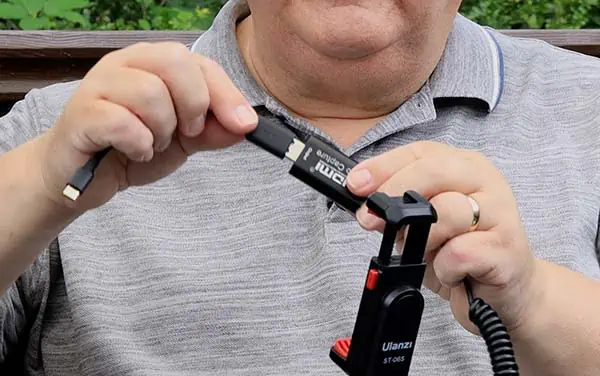
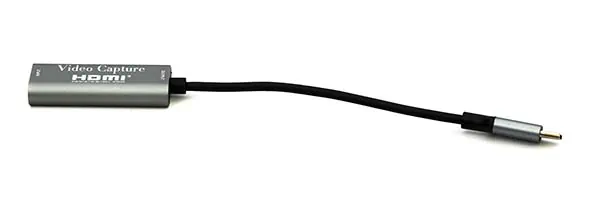
- HDMI video capture card with USB output
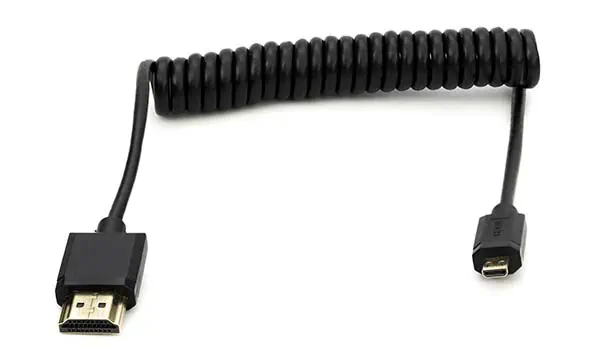
- Coiled HDMI cable (1.2m/4ft)
- Smartphone/Tablet holder with cold shoe connector
- Android USB Camera App
If you want to do this project yourself, the parts list includes links to the correct items on Amazon. Where I suggest modifications or alternative parts later in this article I will also include links to those parts on Amazon.
Before buying a HDMI cable check the size you need for your camera since the connector types vary. For instance, my XF100 video cameras use a full-size HDMI (Type A) port, while my EOS R camera has a mini-HDMI socket, and my EOS R6 uses a micro-HDMI socket.
Check your camera manual or the manufacturer’s website for details of which type of HDMI port your camera uses. Since I am a Canon user, I can say that almost all Canon EOS R series cameras have a Micro HDMI (Type D) port, so you will need a Type D to Type A HDMI cable. However, the original Canon EOS R is the exception since it uses a Mini HDMI (Type C) port so you will need a Type C to Type A HDMI cable.
One last point about the HDMI cable. I originally thought I could save money by using a standard HDMI cord that I already had. I decided I could fold up the excess cord and rap a cable tie around it. Although it worked, it wasn’t very tidy, and it flapped around impeding my operation of the camera. I would advise getting the coiled version of the HDMI cable. It looks neater, and the greater flexibility reduces the strain on your camera’s HDMI port.
Assuming you’ve got everything from my parts list, let’s move on.
How to set up your phone as a field monitor
Here are step-by-step instructions to set up your Android device as a field monitor on a DSLR or mirrorless camera, both as a video and as simple-to-follow instructions.
Note that there will be a lag in the video, but I’ve found it to be minor enough to allow you to focus manually.
VIDEO INSTRUCTIONS
STEP-BY-STEP INSTRUCTIONS
Step 1: Install a USB Camera app
Go to the Google Play store and find a USB camera app so that you can display the video output from your camera on your phone’s display.
The best ones that I found for my Samsung A53-5G phone are the USB Camera![]() and USB Camera Pro
and USB Camera Pro![]() apps from 沈垚 / ShenYao China.
apps from 沈垚 / ShenYao China.
I installed the free version of the app to check it worked well on my phone and then upgraded to the paid version. I found that the ads in the free version got in the way, so I happily paid $4 for the Pro version.
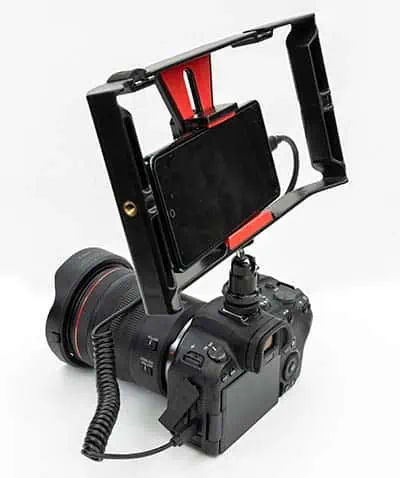
Step 2: Attach a phone holder to your camera
The first thing to do is to attach a phone holder to your camera’s hot shoe. I like the Ulanzi ST-06S. Even though it seems plasticky, you can adjust the angle of the phone, and then tighten it down using an Allen key. The thumbwheel to tighten the holder onto the camera’s hot shoes is also chunky.
This means you can get a good grip and make the holder secure.
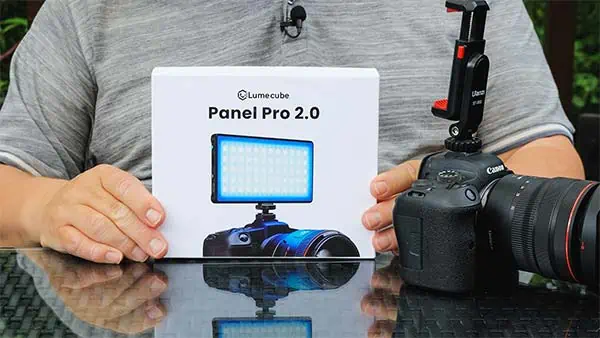
Also, the holder has a cold shoe mount on top, which is helpful if you want to mount a video light or microphone, like the Lumecube Panel Pro 2.0, which I’ll be testing shortly.
Sometimes, when I want to mount a light and video mic I use the Ulanzi U Rig Pro![]() . It has multiple cold shoe and ¼” tripod screw mounting points. To attach it to the camera’s hot shoe I recommend using something like a SmallRig Camera Monitor Mount Lite with Cold Shoe
. It has multiple cold shoe and ¼” tripod screw mounting points. To attach it to the camera’s hot shoe I recommend using something like a SmallRig Camera Monitor Mount Lite with Cold Shoe![]() . I don’t recommend using a mini-ball head. I tried and it always seemed to come loose, especially if moving around with the camera.
. I don’t recommend using a mini-ball head. I tried and it always seemed to come loose, especially if moving around with the camera.
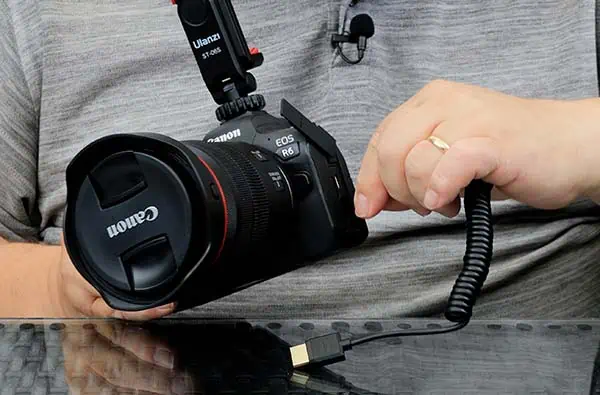
Step 3: Connect the HDMI cable to your camera
I recommend using a coiled HDMI cable instead of a standard one. This gives the cable more flexibility, reducing the strain on the camera’s HDMI port, and also keeps the cables tidy.
Locate the HDMI port on your camera. It’ll normally be under one of the rubber flaps on the side. On my EOS R and R6 cameras, the port is on the left side and next to the USB socket. In the case of my two cameras, the rubber cover is also embossed with “HDMI”. Lift the rubber cover and plug in the HDMI cable.
Step 4: Connect the HDMI cable to the video capture card
Plug the large (Type A) end of the HDMI cable into the input side of the HDMI video capture card. Make sure the cable’s connector is fully inserted and securely seated.
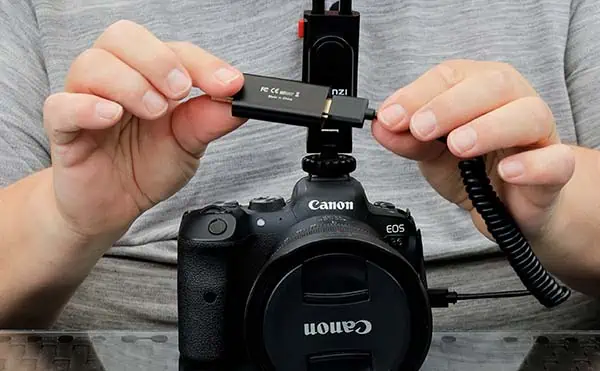
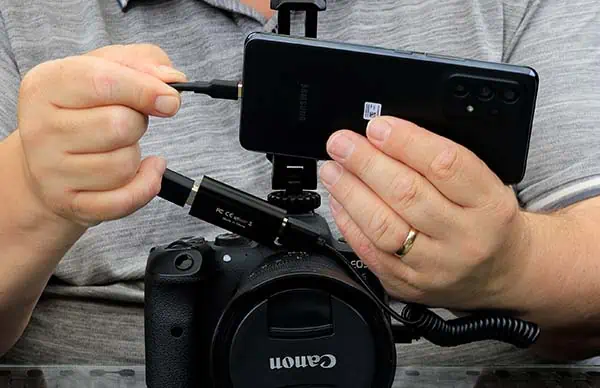
Step 5: Connect the USB adapter to the video capture card
The output side of the video capture card has a USB type A (standard) male connector. Obviously, this will not fit into the USB-C port of your Android phone, so you’ll need a female USB to male USB-C adapter.
I would advise against using the type that has both connectors in one housing. With this type of adapter, you’d have the full length (and weight) of the USB adapter and video card sticking out and hanging off the USB-C port of your phone. This will add unnecessary strain on the phone’s USB-C port and the long overall length will make it easy to knock against other things as you move around.
Ideally, use a USB to USB-C adapter that has a short cable between the two connectors to link the video card to your phone’s USB-C port. The total length of the adapter I use is about 6.5” (17cm), enough to bend around from the USB-C port to the capture card, which can hang safely between the phone and the camera.
Step 6: Connect the adapter to the phone
Connect the free end of the USB adapter to the USB-C port on your Android phone.
Step 7: Mount the phone
Place the phone in the phone holder and ensure that it is held securely.
Step 8: Open the USB Camera Pro app
Turn on your camera so it is sending a video signal. Then open the USB Camera Pro app on your phone.
You will see one or two notices on your phone including a window asking, “Let USB Camera Pro access USB Video?”. Tap OK.
When the app opens you will see a black screen with a blue menu bar across the top edge. Tap DEVICES and then tap “USB Video”. The video stream from your camera should now appear on your phone, along with a blue menu bar across the top of the screen. To hide or reveal the blue menu tap once anywhere on the phone’s display.
You can now start shooting videos or images and get a much larger view on your phone than on your camera’s display. Note that you should record your footage or images on your camera’s memory cards. However, you can also record your camera’s display to your phone’s internal storage (more details below).
Shooting with the USB Camera Pro app on your phone
The first thing to note is that if you normally control your camera through its touch screen, you cannot do the same from your phone’s display. You will need to use the controls on your camera.
However, there are some neat things that you can do in the USB Camera Pro app on your phone.
When focusing precisely, as well as being able to zoom in on your image by using your camera’s magnify button, you can also pinch to zoom on your phone.
I also find the pinch-to-zoom handy when using the camera’s histogram for exposure settings. Normally I find the histogram a little small on my camera, but when I do a pinch-to-zoom I can get the histogram to fill the screen.
To adjust the brightness, contrast, hue, and saturation, tap ADJUST in the blue bar menu. A window will open with slider controls allowing you to change the values. There is also a reset and close button. The adjustments you make will be apparent on your phone’s display and on the video footage or images that are recorded on your phone.
If you switch off your camera between shots, when you turn it back on, the app should still be open and the video feed from the camera should appear on your phone’s display without you having to setup the app again. On my R6 I get this message from the camera when I switch it back on. To return to the standard shooting screen I just need to press the SET button on the camera.
The three vertical dots on the right side of the blue menu bar includes various options. These are:
- Safely Eject
- Settings
- Video Format
- Audio Format
- Audio Output Routing
- Video Flip
- Video Rotate
- Device Info
- Picture in Picture
- Exit
There are four actions available by tapping the red circle in the bottom right of the screen. These include:
- IP Camera Server
- Live Push
- Record
- Snapshot
To start recording video footage of your camera’s screen, including any visible overlays, tap Record. To stop recording tap Record again. The video will be saved to your phone’s gallery.
To capture a screenshot of your camera’s display tap Snapshot. The image will be saved to your phone’s gallery.
To exit the red menu, tap the red circle, which should have a white X.
What to do if the video stream hangs in the USB Camera app
Occasionally you might find that the video on your phone display “hangs”. If this is the case, tap the three vertical dots in the top right corner of the menu bar and select “Safely Eject”. Once ejected, unplug and plug the USB-C connector back into your phone. Also, tap on DEVICES and then tap “USB Video”. If all else fails, close the app, switch off the camera, and start again.
Refinements for the setup that allows charging of your Android phone
I have a couple of refinements that you might wish to incorporate into the setup. The first could save you money while the second can help you shoot for longer without exhausting your phone’s battery.
Using fewer parts
My parts list earlier in this article is for my original setup. This works and I’ve used it frequently. However, I have refined it slightly so that the setup requires fewer parts and therefore costs less.
Instead of using the HDMI video capture card plus a short USB-A to USB-C adapter cable, I found an inexpensive HDMI capture card on Amazon that incorporates a short cable and USB-C plug on the output side.
Therefore, you do not need the female USB to male USB-C cable adapter. It’s available through this link![]() .
.
By using just one component instead of two, there are fewer mechanical connections, which should make the setup more reliable and lighter.
The one con that I’ve found is that these video capture cards can get warm to the touch. I’ve not found this to be a problem but if this concerns you, please use the original list of parts since the original HDMI video capture card has never felt warm or hot to me.
How to shoot for longer
When using the setup(s) I’ve described it’s advisable to start with a fully charged phone battery. I can run my Samsung A53-5G for quite a long time while using it as a field monitor for my Canon EOS R6. However, if you wish to shoot for much longer or find your phone’s battery draining quickly you need a way of connecting the video capture card and a power source to the USB-C port on your phone.
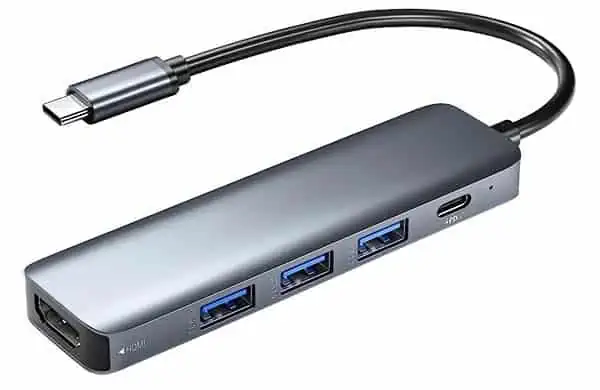
The way I did it was by using a USB C hub and power bank, like this one on Amazon![]() .
.
I found that the order in which you connect everything is crucial if you want the phone to charge while also displaying the video from your camera.
My procedure was as follows:
- Connect the power bank to the USB-C hub using a USB-C cable.
- Plug the hub’s USB-C cable into the phone.
- Turn on the power bank if it doesn’t automatically turn on. The phone’s battery icon should change indicating it is now charging.
- Connect the camera to the video capture card using the HDMI cable.
- Plug the video capture card into the USB-C hub.
- The phone will display a message saying, “Open USB Camera Pro to handle USB Vide?”, tap OK and the app will open on the phone.
- Turned on your DSLR/Mirrorless camera.
- On the USB Camera Pro app tap the DEVICE icon and then tap “USB Video”.
Hopefully, you will now see the video output from your camera displayed on your phone screen and see that your phone is being supplied power from the power bank.
The disadvantage of this setup is that it involves more parts and is starting to get a little untidy. You also need somewhere for the power bank. My Anker power bank came with a draw-string pouch, which I use to hang the power bank off my video tripod.
Why doesn’t this work with my Android phone?
The biggest issue is whether the phone includes USB OTG support. OTG, or On The Go, USB devices are those that can be used when connected with a suitable OTG USB cable to the USB-C port of your device. If those devices aren’t supported, USB camera apps are not going to work. Fortunately, most new phones include USB-C ports and USB OTG support.
To check whether your phone or tablet provides USB OTG support, download the USB OTG Checker app![]() from Google Play. Strangely, once installed on your phone the app calls itself USB to OTG converter. Nonetheless, open the app and at the bottom of the screen you will see a button with “check otg”. Tap on this and after a few seconds, you will see a result panel open. Hopefully, it will confirm that your phone supports OTG technology.
from Google Play. Strangely, once installed on your phone the app calls itself USB to OTG converter. Nonetheless, open the app and at the bottom of the screen you will see a button with “check otg”. Tap on this and after a few seconds, you will see a result panel open. Hopefully, it will confirm that your phone supports OTG technology.
Summary
In this article, I’ve discussed how to check whether your Android phone provides USB OTG support, and if it has, how this feature can be used to display the video output from your camera. The great advantage of using an Android phone with USB OTG support as a field monitor, assuming you already have the phone, is that the cost of the additional parts is much less than a commercially available field monitor. They can cost from about $130 – $600, depending on their specifications. However, the more expensive ones will offer additional features, such as a waveform monitor and the ability to record 4K 4:2:2 video. But if all you need is a larger screen than the LCD display on your camera, then using your Android mobile device may be an excellent option.
You might also like…
Here’s a big ask from me: If you liked this article, please share it.
It will mean a great deal to me if you share this post because a few seconds of your time will seriously help my blog grow. The share buttons are below the “About Author” section.
Thanks. 🙂

About the author: Tosh Lubek is a multi-award-winning broadcaster, writer, and video producer, with 40 years of experience in professional broadcasting and has been using Canon video and stills cameras since 2010. He has worked with radio and TV broadcasters, advertising agencies, and direct clients on a variety of projects including radio and television advertising, online video production, corporate videos, award ceremony motion graphics, and theme park sound design. Tosh has won numerous awards, including a Radio Academy Awards Gold Sony, a Gold, Silver, and Bronze World Medals in the New York Festivals International Advertising Awards. Since about 2007 he has been creating YouTube videos. Tosh has been a sponsor of the “video booth” at HashTag Business Events across the UK.
Recent Posts
Most people use sandbags the wrong way. Here’s how to hang them properly on a light stand for maximum stability and safety — plus what to fill them with.
You're Using the Canon RF 50mm f/1.8 WRONG! Here’s How to Fix It
If you’ve recently picked up the Canon RF 50mm f/1.8 STM—affectionately known as the Nifty Fifty—you might be confused by that strange switch on the side of the lens. It doesn’t say AF/MF...