

DIY Video Studio is supported by its readers who use the affiliate links or ads on this site. As an Amazon Associate, I earn from qualifying purchases. Thank your support if you use any of the links.
Your new Android device can shoot awesome videos, and in this article, I’ll explain step-by-step how to create your own videos.
I’ll go into more detail, but just for a moment, I’ll summarize the process. Obviously, you need an Android smartphone, but which one? And which camera on your phone should you use?
Choosing a suitable location will make a substantial difference to the appearance of the final video. I explain how to improve the lighting, avoid shaky footage, plus get the audio sounding a lot clearer.
I also cover how to prepare your phone to get the best out of it for the shoot, what to do to be a better presenter, and give you a couple of important tips that can save you a lot of time.
Although all you need in this workflow is your Android smartphone, I’ll also mention some inexpensive gear that will help make your videos appear more professional.
So, let’s dive in.
Step 1: Choosing the best smartphone for video
Many people spend too much time worrying about what smartphone they need for video. If that’s you, stop worrying if that’s stopping you from making videos. Just use the one you already have. The crucial point is to film, publish, and film again to improve through experience. You can get a better phone later.

If your phone can shoot HD or better, then it’s good enough to start with. Whether the maximum resolution is HD, Full HD, or 4k, it doesn’t matter. Sharing content with your audience now is what counts.
You can always upgrade later, by which time your video production and presentation skills will have improved. But more importantly, by that point, you’ll already have built up an audience.
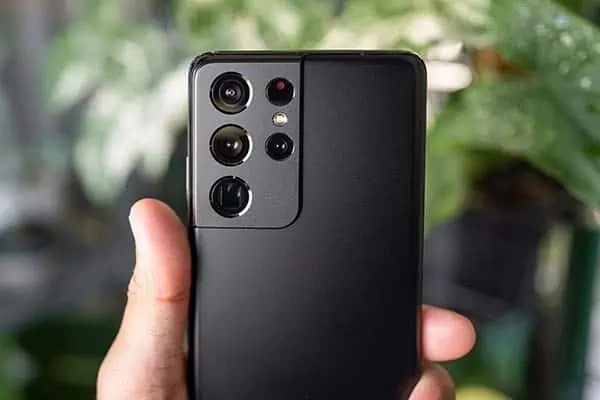
Step 2: Which camera should you use?
Any of the cameras on most modern smartphones will be good enough to shoot YouTube and social media videos. If you are filming yourself, the front-facing camera will make it a lot easier. But if you are filming someone else or b-roll, use the best rear-facing camera on your phone.
On my Samsung Galaxy A53 5G, which is a mid-range smartphone, the front or selfie camera lets me shoot Ultra HD or 4k video. It looks superb, and I can even plug in an external microphone to capture clean audio.
Using the front-facing camera is a real advantage if you’re filming yourself. You can use the phone’s display to check your framing, focus, and exposure. Any adjustments can be made without having to move round to the back of the phone.
Step 3: Pick a suitable location and background for your video
Choose a location that is light and has few audible and visual distractions for your viewer. However, visually rich backgrounds may be ideal for some videos since they can illustrate a point you are making. Finally, choose a location where the video shoot will be hassle-free, this will help you make more videos.

When choosing a location, consider whether there is enough light. Either artificial or natural. Indoors, a room with a large window, plus a light-colored ceiling and walls will be an advantage if you don’t have video lights. If filming at home or at work, choose a room that’s quiet.
The background can sometimes be an issue since many rooms can look busy and untidy. If you have a white painted wall that can work well. But it’s easy to set up a backdrop if required.
Backdrops can be simple as a muslin cloth or a roll of paper, which can be taped or pinned to the wall. You could even use a professional background stand with a crossbar, although this can take up a bit of space. Collapsible backdrops that pop open are also available, that can be simply propped again a wall.
Although indoor locations may be the quietest, shooting outdoors can also work. For instance, if the video is about fishing, shooting beside a lake or on a boat will be appropriate. So, pick a location that looks right, although you don’t want it to be too noisy. The audience should always be able to hear you clearly.

Whichever location you choose for filming, it should help make the process quick and easy. If making videos becomes a time-consuming chore, especially if you’re working on your own, you’ll eventually give it up. So, choose your location wisely and keep your filming enjoyable.
Step 4: Keep your smartphone steady
Shaky footage screams amateur, so you want to keep your smartphone as steady as possible. Rather than hand holding your smartphone, mount it on a mini tripod, and fold down the legs to use as a handle. If you’re shooting while sitting down, place the mini tripod on a table or desk for a rock-solid mount.
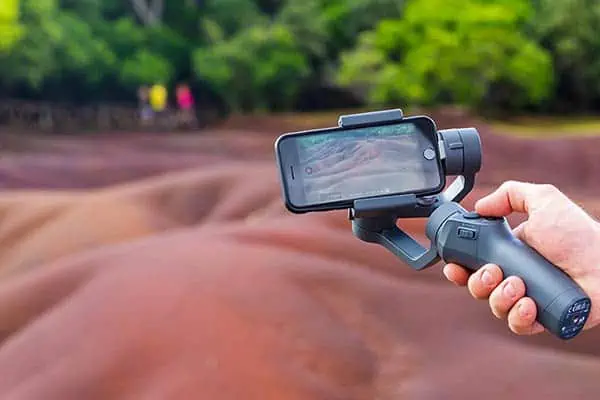
Walking while filming can produce shaky footage, one solution is to turn on optical stabilization (steady shot), if your smartphone camera has it. Alternatively, consider getting a gimbal. You’ll be able to capture tracking shots and silky-smooth tilt and pans that have cinematic look.
If you want something cheaper than a gimbal, have a look at the ULANZI U-Rig Pro Smartphone Video Rig. You mount the smartphone in the middle and can hold the rig firmly with the two side handles. There are also mounting points for an external mic and video lights.

- ❤Simple Design and Multi-function: Ulanzi Smartphone Video Rig delivers what one needs to be…
- ❤Enough Mounting Points: Side and bottom 1/4 inch holes allows you to attach the your phone on to…
- ❤Best Budget Stabilizer: Cheaper and easier to use than a gimbal, helpful for shot smooth Facebook…
- ❤Universal and Compatible: Fits most of smartphones whose width within 2 to 3.35in, such as iPhone…
Last update on 2026-03-01 / Affiliate links / Images from Amazon Product Advertising API
If you already have a photography tripod, get a smartphone adapter, then mount your phone on the tripod. It’ll be a stable base and allow you to adjust the height, so you can shoot either sitting or standing up.
Incidentally, if you have your phone on any kind of tripod or placed so it cannot move, turn off the optical stabilization. Since the camera cannot move you might find that if you make any movements while presenting to the camera, the stabilization will interpret your movement as something it needs to compensate for, causing the whole frame to move around slightly. Turning off the stabilization will keep the shot rock solid.
Step 5: Use good lighting for your smartphone video
Good lighting can make a big difference, but do not overcomplicate it. Natural daylight can look great, alternatively, use two daylight balanced continuous LED panel lights. If you only have one light, get a cheap reflector to bounce light into the shadows.

To begin with, keep things simple by taking advantage of natural daylight, either outdoors or inside next to a large window. But avoid direct sun that will create harsh shadows across your face. You can avoid those shadows by hanging white nylon diffusion material across, which will create soft light.
Alternatively, wait until the sun has gone past the window, at which point the entire window will effectively be a soft light source. An overcast or cloudy sky also produces a soft light, since the light will appear to come from all directions, effectively eliminating the harsh shadows.
If you’re shooting indoors with artificial lights, don’t place your subject directly below ceiling lights. The downward pointing light will cast ugly shadows down your subject’s face.
You could use some of the lights you already have, like desk lights, that you can point toward your subject. But make sure all the bulbs have the same or similar color temperature. If you mix lamps with different color temperatures your camera will struggle to get the correct white balance and you could end up with areas that have orange or blue color casts.
Eventually, you’ll probably want to get proper video lights. I would suggest LED panel lights like the Yongnuo YN300 III LED video light. They are cheap and can make a significant difference to the lighting.
Although three would mean you can set up a key light, fill light, and hair light, you could just get one for a key light and use a reflector to simulate a fill light by bouncing light back into the shadows.
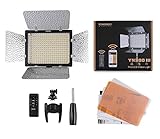
- YN300III adopts 300 high-quality LED light beads of extra-large luminous chips,the brightness is…
- The color temperature of YN300 III is 5600K and Adjustable brightness. NP-F battery and AC Adapter…
- Adopted the professional LED driving chip,the light is stable and the efficiency achieves 93%.
- The infrared remote controller is configured,thus the brightness and power switch can be adjusted…
Last update on 2025-10-20 / Affiliate links / Images from Amazon Product Advertising API
A ring light is a suitable alternative to panel lights. It’s a ring of LEDs with your phone mounted in the middle. Although it’s a little more expensive, it produces beautiful soft light much loved by owners of beauty and make-up channels. A ring light is extremely easy to use, and the ones that offer both battery and wall adapter power options can be used both inside and outdoors.


Last update on 2025-10-20 / Affiliate links / Images from Amazon Product Advertising API
Watch this short video for more details of the UBeesize 12″ Ring Light and how it is set up and used.
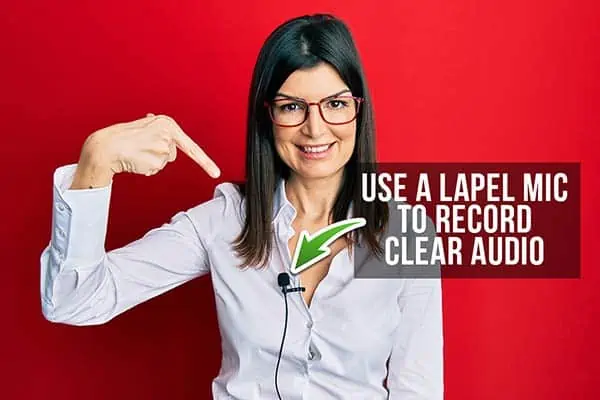
Step 6: Use a lapel microphone for better audio
In a quiet location, you can record good audio with the smartphone’s internal microphone. But by using an external microphone you can record clear dialogue even in noisier locations because the mic can be close to your mouth, which will make your voice louder than the surrounding environment.
The sound on a video is important since viewers will give up on a video if the audio is poor. So, when you record, ensure the audio is free of distortion, interference, and electronic hiss. Make sure your voice is clearly audible above any background noise. Also, make sure the recording level is correct, so your viewer doesn’t have to turn up the playback volume.
Lapel microphones, also called clip-on, lavaliere, or lav mics, are ideal, since they are cheap, allow you to move around, and will make a big difference to your audio. These types of mics frequently come with a clip so you can attach the mic to clothing. If you want to keep the microphone hidden you can even place the mic beneath clothing.
I have four lapel mics that I can recommend for use with a smartphone. I’ve got and used each one, so I know they can capture good audio and are affordable. They are the MOVO LV-1, the Boya BY-M1 (virtually the same as the MOVO LV1), the Purple Panda smartphone lavalier microphone, and the PowerDeWise professional grade lavalier microphone.
Each of the four lapel microphones has a 3.5mm TRRS jack that works with smartphones, either directly via a headphone socket or by using a USB-C to headphone adapter. These mics can also be used with DSLR or mirrorless cameras if you decide to upgrade later.


Last update on 2025-10-20 / Affiliate links / Images from Amazon Product Advertising API
Step 7: Prepare your phone for the shoot
It’s now time to prepare your phone for the video shoot.
Before you do anything else, put your phone into Flight mode so notifications and calls don’t disturb you while recording.
Also, ensure your smartphone’s battery is fully charged before you start filming, which is something that can use up a lot of battery power, especially when using higher resolutions. You can also have a charger plugged in to top up the power while filming.
Next, ensure you have plenty of storage available. If necessary, free-up space on your device.
Now choose your camera’s video settings. Open your camera app and select Video. Select the aspect ratio you need, like 16:9 for YouTube. Next up pick your resolution. Older phones may only do HD (720p), which is OK. But modern phones, and higher spec phones from a few years ago, should offer FHD (1080p) and UHD (4k).
Pick the highest resolution your phone can manage, but remember, filming at higher resolutions will produce larger video files and drain your battery power faster.
The final preparation of your phone is a physical one.
Clean your smartphone’s camera lens as part of your video production workflow. Dirt, dust, and finger smudges on the camera lens can degrade the image quality and result in you having to reshoot the video. Use a microfiber cloth, or a specialist lens cleaning cloth to wipe away any dust and smudges from the camera lens.
Step 8: Lock your focus and exposure
Focus and Exposure on your phone camera are set to auto by default. So, if something moves in the frame, even if it’s you, the camera will adjust, making the image either brighter or darker. However, this is not what we see in professional videos, where the exposure stays constant in each shot.
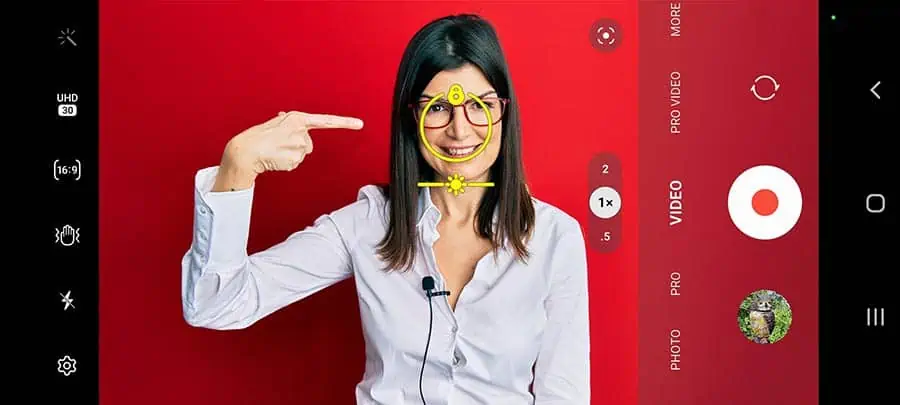
To lock your video focus and exposure touch the screen until you see a yellow square or circle appear. To adjust the exposure, use the slider below the square or circle. Note that if you are using the front-facing camera, this may not work. But if you have installed the Open Camera app tap on the +/- icon with a padlock, it will turn red, showing the exposure has been locked.
If you are filming on your own and using the rear camera, do not try to lock the focus and exposure on the empty space where you will be standing or sitting. You need to place something there to simulate your face and then lock the focus and exposure.
I use a 12-inch grey card taped to a light stand and place it approximately where my face will be. This allows me to frame the shot and set and lock the focus/exposure. I then press record and stand where the grey card was.
Step 9: Engage and connect with your audience
When recording your video try to make a connection with your viewer by maintaining eye contact with them. Do this by looking at the camera lens and not at yourself on the phone’s display. If you look away from the lens it will seem as if you are avoiding a connection with the viewer or even excluding them.

Without that eye contact, there will be a disconnect between you and the audience. If you maintain eye contact; it will help make the viewer feel you’re involving them. So, look at the camera to create a connection with the audience that will help keep them watching for longer.
Also, try to develop an enthusiastic presence in front of the camera and remember to smile. You need to appear friendly and make your topic sound interesting by using an engaging delivery.
Enliven the sound of your voice and don’t be afraid to use hand movements to seem enthusiastic about your topic.
Add a little variety to the tone of your voice and the pace of your speech. Some words may also need a little emphasis, you can do this by putting more force into them and even isolating them a little by including a pause.
Step 10: Rehearse your delivery
Before tapping on the record button, a run-through will make you familiar with what you’re going to say and do. This is especially true if you are including names and technical terms, or if you are handling props while speaking.
When you rehearse, you’ll understand how to deliver your lines, even if you’re making them up on the spot and not relying on a script. If nothing else, a quick run-through will make you more confident when you finally do start recording.
Step 11: Record a test video starting the full shoot
You should always record a test video of about 10 to 30sec before starting the full video shoot. Once you’ve shot the test, check it over. It should reveal any issues, like camera shake, incorrect focus, poor exposure, or whether the mic is picking up electrical hum or no audio at all.
A quick test that catches a problem at the start of the shoot will let you correct the fault and not have to rerecord once you realize there’s a problem when you start editing.
Step 12: You’re ready to record
If you’ve gone through all the steps, you’re ready to record. But before you tap that big red button, let me give you a final tip, and it’s this. You don’t have to be perfect. Although you will get better as you make more videos, don’t worry if you’re not word-perfect from beginning to end.
It’s OK to record your video in chunks, like a sentence or short paragraph at a time. If you can do more, that’s OK too.
If you mess up, keep the camera rolling, go back to the start of the last sentence or phrase, and go again. When you get to the editing, just cut the good parts together and leave out the bits you don’t like.
And one final tip, one I learned early in my broadcasting career. When you tap the record button, take a moment to confirm your device is recording; I usually check that the red timer is advancing.

Believe me, when you get to the end of a take and you realize your device hasn’t been recorded, it’s both annoying and embarrassing.
So that’s it. Now you know my smartphone video production workflow. Good luck and make sure you keep going. Those who persevere are rewarded with success.
Tosh Lubek runs an audio and video production business in the UK and has been using the Canon EOS R since it was released in the Autumn of 2018 and the Canon EOS R6 in 2020. He has used both cameras to shoot TV commercials broadcast on Sky TV, promotional business videos, videos of events and functions, and YouTube creator content. He has also won several international awards for his advertising and promotional work. You can meet him by visiting his “video booth” at HashTag Business Events across the country.
Recent Posts
Most people use sandbags the wrong way. Here’s how to hang them properly on a light stand for maximum stability and safety — plus what to fill them with.
You're Using the Canon RF 50mm f/1.8 WRONG! Here’s How to Fix It
If you’ve recently picked up the Canon RF 50mm f/1.8 STM—affectionately known as the Nifty Fifty—you might be confused by that strange switch on the side of the lens. It doesn’t say AF/MF...