
DIY Video Studio is supported by its readers. Please assume links on this site are affiliate links or ads, and that I get commissions for purchases made through these links. As an Amazon Associate, I earn from qualifying purchases. Thank you if you use any of the links.
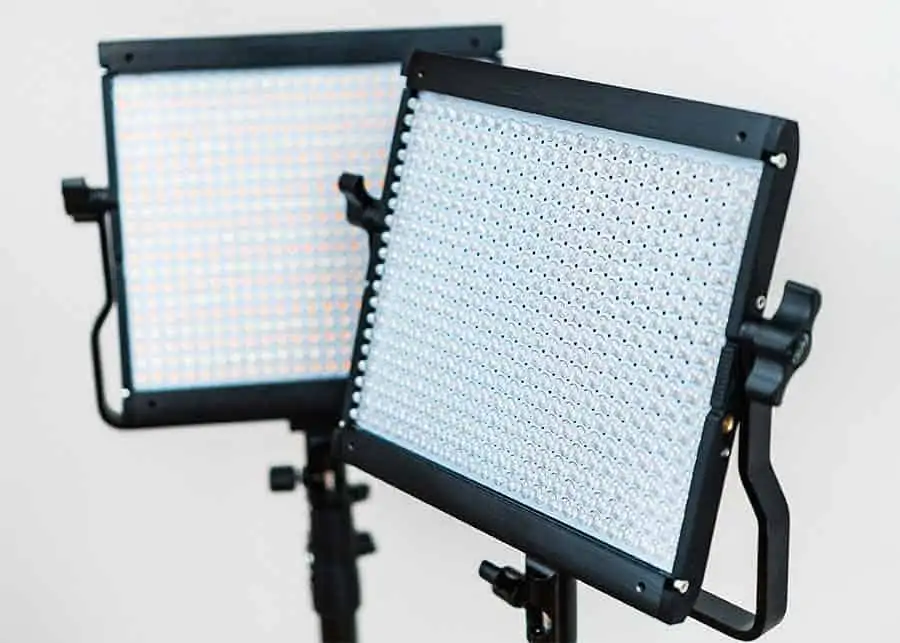
LED lighting has been stirring up the world of video lighting for a few years now. They started as small on-camera lights![]() but now you can buy LED panel lights for video production that have several hundred diodes or bulbs. But what are the best LED panel lights for video?
but now you can buy LED panel lights for video production that have several hundred diodes or bulbs. But what are the best LED panel lights for video?
You should know that buying bigger and brighter light panels is not necessarily the key factor when buying an LED light kit.
The thing that really attracted me to LED panels was how quick and easy they were to set up. I just had to screw them on to a light stand, attach the battery (or plug in a DC power cord) and I was good to go. No time-consuming messing about with softboxes, umbrella, and screwing in bulbs. That saved me a whole lot of time when filming at a client’s premises or other location.
But there are some other key features you should look for or consider when buying LED panel lights for video.
- Look for high CRI LED lights.
- Make sure they are dimmable.
- Consider whether you need bi-color LEDs or will Daylight rated panels be OK.
- Is it easy to add diffusers to soften the light?
- How do you want to power your LED light panels?
- Do you want the flexibility to mount them almost anywhere?
Is your Light Color Rendering Index high enough
The rise in popularity of LEDs, especially amongst solo video creators, Vloggers and YouTubers is understandable. In comparison to other studio lighting kits, LED panels are much less bulky, quicker to set up and take down, plus they can be powered from mains electricity or batteries.
What is there not to love about LED lights?
Well, for one, not all of them do an excellent job of rendering colors. At least, the cheaper ones. I’ll explain.
In an ideal world all artificial lamps, whether LED, Fluorescent tubes, halogen bulbs, and plasma lights would all render colors naturally, but they don’t. To help quantify how accurately a light renders an object’s colors, the CRI system was developed.
But what is CRI?
The CRI value of a lamp is based on an average of 8 sample colors. That CRI value can be between 0 and 100, with 100 representing a perfect color rendering under daylight or a standard light source.
Most LED bulbs from the hardware store will have a CRI value of around 80. That is acceptable for domestic use but not so good where you want faithful color rendering when making videos. What’s worse, hardware store LED bulbs can have a particularly low R9 value. That’s the deep red sample used in judging the CRI value and is related to how well skin tones are rendered.
So, a hardware store LED bulb can give your skin a slight green cast rather than healthy skin tones
For photography or videography, look for high CRI LED light panels. They should have a CRI value of 90+ and ideally 95+. Ultra-high CRI LEDs are violet LEDs with phosphor coatings that will have a CRI of 97 to 98 and a minimum R9 of 90. These tend to be quite expensive but are ideal when high color quality is important.
If the marketing material about a studio or camera LED light panel makes no mention of the CRI value, it’s a fair bet that it will be about 90 or less.
To sum up, buy the highest CRI value LED lights you can afford to record more vibrant colors and better skin tones.
For a fuller explanation of what is CRI check this article![]() .
.
Get dimmable LED panel lights for video
A useful feature of these video lights is that they are usually dimmable. This feature is a great benefit since you will have considerable control over the output level from each panel.
For instance, a pair of these light panels could easily be set up as a key light and fill light by setting the first panel to full power and the second to about 10 or 20%. You couldn’t do that as easily with a pair of identical softboxes since you have far less control.
An alternative use would be to use a single LED light to fill in some shadows on your subject’s face when shooting outdoors in daylight. You can get the exact effect you want because you have precise control over the output.
Consider Bi-color LEDs or Daylight panels
Ask yourself how you plan to use your video gear.
You might be a Vlogger or YouTubers who will only shoot videos at home or in the office, using window light as free ambient lighting. Under those circumstances, you may only need one or two small daylight rated LED panels to light you.
If your rooms are relatively dark, choosing daylight only LEDs will give you more light output for the equivalent size bi-color panel. Daylight and bi-color versions of the same make of LED panel will have the same total number of diodes.
However, half will be white, and half will be yellow on the bi-color panel. Meanwhile, on the daylight model, all the diodes will be white. Therefore, the daylight rated panel will be twice as bright as the bi-color version when running at a color temperature of daylight.
Even if you go and shoot out on the street you can take your daylight panels with you and the light will match the outdoor light.
On the other hand, if your Vlogging is a side hustle, you might be shooting mostly in the evenings. If so, you may use your domestic lights to help with the ambient lighting. Getting bi-color panels makes sense if you are going to use a mix of light sources. With bi-color LEDs, you can mix the two lights to color match your room lights.
If you are after some nice color effects on your background bi-color lights will be a smart choice. You’ve probably seen movies or TV dramas where table lights cast a warm orange light onto a wall. You can do the same with bi-color panels. Turn off the daylight beads and leave the 3200K LEDs to cast their warm glow.
Flatter your subject with soft light
One drawback of LED lighting, especially the smaller panels, is that they can produce pronounced shadows. They are not the softest of light sources. However, this can be remedied by placing a diffuser, such as a photography silk cloth (actually it’s, white nylon), in front of the panel.
A more professional looking option is to use a foldable softbox diffuser to the front of the panel.
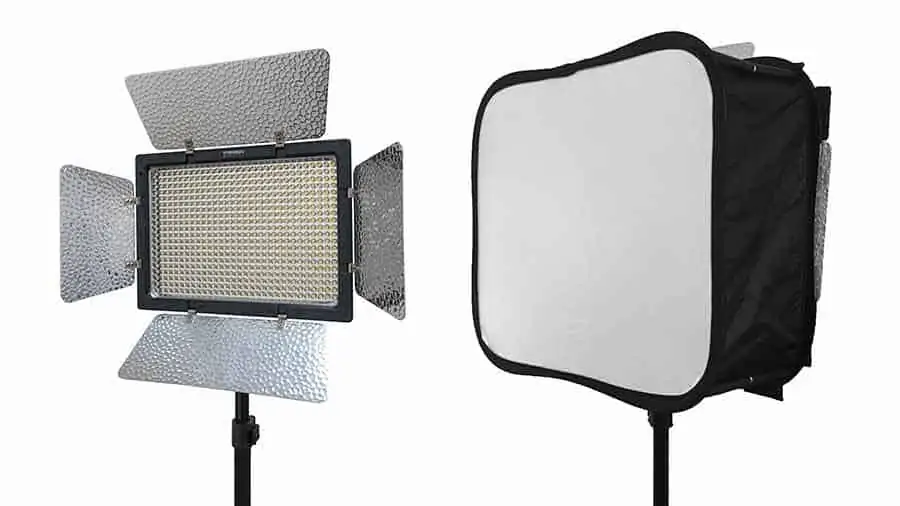
Yongnuo YN600L LED light![]() with and without an Ulanzi foldable softbox (front view). In North America, this softbox is known as the Ulanzi SB600 Softbox Diffuser.
with and without an Ulanzi foldable softbox (front view). In North America, this softbox is known as the Ulanzi SB600 Softbox Diffuser.![]()
Not only do these foldable softbox accessories soften the quality of the light but they can also control light spill off to the sides. In both respects, they are like their big brother softbox lights![]() .
.
Although you can’t expect them to perform as full-size softboxes, they are easy to transport, take up less space on set, and importantly, they are cheap.
In the case of the Ulanzi SB600 Softbox Diffuser and Yongnuo YN600 light, once you pop open the diffuser, secure them to the front of the light with velcro straps over the light’s barn doors.
The front diffuser is 5.25 inches from the LEDs. If you want more diffusion, hang some photography silk cloth a few inches in front of the softboxes.
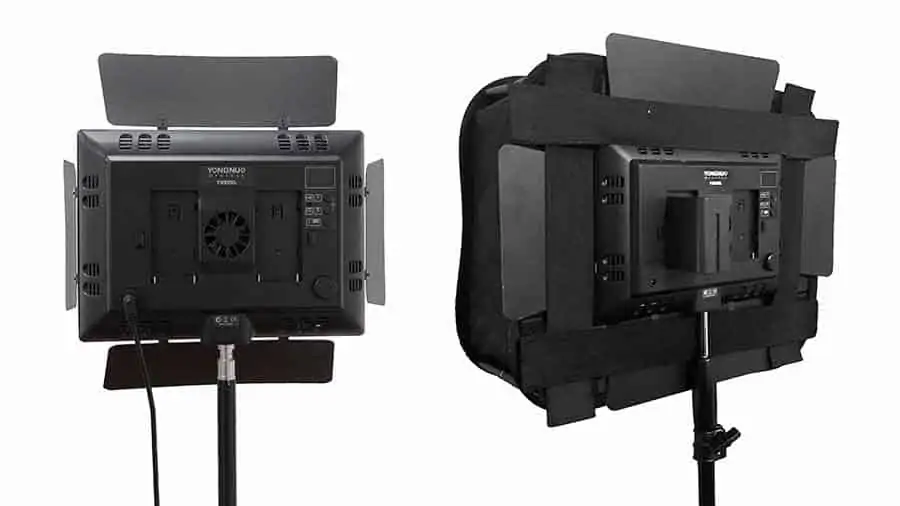
Yongnuo YN600L LED light![]() with and without an Ulanzi foldable softbox
with and without an Ulanzi foldable softbox ![]() (rear view), showing how the softbox diffuser is attached to the light.
(rear view), showing how the softbox diffuser is attached to the light.
Mains and battery power for the best of both worlds
Most smaller LED light panels are battery-powered. But got for larger panels and you’ll usually have the choice of using rechargeable batteries or mains power adapters.
I have both power sources for my Yongnuo lights. I bought the main power adapters and lights separately, but you can now find plenty of Amazon listings where you can get the lights and main adapters together.
Don’t scrimp on the batteries, get the largest you can. I use a Sony NP-F970 compatibles that were relatively inexpensive. Each Yongnuo YN600L light takes two batteries, so I have four for each light. That’s enough to keep shooting for a full day.
Get into tight corners with flexible LED Mats
A recent development with LED lighting is flexible light mats.
The LEDs are attached to a flexible backing that can be rolled up. The result is square or rectangular LED panels that are very thin and light.
You can curve them around the subject, tape them to ceilings, walls, or floors. Or use them for special FX shots. Put them into a suitcase and watch the bright light spill out as you open the case. If you’re shooting in a vehicle attach an LED mat to the roof or lay it across your lap. If you really must, you can even use them as a conventional light mounted on a light stand.
Sounds cool.
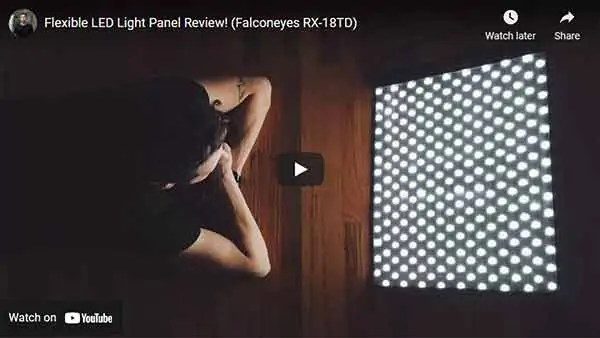
Since I don’t yet have an LED light mat here’s a review of the Falconeyes RX-18TD flexible LED light panel by Nigel Barros.
In summary, here are the pros and cons of using LED light panels. Although I have put down more cons, to be honest, I use my panels more often than my full-size softboxes, umbrella lights, or fluorescent tube light banks. Being bright, light, compact and quick to set up outranks everything. However, all the benefits I’ve mentioned are, as I would say, the icing on the cake.
Pros for LED panel lights for video
- Very portable and can be used outdoors with rechargeable batteries.
- Dimmable models provide greater control of your lighting set up.
- Offer color temperature flexibility. Daylight only and bi-color models are available.
- Modern flexible LED mats allow you to place lights where it would be difficult to use a large softbox or umbrella lights. They also open up new creative possibilities for your lighting.
Cons against LED panel lights for video
- Some cheaper or older LEDs can have a poor CRI (color rendering index). Resulting in inaccurate or paler colors and skin tones. Look for lights with CRI values of 95+ since these should give more accurate color rendering.
- If using rechargeable batteries, make sure you have a spare set in your kit back.
- If mixing LED lights with Compact Fluorescent lamps on set, even if both are daylight rated, use bi-color LED light to make sure all your lights do color match.
- They benefit from the addition of modifiers to soften their light.
- If used without a modifier and in your subject’s line of sight, the LEDs can cause the presenter to temporarily see gray dots at the end of the shoot.
My Favorite Content Creation Kit
Thank you for taking the time to read this article. Hopefully, you found it helpful in creating your own content for your social media and YouTube channels. I have listed some of the gear I use as a YouTuber and online course creator and hope you’ll also find it useful. I have recommended this equipment to my readers and my own family and friends.
Audio Recorder: I use Zoom digital recorders to capture good quality audio for videos, podcasts, and radio/TV advertising. Unlike SLRs the Zoom Handy recorders can record from multiple sources simultaneously, ideal if you have two or more people speaking. I’ve used the H4n![]() , H5
, H5![]() , and H6
, and H6![]() and would recommend them to anyone.
and would recommend them to anyone.
Camera: You can use your smartphone when starting out, but I’d recommend getting a Mirrorless Camera. I use both the Canon EOS R![]() and EOS R6
and EOS R6![]() . Both can shoot Full HD or 4K, and the Eye AutoFocus will keep you sharply in focus even if you move around. If your budget is smaller, I would recommend the Canon M50 MkII
. Both can shoot Full HD or 4K, and the Eye AutoFocus will keep you sharply in focus even if you move around. If your budget is smaller, I would recommend the Canon M50 MkII![]() .
.
Video microphone: Arguably, sound quality is more important than video quality, that’s why I use a Deity V-Mi![]() c D3
c D3 ![]() Pro super-cardioid shotgun microphone on my mirrorless cameras. It automatically powers on when I turn on my camera and powers down when I switch off the camera. But I also like the versatility of the mic. It automatically senses what device it is connected to ensuring it works with SLRs, camcorders, smartphones, Handy recorders, laptops, and bodypack transmitters.
Pro super-cardioid shotgun microphone on my mirrorless cameras. It automatically powers on when I turn on my camera and powers down when I switch off the camera. But I also like the versatility of the mic. It automatically senses what device it is connected to ensuring it works with SLRs, camcorders, smartphones, Handy recorders, laptops, and bodypack transmitters.
Video Lighting: Although daylight is my favorite lighting, I use LED lighting for all the videos I shoot indoors because good lighting can make a tremendous difference to the visual appeal of a video. For video calls on Zoom or Teams, I use the Lume Cube Broadcast Lighting Kit![]() . For YouTube videos and creating video tutorials for online courses, I love the Lume Cube 18″ Cordless Ring Light Kit. Both these lights are excellent, and I wouldn’t hesitate in recommending them.
. For YouTube videos and creating video tutorials for online courses, I love the Lume Cube 18″ Cordless Ring Light Kit. Both these lights are excellent, and I wouldn’t hesitate in recommending them.
Teleprompter software: I use the iCue teleprompter![]() app on my iPad when using it with a traditional beam-splitter teleprompter and control it remotely with the iCue Remote
app on my iPad when using it with a traditional beam-splitter teleprompter and control it remotely with the iCue Remote![]() app on my iPhone. On my PC I use Teleprompter Pro
app on my iPhone. On my PC I use Teleprompter Pro![]() from the Microsoft Store.
from the Microsoft Store.
Teleprompter hardware: Teleprompters help you present to the camera without needing to learn your script. When I need more screen space and the durability of an all-metal build, I like the Glide Gear TMP100![]() beam-splitter teleprompter. It works with my mirrorless cameras and uses an iPad or tablet to run the teleprompter software.
beam-splitter teleprompter. It works with my mirrorless cameras and uses an iPad or tablet to run the teleprompter software.
Tosh Lubek runs an audio and video production business in the UK and has been using the Canon EOS R since it was released in the Autumn of 2018 and the Canon EOS R6 in 2020. He has used both cameras to shoot TV commercials broadcast on Sky TV, promotional business videos, videos of events and functions, and YouTube creator content. He has also won several international awards for his advertising and promotional work. You can meet him by visiting his “video booth” at HashTag Business Events across the country.
Recent Posts
Most people use sandbags the wrong way. Here’s how to hang them properly on a light stand for maximum stability and safety — plus what to fill them with.
You're Using the Canon RF 50mm f/1.8 WRONG! Here’s How to Fix It
If you’ve recently picked up the Canon RF 50mm f/1.8 STM—affectionately known as the Nifty Fifty—you might be confused by that strange switch on the side of the lens. It doesn’t say AF/MF...