
DIY Video Studio is supported by its readers who use the affiliate links or ads on this site. As an Amazon Associate, I earn from qualifying purchases. Thank your support if you use any of the links.
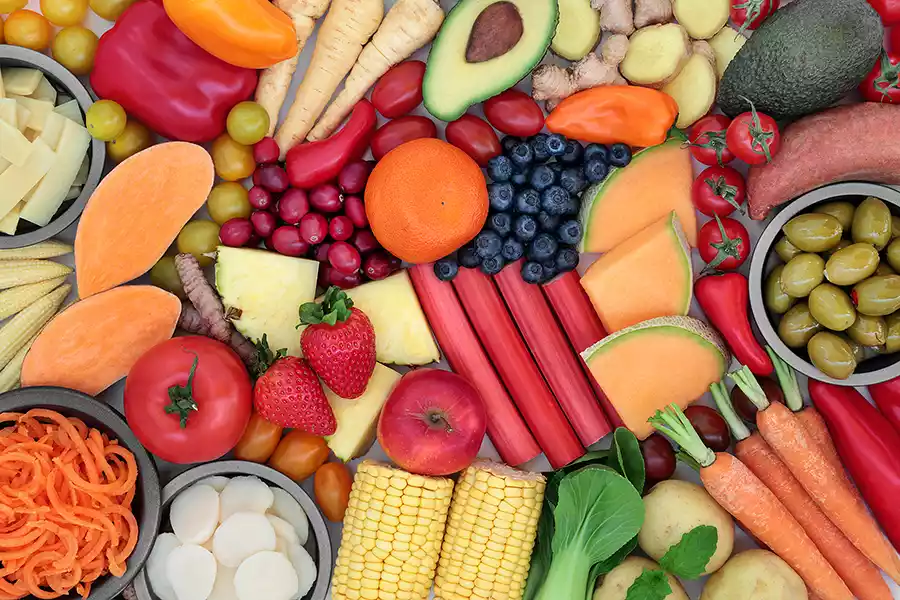
If you’re a food blogger, at some point you will want to try top view or flat lay food photography. But even if you have a great camera, your biggest headache will be mounting it above the food.
Of course, mounting the camera is just part of the story, and I’ll talk about those aspects later, but for now, let’s look at how you can mount your camera to get those perfect overhead food shots.

You might also like to read my other article about food photography: 10 Amazing food photography tips for beginners | See improvements quickly![]() If you click on the link the article will open in a new tab.
If you click on the link the article will open in a new tab.
Overhead Camera Mounts for Food Photography
To shoot overhead food images you need a camera mount that does four things.
- Positions the camera above the food.
- Points the camera downwards.
- Can adjust the camera’s height to frame the shot.
- Stabilizes the camera to eliminate shake.
The first three points are obvious, and you could argue that they can be achieved by handheld photography. Even so, it’s the last requirement of stability than requires a camera mount.
But why is that?
Almost always we do food photography inside, and most probably in the kitchen. In that environment, the lighting, especially natural window light, won’t be bright, and that can make the image quality suffer.
Sure, you can deal with low light by bumping up the ISO, but that runs the risk of introducing noise, especially in the shadows. For a clean image you need a low ISO and to capture as much light as possible by keeping the shutter open for longer. That’s where having a good overhead mount becomes important.
By using a camera mount, you can immobilize the camera, thus eliminating the possibility of camera shake that would otherwise blur the image, no matter how long the shutter is open.
Fortunately, there’s no right or wrong way to mount your camera above the food. You can adapt photography or videography gear you already own and improvise a camera rig, or you could buy some equipment that is designed for the purpose. I’ve taken both approaches when for top view food photography on my Kitchen Acorns![]() food blog.
food blog.
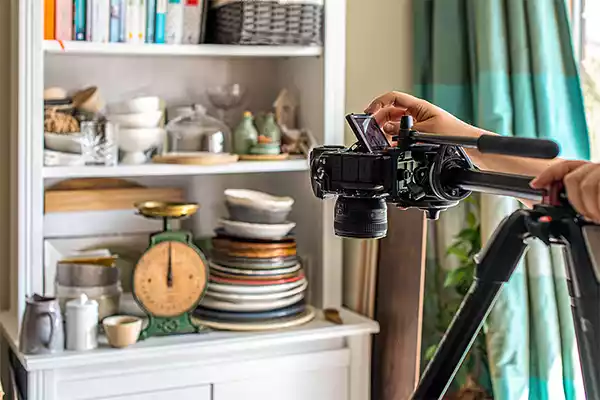
First, let’s look at using the equipment for food photography that you may already have.
Improvising a camera rig from the gear you already own
You may already have all or most of the equipment necessary to create a DIY overhead camera rig. Here are three approaches that require a tripod, a monopod, or a photography backdrop support.
Using the tripod you already have
The most basic way to take overhead food shots is to have a tripod over the food and tilt the camera down. But if you’ve ever tried that, you’ll know it can be tricky to get the framing you want without getting the tripod’s legs in the shot. Often, It’s possible to get usable results with a lot of tripods, but sometimes it can be awkward and can take a lot of time and trouble getting the shot you want, especially if you’re shooting overhead videos.
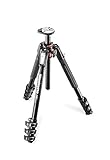
Tripods like the Manfrotto 190, have a center column that can be turned through 90° and extended out to one side as a horizontal arm so you can mount a camera for overhead photography. The legs on the Manfrotto can also spread out quite far, helping to avoid getting the legs in the shot.
If you are working with a tripod that is designed for overhead shots, like the Manfrotto190 , having your heavy camera gear out on the end of a horizontal arm will make the tripod easier to tip over since the tripod will be unbalanced. So hang a counterweight off the other end of the arm to bring everything back into balance, otherwise, your expensive camera and lens could topple over.
- (90° Center Pole Mechanism for Multi-Angle Shooting) The 190XPRO Aluminum 4-stage tripod features a...
- (Quick Power Lock to Ensure Stability) Each section of the tripod is equipped with a quick power...
- Easy to Connect Accessories: The easy link connector allows you to easily attach accessories such as...
- New Leg Angle Selector: The newly developed leg angle selector allows you to easily and intuitively...
Last update on 2026-03-01 / Affiliate links / Images from Amazon Product Advertising API
But not everyone has such a tripod that is designed for overhead shots. If you have a standard tripod that does not have a 90° arm, or legs you can spread out, here’s what to do to help avoid getting the tripod legs showing in your food shots, even if you have a large food flat lay.
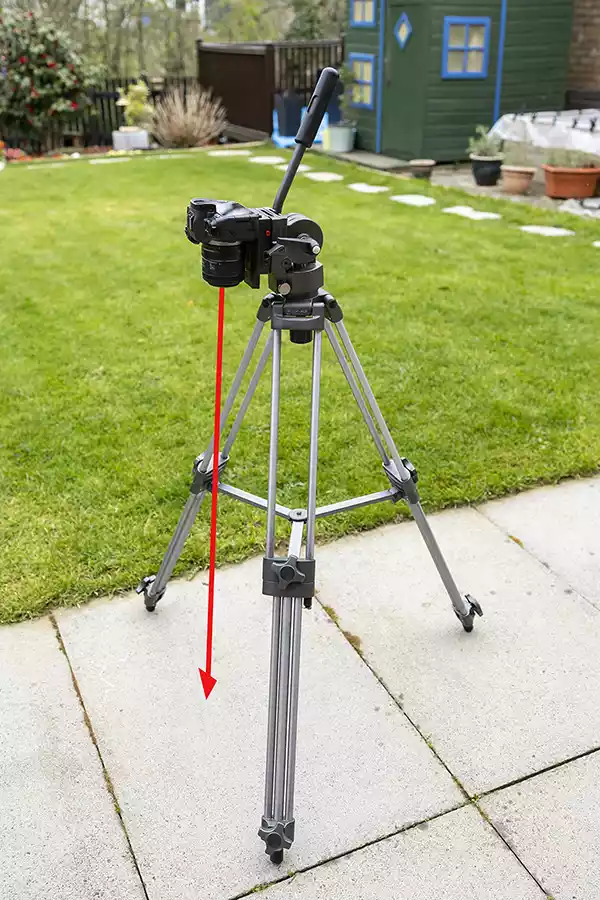
Extend the legs of the tripod by an amount that will give you the framing you want. Now rotate the tripod head horizontally, so that the quick release plate would point halfway between two tripod legs when you tilt the tripod head or ball head forwards through 90°.
This will allow the camera lens to point down and “see” the largest amount of floor area, hopefully without the tripod legs getting in the shot.
If the tripod legs are still in shot, you can tilt the whole tripod over a little, simulating the effect of having a short horizontal arm.
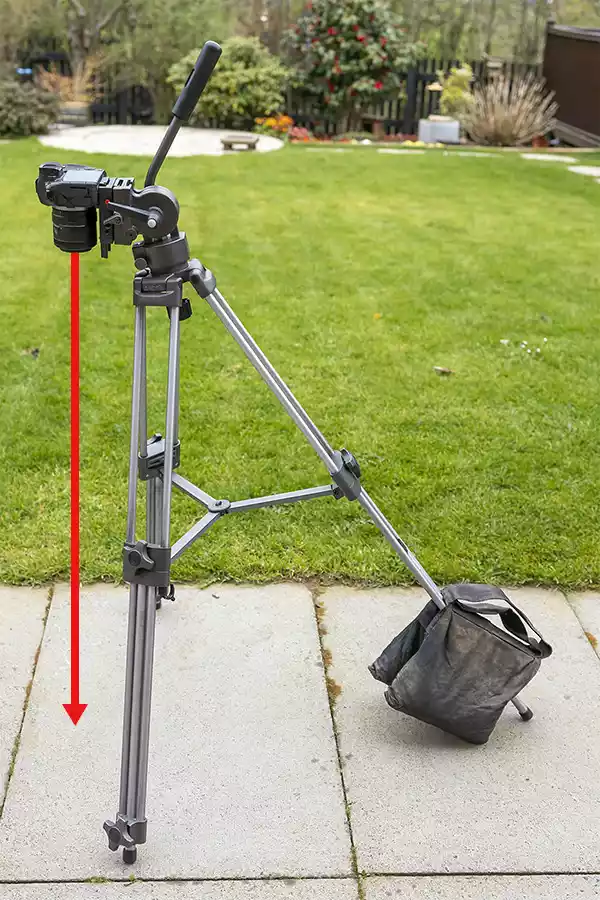
Extend the tripod leg at the back more than the two at the front. This will make the two legs at the front appear vertical when looking from the side of your setup. The camera will move further a few inches over your flat lay and, hopefully, the tripod legs, or the leg stretchers, will no longer be in the shot. If you need more forward reach to avoid seeing the tripod legs, you could add a ball head between the tripod and camera. This will add about four inches to the outward distance of the camera.
However, the extra reach is at the expense of stability. To counteract this, add a pair of sandbags to the longer rear leg. But even with the counterweight in place, exercise caution.
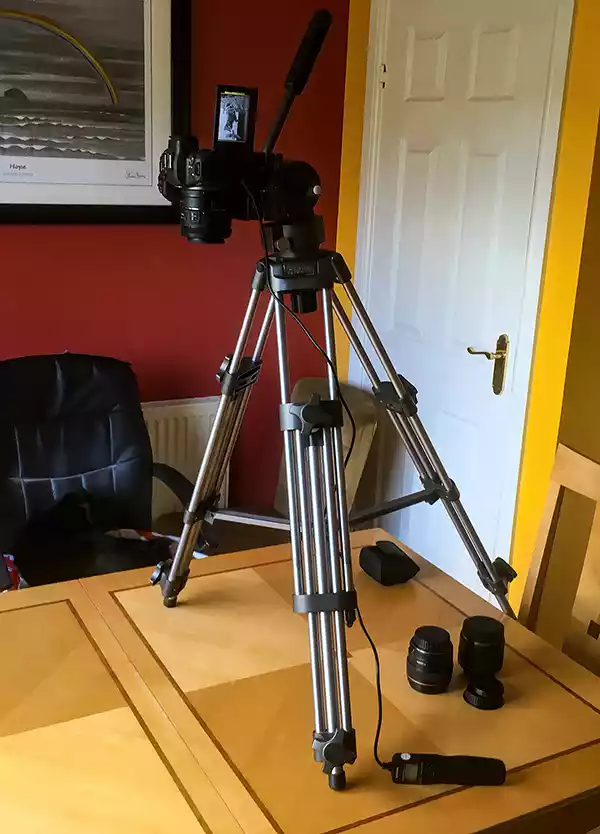
If you’re laying out your food on a table top it’s likely that you won’t be able to get all three tripod extended legs on the table and have the camera point down at the spot you want. But don’t worry.
If you have a tripod with three or four sections to the legs, place two tripod legs on the table, about a third of the way past the edge, and extend the third leg so it reaches the floor.
This is a much better setup than trying to get all three tripod legs onto the table top, giving you more room to work with and get the framing exactly as required.
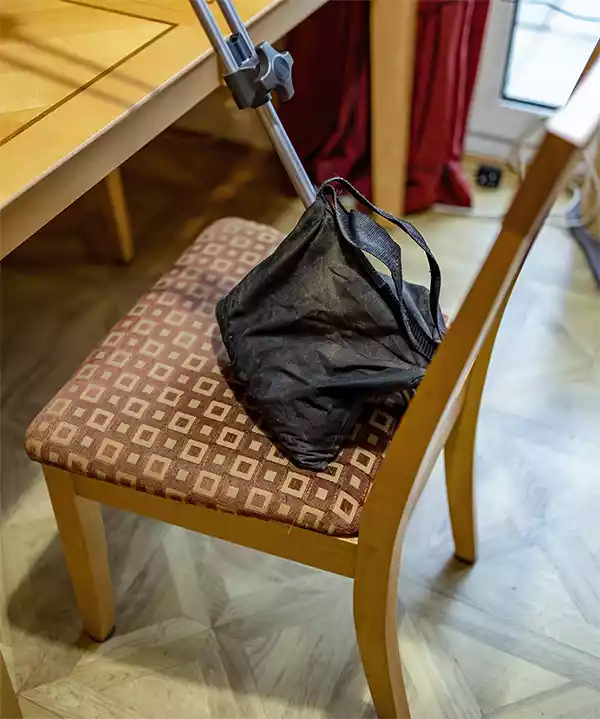
One problem you may encounter on some shorter tripods is that the third leg isn’t long enough to extend all the way down to the floor. That’s not really an issue because you can rest the end of the leg on a chair or low table. But as before, hold it in place by adding a sandbag over that back tripod leg. You can now tilt the tripod head and camera through 90° to point at the table top.
Using a monopod for overhead photography
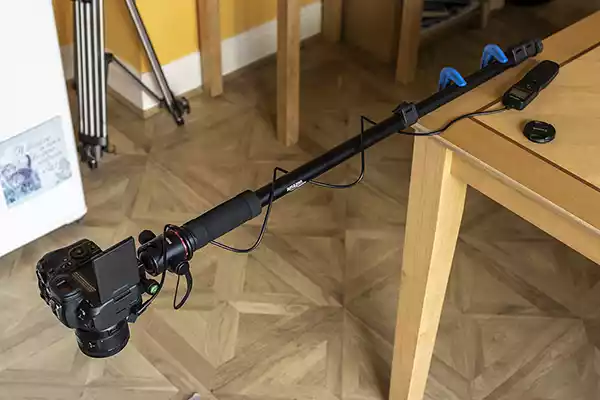
Using a monopod may initially sound strange since when you let go of it, the monopod will topple over. But turn the monopod so it’s horizontal and clamp it to a desk, table, or even to the top of a tripod, and you have an extendable arm that you can mount a camera on.
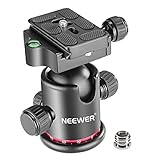
But you’ll find it easier to use as an overhead camera mount if you add a ball head to the top of the monopod. You’ll then be able to make minor adjustments to make sure your camera is pointing vertically down at the floor or table top.
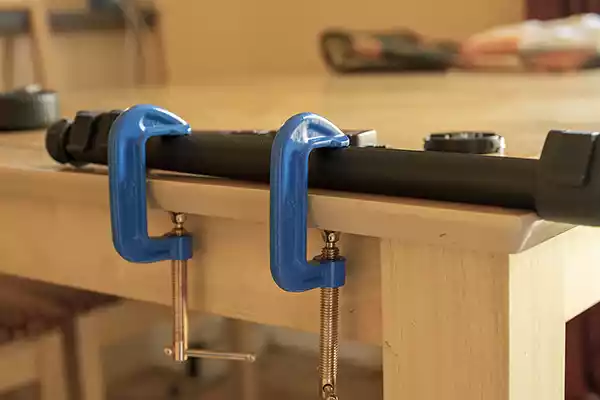
I use a couple of 2-inch (50mm) G-Clamps that cost about $5. They are small enough to enable me to clamp my monopod to almost any table or countertop, or to the long quick-release plate of my video tripod.
The monopod can extend quite far and still be a steady camera mount, but when attached to a tripod it’s best to hang a counterweight on the opposite end to balance the weight of the camera. This can be a sandbag or even a water bottle tied on by a loop of cord.
By the way. You don’t need a really expensive monopod to create a DIY overhead camera mount. The one I use is the 67-inch Amazon Basics monopod. I have found that it is really sturdy, even when I hang a ball head and Canon R6 camera off the end. The aluminum extension tubes have grooves pressed into opposite sides, helping them resist sideways bending forces. The other reason I like the Amazon Basics monopod is that it’s inexpensive. So, if I were to over-tightening the clamps and damage the tube, it’s not going to be the end of the world. Fortunately, the metal monopod tubes have taken all the tightening I’ve ever needed without being damaged.
- Supports video cameras, still cameras, and scopes up to 6.6 lbs.
- 1/4-inch univeral thread mount
- Four leg sections able to extend 67-inches
- Non-skid rubber foot and retractable spikes
Last update on 2026-03-01 / Affiliate links / Images from Amazon Product Advertising API
Using a photography backdrop support for overhead photography
If you already have a backdrop or green screen support stand, the type that has two side stands and a horizontal tubular crossbar, it could easily be adapted to function as an overhead camera rig.
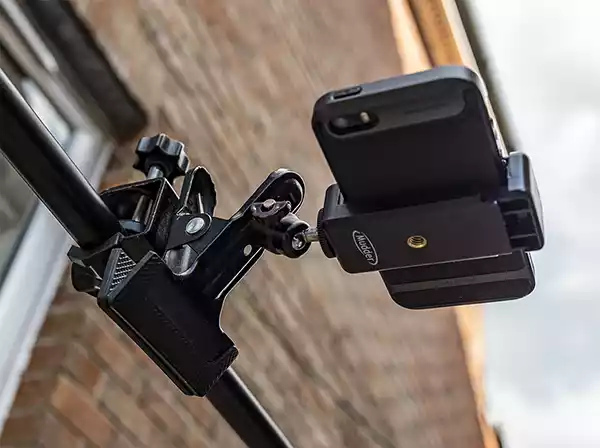
You’ll also need a C Clamp with a 1/4″ screw mount to attach a camera or ball head. If you’re shooting with a smartphone you’ll also need a phone adapter.
Attach the C Clamp to the crossbar, making sure it’s secure. Then add a ball head so you can adjust your camera. To get your framing right, adjust the height of the two side support stands.
If you don’t already have the gear, I’ve found affordable options for the Support Stand, C Clamp, and Ball Head on Amazon.


Last update on 2026-03-01 / Affiliate links / Images from Amazon Product Advertising API
Ready-made overhead camera rig solutions
If you take overhead food shots or need to film overhead video, getting a piece of professional kit that is designed to do the job is a wise investment. That’s because trying to use a tripod, although possible, can be frustrating.
I have two recommendations, both will work with smartphones and mirrorless camera, but the first is more suited to lighter cameras.
Table top stand and boom arm
This solution is relatively cheap but has the advantage that you can use it for flat lay photography and then set it up as a camera and lighting platform for Zoom calls, streaming video, and even attach it to a kitchen counter to record cooking videos.
The VIJIM (Ulanzi) LS11 Desk Stand and Camera Mount is an adjustable vertical stand that screws into a heavy-duty metal C-Clamp that is attached to the edge of a desk, table top, or counter that is a maximum thickness of 2-inches (50mm). The top of the stand has an integrated mini ball head with a standard ¼”-20 tripod screw mount. The stand height can be adjusted between 16.2” (41cm) to 33.8” (86cm).
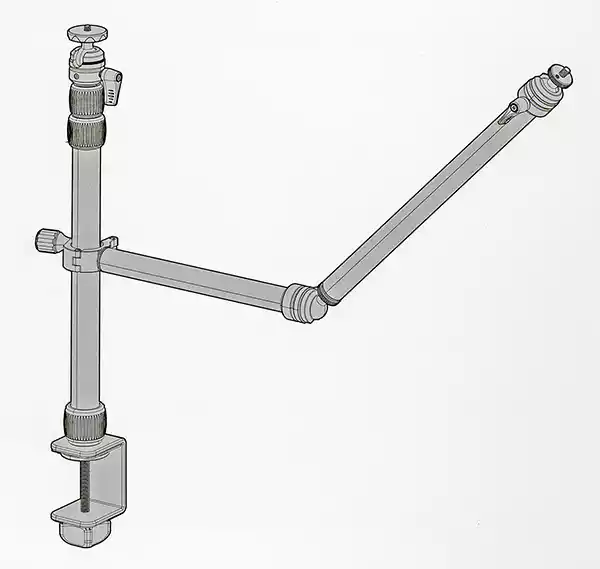
The package comes with two arms with integrated mini ball head mounts. The first arm is 13¾ inches (35cm) long, with a ¼”-20 mounting hole at one end. This can be attached to the top of the vertical stand or to the end of the second arm, which is 9¾ inches (25cm), to extend the overall reach. The second arm has a built-in clamp at one end so that it can be fixed to the vertical stand almost at any height.
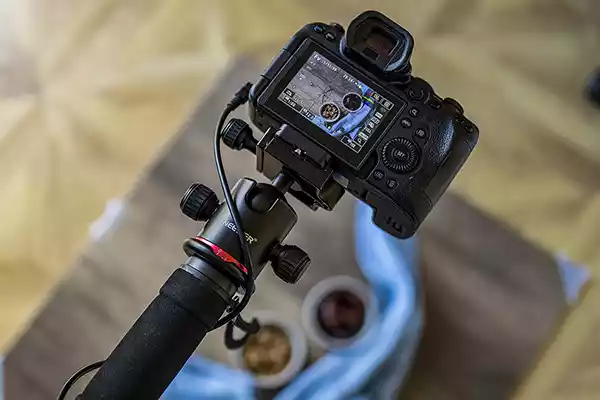
The arrangement of having a vertical pole and two arms allows for various mounting options, but for overhead food photography, I connect one or both arms to the top of the vertical stand and then tilt them until they are horizontal.

Although the construction is all metal and quite robust, I only use one arm when shooting with my Canon EOS R6 and 50mm lens. This is because the combined weight is close to the maximum load capacity of the arms of 2.2lb (1kg). But if you’re using a lighter camera or smartphone, you could connect both arms and get a total horizontal reach of about 23½ inches (60cm). But since most food flat lay backgrounds are 40x40cm or 60x60cm, you probably only need to use the longer of the two arms.
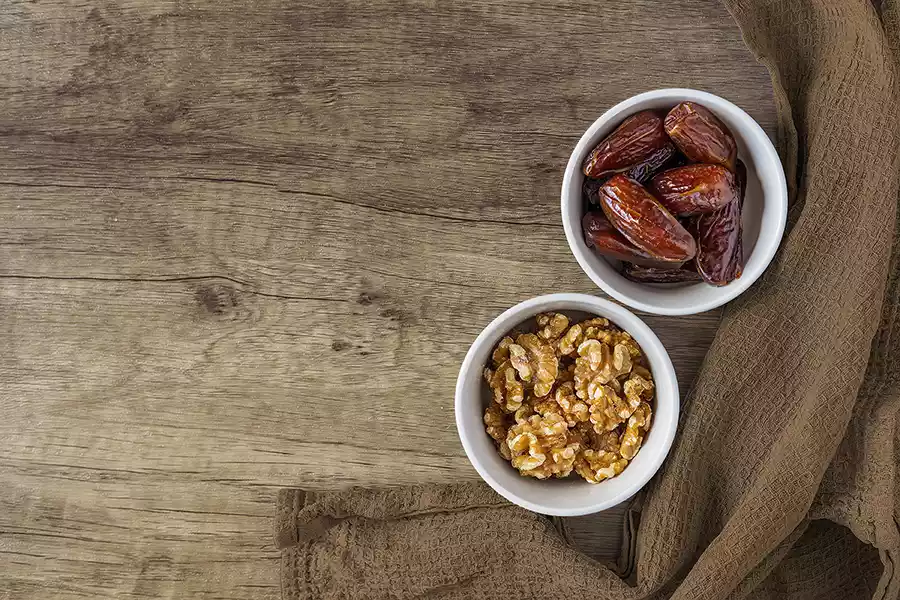
I like this setup because of its versatility, the robust metal construction, and the fact that it takes up very little desk or table top space. The one thing that you need to be aware of when using this stand is that after touching a heavy camera, the rig will vibrate slightly for a second or two before settling. Even so, I’ve taken shots with my EOS R6 camera on the LS11 Desk Stand with shutter speeds as long as half a second without the appearance of any camera shake. The following image was taken with a shutter speed of 1/15th of a second. The setup is shown in the previous image.

Last update on 2026-03-01 / Affiliate links / Images from Amazon Product Advertising API
Professional metal overhead camera mount
This is one of a few overhead camera rigs from Glide Gear. Other options include a tripod for overhead shots and a much larger overhead rig suitable for music videos and filmmaking. However, Glide Gear OH100

The Glide Gear OH100 overhead rig is a cool and useful piece of photography kit, and one of five different top-down photography solutions, which include the OH50, OH75, OH100, OH150, and OH200.
In design, this overhead rig is like a backdrop support with two stands and a crossbar, but sturdier and smaller, so it will fit on a table top or counter and give you rock-solid stability for your shot.
The overhead bar has a 1/4”-20 mounting bracket for your camera and is height adjustable. This allows you to get your camera in the right position and be square on to your flat lay below. The rig adjusts up to a maximum height of 27 inches for wide shots, or you can bring it down for cool macro images.
If you wanted to you could also attach a ball head to the crossbar for more versatility, but it isn’t necessary in most cases. But rock-solid stability, ease of use, and versatility are what this rig is all about. In total the OH 100 has twenty 1/4”-20 holes along the legs and top bar so you can mount your gear, including LED panel lights, pretty much anywhere you need it.
The rig is made of aluminum and steel parts and coated in matte black paint to cut down on unwanted reflections.
The rubberized feet will help keep the thing in place and prevent it from slipping, and if you only need to use the rig occasionally, it’s easy to disassemble and pack away. However, there are mounting holes in the feet, so if you want to permanently screw or bolt the rig down, you can do that too.
Unlike the VIJIM (Ulanzi) LS11 Desk Stand and Camera Mount, the Glide Gear OH100 doesn’t have any problems holding the heaviest of cameras without any shake, even if you’re using a large DSLR with a battery grip.
In terms of working space, the OH100 is 34-inches (86cm) wide, so you’ll have no worries about fitting any kind of setup underneath it. You’ll have way more space than you actually need for your setup, which will make working way easier.
But if you need more vertical height than the OH100 can provide, look at the Glide Gear OH200. With a max height of 36 inches, that gives you an extra 9 inches to play with.
The final thing about the OH100 (or OH200), is that it’s rock-solid, and adding your camera doesn’t through anything out of balance. You don’t need to add a counterweight, and nothing is likely to topple over.
Here’s a video from Glide Gear showing the setup and use of the Glide Gear OH100 professional metal overhead table top camera mount Stand for DSLR/DSLM, Video Camera, and smartphone top down photography. Notice that it can be used for much more than just overhead food photography.

- Ideal for Diverse Creative Projects: Whether you're filming cooking tutorials, stop-motion...
- Lightweight Yet Sturdy Construction: Built from high-grade aluminum and steel, the OH 100 offers a...
- Customizable Setup with Multiple Mounting Options: Featuring multiple 1/4-20" mounting points, the...
- Adjustable Height for Perfect Angles: Achieve precise overhead shots with an adjustable height range...
Last update on 2026-03-01 / Affiliate links / Images from Amazon Product Advertising API
If you do need more vertical height, perhaps because of your choice of camera and lens focal length, the Glide Gear OH200 gives you 9-inches of extra height. The design is also a little different, in that it allows finer vertical and horizontal camera movement. See for yourself in this video from Glide Gear.

- Stable Overhead Shooting Platform: The Glide Gear OH 200 Adjustable Overhead Rig provides a secure...
- Versatile Camera & Accessory Mounting: This rig features an adjustable mounting sled with a 1/4"-20...
- Customizable & Expandable Design: The OH 200 comes with 3x 11.5" cross-sections, creating a total...
- Adjustable Height for Perfect Angles: With height adjustment ranging from 23 to 36 inches, this rig...
Last update on 2026-03-01 / Affiliate links / Images from Amazon Product Advertising API
Summary
Depending on how frequently you need to take overhead food shots, and easy you want the experience to be, will determine your approach.
If you only need the occasional flat lay shot, then go ahead and use the gear you already have, whether that’s a regular tripod, monopod, or an adapted backdrop stand.
But for more regular overhead food photography you’ll appreciate getting a better tool for the job. A tripod with a horizontal arm works well, as does a camera mount that can be clamped onto a table top. But in both cases balance may be an issue. For a rigid overhead camera rig with plenty of versatility and ease of use, a camera mount like the Glide Gear OH100 really is a terrific option.
Source: 1![]()
Tosh Lubek runs an audio and video production business in the UK and has been using the Canon EOS R since it was released in the Autumn of 2018 and the Canon EOS R6 in 2020. He has used both cameras to shoot TV commercials broadcast on Sky TV, promotional business videos, videos of events and functions, and YouTube creator content. He has also won several international awards for his advertising and promotional work. You can meet him by visiting his “video booth” at HashTag Business Events across the country.
Recent Posts
Most people use sandbags the wrong way. Here’s how to hang them properly on a light stand for maximum stability and safety — plus what to fill them with.
You're Using the Canon RF 50mm f/1.8 WRONG! Here’s How to Fix It
If you’ve recently picked up the Canon RF 50mm f/1.8 STM—affectionately known as the Nifty Fifty—you might be confused by that strange switch on the side of the lens. It doesn’t say AF/MF...