
DIY Video Studio is supported by its readers. Please assume links on this site are affiliate links, and that I get commissions for purchases made through these links. As an Amazon Associate, I earn from qualifying purchases. Thank you if you use any of the links.
The Blue Yeti is one of the best USB microphones you can buy. Even though it was launched at the end of 2009, it’s still the go-to USB microphone for people starting out podcasting, live streaming, and recording audio for YouTube.
It’s not surprising. The Yeti is a versatile microphone, offers good quality, has a reasonable entry-level price, and provides the convenience of USB connectivity so you can record straight into a computer.
However, when you first take it out of its box, unless you know what you’re doing, you’ll think the Blue Yeti is gain too high and it’s noisy. Then you’ll have the hassle of trying to figure out what’s wrong. To save you the trouble let me explain how to use a Blue Yeti microphone and how to work out the best Blue Yeti microphone settings to use.
I will go into full details, but in brief, this is how to set up and use a Blue Yeti microphone on a PC to record great audio.
- Set your mode to the cardioid pattern
- Keep noise sources behind the Yeti
- Speak into the front side of the Yeti
- Keep the Yeti about 6-inches to your mouth
- Use the Blue Yeti gain knob to set the maximum level
- Use the Blue Sherpa companion app for fine control
- Take the Yeti off your desk
- Get a windscreen or pop filter
- Monitor your audio using good headphones
- Test before you start recording or streaming
Using the correct Blue Yeti microphone settings for streaming, podcasting and YouTube videos is important. That’s why I have a separate article if you want to set up the Blue Yeti for Zoom calls. But, as you can see in the quick overview list, there are other things you also need to consider.
So, let’s move on and I’ll explain.
How to setup a Blue Yeti for podcasts, streaming, and YouTube
Tip 1: Set your mode to the cardioid pattern

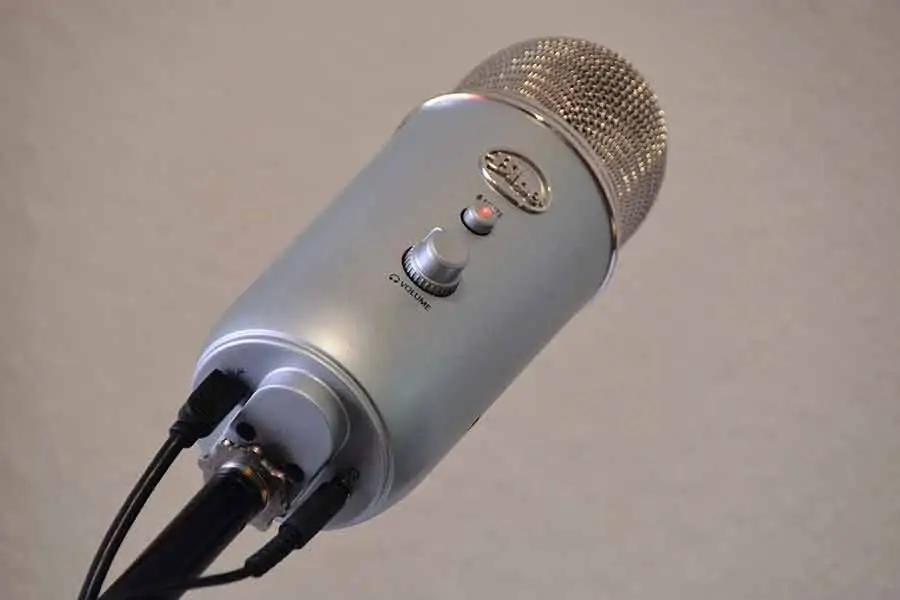
On the Blue Yeti, the mode or pattern knob is on the rear of the mic, below the gain knob. Compared to the gain you’ll find there’s a lot of resistance when you try turning it, and it clicks between positions.
Typically, you’ll only want to use the cardioid pattern. It’s the position that’s marked by a heart shape. The only other patterns you might use are the bi-directional (figure of 8), or the omnidirectional (circle). That would be if you were doing a face-to-face interview, which for most podcasters, YouTubers, streamers, or Zoom users is unlikely.
The cardioid pattern is a unidirectional mode, where the microphone is most sensitive to sound from the front. It will pick up sound, although not as well, from the sides. But the microphone will reject most of the sound from the rear.
Tip 2: Keep noise sources behind the Yeti
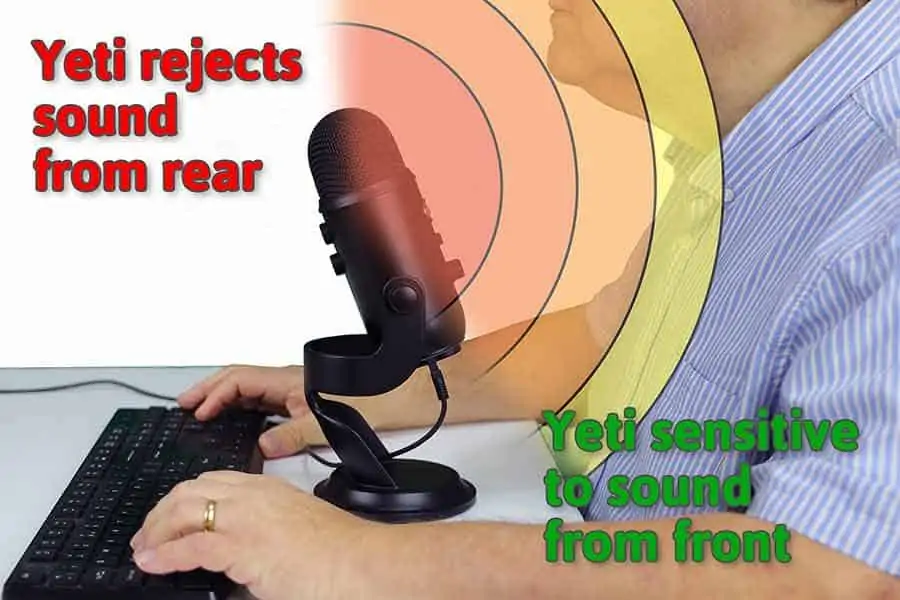
Assuming you apply Step 1 and use the Cardioid pattern you can exploit the fact that the Yeti will have a kind of sound shadow or dead zone behind it.
That makes Yeti’s cardioid pattern ideal when you want your listeners or viewers to hear you but not your keyboard, computer fan, or your meowing pet cat. To make sure your mic rejects that unwanted sound put the stuff you don’t want to be heard is behind the Yeti.
If there are any noise sources in the room, can eliminate them? If it’s a fan, turn it off. Ticking wall clocks suddenly seem much louder when you’re recording, so take them out of the room or take out the battery.
Finally, if possible, find somewhere quiet to record or stream. It really is worth the effort of finding somewhere quiet rather than trying to fix noise problems in post. Fixing noise issues will always waste your valuable time and never yield the same result as if you had been able to record clean audio in the first place.
Tip 3: Speak into the front side of the Yeti
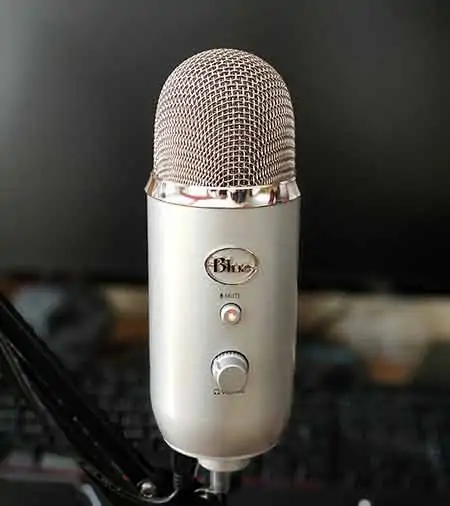
The Yeti is what’s called a side-address microphone. That means you speak into the dome of the yeti from the side where you see the Blue logo and the headphone level knob. Use the Yeti this way and you’ll sound as clear as possible.
You do NOT want to speak into the end of the Yeti, as if the top of the mic is pointing at your mouth. The Yeti doesn’t work as a handheld microphone you might see s vocalist using or the mics you see the president using at press conferences. If you speak into the top of the Yeti, you won’t sound as clear as you should.
Tip 4: Keep the Yeti about 6-inches to your mouth
The distance between your mouth and the Yeti is important. That distance can be about 4 to 10 inches, but ideally, around 6 to 8 inches.
I’ve seen many people complain, saying the Blue Yeti sounds bad because they’ve put their microphone off to the side of their desk or up beside their computer monitor. By having the mic too far away the gain must be cranked up and that means all the background noise will sound quite loud.
Generally, the closer you are to your mic the lower you can turn the gain and therefore make your voice the focus of the recording.
Tip 5: Use the Blue Yeti gain knob to set the maximum level
Initially use the gain knob to turn the Blue Yeti gain all the way down, then experiment, increasing the gain. Turn the gain back up, bit by bit, to figure out the best level for your situation. Most podcasters, YouTubers, and streamers find turning the knob to somewhere between the minimum and about halfway produces the best results.
However, it will depend on the room where you have set up. If you have a soundproof voiceover booth you will be able to set the gain higher because you won’t have any background noise. But if you’ve set up in a bedroom or office where there’s plenty of background noise, you’ll need to turn down the gain and get closer to the Yeti.
Think of the gain knob as a faucet or tap. But instead of controlling the amount of water flow, it controls the amount of sound you’re feeding into your computer. So, the higher you turn the gain the louder you and any background sound will sound.
The Blue Yeti is a “hot mic”, meaning at its highest setting the output is quite high, you’ll find that it’s easy to hear quiet sounds. With the gain turned up you’ll hear the fan on your computer, the rustle of your clothes as you move about, other people talking down the hall. The Yeti is a condenser mic and condenser mics are very sensitive. That’s what they are designed to do.
Having the gain knob turned way too high is one of the main reasons why straight out the box, many people want to know why their Yeti mic sounds bad and how they can make their Yeti microphone sound better.
Apart from picking up lots of background noise, having the Blue Yeti gain too high can mean you’ll be sending too much signal into your computer.
Think of turning open that water faucet again. If opened too much, you’re pouring way more water into the basin or tub than can drain away. The water will rise and spill over the sides, creating a mess.
When recording, that extra flow of audio signal is too much for the sound card to cope with. But instead of a watery mess on the floor, your sound will sound messed up because there’s too much signal to deal with. Just like the excess water overtopping the basin, the extra audio signal can’t be processed, and will be lost. What signal is left overpowers the audio circuits. We see that as peaking, where an audiometer goes into the red and hits the 0dB end stops. We hear it as clipping and distortion, where the audio sounds very fuzzy and grungy. That is great for an electric guitar but awful on a voice.
Tip 5: Use the Blue Sherpa companion app for fine control
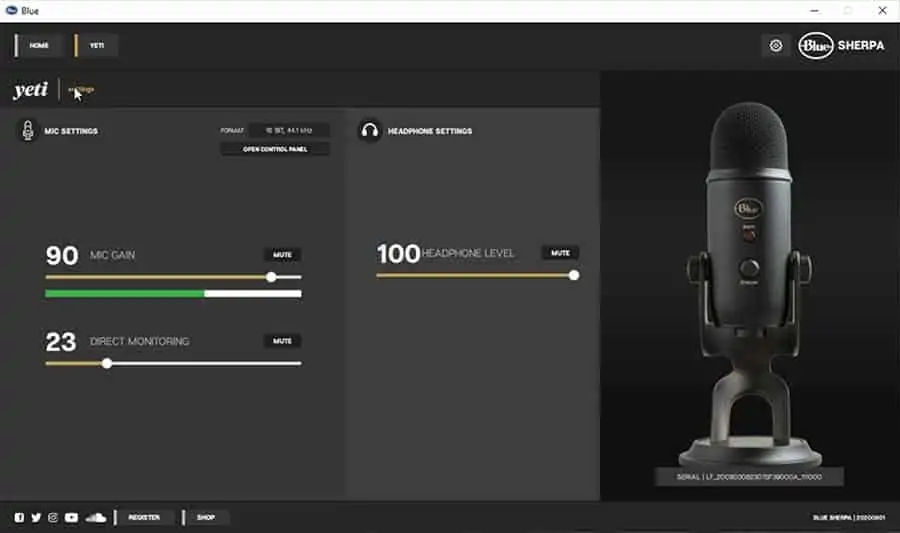
If you’ve ever gone into a recording or radio studio the biggest piece of kit in the room is the soundboard or mixing desk. Each channel has a gain knob and a fader. The gain knob on the soundboard is like the gain knob on the Yeti. It’s a coarse control that sets the maximum sound level of the microphone. The fader on the soundboard gives you fine adjustment from zero to the maximum set by the gain knob. In our case, that fader is in the Blue Sherpa app.
By using the MIC GAIN slider, you can make fine adjustments to the audio level being fed into the software you’re using. That could be a DAW like Audacity or Audition, streaming software like OBS, or video conferencing apps like Zoom, Microsoft Teams, or Skype.
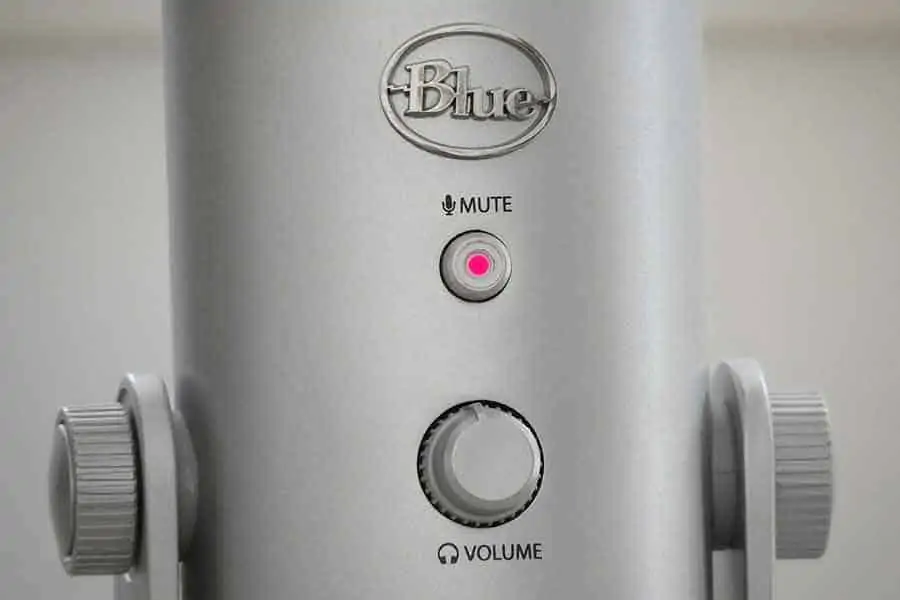
At 100% you’ll be using the maximum gain you set with the gain knob on the Yeti. In practice, when you take the slider down to 0% that’s not the same as muting the audio. When using my Yeti to record into Adobe Audition, even at 0% I could see a very small audio waveform being recoding. So, if you don’t want to be heard click the MUTE button at the top right of the MIC GAIN slider.
I should also mention that when your headphones are plugged into the Yeti and using DIRECT MONITORING when you adjust the position of the MIC GAIN slider you won’t hear a change in level in your headphones. The level you hear will be determined by the DIRECT MONITORING slider. So you could think that your Yeti is live because you can hear yourself through direct monitoring, but in fact, the mic gain could be low or muted. Always check or use a virtual audiometer.
Tip 6: Take the Yeti off your desk
Straight out the box, the Blue Yeti cradled in its heavy metallic stand is beautiful. I would argue that it looks like what most people would say a quality microphone should look like.
Unfortunately, unless you’re a marble statue, you’re going to tap away on the keyboard, click with your mouse, you’ll touch the desk, maybe even bump the leg of your desk with a foot or knee. The trouble is, that the beautiful metal desktop stand holding the Yeti is a superb transmitter of sound.
All those bumps and clicks will be carried through the stand, into the body of the Yeti, and to the mic capsule. Placing your hand lightly on the surface of your desk will go unnoticed by you but the Yeti hears a significant tap. The vibration from your PC’s cooling fan will be transmitted through the desk and into the Yeti and will sound like you’re recording next to a refrigerator.
You could add some vibration-absorbing foam rubber matting under the Yeti’s stand, that would work (kind of). Or you could break that mechanical contact between the Yeti and your desk. Fortunately, your Yeti has been designed to do that.
Look at the base of your Blue microphone and between the USB and headphone sockets, you’ll see a threaded 5/8” hole. That’s for mounting your Yeti on a microphone stand.
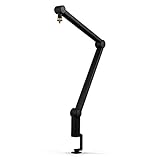
Realistically there are two types of mic stand you can use with a Yeti. The first is a microphone stand with a boom arm. It’s ideal because it eliminates all contact with the desk and it’s quite cheap. However, it also has its cons. You need a reasonable amount of space otherwise you’ll end up tripping over the thing. It’s also not quick and simple to move the mic from one position to another.

- Adjustable microphone stand designed to hold a microphone securely in place (microphone clip sold...
- Long boom arm with molded plastic counterweight; adjust to standing height for singing or speaking...
- Versatile design folds flat for use as straight mic stand; max height 85.75 inches; base width 21...
- Sturdy steel construction; ultra-light for easy transport
Last update on 2026-03-01 / Affiliate links / Images from Amazon Product Advertising API
The other option is to use a scissor boom arm. These are like sprung levers, like an Anglepoise desk lamp. This is then clamped to the edge of a desk.
- Broadcast studio-grade design with enclosed aluminum construction and internal springs.
- Hidden channel cable management system for sophisticated on-camera looks.
- Hand-tightened friction hinges for smooth, quiet operation.
- 32-inch reach and 360-degree rotation.
Last update on 2025-10-11 / Affiliate links / Images from Amazon Product Advertising API
With the microphone attached to the end of the arm, you can easily and quickly move the Yeti to any position you want. The drawback is that you’re again providing a mechanical connection between the desk and the Yeti. But there’s a solution to that problem.
What’s required is a shock mount between the microphone and the scissor stand. The shock mount literally damps those shocks or vibrations, so they don’t get transmitted to the body of the microphone. A shock mount is usually made of two parts, an inner part onto which the microphone is mounted and an outer part that attaches to the scissor arm. The inner mount is suspended within the outer part using rubber cords, that dampen out any vibrations and bumps.

- Blue Compass PREMIUM MICROPHONE BOOM ARM is not included and sold separately.
- Blue Radius III custom shockmount is designed especially for Yeti and Yeti Pro Microphones,...
- Elevate your audio recordings with Radius III custom shockmount to shield your microphone from...
- This universal mic shockmount cradles the mic in style and features a new streamlined, lightweight...
Last update on 2025-10-11 / Affiliate links / Images from Amazon Product Advertising API
The right choice of mic stand is really a matter of preference, your available space, and your budget. However, considering you’re spending a decent amount on a Yeti don’t cripple its performance with a cheap scissor mic stand and no shock mount.
Tip 7: Get a windscreen or pop filter, better still, get two
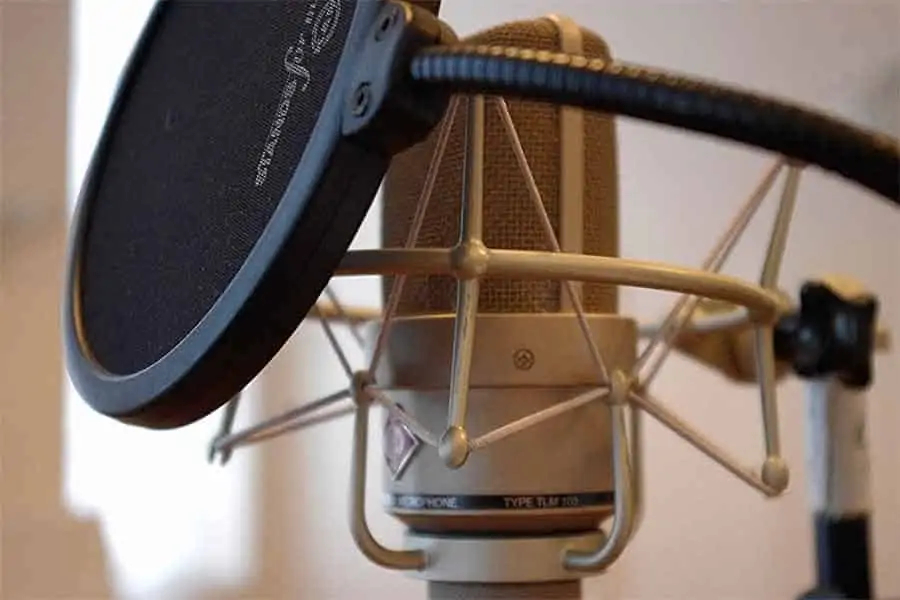
If you’re going to speak close to any microphone, a pop filter is necessary to stop pops and blasts from plosives ruining a recording. These are caused by the high energy wind when we sound certain consonants, like Ps, Bs, and Ts.
Professional voiceover artists learn a microphone technique that minimizes pops and blasts, but even they will use pop filters. So, we would be wise to follow their lead.
There are three types of windscreens you can use. First, there’s the foam type that covers the business end of the microphone. In my opinion, most cheap foam pop filters are ineffective. However, I would still use one.
That’s not as dumb as it sounds. Those cheap foam filters are too thin and don’t contain enough of the right kind of foam to be effective as anything other than a spit guard. Their main purpose is to protect the microphone capsule from moisture and keep everything hygienic.
Provided you keep the foam pop filter, or foamy, securely over the microphone grill you can spray your gear with a suitable disinfectant. If in doubt, just spray the foam pop filter, letting it dry before fitting it back on your microphone.
Andrew from Deity Microphones says you want your gear to stay “wet” for about a minute to make sure the bugs are killed. If you do disinfect your microphone please watch the video and make sure you don’t do anything that might damage your equipment.
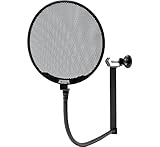
The second type of pop filter, and the one I recommend for voiceover work, is the circular mesh type. There are two versions of mesh filters, the cheap plastic ring with one or two layers of black nylon-type material. You know, the sort you get in pantyhose. The other kind is a circular metal mesh with specially designed perforations. You can learn more about pop filters and how to use them in my article Stop Audio Popping.
These types of pop filters work well. You can even make your own DIY pop filter using an embroidery ring and a pair of pantyhose.


Last update on 2025-10-11 / Affiliate links / Images from Amazon Product Advertising API
The third type of pop filter is the dead-cat type. In shape, it’s like a foamy but is made of synthetic fur material. These are effective in protecting microphones outside from wind blasts and will also work in your studio as a pop filter.
The type of filter to use is up to you. Personally, I would choose a metal mesh type of pop filter if you’re going to be serious about your audio. But if you’re just starting out and have a limited budget, I’d stick with a nylon mesh pop filter.
Since writing this piece I’ve researched several pop filters and created an article and video on the 6 best Blue Yeti pop filters. They are all affordable, with five out of the six costing less than $15. Click the link to read the article.
Tip 8: Monitor your audio using good headphones
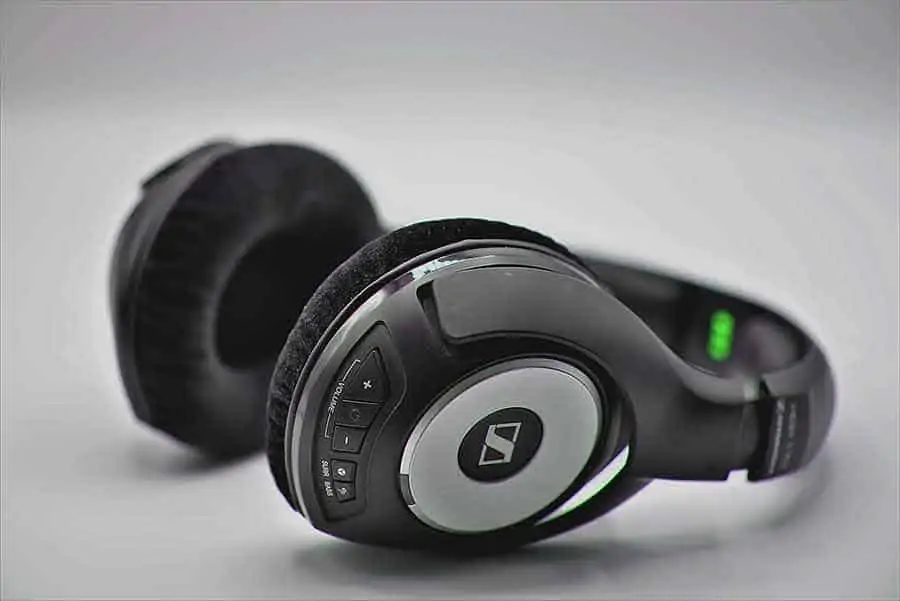
If you get the opportunity, take a studio tour of a radio station. You’ll see how a professional broadcaster works. You don’t need to get the exact same gear used in a broadcast studio, but you will pick up some pretty good ideas. Not least that you should always monitor your sound.
Headphones aren’t just for listening to other sound sources and guests, you should use them to listen to your voice. It’s not about being narcissistic and feeding your ego. It’s just plain sensible. If you monitor your audio, you’ll know if it’s sounding OK. There’s nothing worse than recording a 30min podcast or vlog only to discover you’ve got to do it again because there was a problem with the audio.
Monitor your sound with headphones so you can tell if you’re loud enough, whether you sound clear and undistorted, and whether there’s any background noise. You’ll immediately be able to fix any problems and save yourself a lot of time and heartache.
If you haven’t already got some good quality headphones for use in content creation, here are three that I’ve found to be particularly good.
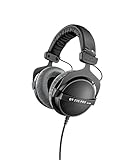


Last update on 2026-03-01 / Affiliate links / Images from Amazon Product Advertising API
Tip 9: Test before you start recording or streaming
You may choose to ignore me on wearing headphones but please, please, please, do a test before you start recording for real.
By testing your setup with a short recording and then listening back, you’ll have the confidence that everything is going to work. In doing so, you’ll save yourself time and show respect to your audience, especially if you’re going to be streaming live. Their time is no less precious than yours, so test in advance so that you are good to go as soon as the stream begins.
You might also like…
- How to connect and use a Blue Yeti to an iPhone or iPad
- How to stop Blue Yeti from picking up keyboard sound
- Best microphone for better Zoom calls

- Best On-Camera Mics: V-Mic D3 a good microphone for vlogging?
- Microphone Fuzzy: Make a DIY Dead Cat Windscreen
- Stop Audio Popping
- How to connect Blue Yeti or USB mic to Samsung Android Phone
- Blue Yeti USB Microphone Cable: What you need to know
Tosh Lubek runs an audio and video production business in the UK and has been using the Canon EOS R since it was released in the Autumn of 2018. He has used the camera to shoot TV commercials for Sky TV, promotional business videos, videos of events and functions, and YouTube creator content. He has also won international awards for his advertising and promotional work. You can meet him by visiting his “video booth” at HashTag business events across the country.
Recent Posts
Most people use sandbags the wrong way. Here’s how to hang them properly on a light stand for maximum stability and safety — plus what to fill them with.
You're Using the Canon RF 50mm f/1.8 WRONG! Here’s How to Fix It
If you’ve recently picked up the Canon RF 50mm f/1.8 STM—affectionately known as the Nifty Fifty—you might be confused by that strange switch on the side of the lens. It doesn’t say AF/MF...
