

DIY Video Studio is supported by its readers. Please assume links on this site are affiliate links, and that I get commissions for purchases made through these links. As an Amazon Associate I earn from qualifying purchases. It helps me pay for the running of this website. Thank you if you use any of the links, I really appreciate it!
Is your Blue Yeti picking up keyboard noise when you’re streaming, on video conference calls, or recording screen share tutorials? Don’t worry. I’ll explain what’s going on and how you can fix the problem.
You can prevent a Blue Yeti from picking up keyboard noise by doing the following…
- Using the mic’s cardioid pattern or mode
- Speaking into the side of the Yeti and not the top
- Placing the keyboard behind the Yeti
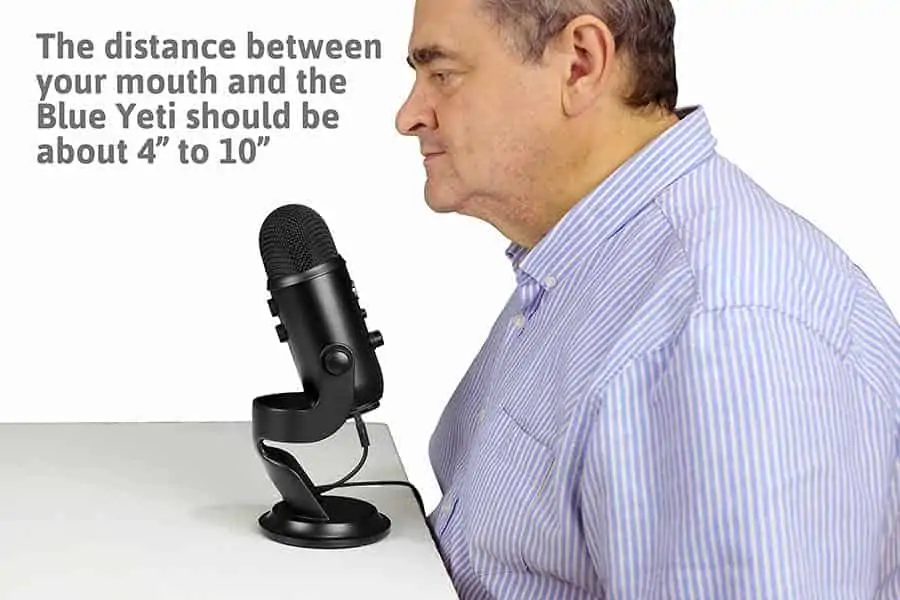
- Having 4 to 10 inches between the mic and your mouth
- Dampening mechanical transmission of sound
- Using a boom scissor stand and shock mount
- Stopping sound reflections
- Reducing the noise of your keyboard
I’ll go into more depth on each of those points, explaining the issue and how each can be corrected. I’ll also provide links to products that you may find useful to stop your microphone picking up your keyboard.
The correct recording mode for streaming, podcasting, and vlogging
Your Blue Yeti has several modes or polar patterns that determine from which direction the mic will accept sound.
The microphone pattern that you will probably find to be the most useful will be Cardioid. This is the pattern you should use for streaming, podcasting, vlogging, singing, or recording a voiceover.
The reason you would use the cardioid pattern is that it makes the microphone pick up sound mainly from directly in front of the mic. Sound from the sides is partly rejected and sound from the rear of the microphone is mostly rejected.

By choosing the Yeti’s cardioid pattern you can control the direction from which sound is picked up. In do that, you can avoid picking up the sound of your keyboard while clearly picking up the sound of your voice.
CARDIOID MIC PATTERN: The best microphone polar pattern for most streaming, podcasting, vlogging, singing, or recording a voiceover.
Addressing your Blue Yeti Correctly
Although the Blue Yeti USB microphone is simple to use, you do need to understand that not all microphones work and are used in the same way. So, in this section, I’ll explain the correct way to speak into your microphone.
Whether you have left the Yeti on the included desktop stand, or attached it to a mic stand, you should understand how to angle the mic.
You’ve probably watched plenty of TV news where the reporter uses a handheld microphone. Or maybe concerts where the singer holds a vocal mic just in front of their mouth. These are “front address microphones”, where the speaker, singer, or instrument face the top or end of the microphone.
However, the Blue Yeti is a “side-address microphone”. A side-address microphone accepts sound from the side, or at 90° to its long axis. You should also know that if you have chosen the correct mode or pattern, you should be speaking into the side that includes the “Blue” logo. The Blue logo indicates the front of your Blue Yeti microphone.
Now you understand from which direction the Blue Yeti accepts sound; it can explain how a computer keyboard can appear loud if the Yeti is mistakenly used as a front address mic.
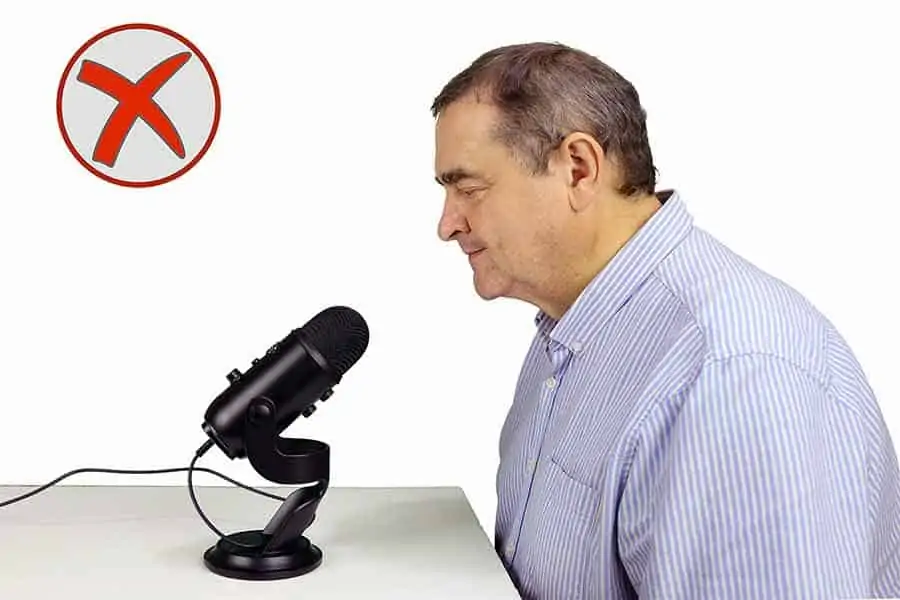
In this situation the Yeti’s mic capsule (the part sensitive to sound) is pointing directly at the keyboard. But the speaker is talking into a less sensitive part of the microphone. To make themselves sound louder, the person speaking might try to turn up the microphone’s gain. This might improve the level of the voice, but it will also raise the sound of the keyboard by the same amount. The result is to that the keyboard will appear quite prominent.
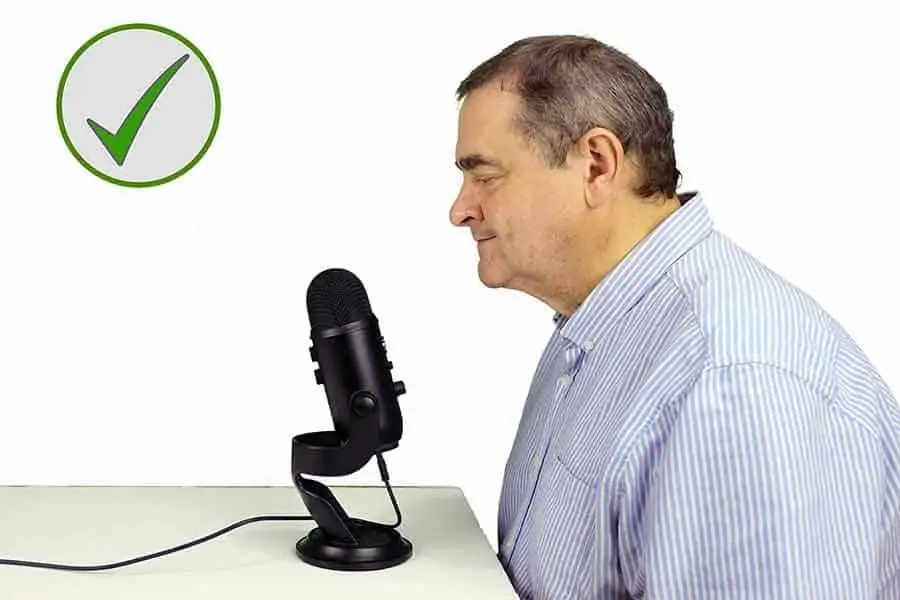
So, the correct way to use a Blue Yeti when speaking, or singing, is to turn the mic so the side with the Blue logo faces toward your mouth. This may also require having the Yeti at an angle, so the grill is pointing at your mouth. Typically, the angle is about 30° to 45° from vertical, but it will depend on the position of your head relative to the Yeti.
SPEAKING INTO A BLUE YETI: The Blue Yeti is a side-address microphone. Speak into the mesh dome from the side with the Blue logo.
Correct positioning of the Yeti to minimum keyboard noise
You now know the correct mic pattern to select and how to address the mic, now you need to know where to place your Blue Yeti relative to your keyboard.
In this step your aim is to capitalize on the two previous steps, particularly that of choosing a cardioid pick up pattern.
You know that a cardioid pattern preferentially picks up sound from directly in front of the microphone but rejects sounds from the side and even more so from the rear of the mic. This means you want to be in front of the mic or at least have the front of the mic pointing at your mouth. You’ll also need to place the keyboard in an area where the mic is less sensitive to sound. Ideally, that’s behind the Blue Yeti but off to the side of the Yeti would also do.
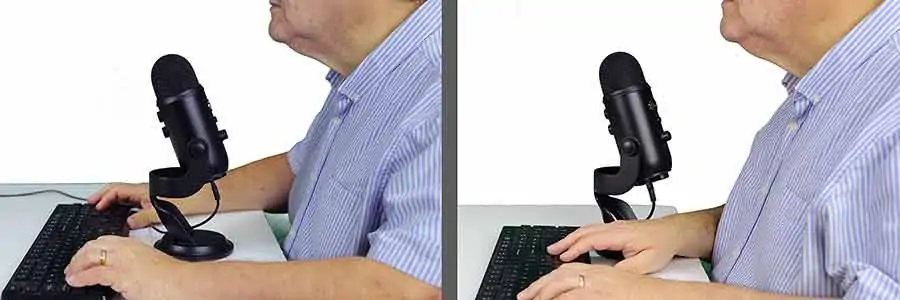
In practice that gives you two configurations.
Place your Blue Yeti directly in front of you, with the keyboard further away, either behind the Yeti or over to one side.
The other option is again to have the keyboard in front of you and a little further than normal. Place the Yeti nearer to you than the keyboard, but slightly to one side, and ensure the front of the mic is pointing at your mouth. In this way, the keyboard should be off to the side of the Yeti, where the mic is less sensitive to sound.
The first setup, with the mic and then the keyboard in front of you, will make the keyboard’s sound least noticeable. But if you need to clearly see your computer screen while talking, you’ll probably want your monitor mounted a little higher so that the Blue Yeti doesn’t obscure your view.
The correct mouth to microphone distance
I frequently see people using their mics at the wrong distance, and this causes problems.
If your microphone is too far away, you will sound distant or “off-mic”. Microphones, even shotgun mics, are not like a zoom lens. They can’t “zoom in” to make you sound as if you are closer to the microphone.
I know you have a gain knob that can raise (or lower) the level of your voice but there’s a problem. It’s not just the level of your voice that will be raised. When you increase the gain the level of every sound the microphone is picking up will be boosted. That means the listener will still hear you tapping on your keyboard while you’re speaking.
Your goal is to make your voice either the only sound, or at least the dominant sound. This is easier to do than you might think. All it takes is for you to have the Blue Yeti Microphone at the correct distance to your mouth.
The best mouth to microphone distance is between 4 to 10 inches. Broadly speaking, the closer the better. Certainly, you don’t want the distance to be more than 12-inches.
By getting close to the microphone the direct sound of your voice will seem relatively loud. This allows you to turn down the gain until your voice level is perfect. But there’s an additional benefit to turning down the gain. Those room reverberations and any background sounds, like your keyboard, that were previously quiet but noticeable, will now be too quiet to notice.
So, in summary for this step. Get closer to your Blue Yeti and turn down the mic gain until you sound good, but the background becomes too quiet to notice.
MIC DISTANCE: 4 to 10 inches is the correct distance between your mouth and a Blue Yeti condenser microphone.
Isolate your keyboard and Yeti from the desktop
Sound doesn’t just travel through the air; it can also travel through liquids and solids. In fact, your desktop will probably be a great way for the sound of your keyboard to get to your mic.
The base of the Blue Yeti’s desktop stand has a thin layer of a kind of foam rubber material. It helps prevent the microphone from sliding across a shiny desktop, but it also plays a role in isolating the Yeti from your desk. If the metal base of the stand were in direct contact with your desktop, every tap or bump against your desk would be easily picked up by the Yeti. The foam helps to dampen the sound waves traveling through the desktop.
However, sometimes this thin layer of foam on the base of the Yeti’s desktop stand isn’t enough. If the sound of you tapping on your keyboard is being picked much by the Yeti being in physical contact with your desk you can try a couple of things.
First off, you could try increasing the amount of isolation between the mic stand and the desktop. You can do this by placing an Acoustic Isolation Pad or some Vibration Absorber Matting under the mic’s desktop stand. These will dampen the sound and reduce the transmission of sound waves to the microphone’s body.
The second option is to minimize the amount of sound that passes from your keyboard into the desktop. This time you want to put the sound-absorbing/dampening matting under the keyboard.
An attractive way of doing both things is to use a gaming anti-slip rubber desk mat, like this Large Gaming Non-Slip Desk mat![]() that’s available on Amazon.
that’s available on Amazon.

- [SMALL BUT HIGHLY FUNCTIONAL]:PECHAM Cordless Screwdriver set can be adjusted precisely from 1N.m...
- [SMALL BUT HIGHLY FUNCTIONAL]:PECHAM Cordless Screwdriver set can be adjusted precisely from 1N.m...
- [HIGH QUALITY]:The drill bits are made of high-quality S2, which is better than the market CR-V...
- [HIGH QUALITY]:The drill bits are made of high-quality S2, which is better than the market CR-V...
Last update on 2025-10-20 / Affiliate links / Images from Amazon Product Advertising API
MIC NOISE TRANSMISSION: Sound can travel through solids, as well as through the air. This includes your desk, the microphone body, and the mic cable.
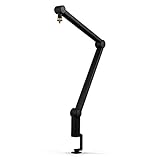
Use a suspension boom mic arm stand with shock mount
Although the Blue Yeti comes with a heavy desktop mount, I prefer to use a suspension boom scissor mic stand. Not only is the microphone easier to move around and frees up desk space, but it also addresses three of the already mentioned points.
- You can easily move the Blue Yeti away from the keyboard and into a position where it will be less sensitive to keyboard sounds.
- The Yeti can be located much closer to your mouth. That allows the gain to be reduced since your voice will appear louder. Consequently, background noise will appear much quieter.
- The Yeti will be less suspectable to the mechanical transmission of sound. The acoustic isolation can be further increased by adding a shock mount between the mic stand and the Yeti.
The official suspension boom arm from Blue Microphones is the Blue Compass Premium Broadcast Boom Arm![]() . This tubular design is made specifically for the Blue Yet and its stablemates, so you can be confident it’s a quality product that will work with your microphone.
. This tubular design is made specifically for the Blue Yet and its stablemates, so you can be confident it’s a quality product that will work with your microphone.
- Broadcast studio-grade design with enclosed aluminum construction and internal springs.
- Hidden channel cable management system for sophisticated on-camera looks.
- Hand-tightened friction hinges for smooth, quiet operation.
- 32-inch reach and 360-degree rotation.
Last update on 2025-10-11 / Affiliate links / Images from Amazon Product Advertising API
If your budget is a little smaller, you can find some good alternatives available on Amazon. When it comes to third-party boom arms my preference is for the HAUEA suspension boom scissor arm![]() stand and the InnoGear’s upgraded heavy-duty microphone suspension scissor boom stand.
stand and the InnoGear’s upgraded heavy-duty microphone suspension scissor boom stand.

- Note: HAUEA Large Microphone Arm Stand (18.9") is specially designed for heavy-duty microphones, the...
- Specially For Heavy-Duty Mic: When hanging microphones and accessories whose weight is within the...
- UNIVERSAL DEGREE: The diameter of shock mount is between 1.77’’/4.5cm~2.36”/6cm(not for blue...
- FOLDING TYPE: Due to its premium heavy-duty steel material and two 18.9"/48cm adjustable mic arms,...
Last update on 2024-03-10 / Affiliate links / Images from Amazon Product Advertising API

- Upgraded Length & Flexible Angle: The boom arm is fully adjustable at 135° back and forth and 180°...
- Built-in Springs & Premium Appearance: This heavy-duty mic arm features strong internal springs for...
- Enhanced Load-bearing & Sturdy Material: Made of high-quality steel, the thickness of its microphone...
- Desk Edge Compatibility: The solid desk clamp is specifically designed to securely grip squared...
Last update on 2025-10-20 / Affiliate links / Images from Amazon Product Advertising API
However, you’re not done just getting a scissor boom arm. Because it clamps to your desk it will pick up noise from your desk and transmit it to the microphone. So you need a shock mount to isolate the Blue Yeti from that unwanted sound, like the sound of you using your keyboard or just tapping your desk.
The shock mount designed for the Yeti and Yeti Pro is the Blue Radius III custom shock mount. It may be more expensive than some generic shock mounts out there, but I can say from experience that it does a great job of helping to isolate the Yeti from mechanically transmitted knocks, bumps, and vibrations.

- Blue Compass PREMIUM MICROPHONE BOOM ARM is not included and sold separately.
- Blue Radius III custom shockmount is designed especially for Yeti and Yeti Pro Microphones,...
- Elevate your audio recordings with Radius III custom shockmount to shield your microphone from...
- This universal mic shockmount cradles the mic in style and features a new streamlined, lightweight...
Last update on 2025-10-11 / Affiliate links / Images from Amazon Product Advertising API
Reduce sound reflections
Sound reflections probably won’t be too much of a problem, but in a room with hard reflective walls it can sometimes be an issue. Dealing with those reflections isn’t going to be difficult, you want to add sound absorbing mattering to nearby hard shiny surfaces.
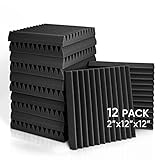
If you got the gaming non-slip slip mat for your desktop, that would help deal with reflections off the surface of your desktop. You could add some acoustic foal tiles to the wall in front of you. Again, these can be bought on Amazon and shouldn’t cost too much.
These 2″ X 12″ X 12″ Acoustic Foam Sound Insulation Tiles![]() are the type I use in my voiceover booth, but they work equally well on walls close to a workstation.
are the type I use in my voiceover booth, but they work equally well on walls close to a workstation.
- 3D ACOUSTIC DESIGN: Our 2 inches foam provides moderate sound control on walls or ceilings. Perfect...
- ENVIRONMENTAL PROTECTION: Made up of environmentally friendly polyurethane foam at 50/lbs per cubic...
- QUICKLY RECOVER TO NORMAL SIZE: Open the Vacuum package, put the foam panels in a ventilated place...
- WIDE USE: Great for spot treating sound on walls in your studio or office - For use in recording...
Last update on 2025-10-20 / Affiliate links / Images from Amazon Product Advertising API
Consider replacing your noisy keyboard
One option you may wish to consider is fixing the noise problem at source rather than having to deal with the consequences. If you want to stop the Blue Yeti from picking up your keyboard sound, you could get a keyboard that’s almost silent.
This is where gamers have an advantage over the rest of us. Manufacturers have been making specialist gaming keyboards for some time, where one available feature is that they are quieter than standard computer keyboards.
Membrane keyboards make far less noise than mechanical keyboards, although some gamers say the keyboards can wear out faster due to the film under the keys getting worn down. However, you tend to get what you pay for, so it’s worth paying a little more for quality. The HyperX Alloy Core Membrane Gaming Keyboard![]() on Amazon has silent keys and RGB LED lighting effects. It’s one of the best “silent” gaming keyboards you can get and worth the money.
on Amazon has silent keys and RGB LED lighting effects. It’s one of the best “silent” gaming keyboards you can get and worth the money.

- Signature Light Bar and dynamic RGB lighting effects so you can personalize your battle station and...
- Durable solid Frame for long lasting durability and stability
- Quiet and Responsive Keys with Anti-Ghosting: Key rollover lets you press keys simultaneously and...
- Spill Resistant to prevent damage from accidental spills
Last update on 2025-10-20 / Affiliate links / Images from Amazon Product Advertising API
If you are on a tight budget and don’t mind doing a bit of DIY on your existing keyboard, consider fitting some O-ring switch dampeners to the keycaps. They’re tiny rubber rings that fit around the underside of each key, and the idea is that they cushion the key as you tap it down. Instead of the plastic key hitting the plastic underneath, the O-Ring stops gets in the way, and prevents the audible click.
To fit the O-Rings you’ll have to remove the keycaps using a cap puller tool, push the O-Ring onto the plastic column on the reverse of the keycap, and then replace the keycap on the keyboard. It’s simple enough, although it can be a bit fiddly. Cherry MX Rubber O-Ring Switch Dampeners![]() are a good example of suitable O-Rings you could use.
are a good example of suitable O-Rings you could use.

- (Red) 0.2mm travel reduction. Sound reduction with minimal change in feel.
- Reduces noise caused from "bottoming out" keys
- Shock absorption minimizes finger fatigue
- EPDM rubber, resistant to cracking and tearing
Last update on 2025-10-20 / Affiliate links / Images from Amazon Product Advertising API
Tosh Lubek runs an audio and video production business in the UK and has been using the Canon EOS R since it was released in the Autumn of 2018. He has used the camera to shoot TV commercials for Sky TV, promotional business videos, videos of events and functions, and YouTube creator content. He has also won international awards for his advertising and promotional work. You can meet him by visiting his “video booth” at HashTag business events across the country.
Recent Posts
Most people use sandbags the wrong way. Here’s how to hang them properly on a light stand for maximum stability and safety — plus what to fill them with.
You're Using the Canon RF 50mm f/1.8 WRONG! Here’s How to Fix It
If you’ve recently picked up the Canon RF 50mm f/1.8 STM—affectionately known as the Nifty Fifty—you might be confused by that strange switch on the side of the lens. It doesn’t say AF/MF...