

Author: Tosh Lubek Published: 10th May 2023
DIY Video Studio is supported by its readers who use the affiliate links or ads on this site. As an Amazon Associate, I earn from qualifying purchases. Thank your support if you use any of the links.
During the lockdown, I discovered that I could use my Blue Yeti USB microphone to easily improve my audio quality on Zoom calls. Even better, setting the microphone up was straightforward because the Blue Yeti is a Plug’n’Play USB microphone. All I needed to do was to connect the mic to my computer and Windows 11 automatically did the setup for me so I didn’t have to install any drivers or other software.
In this article, I explain what I did and how I got the best out of my Blue Yeti. To set up a Blue Yeti for Zoom calls follow my simple steps. The process is easy, and you will make yourself sound a whole lot better on your Zoom remote calls.
If you don’t already own a Blue Yeti here is a link to one of the best Blue Yeti deals I’ve been able to find on Amazon.

- Custom three-capsule array: This professional USB mic produces clear, powerful, broadcast-quality…
- Onboard audio controls: Headphone volume, pattern selection, instant mute, and mic gain put you in…
- Four pickup patterns: Flexible cardioid, omni, bidirectional, and stereo pickup patterns allow you…
- Blue VOICE software: Elevate your streamings and recordings with clear broadcast vocal sound and…
Last update on 2026-03-13 / Affiliate links / Images from Amazon Product Advertising API
Simple steps to setup a Blue Yeti for Zoom calls
Step 1: Use the included desktop stand
If you need to record high-quality audio for podcasts or videos, it’s much better to use a mic stand with the Blue Yeti. This would help avoid the sound of knocks and bumps on your desk being picked up by the microphone. However, on Zoom calls the occasional bump is less important, so it is fine to leave the Yeti on the supplied desktop stand.
Place the microphone on your desk, with the side with the Blue logo facing you.
The Yeti’s body should be approximately vertical or tilted back a little, so the side of the grille points toward your face. It should be about 6-8 inches from your mouth. A good way to judge 8 inches is to stretch out your thumb and little finger (pinky) apart. The reach from tip-to-tip is about the correct distance.
With the Yeti at the correct angle and distance, tighten the screw knobs on the sides of the stand to keep the Yeti in place.
Step 2: Change the polar pattern to Cardioid
On the back of the microphone, you will find a round dial that can be set to four different positions. These relate to the four different polar patterns or modes that the Blue Yeti can be set to. For speaking at your desk, the best polar pattern to use is the cardioid mode. Turn the dial so that the indicator line points to the heart-shaped symbol, it’s between the circle and the figure of eight.
Step 3: Connect the mic to your computer
Use the USB cable that came with the Blue Yeti to connect the microphone to your computer. You’ll find a mini-USB socket on the base of the Blue Yeti, plug the USB mic cable into this socket and the other end into a free USB port on your computer.
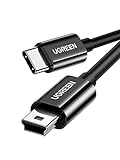
If you are using a more modern computer with USB-C ports, you will need a USB-A to USB-C adaptor to connect the supplied USB mic cable. Alternatively, replace the mic cable with a new mini-USB to USB-C cable, such as this one from UGREEN.
Last update on 2025-10-20 / Affiliate links / Images from Amazon Product Advertising API
Once you have connected the Blue Yeti to your computer the microphone will receive power from the computer. To check that this is the case, look at the Yeti’s mute button, the light in the middle should now be glowing red.
The Yeti will also have been detected as a USB audio device and will have been set up as your audio input microphone. No additional software is required, although Blue Voice software is available to download that can help reduce background noise. This is slightly more complicated, so I am not including it in this setup guide.
Step 4: Make sure the Yeti isn’t muted
If you see the mute button blinking red, this means the microphone is muted. To unmute the Yeti, press the mute button once and the light should become a solid red, indicating the mic is unmuted and on.
Step 5: Adjust the microphone gain
The Blue Yeti has a gain dial on the rear of the microphone, this adjusts the gain or volume of the microphone. It doesn’t need to be set too high since the Yeti is a high-output level microphone.
Turn the dial so the indicator line is in the 8 or 9 o’clock position. If you’re very quiet spoken you can turn the dial higher but be aware that not only will your voice be louder but so will the room’s background noise.
The gain dial position isn’t too critical because you’ll also make further adjustments in the Zoom desktop client (software).
Step 6: Set the headphone volume
You can plug your headphones either into the audio output socket on your computer or the Blue Yeti. If you want to hear yourself along with the remote call participants, plug your headphones into the 3.5mm socket on the base of the Blue Yeti microphone. Use the headphone volume dial on the front of the Yeti to adjust the volume of your headphones.
Some people find hearing their own voice a little off-putting. To just hear the remote participants, plug your headphones directly into the audio out socket on your computer.
Step 7: Set your speaker output in the Zoom client
You’re now set to open the Zoom software client on your computer. Click on the gear wheel icon to open the Zoom settings panel. Then click on the Audio tab, on the left side, to access the audio settings.
The first thing to set is your speaker. In the Speaker section click on the down arrow to open the drop-down list of audio outputs. If you are going to plug your headphones into the Blue Yeti, choose “Speakers (Yeti Stereo Microphone)”. But if you plug your headphones into your computer or want to listen to your computer’s loudspeaker, choose “Same as System”.
Now click on the Test Speaker button. You should hear a ringtone on your headphones or computer speaker.
Step 8: Set the Blue Yeti as the active microphone
On the Zoom audio settings panel check the microphone section. In many cases, where the Blue Yeti is the only connected USB audio source, the Yeti will have been automatically selected. If it has not been selected, click the down arrow to open the drop-down list of microphone options and choose Microphone (Yeti Stereo Microphone).
Now click on the Test Microphone button. If you speak into the microphone, you should see the level meter move. Make sure the box next to, “Automatically adjust microphone level” is checked. Zoom will now adjust the microphone level for you. But if you want to set the manually, uncheck the box and drag the volume control to make the necessary adjustments.
Step 9: Set your Zoom audio profile
In the Zoom audio settings panel, under Audio profile, ensure Zoom-optimized audio is selected along with Background noise suppression on Auto. Both will probably be selected, but if not, make sure you’ve got them turned on.
That’s it, you’re done. You’ve completed all the necessary steps to set up the Blue Yeti for Zoom calls and you’re ready to jump onto a call, meeting, or seminar.
You might also like…
Here’s a big ask from me: If you liked this article, please share it.
It will mean a great deal to me if you share this post because a few seconds of your time will seriously help my blog grow. The share buttons are below the “About Author” section.
Thanks. 🙂

About the author: Tosh Lubek is a multi-award-winning broadcaster, writer, and video producer, with 40 years of experience in professional broadcasting and has been using Canon video and stills cameras since 2010. He has worked with radio and TV broadcasters, advertising agencies, and direct clients on a variety of projects including radio and television advertising, online video production, corporate videos, award ceremony motion graphics, and theme park sound design. Tosh has won numerous awards, including a Radio Academy Awards Gold Sony, a Gold, Silver, and Bronze World Medals in the New York Festivals International Advertising Awards. Since about 2007 he has been creating YouTube videos. Tosh has been a sponsor of the “video booth” at HashTag Business Events across the UK.
Recent Posts
Most people use sandbags the wrong way. Here’s how to hang them properly on a light stand for maximum stability and safety — plus what to fill them with.
You're Using the Canon RF 50mm f/1.8 WRONG! Here’s How to Fix It
If you’ve recently picked up the Canon RF 50mm f/1.8 STM—affectionately known as the Nifty Fifty—you might be confused by that strange switch on the side of the lens. It doesn’t say AF/MF...