
DIY Video Studio is supported by its readers who use the affiliate links or ads on this site. As an Amazon Associate, I earn from qualifying purchases. Thank your support if you use any of the links.
If you’ve tried food photography, you’ll know getting great-looking results can be difficult and frustrating. Fortunately, there are lots of simple to-do hacks that can lift your food photography to another level. In this article, I’m going to share some of my favorite hacks and tricks for food photography that you can easily implement yourself.

Tip 1 – Use Photography Backdrop Boards
The easiest thing you can do to make your food shots look way more professional is to use photography backdrop boards. They can turn a so-so layout into an image with the impact that helps tell your photo story.
They come in a few sizes but the most common is 2×2 ft (60×60 cm) and are a substitute for various surfaces, such as old wood, cutting boards, marble, or slate. The designs are photorealistic, and, if appropriate, have a 3D textured finish. Often, the boards are double-sided, with a different design on each side to extend the creative possibilities.
The boards are as thick as foam board but a bit heavier and sturdier, and the surface of each board is usually a non-reflective mat finish to avoid glare from lights.
They can be used individually for flat lay (overhead) photography, or two can be clipped together at right angles for a base and wall backdrop when shooting from an angle or horizontally. By joining three boards together you can create a corner scene with a base and two perpendicular walls.
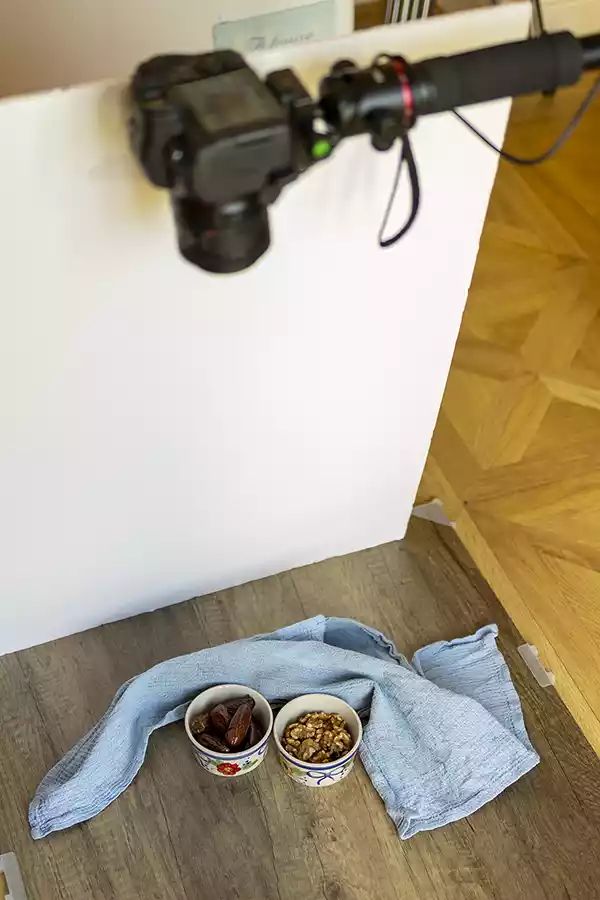
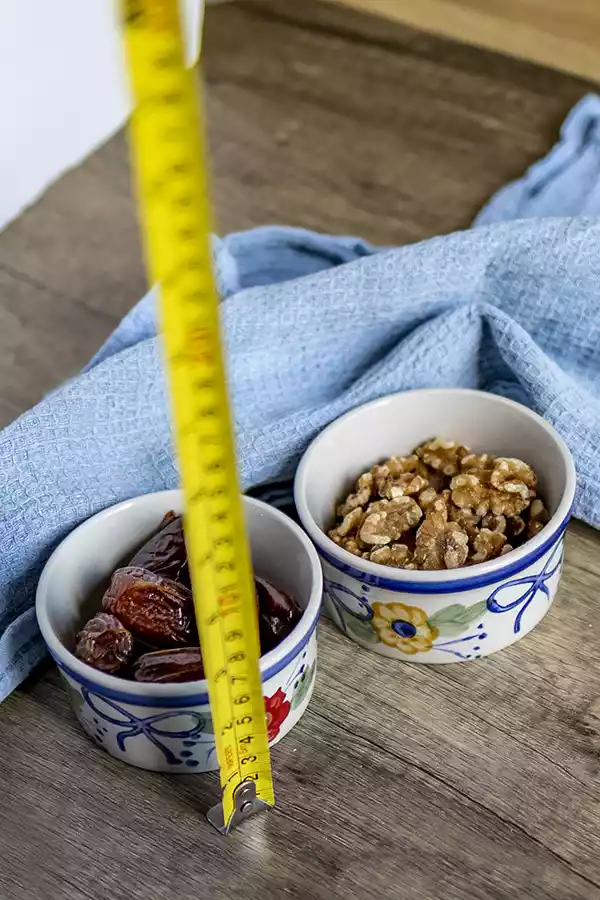
Here’s an example where I used one photography backdrop board for an overhead shot of dates and walnuts.
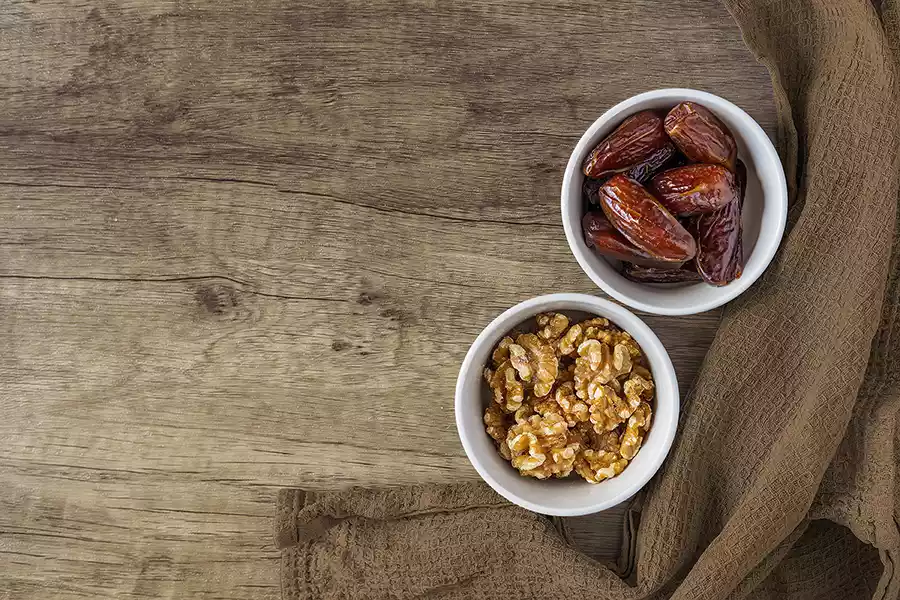
If you are interested in getting photography backdrop boards, I have found a selection of 2-piece sets on eBay. One of the sets was used to create the Date and Walnut image above. They are double-sided and the photo background has a 3D texture. Each board is 2ftx2ft and each set comes with two bracket clips to join two boards at a 90° angle. If you want to make a corner from the boards you will need two sets. From my own purchase, I know the quality of these boards is excellent, but even better, these are also some of the most affordable backdrop boards out there.
There are four textured backdrop board pattern kits available from the seller’s eBay page:
Kit 1:
Marble+ White Marble (2 Pattern 1 Board)
Natural Wood + White Wood (2 Pattern 1 Board)
Kit 2:
Natural Wood + White Wood (2 Pattern 1 Board)
Dark Concrete + Light Concrete (2 Pattern 1 Board)
Kit 3:
Dark Wood+ Nature Wood (2 Pattern 1 Board)
Dark Concrete + Light Concrete (2 Pattern 1 Board)
Kit 4:
Dark Concrete+solid white (2 Pattern 1 Board)
Light Concrete+solid white (2 Pattern 1 Board)
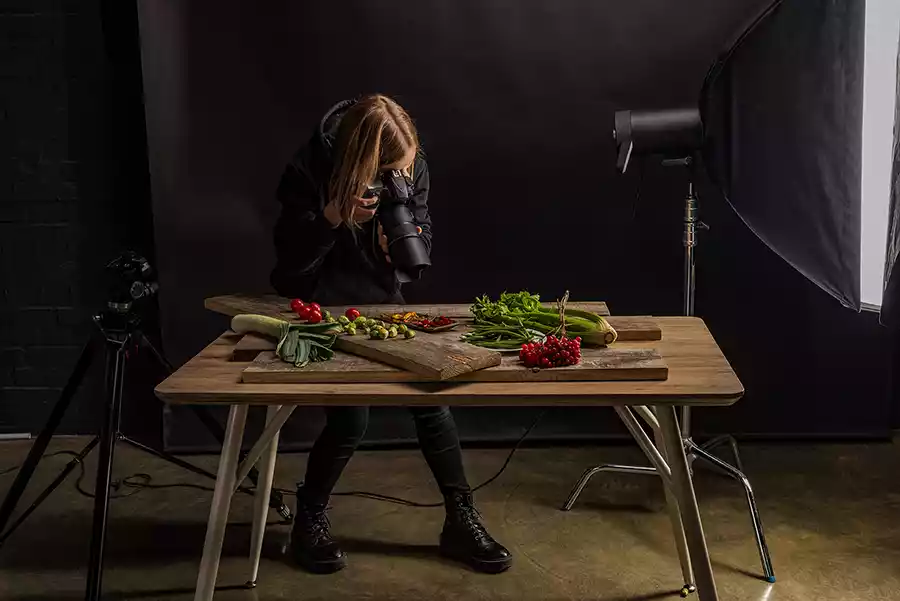
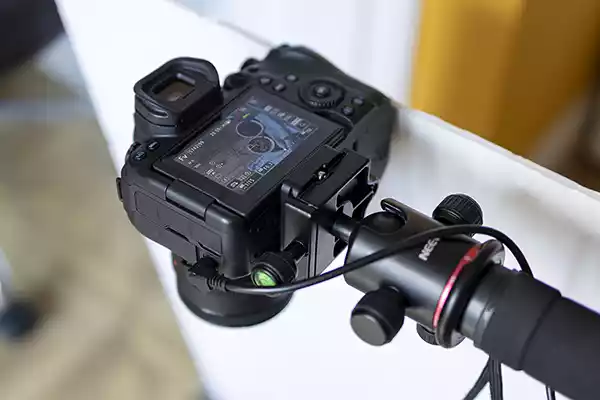
Tip 2 – Use an overhead camera mount for flat lay food photography
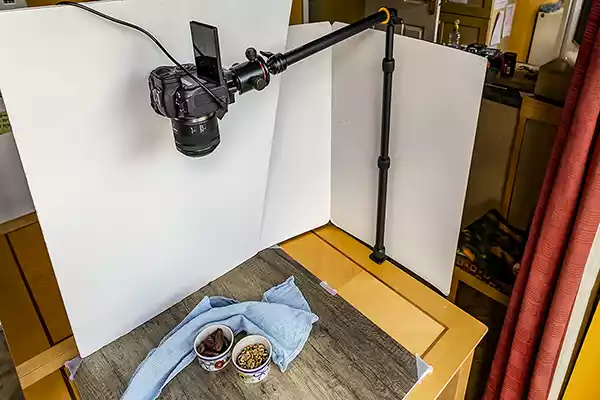
Top-down photography can be tricky, especially when shooting inside where the light levels may require slow shutter speeds. That’s where an overhead camera mount simplifies your photography and avoids camera shake. Overhead photography is an instance where having the right piece of kit will make your life a lot easier and help you produce better results.
If you already have some photography equipment, you might own the necessary kit to create a DIY camera rig or mount. Some tripods have center columns that can swivel through 90° and extend sideways, so your camera can point downwards. But even ordinary tripods can be used for flat lay photography by tilting the head all the way forwards. Another DIY option is to clamp a monopod to a table, or, if you’re shooting with a smartphone, you could use a selfie stick.
A professional overhead camera rig can cost between $150 and $250, but you’ll have a camera mount that’s very sturdy and lets you freely work on your layout under the camera. It’s also likely to include several threaded holes on the support arms and crossbar where you can mount additional kit, such as lights and even a microphone if you’re filming a video.
For more details on overhead camera mounts, whether DIY or professionally designed, see my article, How to setup the perfect overhead food image shoot for food bloggers.
Tip 3 – Avoid camera shake by not touching the camera’s shutter button
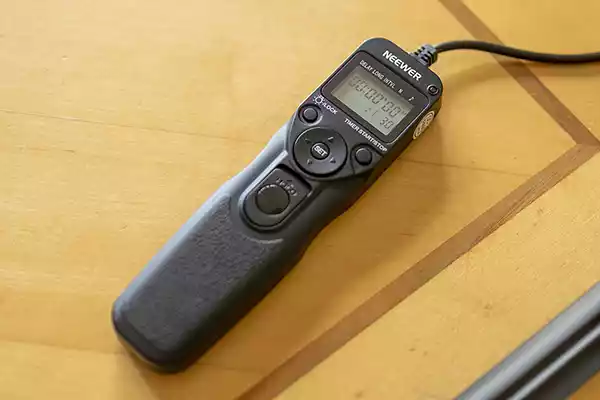
Even if you have your camera on a tripod, when you press the shutter button, you’re introducing a tiny bit of movement or vibration to the camera. Normally the movement does not matter, because fast shutter speeds and optical stabilization prevent any motion blur from appearing in your images. But when using natural light, you might need to use longer shutter speeds, and that’s when camera shake can become noticeable.
To avoid introducing any vibration, and therefore camera shake, fire the shutter with a wired remote, wireless trigger, mobile app, or a tethered laptop. Alternatively, use a 2sec exposure delay, so any vibration caused by pressing the shutter button can die down before the camera takes the shot.
If you are using a smartphone for food photography, you may have other ways of taking the shot. On a Samsung phone, you can use voice commands to take pictures. To activate it, go to shooting methods in the camera settings. You will then be able to take pictures by saying “Capture”, or “Shoot”.
Tip 4 – Get some food photography props

It is amazing how much of a difference a few props can make to your food shots. But you don’t need to spend a lot of money on those props. You can pick up quite a lot of cheap props at flea markets and thrift shops. The props could even find free props when out hiking or taking walking along a beach.
Suitable props can include pieces of hessian sacking, driftwood, leaves, seashells, seaweed, old crockery, and cutlery. Be more observant of everything around you, look at them with a creative eye and you’ll start to acquire a collection of props that will really help you enhance your visual storytelling.
Tip 5 – Add visual interest by casting shadows with cookies
I better explain that in this context a cookie is not something that you would eat, but a piece of equipment that is used to cast shadows.
In photography lighting, cookie is short for cuculoris, a device that produces patterned illumination by casting shadows or silhouettes. The patterns are varied. They could simulate shadows found in dappled sunlight, the horizontal lines of window blinds, as well as other designs.
By placing a cookie in front of a light source you can cast interesting shadows across your layout, adding to the visual interest of your image. The size of the shadows can be changed by moving the cookie closer or further away from the light source.
Although you can buy a cuculoris set, it’s also easy enough to make your own. For window blinds, create a frame and stick parallel strips of paper across from one side to the other. For a dappled sunlight look stretch a sheet of clear plastic across the frame, then glue on randomly shaped pieces of paper with rounded edges so that it is almost like a camouflage pattern.
Tip 6 – Use food styling tricks to make your food last longer on set
Depending on the food you are trying to photograph, you might not have long to get your shot. I know from my own experience that some food items last such a short time that they would be ruined before I’m ready to start shooting. So, if you can’t use the real thing, fake it. That way you will have time to concentrate on getting the images you really want and not feel under pressure to hurry.
So, what do I mean by faking it in food styling?
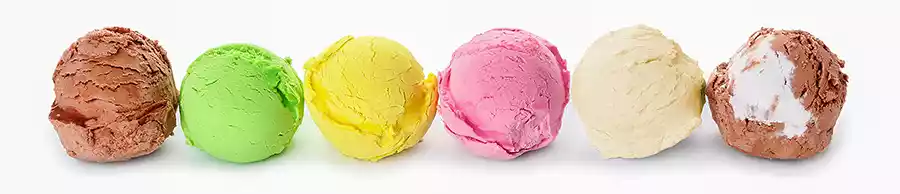
Well, think of ice cream. Even though we seldom use bright hot lights, ice cream at room temperature doesn’t take long before it melts. Instead of looking as if it has been freshly scooped and balls of frozen goodness, it doesn’t take long for the surface to look wet and shiny and then start forming drips.
Fake Ice Cream
To gain the time you need for photography, make fake ice cream mix together readymade frosting and powdered sugar until you have a dough-like consistency. If you don’t have any frosting mix equal volumes of corn syrup and Crisco shortening, then add double that volume of powdered sugar. Mix everything, adding extra powdered sugar until you get the dough-like consistency. With the fake ice cream made, pack it into a container and chill in a refrigerator for about an hour.
When you scoop the fake ice cream the surface will look too smooth, so scrape the sharp edge of a kitchen knife across the scoop. This will pull open and roughen the surface to form “barking” and make the scoop look much more like the real thing. To add further realism, apply a small amount of glycerine to give the surface a moist sheen effect, almost as if the ice cream is just about to melt.
Condensation on cool glasses of drink
If you have glasses of drink in your shot, they often look more attractive looking as if the drink is cold, and that could mean ice cubes. But unfortunately, ice is going to melt at room temperature, so use fake ice instead. You can take all the time in the world to set up your shot and the ice cubes will look just as great in 30 minutes as when you added them to the glass.
Now a cold drink will usually have some condensation on the glass, but only up to the level of the drink. To get this effect, use a 50/50 mix of water and glycerine in a fine spritzer. Then use some paper or kitchen towel to mask above the level of the liquid and spritz the lower part of the glass.
Condensation and water droplets on cold fruit
The same 50/50 glycerine/water mix can also be used to simulate condensation of food items recently taken out of a refrigerator, such as grapes. But to simulate individual drops of water on fruit or leaves, use neat glycerine applied with an eyedropper. It will look like drops of water, but the higher viscosity of glycerine will stop it from running off like water.
Fake milk
If you’re photographing a bowl of breakfast cereal, you’ll find that the cereal goes limp and soggy once you’ve added milk. Instead, pour white PVA glue into a shallow bowl and add cereal and fruit on top. The useful lifetime of the cereal will be much longer than if you had used milk.
Hiding light reflections
The final trick also applies to anything that is shiny, which could be forks, spoons, and plates. Reflections of lights can cause glare, so make the reflective surfaces less shiny and reflective by using an anti-reflection spray.
Tip 7 – Get the max from each food set up
When you want great-looking food shots, your photography is going to take time. So, it makes a lot of sense to get the most return on your time investment, at least, if it’s possible.
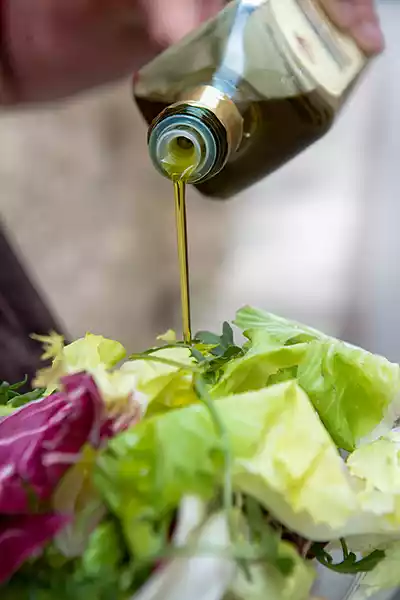
There are several times when the food item, or your finished meal, might have something poured on it. It could be syrup, sauces, gravy, etc. In this situation get two images for the price of one. Once you’ve got your food layout ready, take a shot. Then, get some drizzle shots pouring syrup over pancakes, or cheese sauce is over cauliflower. Whatever it is, if it makes sense, get a clean shot and drizzle shot, and get two shots for the price of one.
Tip 8 – For overhead food shots, keep your camera parallel with the flat lay
Food photography is often done with the camera relatively close to the food and with fast apertures, which can lead to quite a shallow depth of field. In other words, your food layout will only look in focus over a narrow range of distances.
Now, if your camera is not pointing straight down, the camera’s focal plane will not be parallel with the table top. So, on one side of the image, the table top will be closer to the camera than the other side of the image. Since the depth of focus is relatively shallow, you could end up with a situation where the left of the flat lay is in focus but off to the right, it appears a little soft.
So, to get everything in focus, make sure the camera points straight down and not slightly off at an angle.
Tip 9 – Create cheap soft lighting
Softboxes, octaboxes, and umbrella softboxes are not the only sources of beautiful soft light for food photography. There are some that could be completely free.
First, how about natural daylight? Provided you don’t have direct sunlight flooding in through your window, which would in effect be hard light, window light is a wonderful soft light for photography. The larger the window the better because the whole window is effectively the light source, and you can imagine every point on the window emitting a ray of light toward your food layout.
The effect is that light comes from many different directions and wrapping around the edges and softening the shadows. As you’d expect, window light produces a natural and familiar look, enhancing the attractiveness of the food.
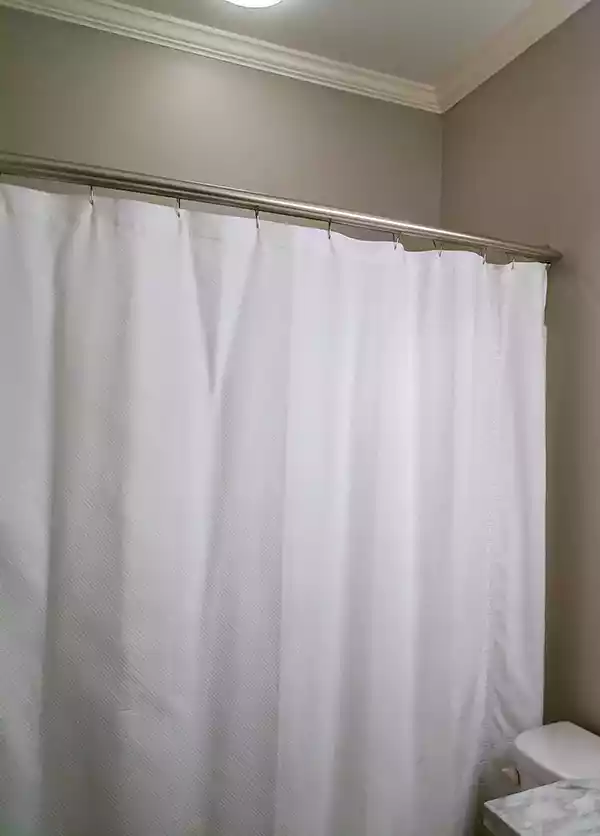
But how about artificial lighting? You can turn a speedlite flash or a bare bulb into a soft light source by hanging a shower curtain in front of it. If you don’t have a shower curtain available, you can get about 20ft x 5ft of white diffusion fabric, also known as photography silk cloth, for around $30.
Don’t have the diffusion fabric too close to your light since that would create a hot spot. Move the fabric away from the bulb a little so the fabric acts as a broad light source.
Tip 10 – Don’t guess the correct aperture setting, use a DoF calculator
If you’re doing overhead food photography you want everything to look in focus, from the highest part of the flat lay down to the backdrop board. Making sure you’ve got everything right can be tricky if you rely on the camera’s small LCD screen, so let your smartphone calculate the correct settings for you.
You can use a Depth of Field Calculator app to make sure everything is set up correctly. You’ll need to make two measurements, the distance between the camera’s focal plane and the backdrop board, this is your subject distance. The second measurement is the highest part of the food above the backdrop board.
Enter the first measurement into the app as your subject distance, then select your lens focal length, and the type of camera you are using. Gradually change the aperture in the app, that’s the f-number, and notice how different values affect the total depth of field (DoF) and the DoF near limit. You want the Subject Distance minus the DoF Near Limit to be greater than the maximum height of your food layout above the backdrop board.
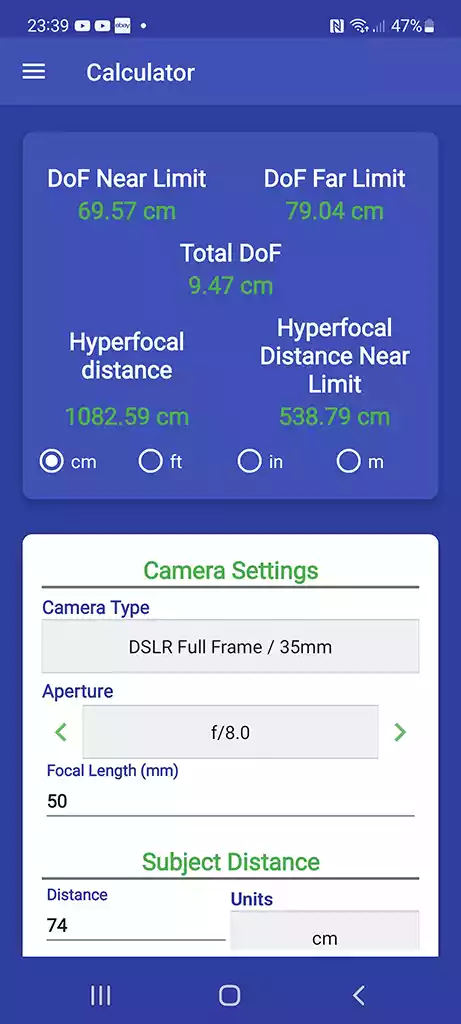
Example. Say I’m using a Full Frame camera with a 50mm lens, at 74cm from the backdrop board and the highest point of the food is 4cm above the board. So, I need to find a DoF Near Limit where Subject Distance minus DoF Near Limit is more than 4cm. As I increment up the f-number, when I get to f/8.0 the DoF Near Limit is 69.57cm. So 74cm – 69.57cm equals 4.43cm, which is a little more than the maximum height of the food layout. So, I would need to set the lens to an aperture of f/8.0 to get all of my setup to appear in focus.
Tosh Lubek runs an audio and video production business in the UK and has been using the Canon EOS R since it was released in the Autumn of 2018 and the Canon EOS R6 in 2020. He has used both cameras to shoot TV commercials broadcast on Sky TV, promotional business videos, videos of events and functions, and YouTube creator content. He has also won several international awards for his advertising and promotional work. You can meet him by visiting his “video booth” at HashTag Business Events across the country.
Recent Posts
Most people use sandbags the wrong way. Here’s how to hang them properly on a light stand for maximum stability and safety — plus what to fill them with.
You're Using the Canon RF 50mm f/1.8 WRONG! Here’s How to Fix It
If you’ve recently picked up the Canon RF 50mm f/1.8 STM—affectionately known as the Nifty Fifty—you might be confused by that strange switch on the side of the lens. It doesn’t say AF/MF...