

DIY Video Studio is supported by its readers who use the affiliate links or ads on this site. As an Amazon Associate, I earn from qualifying purchases. Thank your support if you use any of the links.
Even if you’re new to photography, creating classic portraits is in your grasp when you use Rembrandt lighting.
Lots of expensive gear or a large studio are not necessary, you just need an understanding of the Rembrandt lighting setup in photography. Once you understand the basics you can start taking fantastic portrait images almost anywhere.
What is Rembrandt lighting in portrait photography?
Rembrandt lighting produces a look that is naturalistic yet impressive and can be done with a minimum of equipment. It is technically simple but can produce beautiful images that will stand the test of time.
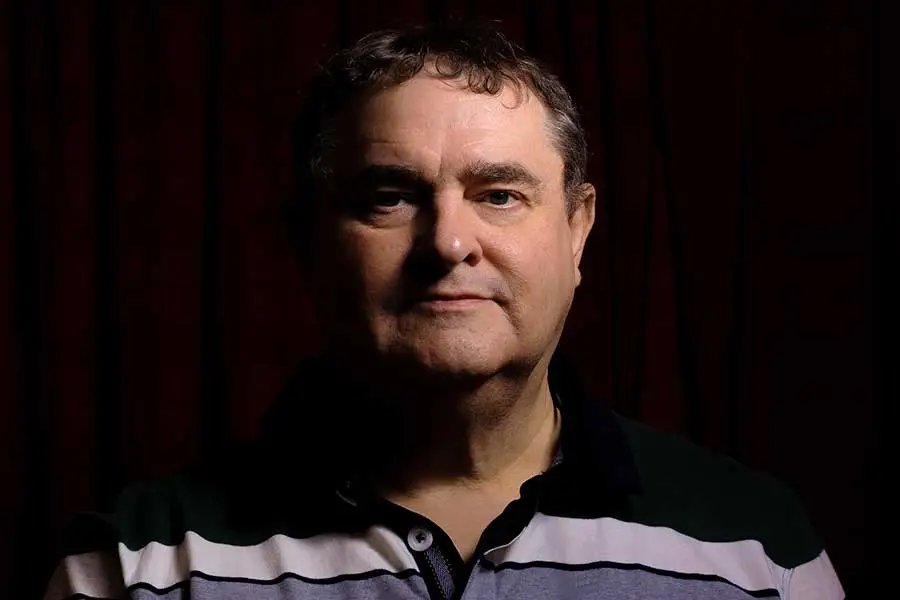
Rembrandt lighting is a split lighting setup, where half of the face is lit but the other half is in shadow. However, on the shadow side, there is a triangular patch of light below the subject’s eye, formed by light passing over the subject’s nose and falling on their upper cheek.
Frequently examples of Rembrandt lighting show the model looking toward the camera lens, however, this is not a defining aspect of this type of lighting. The model can equally be looking past the camera, as can be seen in the image below. The lighting setup still produces light on one side of the face, shadow on the other, plus the Rembrandt patch below the eye, also known as the Rembrandt lighting triangle.
This style of lighting is named after Rembrandt, the 17th-century Dutch painter who used this type of lighting way before the invention of photography. However, he did not invent the lighting style, with earlier artists having used this type of lighting.
So, if he didn’t invent this type of lighting why is it named after him?
The first use of the term has been attributed to, Cecil B. DeMille, an early American movie director. In his autobiography![]() , he claims to have used the term to reassure his producer, Samuel Goldwyn, who was worried that exhibitors would only pay half the regular fee for the movie since the shadows meant only half of the actor’s faces could be seen. DeMille claims he told Goldwyn it was ‘Rembrandt lighting’, to which the movie producer replied, “For Rembrandt lighting, the exhibitors would pay double!“
, he claims to have used the term to reassure his producer, Samuel Goldwyn, who was worried that exhibitors would only pay half the regular fee for the movie since the shadows meant only half of the actor’s faces could be seen. DeMille claims he told Goldwyn it was ‘Rembrandt lighting’, to which the movie producer replied, “For Rembrandt lighting, the exhibitors would pay double!“
Whether true or not, the tale does convey the idea that shadow and naturalism are important parts of Rembrandt lighting and that it is a classic and desirable look.
The equipment needed for a Rembrandt portrait lighting setup
If you’ve seen professional portraits that use Rembrandt lighting, it’s easy to think you will need lots of gear to produce this style of lighting. However, that’s not true. In fact, you may already have the necessary kit, or at least you can get it quite cheaply.
You might also be worried that you will need a large photographic studio, but again, that’s not always the case. Although ample space is a bonus, you can set up to shoot with Rembrandt lighting when space is limited, like in a living room.
Rembrandt made use of natural light by placing his subjects next to a window, but we don’t need to. We have modern lights that enable us to create the same lighting effect almost anywhere, whether indoors or out.
The equipment you’ll need to take portraits using Rembrandt lighting is as follows.
- Camera with a 50-90mm lens
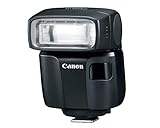
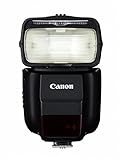
- Speedlite or studio strobe flash
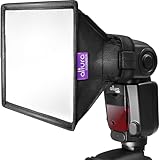
- Light modifier (Soft box, umbrella soft box, etc.) and stand
- White reflector (optional)
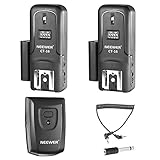
- Wireless camera flash trigger
- Backdrop, curtains, or plain wall
I’ve specified a Speedlight flash in the equipment list, but you could use another type of flash or even continuous lighting. That’s good news if you are a videographer who occasionally takes headshots. You can use your existing continuous LED or CFL lights to create Rembrandt lighting for portraits.

Last update on 2025-10-20 / Affiliate links / Images from Amazon Product Advertising API
The lights to use for the Rembrandt lighting technique
The Rembrandt style of lighting can be created using one light source with a modifier.
The light source
If shooting indoors, the light source could be a Speedlite, a studio strobe, or even a continuous light. I take most of my portrait headshots in domestic settings or the confined space of my exhibition stand at business EXPOs. In both situations, a four AA battery Speedlite provides plenty of power to create the Rembrandt lighting effect.
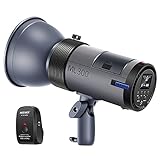
If you’re shooting outdoors, you may need a more powerful light, since a Speedlite flash is likely to be insufficient, since it will be competing with the brightness of the sun. Choose a studio/location strobe such as a Neewer ML300, Westcott FJ400, or Godox AD400 Pro. The best option would be a strobe light that uses a battery pack since it provides freedom of movement along with safety since no cables are required.


Last update on 2025-10-21 / Affiliate links / Images from Amazon Product Advertising API
The modifier
The modifier to use with your light is usually something like a softbox, octa box, or umbrella softbox. All these modifiers produce soft light with directional control. For more precise control of where the light falls, you could add a grid to the front of the modifier. If you do not mind having some light spill onto the background, and pretty much everywhere else, you could use a cheap 33-inch shoot-through umbrella, as I did for the image below.
For better control of the light, but keeping the cost low, use an umbrella reflector (black on the outside and either white or silver on the inside). Although cheap, these can be quite effective in controlling where the light falls.
Size and distance of the light and modifier
When it comes to your soft light source, the size of the modifier and the distance to the subject are linked. A powerful light with a large modifier at a greater distance is the same as a less powerful light and smaller modifier that’s close to the subject. However, I have always found that a light with a large modifier that is also close to the subject tends to produce the softest quality of light.
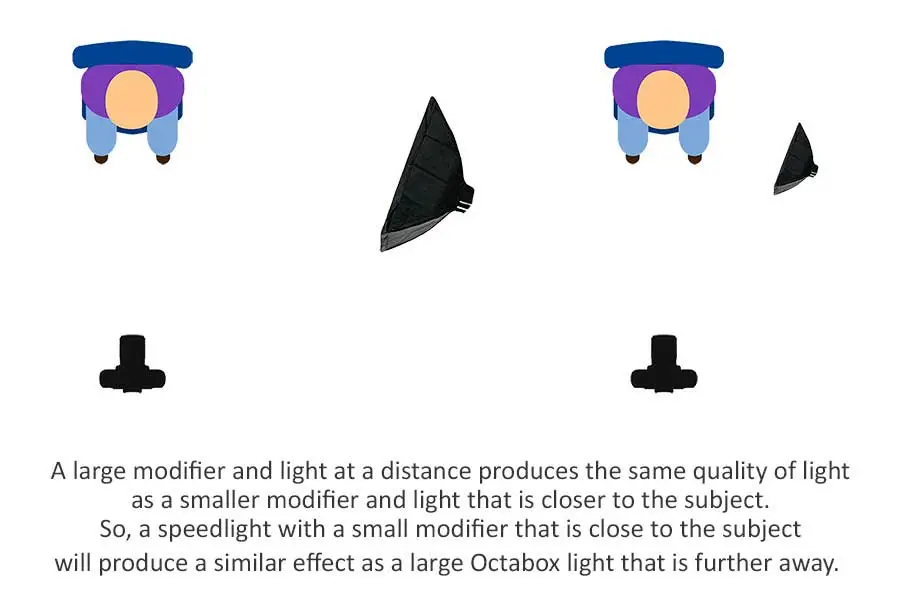
Even so, you can still create the Rembrandt lighting effect with a Speedlite and small bounce modifier held close to the subject.
Optional bounce light
If you want to lift or lighten the shadows formed on your subject’s face you could use a second light source. However, there’s no need to spend a lot of money on a second flash or continuous lights. You can use a large sheet of white foam core board or a circular reflector to bounce light back into those shadows.
How to Set Up Rembrandt Lighting for Portrait Photography
If you’ve never done a Rembrandt lighting setup, the easiest way to begin is to start with split lighting, then adjust it to give the required look. Split lighting illuminates one half of the face while throwing the other half into shadow.
Step 1
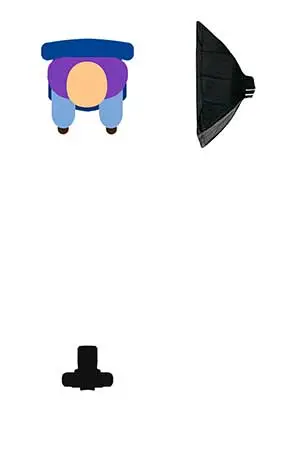
Place your light source on one side of the subject so that it is facing them and at about head height.
The distance between the light and your subject depends on the size of your light source. A small light source that is close to the subject is the same as a large light source that is further away.
Step 2
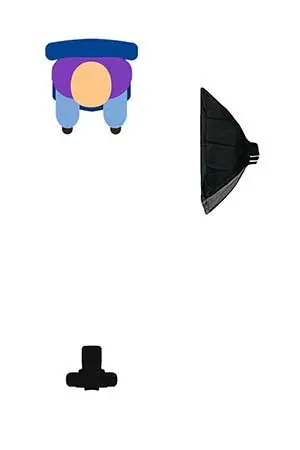
Move the light forward of the subject so that if you look from the edge of the modifier, you can see the subject’s far eye and the area of the cheek below that eye.
Step 3
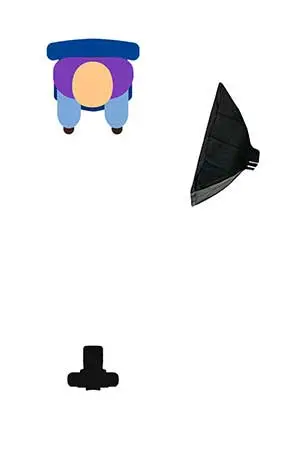
Turn the front of the light and modifier inward to point toward the subject. The angle made between the camera, subject and light should be about 45 degrees.
Step 4
Adjust the height of the light source so the mid-point is approximately at or a little above your subject’s head height. The size of the Rembrandt patch below the subject’s eye can be adjusted by increasing or decreasing the height of the light. If the height of the light is too high, the patch of light will extend too far down since too much of the far cheek will be illuminated.
If you’ve performed the steps as described, you should have a result that looks like my image.

Last update on 2025-10-11 / Affiliate links / Images from Amazon Product Advertising API
Practical considerations
I took the image in a very cramped space, which was about 5ft x 9ft with an 8ft high ceiling. Consequently, I used a 33” shoot-through umbrella with a Speedlite (a cheap 4 AA battery Neewer electronic flash with remote transmitter/receiver trigger). The shoot-through umbrella light was about 3ft (1m) from my head.
Since I was both the photographer and subject, I used a handheld wired remote control to fire the camera shutter and Speedlite. If I had been further from the camera I could have used the Canon Camera Connect app on my iPhone or Android to control my Canon EOS R camera.
The ceiling height is an important consideration since it will dictate the size of the light you can use or how you pose the subject. Depending on their height, you might need to have them sit on a chair.
In a domestic setting, the ceiling height is likely to be about 8ft. So, it will be awkward to use a large modifier with your flash. I got away with using a 33” shoot-through umbrella as my modifier but a 24”x24” square softbox or 32” octagon softbox would have been fine.
However, if you are taking shots in a commercial building, hotel, or industrial premises the ceilings are likely to be much higher. In such circumstances, you will have greater choice in the size of your lighting gear.
A birds-eye view of the Rembrandt lighting portrait setup
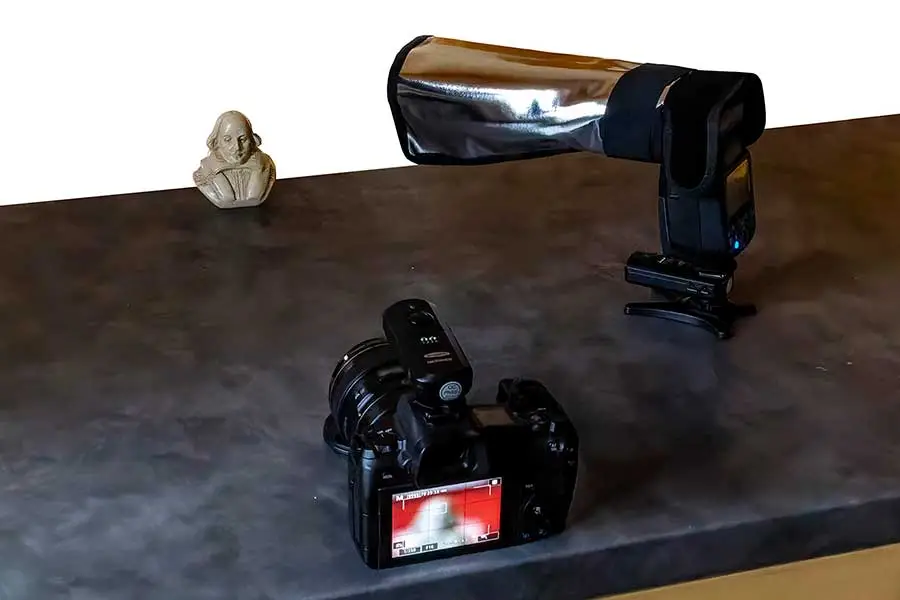
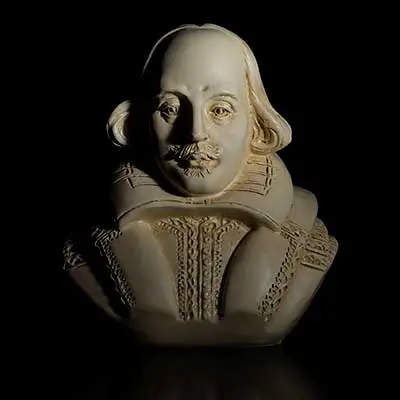
The above image shows a tabletop representation of my Rembrandt lighting setup. The small bust of William Shakespeare represents the subject. Creating tabletop photography setups is a great way to learn skills and experiment. Once you are ready you can scale up quite easily and save time and expense.
In my set up the Speedlite with a snoot attached is a stand-in for my light and modifier, although the end of the snoot is where the light modifier would be. As in the situation of taking my self-portrait, the light source is to the side and a little in front of the subject. It is also slightly higher than the subject but points down towards the head.
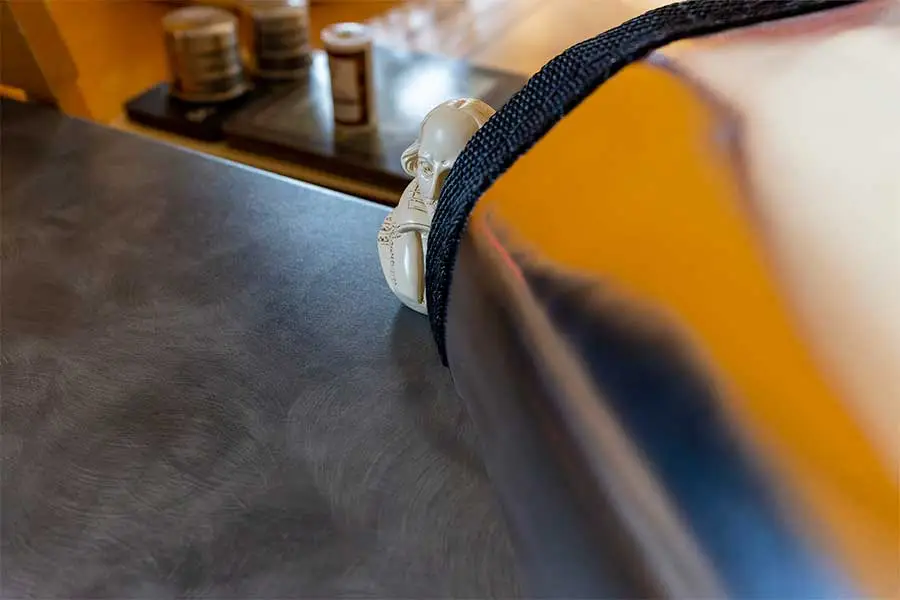
Based on the size of Shakespeare’s bust, the camera has been placed in approximately the correct scale position. However, when taking a shot of the bust, I need to move back slightly, since the minimum focus distance of the EF85mm f1.8 lens is 33 inches or 85cm.
You can check whether the Speedlite is in the correct position by looking at the subject from the edge of the light nearest the camera.
If you can see the far eye and cheek below the eye you can assume your light source will illuminate that part of the subject’s face, and therefore form the Rembrandt light patch on the cheek.
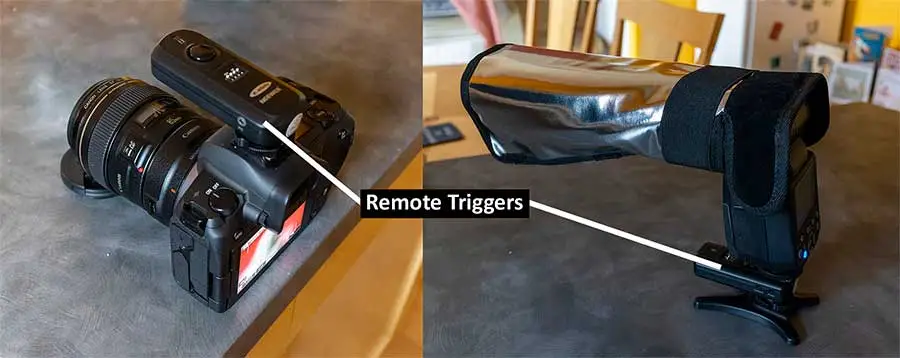
In the next pair of images, you can see the transmitter trigger mounted in the hot shoe of the camera and the receiver on the base of the Speedlite. The trigger ensures the Speedlite fires when the camera’s shutter button is pressed. Check the instructions that came with your camera flash trigger to ensure you have the switches set correctly otherwise pressing the camera shutter button might not fire the flash.
For my portrait, I used a shoot-through umbrella as the modifier for the Speedlite, which resulted in some light also falling on the background. That’s perfectly fine and depending on the background you might even want to see more of it. However, I want to make the background as dark as possible, or even black. The problem is that I’m shooting in a room that is bathed in daylight. It has several windows letting in daylight, and even if I did close all the curtains and blinds, I don’t want to work in the dark since I need to see what I’m doing.
So, what’s the trick to creating a dark background but keeping the subject illuminated?
You need to set your exposure so that your background appears dark or black. Because your flash will be brighter than the ambient light, and because it’s pointing at your subject and not the background, the final shot will show your subject but nothing in the background. The level of exposure on your subject is adjusted by tweaking the flash power. The power of my Neewer Speedlite can vary from 100% to 1/128th power.
If you’re a videographer using continuous lighting, some continuous lights offer variable brightness levels, or maybe you can selectively switch off some bulbs. Failing that, you could remove a bulb or two. Finally, there’s the option of changing the light level by adjusting the distance of the light to the subject.
I’m using a Speedlite and shooting with an EOS R in Manual, or M mode. From experience I know to get a black background indoors I need a shutter speed of 1/250th sec, aperture of f/16, and ISO of 50.
The thing is, now that I’ve changed the camera settings to make the background dark, I can’t see the subject to frame the shot or focus on the subject. But if press the focus button the display briefly shows the scene to allow the camera to acquire focus.
The problem is that mirrorless cameras have Exposure Simulation enabled by default. So, the camera rear display and EVF will show how the scene will look with the current camera settings. Which we know, should be completely dark
To fix this issue on a mirrorless camera, go into the camera’s menu and disable Exposure Simulation. On the Canon EOS R it’s in the third tab of the red camera menu and marked as Expo. Simulation. On the EOS R6 it’s on the 7th tab of the red camera menu.
Now that you can see what you’re trying to photograph, you can proceed and take your shot. My result looks like this.
You can clearly see the typical Rembrandt light patch below the left eye, and the background is completely black. The shot is exactly as I had wanted.
Posing your subject for Rembrandt lighting
So far, I have only shown example shots where the subject is looking towards the camera, However, this doesn’t always have to be the case. You can still use Rembrandt lighting without the subject looking into the camera.
The setup is just as before, but instead of the camera facing the subject, it is moved off to the shadow side of the subject, as is shown in the following setup image, along with the result.
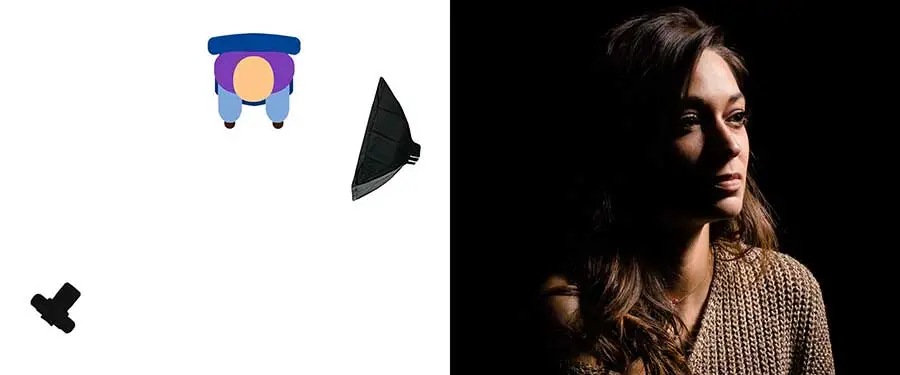
We now see the subject with the cheek with the Rembrandt light patch nearest to the camera, while she gazes in the direction where the camera was originally placed.
Also notice that the body does not need to be aligned with the direction of her gaze. In the image, her chest and shoulders approximately face the camera, but her head is pointed away at about a 30-45° angle.
The pose creates more of a disconnect with the subject, from the viewer’s perspective. Psychologically speaking, the subject is more in her own world, or perhaps connecting with something beyond the edge of the frame.
This kind of pose is frequently seen in video interviews. In this case, the lighting gives a slightly moodier feel because of the black background, but by changing the camera settings or adding background lights the mood could be changed. A similar, but opposite, set up for the other participant in the interview would give the impression that the two people are speaking to each other.
Conclusion
Rembrandt lighting is a form of split lighting where we position the light with modifier and little forward of the subject and over to one side. This allows some light to fall on the far side of the face to create the distinctive triangular light patch below the subject’s eye. By choosing the appropriate camera settings the background can either be left visible in the final image or made to appear dark or even black. It’s possible to shoot with Rembrandt lighting even in quite restricted spaces, although having more space always makes for a more comfortable shoot.
Frequently asked questions
My Canon EOS R series camera does not fire my speedlite electronic flash
The electronic or silent shutter of a mirrorless camera is perfect for shooting discreetly at a wedding service. But an EOS R can only fire a Speedlite flash if the silent shutter is disabled in the red camera menu. On an R5 or R6 choose either Elec. 1st-curtain or Mechanical shutter mode.
Why do you use Rembrandt lighting?
This naturalistic lighting has become a standard form of portrait lighting in photography and cinematography. Its use of shadow creates a moody yet natural look. Although having a sophisticated appearance it can be created with very little lighting equipment, such as a single Speedlite and modifier.
Why is it called Rembrandt lighting?
The lighting style is named after Rembrandt Harmenszoon van Rijn, a 17th-century Dutch painter who used the technique in many of his paintings. Cecil B. DeMille, the American movie director, claimed to be the first person to use the term when discussing the type of lighting with his movie producer.
What angle is Rembrandt lighting?
In Rembrandt lighting the angle between the camera, subject and light should be about 45-degrees. The light should also be higher than the subject. The height of the light determines how far down the cheek the Rembrandt patch, or triangle of light, stretches.
How many lights do you need for Rembrandt lighting?
The lighting style can be created by using a single light. However, by adding a second light, or a reflector, the shadows can be made less pronounced and make the overall effect appear less moody. The main light is known as the key light and the second is the fill light.
Tosh Lubek runs an audio and video production business in the UK and has been using the Canon EOS R since it was released in the Autumn of 2018 and the Canon EOS R6 in 2020. He has used both cameras to shoot TV commercials broadcast on Sky TV, promotional business videos, videos of events and functions, and YouTube creator content. He has also won several international awards for his advertising and promotional work. You can meet him by visiting his “video booth” at HashTag Business Events across the country.
Recent Posts
Most people use sandbags the wrong way. Here’s how to hang them properly on a light stand for maximum stability and safety — plus what to fill them with.
You're Using the Canon RF 50mm f/1.8 WRONG! Here’s How to Fix It
If you’ve recently picked up the Canon RF 50mm f/1.8 STM—affectionately known as the Nifty Fifty—you might be confused by that strange switch on the side of the lens. It doesn’t say AF/MF...