
DIY Video Studio is supported by its readers who use the affiliate links or ads on this site. As an Amazon Associate, I earn from qualifying purchases. Thank your support if you use any of the links.
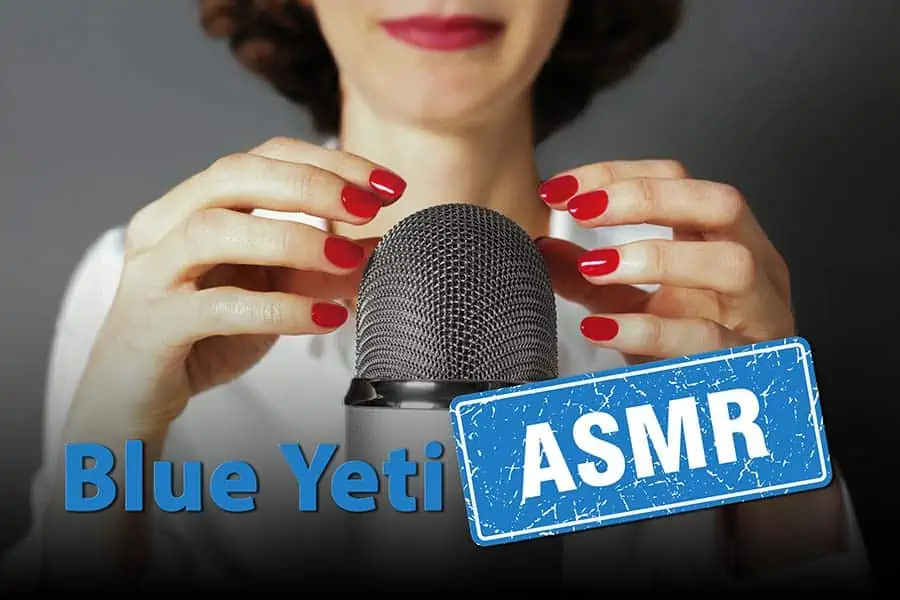
ASMR has taken the internet by storm in recent years, with thousands of creators uploading videos to YouTube. From eating jelly to ear-to-ear whispers and everything in between, ASMR content has grown in popularity and gained many followers.
But what is ASMR? Well, have you ever felt a tingling sensation in your scalp or neck that can run down your spine and leave you feeling wonderful all over? That is ASMR, or Autonomous Sensory Meridian Response, and it’s produced by triggers, like head massages, whispers, and scraping sounds.
In this article, I’ll help you with the best Blue Yeti settings for ASMR to use to let the power of tingles get you on the path of an ASMR creator.
Is the Blue Yeti a good ASMR microphone
To create an immersive ASMR experience it’s best to start recording in stereo. Normally that means using a pair of microphones, preamps, and an audio interface with multiple inputs. But that can be costly and the setup complicated. If you’re just getting started in the genre, the Blue Yeti is a good ASMR microphone to begin your content creation journey.
The Yeti has a stereo pickup pattern, high sensitivity, and a built-in headphone jack, so it has become a go-to mic for ASMR creators. It’s also a beginner-friendly USB microphone for which you don’t need extra cables, fancy equipment, or technical knowledge. Just plug the Yeti into your computer’s USB port for it to be automatically set up. You’ll quickly be ready to start capturing your own tingle-inducing audio. But as I’ll explain later, it’s worth taking the mic off its desktop stand and mounting it properly to help ensure your audio is perfect.
Pros and Cons of using the Blue Yeti Microphone for ASMR
The Blue Yeti is a popular choice for ASMR recordings due to its good-quality sound, versatility, and easy-to-use features. When it comes to pros and cons, some features can be considered to be both positive and negative, depending on your circumstances and preferences.
Some of the pros of using a Blue Yeti microphone for ASMR recordings include:
Pros:
- Good quality sound: The Blue Yeti is a good-quality condenser microphone, which is ideal for capturing clear and detailed audio.
- Stereo microphone: The Blue Yeti has four different pickup patterns, one of which is stereo. This allows immersive audio to be recorded without the need for two separate microphones.
- Easy to use: The Blue Yeti is a USB plug-and-play, which means you can easily connect it to your computer, or even a smartphone, without needing any additional equipment.
- Durable: The Blue Yeti is built to last, with a metal body and solid build quality. It can withstand the rigors of recording.
- Very sensitive: The Blue Yeti is a condenser microphone and therefore very sensitive. This lets AMSR artists record crisp and clear and detailed audio, making it ideal for ASMR recordings where sound quality is important.
- Wide frequency response: The Blue Yeti is sensitive across the full range of human hearing, with a frequency response of 20Hz–20kHz. Allowing it to produce crisp recordings of sounds with a high-frequency component.
- Size: Because of its large size, ASMR artists can stroke and tap the Blue Yeti’s grille, treating it like an instrument or sound source.
Some of the cons of using a Blue Yeti microphone for ASMR recordings include:
Cons:
- Price: If you have little experience in sound recording the Blue Yeti can appear expensive since you can buy USB microphones for half the price. But considering the quality and included features, it is actually reasonably priced.
- Size: The Blue Yeti is a large microphone, which may not always be ideal for certain recordings.
- Noise: The Blue Yeti is a very sensitive microphone and can pick up unwanted background noise if you are not recording in a quiet environment. This can include the sound of your computer fans, keyboard clicks, and sounds from other rooms or outside, which can be distracting in ASMR recordings.
- Size: The Blue Yeti is a large microphone, which may be a drawback if you have limited space or need to record on the go.
- Learning curve: You need to know how to use this microphone, which explains why some people think the Yeti sounds bad. This is chiefly because the Blue Yeti is a side-address microphone and is being used in the wrong environment.
Overall, the Blue Yeti is a great option for ASMR recordings due to its good-quality audio, versatility, ability to record in stereo, and that it does not need additional equipment. Note that its high sensitivity is a two-edged sword. Although quiet sounds can be recorded clearly, you will need a quiet working location. If your room is noisy, you will need to consider using some noise reduction techniques.
- Yeti USB Microphone – Record and stream with unparalleled sound quality direct to your computer…
- Compass Broadcast Boom Arm – Premium internal spring design with built-in cable management for…
- Radius III Custom Shockmount – Vintage-style suspension mount designed to isolate Yeti from noise,…
- Legendary Blue Broadcast Sound – Makes the professional difference for recording, streaming and…
Last update on 2025-10-20 / Affiliate links / Images from Amazon Product Advertising API
The best Blue Yeti ASMR settings and setup
If you’re ready to set up your Blue Yeti for some ASMR magic? Here is a 10-point checklist of how to ensure you can capture tingle-worthy audio:
- Make sure your recording space is as quiet as possible, with minimal background noise. If necessary, record at a different time when noise is less of a problem.
- Turn off fans, aircon, and wall clocks. The sounds may not register with your ears during the recording, but you’ll notice the noise when you start editing your ASMR video.
- If you notice room echo in your recordings, close your window drapes, and hang blankets over hard, flat reflective surfaces. They will absorb and deaden the echoey room noise.
- Use a shock mount and mic stand to prevent picking up handling noise and vibrations from reaching the Blue Yeti. This includes table noise from knocks, bumps, and other vibrations that can ruin your recordings.
- Invest in a good pop filter to avoid pops caused by plosives appearing on recordings. Check my article on the best Blue Yeti pop filters for guidance.
- Consider using a quality foam windscreen. Although only the more expensive ones will help reduce wind noise, even the inexpensive ones will help protect the microphone from potential damage caused by saliva and dust.
- Use the Blue Yeti’s stereo polar pickup pattern for a more immersive listening experience. Turn the mode dial on the rear of the microphone fully counterclockwise, so the white marker points at the two overlapping circles.
- Position the microphone close to what you intend to record. The closer the mic, the more intimate the sounds will appear. Reducing the proximity of the microphone will also help you control background noise.
- Initially set the Yeti’s Gain dial to between 20 and 50% and set the input volume in your computer’s sound settings to about 30%. This will help minimize the noise floor of the preamps. By turning up the mic’s Gain you’re also making any self-noise more apparent.
- Get a pair of good headphones and plug them into the Blue Yeti’s headphone socket. They will let you carefully monitor the sounds you are recording and immediately realize if something is amiss.
Now that you’ve seen my 10-point checklist, let’s dive a little deeper into some of them before moving on to your actual recording.
Choosing the right recording environment
When trying to create high-quality ASMR audio, it is important to record in a room that is as free of background noise as possible. This is because background noise has the potential to distract the listener’s attention from the ASMR triggers, thereby ruining the overall listening experience.
First, close windows and doors to help keep outside noises out.
If you only have access to one room, try to find a time of day or night when it is quieter than usual.
Room echo can also be an issue, and it’s probably due to hard flat reflective surfaces in your room. This allows sound to bounce back and fore, causing reverberation. Try to make those surfaces softer and sound absorbent by covering them with blankets and closing the drapes over windows. You can also try breaking up the room space by including more furniture. For more details on solving the problem see my article How to reduce echoes in a room cheaply.
Fans and aircon can also be a source of noise, if possible, turn them off. Although these constant sounds can be “fixed in post”, it’s better not to record them in the first place.
Watch out for wall clocks. This also includes the battery-operated quartz variety as well as those mechanical chiming clocks. We grow used to their relentless tick-tick-ticking in daily life, and our brains filter out the sound. However, our recording devices are dumb, and they do notice the tick-tock, and so will you as soon as you start playing back the recording on your computer. Either stop these room clocks or take them out of the room.
By creating a quiet, controlled environment for your recordings, you can ensure that your ASMR audio is as clear and immersive as possible. This is especially important if you are using a very sensitive microphone like the Blue Yeti that can pick up sound from across the room.
Protect your Blue Yeti ASMR microphone from you
To ensure the best quality ASMR recordings with your Blue Yeti mic, it’s important to take steps to protect it from both external and internal factors.
One way to do this is by using a pop filter, which helps to prevent popping sounds caused by plosives. In my tests I’ve found that the fabric mesh and metal screen pop filters work the best. Another option is a foam windscreen, which can protect the mic from saliva and dust.
Additionally, using a mic stand and shock mount can help to eliminate unwanted table noise by preventing the mic from picking up vibrations caused by bumping or touching your desk. Unfortunately, when it comes to shock mounts and mic stands, you do get what you pay for. Don’t try to cut corners here, otherwise, you’ll end up buying twice to replace the budget option with a better-quality product.
With these microphone accessories in your arsenal, you’ll be able to create crystal-clear ASMR audio that will send tingles down your listeners’ spines!”
Choosing the correct recording pattern for ASMR on your Blue Yeti
There are four polar patterns to choose from on the Blue Yeti: stereo, omnidirectional, bi-directional, and cardioid. Although omnidirectional might sometimes be an option if you want to capture the whole room, the stereo pattern will likely be your best choice.
Your stereo recordings will capture audio from left to right, creating an immersive listening experience.
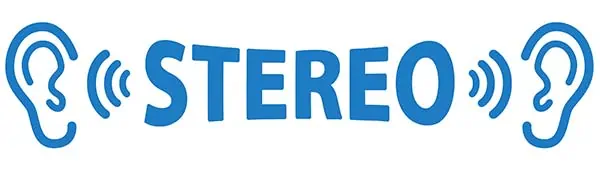
This is especially true if your listeners wear headphones. Stereo recordings add an extra dimension to your trigger sounds, allowing them to seemingly flit and play around the listener.
Controlling mic self-noise and background noise on the Blue Yeti
You can change how intimate your audio sounds by changing the distance of the sound source from the microphone. The closer the mic, the more intimate the sound will appear. With ASMR you will normally place the Yeti close to the sound source. In some cases, you might even be “playing” with the Yeti’s grille to create the sounds.
However, getting the microphone close to the sound source has another purpose. Because the source, which could be you, is closer to the mic, it will appear louder, allowing you to reduce the microphone’s gain while maintaining the apparent volume. But there is a beneficial side effect of reducing the gain. Because the background noise source has not got any closer to the microphone, and therefore it’s not louder, turning down the gain means the noise will seem quieter in comparison to what you are trying to record.
There’s also one more consequence of reducing the gain. It helps to minimize the noise floor or internal self-noise of the microphone. Every microphone’s preamp circuitry produces some noise, and it can become noticeable as you increase the gain. Fortunately, the noise floor on the Blue Yeti is not bad, but since what you are trying to record may be quiet, if you max the microphone gain, you may start to hear the mic’s self-noise.
As far as the gain setting is concerned, start low and gradually increase it. I aim to set the gain on the Blue Yeti to between 20 and 50%. However, when I have my mouth very close to the Yeti, or I’m touching the grille, the gain can be lower. You can also control the mic’s input level in your computer’s sound settings. I usually leave that at about 30%.
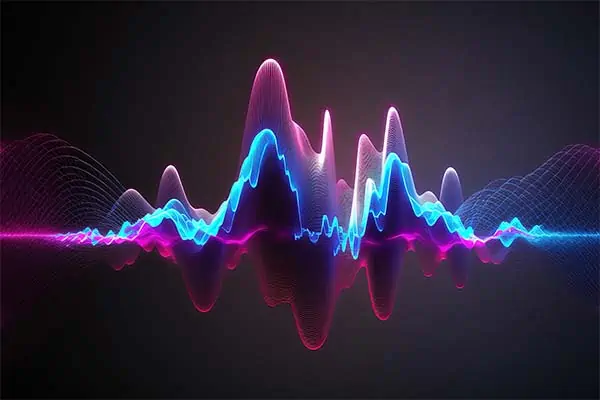
Enhancing your ASMR recordings with audio processing
You’re not done once you have recorded the audio, you’ve got post-processing as your next task. You will use the tools available to you in your DAW (digital audio workstation) to enhance your ASMR recordings and take them to the next level.
If you have Adobe Audition you have plenty of options open to you, although this DAW comes at the cost of a monthly subscription. But if you want your software to be free, download Audacity. It’s a cross-platform DAW that’s extremely capable.
To add depth and punch to your audio apply some compression. If you use Adobe Audition, try the multiband compressor, it’s frequently my go-to compressor in post-production. But be careful not to overdo it since it will also make any background noise more noticeable.
For a hint of psychedelia in some recordings why not experiment with a flanging or chorus effect?
Playing with the EQ can also enhance the recording. I always apply a low-cut filter, removing everything from below about 80Hz. This is ideal if your home is beside a busy street and the microphone picks up low-frequency rumble transmitted through the ground.
I also like to add a little sparkle at the high end between 6 and 16kHz, but the settings to use will depend on your voice. If you have a problem with harsh high frequencies on “S” sounds, especially ladies, try applying a parametric EQ filter. Alternatively, use a de-esser or the Sibilance plug-in from Waves Audio.
Finally, if you forgot to turn off a fan or other constant sound, you can rescue your audio in post. Both Adobe Audition and Audacity have noise removal filters. But for much more effective noise reduction I would recommend noise removal VST plug-ins like Clarity-VX from Waves Audio. Go to their website and type Clarity VX in their search bar to find see plug-in page. It regularly goes on sale for $29.99, but you can try the demo for free. If you decide to purchase Clarity VX, use this link![]() to get 10% off at Waves!
to get 10% off at Waves!
Although I said “Finally” in the previous paragraph, what I’ve suggested so far is just the beginning. Once you find your way around the DAW of your choice, you’ll probably find and learn additional techniques to make your audio pop.
Monitor your recording on headphones
I started my media career in radio and it’s there that I learned that it is important to monitor my audio, whether it’s me who is speaking, another person, or a location sound. Forty years later I still wear headphones when creating audio content, because like the microphone and recording software (40 years ago it was a PR99 reel-to-reel tape machine), they are a tool that helps me record the audio I need.
The headphone will let you judge the sound quality, the audio level, whether the mic is picking up other sounds, and, importantly, whether the mic is live and not muted. I appreciate that sometimes, especially if you will be seen in the video, you won’t want to wear headphones, but even then use them at the start to check everything is OK. Once you are satisfied that your audio sounds good, go ahead and take them off for the actual take. Once you’re done, use the headphones again to check the recording went according to plan. I can tell you from experience that when I haven’t bothered to check at the start and after a take, that’s when I have sometimes faced problems when starting to edit.
If I’ve convinced you to get headphones, get somewhere the ear cup encloses your ears. This will help you focus on the audio by minimizing other sounds.
How to use the Blue Yeti microphone for ASMR recordings
I’ve explained how to set up your microphone and how to enhance your recordings, but the audio creations rely on your imagination and the artist in you. Don’t worry, the genre is so broad that even if you don’t have a sonorous voice like James Earl Jones there are plenty of other possibilities.
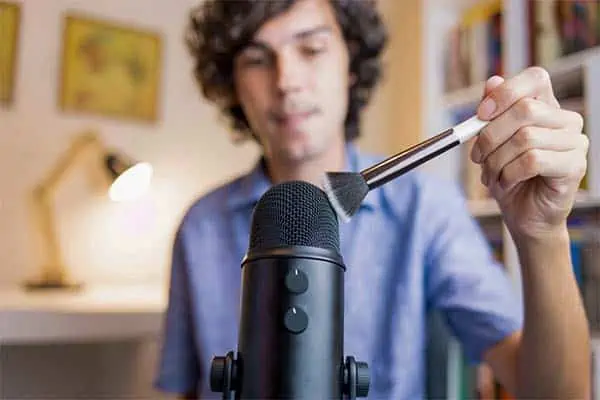
- Stroke the grille of the Blue Yeti with a brush.
- Scratch the grille with your nails.
- Install a foam windshield and draw your fingers over it.
- Whisper things while close to the grille.
- Tap on a hard surface.
- Eat some food.
- Make lip-smacking sounds.
- Crinkle plastic/foil packaging.
Just put your little gray cells to work and don’t be afraid to experiment. That’s because not all ASMR triggers are universal. We’re all individuals, so what works for me might have a negligible effect on you. Always keep things slow and calm. With repetitive or rhythmic sounds working well.
So, think about what can get you into a relaxed and chilled state, and express that through the creative use of sound.
Is ASMR a real thing?
By recommending the Blue Yeti as a suitable microphone for ASMR audio creation and providing a guide on how to record ASMR I’m effectively endorsing the phenomenon. So, I felt it best to address the issue of whether ASMR really is a genuine thing or is it some kind of a self-delusional fad promoted on social media. As it turns out, there have been several academic papers published on ASMR (Autonomous Sensory Meridian Response) in recent years. Here are a few examples:
- “Autonomous sensory meridian response (ASMR): a flow-like mental state
 ” by Emma L. Barratt and Nick J. Davis (2015). This paper describes the experience of ASMR, lists common triggers, and reports temporary improvements in symptoms of depression and chronic pain in those who engage in ASMR.
 - “More than a feeling: Autonomous sensory meridian response (ASMR) is characterized by reliable changes in affect and physiology” by Giulia Lara Poerio, Emma Blakey, Thomas J. Hostler, Theresa Veltri, and Jane Elizabeth Aspell (2018). This paper presented two studies that indicated ASMR may have therapeutic benefits for mental and physical health.
- “Beyond tingles: An exploratory qualitative study of the Autonomous Sensory Meridian Response (ASMR)” by Enya Autumn Trenholm-Jensen, Lindsey Burns, Jill Ellen Trenholm, Christopher James Hand (2022). This paper indicated that the existing data points to potential wider applications and informs further research.
Overall, the research suggests that ASMR is a real and potentially beneficial phenomenon, although more research is needed to fully understand its effects and mechanisms. So, if you had been worried that ASMR might be the modern equivalent of “snake oil”, there seems to be no need to worry. ASMR really does seem to be a real thing, and one with genuine benefits.
Conclusion
Congratulations, you’ve made it to the end of our guide on creating ASMR audio with a Blue Yeti USB microphone! Its ease of use and plug-and-play design makes it a perfect choice for beginners, and it’s more than capable of creating high-quality ASMR recordings. With its solid reputation among podcasters and content creators, you can trust that the Blue Yeti will be a reliable partner in your ASMR journey.
I hope these tips have been helpful and have given you a good starting point for creating your own ASMR recordings. Remember, the ASMR community is incredibly welcoming and supportive, so don’t be afraid to explore and connect with other creators. As you build your following, you can consider investing in more advanced equipment and techniques, like binaural microphones. Until then, keep experimenting and having fun with your Blue Yeti – Happy tingling!
Here’s a big ask from me: If you liked this article, please share it.
It will mean a great deal to me if you share this post because a few seconds of your time will seriously help my blog grow. The share buttons are below the “About Author” section.
Thanks. 🙂

About the author: Tosh Lubek is a multi-award-winning broadcaster, writer, and video producer, with 40 years of experience in professional broadcasting and has been using Canon video and stills cameras since 2010. He has worked with radio and TV broadcasters, advertising agencies, and direct clients on a variety of projects including radio and television advertising, online video production, corporate videos, award ceremony motion graphics, and theme park sound design. Tosh has won numerous awards, including a Radio Academy Awards Gold Sony, a Gold, Silver, and Bronze World Medals in the New York Festivals International Advertising Awards. Since about 2007 he has been creating YouTube videos. Tosh has been a sponsor of the “video booth” at HashTag Business Events across the UK.
Recent Posts
Most people use sandbags the wrong way. Here’s how to hang them properly on a light stand for maximum stability and safety — plus what to fill them with.
You're Using the Canon RF 50mm f/1.8 WRONG! Here’s How to Fix It
If you’ve recently picked up the Canon RF 50mm f/1.8 STM—affectionately known as the Nifty Fifty—you might be confused by that strange switch on the side of the lens. It doesn’t say AF/MF...