
DIY Video Studio is supported by its readers who use the affiliate links or ads on this site. As an Amazon Associate, I earn from qualifying purchases. Thank your support if you use any of the links.
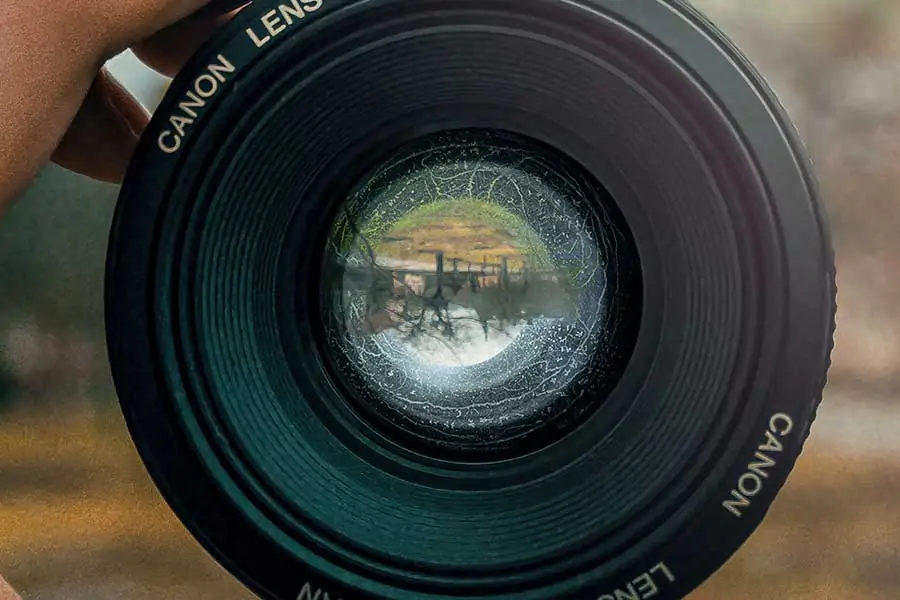
No matter where fungus grows, it needs three things to proliferate, which are moisture, darkness, and a source of food. With those three things, the fungus can spread like wildfire and if it gets inside your camera lens, it can do a lot of damage if unchecked.
While it is true that sunlight, or any form of UV exposure, will effectively kill the fungus, it will not remove it from its cozy home behind your camera lens. It is like killing a rat in the wall. Sure, it is quite dead, but it is still behind your wall and needs to be removed.
It’s unfortunate this way because the entire point is to get rid of the stuff because it degrades the capabilities of the lens. Fungi also secrete organic acids which will etch their way into the lens coatings and the glass of your lens, effectively destroying beyond repair and denying you the proper use of the lens in the future.
If the infestation is minor the performance of your lens will not be impaired significantly. So go ahead, take the lens off the camera body, remove the lens caps, and expose the fungus to sunlight for a few hours, or better still, days. Alternatively, use a UV light, which is probably your best option during the winter months.
But the best option for your lens is not to get rid of fungus inside the lens but rather not to allow it to grow in there, to begin with.
How To Prevent Fungus
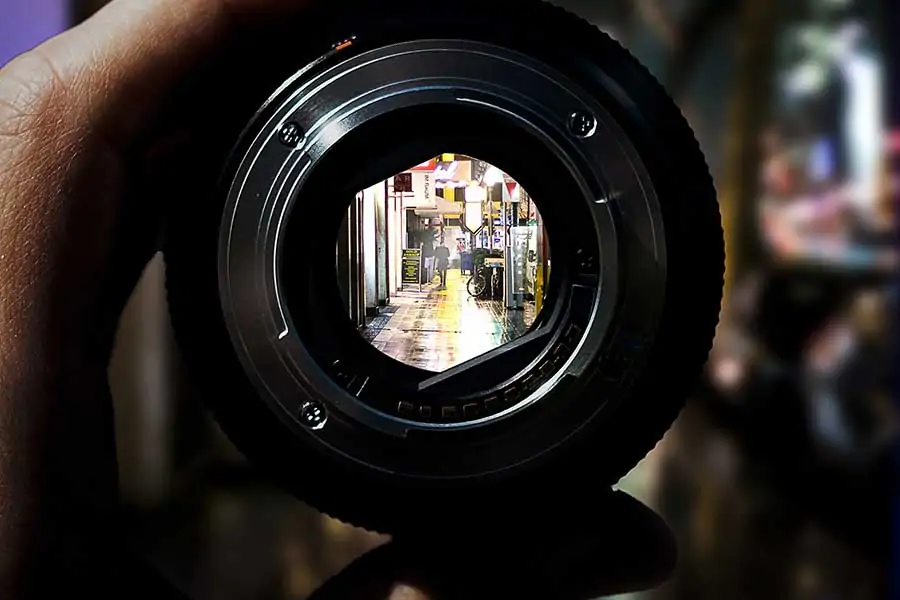
Once fungus takes hold inside your camera lens![]() , it’s difficult to remove without entirely removing the lens from its housing and cleaning it by hand. Of course, that’s a bit dangerous unless you know exactly what you’re doing, and it should be done professionally.
, it’s difficult to remove without entirely removing the lens from its housing and cleaning it by hand. Of course, that’s a bit dangerous unless you know exactly what you’re doing, and it should be done professionally.
As aforementioned, fungus requires moisture, a food source, and darkness in order to grow and spread. Denied of any one of these sources is enough to keep it at bay. So, if you’re looking to avoid an invasion of fungus, you need to deprive it of what it needs.
Dealing With Moisture
Moisture, along with a source of organic food, is the main driving force for fungus growth and the most common element that your camera lens will come in contact with. In other words, even if your camera and lens are weather-sealed, try to avoid getting them wet.
If poor weather conditions are unavoidable, try to keep your lens and camera as dry as possible by wiping them down with a cloth or tissues while filming or taking photographs on a misty day with heavy humidity. On rainy days, don’t take photos out in the open or use a waterproof cover to keep the rain off your photography gear.
If your camera and lens are exposed to the rain, be sure to thoroughly wipe it down and make sure that you don’t miss a thing. There are also a few things you can do after taking pictures or filming in inclement weather before you stash your camera away.
- Remove the lens cap
- Zoom in and out
- Wipe it down with a dry microfiber cloth that’s safe for a lens
- Store in a dry environment that’s between 30% and 60% humidity
- Purchase a good storage solution
- Put a packet of silica gel desiccant in with your lens
Removing the lens cap is a great way to let the moisture to evaporate and get out from around the lens after you’ve spent time out there taking pictures. Once you’re home, removing the lens releases the humid air that was trapped next to the front lens element when you capped the lens.
Wipe down the lens cap and the lens well after removing it and set aside the lens cap for a bit. Power the camera up and start zooming in and out. Zooming makes the parts in your lens mechanical parts move, releasing and exchanging any humid air that has been trapped within the lens with the drier air outside.
Make sure you thoroughly dry your camera and lens. This may include leaving them in a warm room for a little while. Before you store the kit, you don’t want to place it in an enclosed environment with moisture still on the camera. Once it’s dry, the lens cap is dry, and you’ve zoomed in and out a few times, it’s safe to store.
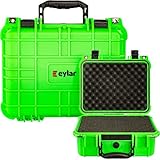
When you do store it, ZEISS recommends that the humidity![]() is no less than 30% and no higher than 60%. To ensure that is the case, it’s wise to have a solid storage option in which to keep your camera and lens, whether it’s for the short or long term. These could include (links to Amazon):
is no less than 30% and no higher than 60%. To ensure that is the case, it’s wise to have a solid storage option in which to keep your camera and lens, whether it’s for the short or long term. These could include (links to Amazon):
- Samurai Dry Box F580 Humidity Controlled Storage
- Eirmai Digitally Controlled Dehumidifying Dry Cabinet with Key Lock for...
- Eylar Protective Gear and Camera Hard Case Water & Shock Proof with Foam...
You wouldn’t be insulted for asking how you can keep moisture levels between 30% and 60%. Without the ability to measure humidity in your home, you can’t. That’s why Samurai, Eirmai, and Eylar devices come in so handy.
Each storage compartment gives you the ability to control the environment in which your camera is stored, and it won’t require you to sell a kidney on the black market to afford them.


Last update on 2025-10-11 / Affiliate links / Images from Amazon Product Advertising API
Should You Disassemble a Lens and Clean Dead Fungus on Your Own?
There’s a difference between being a professional photographer and being a professional lens repair person. It’s also a problem if the fungus has spread and released enough organic acid to etch the glass.
If it has gone that far, you’re wasting your time taking the lens apart and should replace the lens.
Cleaning fungus from the outside glass surfaces is only slightly more difficult than normal lens cleaning. However, any kind of lens cleaning that involves taking the lens apart should be handled by a professional. But, if you’re determined to do this on your own (which I don’t recommend), be sure to follow these steps and proceed very carefully.
List of tools require (includes links to Amazon)
- Technical documentation or details from the internet for your lens
- Microfiber lens cloth

- Spanner wrench set for a camera lens
- Rubber lens opener
- Protective vinyl or latex gloves
- Precision screwdrivers that fit the screws on your lens
- Dish Soap
- Isopropyl alcohol
There are thousands of lenses out there and no real way of defining the breakdown process of your lens without writing a non-fiction novel that wouldn’t fit on a bookshelf.
You’ll have to closely observe how your lens is assembled and routinely refer to any available service documentation or look online for details. It’s also wise to look up disassembly tips for your camera lens on YouTube.
When you’re finished disassembling your camera lens, place all the glass elements in a warm bowl of water that is mixed with a very mild amount of dish soap. Let them soak. Once the fungus is soft enough, gently remove it with a microfiber cloth.
If the fungus is a little stubborn, I have used a 3-6% hydrogen peroxide solution. Place the lens elements in the solution for 5-10 minutes. You will see bubbles of gas form on the lens surface as the hydrogen peroxide attacks the fungus. Once the hydrogen peroxide has done its job clear any residue with water and a microfiber cloth.
With the mold removed, rinse with the isopropyl alcohol. Now, you can use your dry microfiber cloth to dry each lens completely under a strong light, to see if there’s anything that you missed. If you find that the alcohol has left any smears, add a few drops of lens cleaning fluid to the cloth and wipe again.
Reassemble your lens, being incredibly careful to do everything in the exact reverse. In fact, it may be a good idea to have everything written down and the parts organized and labeled. The problem with reassembly is that it needs to be perfect. Any flaws will make your camera ineffective. As well as taking notes I frequently take photos or even set up my iPhone and video the procedure for future reference.
It is easy to get confused as to which way round a lens element should face. When you first set out to disassemble the lens, be sure to lay the back of the lens down with the forward part facing upward, so you know how to correctly reassemble it.
A further tip from my own experience is to always have your hand over the end of the lens when you turn it over. Any lens element that falls out is unlikely to land so that you can tell which way round it had been in the lens barrel. It usually spins like a coin before falling over any which way. At least with your palm in place you can catch the loose lens and be certain which way it is meant to face.
Once the lens is reassembled, go try it out to make sure that the image has been restored to full clarity. If things look blurrier than they were before you removed the fungus, then you may have inadvertently replaced a lens element the wrong way round.
Assuming the lens functions correctly, and everything looks sharp and clear, you can pat yourself on the back because you’ve done something most photographers will not try. Instead, they’ll pay $100 -$200 to a professional, which is understandable considering the cost of modern quality lenses.
With that in mind, you might want to practice on an old broken lens that you might be able to find on eBay being sold for spares. Practicing on a lens that costs $30-$50 is preferable to learning from your mistakes on a lens worth hundreds or even thousands of dollars.
It’s good to now have the knowledge of how to thoroughly clean your lens of fungus so it can be crystal clear and fit for use again. But by far the better option is not to let the fungus grow in the first place through the correct storage of the lens.
Final Word
Fungus prevention is far more important than anything else when it comes to keeping your camera lens clean and ready to go. If you’re a professional photographer or have the ambition to be one, it is wise to own quality storage for your equipment that will keep your gear in tip-top condition. After all, spending a relatively small amount of money now could mean you don’t have to spend a lot of money in the future to replace an expensive lens that contributes to the fun of your hobby or the income to your photography business.
You might also like…
Tosh Lubek runs an audio and video production business in the UK and has been using the Canon EOS R since it was released in the Autumn of 2018 and the Canon EOS R6 in 2020. He has used both cameras to shoot TV commercials broadcast on Sky TV, promotional business videos, videos of events and functions, and YouTube creator content. He has also won several international awards for his advertising and promotional work. You can meet him by visiting his “video booth” at HashTag Business Events across the country.
Recent Posts
Most people use sandbags the wrong way. Here’s how to hang them properly on a light stand for maximum stability and safety — plus what to fill them with.
You're Using the Canon RF 50mm f/1.8 WRONG! Here’s How to Fix It
If you’ve recently picked up the Canon RF 50mm f/1.8 STM—affectionately known as the Nifty Fifty—you might be confused by that strange switch on the side of the lens. It doesn’t say AF/MF...