
Author: Tosh Lubek Published: 6th September 2023
DIY Video Studio is supported by its readers who use the affiliate links or ads on this site. As an Amazon Associate, I earn from qualifying purchases. Thank your support if you use any of the links.
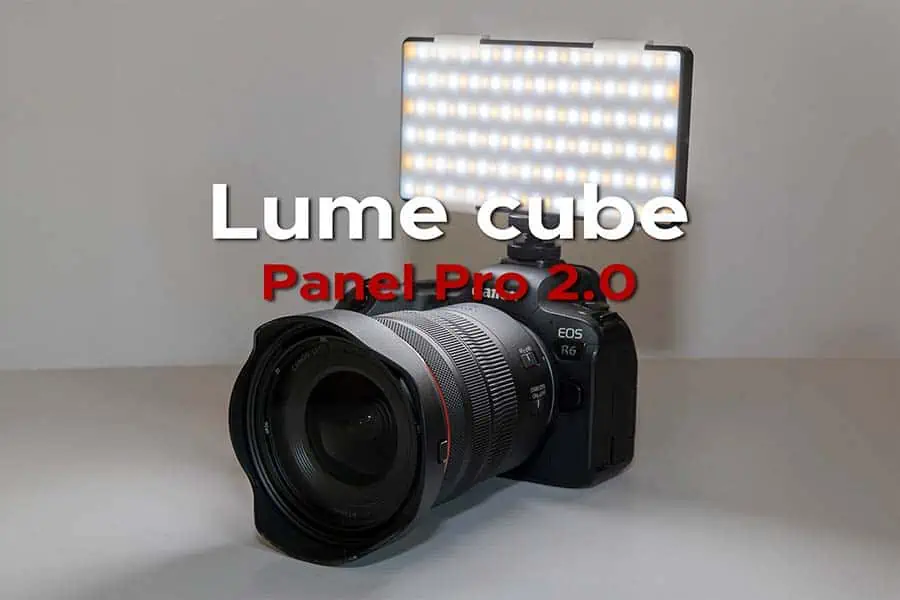
Photography and videography have seen many huge developments in the last few years. If you are a creator who wants to stay ahead of the curve, you need to be alert to the release of new products and creator tools. So let me introduce the new Lume Cube Panel Pro 2.0.
The original Lume Cube Panel Pro was launched in 2020, quickly becoming popular with many creators, but it has now evolved into the Lume Cube Panel Pro 2.0.
Based on user feedback and advances in LED technology, Lume Cube has given the Panel Pro 2.0 significant upgrades in brightness, battery life, and the range of available color temperatures.
In addition, Lume Cube has added some other exciting features that aren’t just fancy talking points but truly useful add-ons. These include adding power bank functionality to the more powerful internal battery. As well as seamless integration of Bluetooth wireless control via the Lume Control App on your smartphone.
Let’s dive into what makes the Lume Cube Panel Pro 2.0 such a must-have tool in your creator arsenal.

- MILLIONS OF COLOR OPTIONS: Unleash your creativity with unlimited RGB color options, crafting the…
- ADJUSTABLE BRIGHTNESS & TEMPERATURE: Fine-tune your lighting with a color temperature range from…
- INCLUDES DSLR MOUNT & SNAP-ON DIFFUSER: Complete your setup with the included cold shoe mount and…
- WIRELESS CONTROL VIA BLUETOOTH: Harness the ultimate power of the Panel Pro with wireless control…
Last update on 2025-10-20 / Affiliate links / Images from Amazon Product Advertising API
Get the Panel Pro 2.0 direct from Lume Cube by clicking here![]() .
.
YouTube Video Review
I’ve written a video review of the Lume Cube Panel Pro 2.0 to go along with this written review. Feel free to watch or read, but if you’re interested in getting any of the great products I mention, you’ll find them in this article.
What’s Included in the box
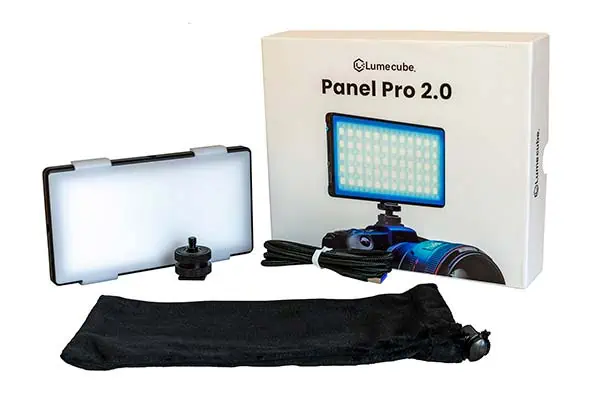
Your Lume Cube Panel Pro 2.0 comes in a sturdy cardboard box, here’s what’s inside.
- Lume Cube RGB Panel Pro 2.0
- White Diffuser Lens
- Cold shoe Camera Mount
- Braided USB-C to USB-A Cable
- Cloth Travel Pouch
- Card with QR codes to the product guide and mobile app
What has changed at a glance
Compared to the original Panl Pro, Lume Cube has introduced quite a few improvements. Here’s what you can expect from this upgraded panel light.
- 11% brighter in bi-color mode
- 20% longer battery life
- 400% brighter in RGB mode
- Double the color temperature range, now 2700K – 7500K instead of 3200K – 5600K
- Green/magenta tint control
- Improved exterior durability
- More accurate color rendering with LED CRI of 96
- Power bank functionality
- Wireless app control with new features
Overview of the Lume Cube RGB Panel Pro 2.0
Measuring 6 x 3.1 x 0.43 inches, the Lume Cube RGB Panel Pro 2.0 is sleek and effortlessly fits into your gear bag or pocket. When you hold the light, its aluminum body and ergonomic design make it feel like you’re handling a quality product. The metal body helps to make it durable and drop-proof, although I’ve no intention of intentionally dropping my new Panel Pro.
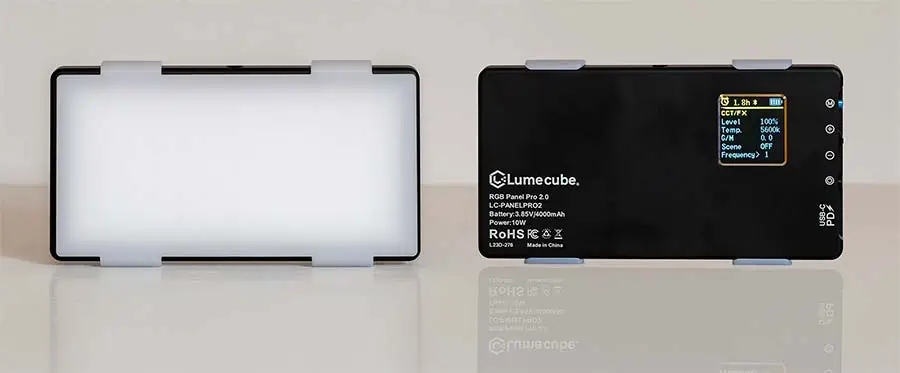
The front of the light is where you’ll see the 204 LEDs that are both powerful and have a CRI rating of 96. In other words, this light is bright and renders colors accurately. The LEDs are behind a frosted lens but the light includes a detachable white diffuser to make the light a little softer.
To turn on the light, slide the power switch up, and after a brief delay, the light will turn on. The current settings will be displayed on the rear LCD screen. These can be changed using the control buttons.
Press the blue mode button to toggle through the settings. The current selection is either highlighted yellow or indicated by a little blue arrow. Use the adjustment dial, which is below the blue button, to adjust the value of the selected mode. If you’ve chosen the yellow area of the menu, the adjustment dial lets you toggle between the CCT/FX and HSL/SET light modes.
The CCT/FX mode is the bi-color mode where you can control the Brightness, Color Temperature, Green/Magenta tint, and access the pre-programmed effects (under the scene menu item).
The HSL/SET menu is where you can adjust the light’s Brightness, Color, Saturation, and toggle Bluetooth on and off.
To make changes to any of the values in the CCT/FX or HSL/SET, you can use the blue button and adjustment dial on the side of the light. Although this is easy to do, I prefer to make changes using the Lume Control App on my phone.
One adjustment you can only do from the Lume Control App is matching the color of the light to an object in your scene. I explain how to do it later in this article.
Using the Preprogrammed Effects
To access the preprogrammed effects, you will need to be in CCT/FX mode and then use the Scene and Frequency menus.
SCENE
The available effects in the SCENE menu include:
- STROBE (strobe light with a frequency of 1-10Hz)
- LIGHTNING (simulated lightning flashes)
- FIRE (varying warm reddish illumination from an open fire)
- CANDLE (varying warm orange illumination from a candle flame)
- SIREN (emergency services red and blue flashing lights)
- TV (varying light simulating illumination from a TV)
There’s also a LOOP option that loops through the colors for a cool atmospheric effect.
FREQUENCY
This menu is where you control the speed of the preprogrammed effect. It can be adjusted between 1Hz to 10Hz. In other words, it’s the rate at which the effect changes. As an example, if you select the STROBE effect, the light will flash once a second if the frequency is 1 and at ten times a second if the frequency is 10.
Mounting the light on your camera
The Panel Pro 2.0 includes a cold shoe camera mount so it can be mounted on a DSLR/Mirrorless camera. Screw the end of the mount into one of the three ¼”-20 threaded mounting points around the edge of the light and tighten it in place using the mount’s upper thumb wheel. Then slide the foot of the mount into the camera’s hot shoe and use the lower thumb wheel to secure it, and the light, onto the camera.
You can also use the ¼”-20 threaded mounting holes to attach the light to a camera rig, standard tripod, or light stand with a ¼”-20 screw. Unfortunately, the cold shoe mount does not allow you to stand the light on a flat surface, such as a desk or tabletop, nor can you tilt the light at an angle. But you can stand the light on its edge, although I found it easy to knock the light over.
To create a more reliable tabletop stand for the Panel Pro 2.0 I attached the cold shoe mount to a speedlight/flash stand. If you don’t have a speedlight stand amongst your gear, here’s one I found on Amazon that will do the job well.

- Universal Camera Hot Shoe Flash Stand for dslr camera, Compatible with Canon Nikon Sigma Olympus…
- With 1/4″ Metal Tripod Thread on the bottom for mounting on a tripod or light stand.(Tripod/Light…
- A locking hole on the hot shoe flash stand perfectly matches the locking pin to allow the Speedlight…
- Dimensions: 95 x 63 x 12mm (3.7″ x 2.5″ x 0.5″)
Last update on 2025-10-20 / Affiliate links / Images from Amazon Product Advertising API
But if you need to tilt the light, my DIY solution would be to use a phone clip, like the Ulanzi ST-06S smartphone tripod adapter, and slip the cold shoe plate into the speedlight flash stand. You can then secure the light in the phone clip and tilt thew light at any angle you require.
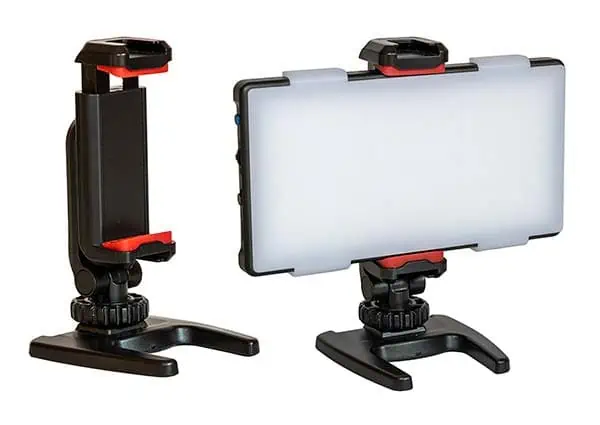
If you want the Ulanzi ST-06S phone tripod mount, it’s also available on Amazon.

- 2 Standard Cold Shoe and 1/4″ Screw Design: The mobile phone tripod mount upgraded, has a standard…
- Any Angle, Instead of a Ball Head: The traditional smartphone tripod mount cannot adjust the Z-axis…
- Update and Safer Design: Ulanzi phone mount upgrade traditional installation method, push and lock…
- 360° Rotating Tripod Phone Holder: You can rotate your phone from portrait mode (vertical) to…
Last update on 2025-10-20 / Affiliate links / Images from Amazon Product Advertising API
How can you use the Lume Cube RGB Panel Pro 2.0
Since this panel light is designed to be attached to the hot shoe on your camera, you’d imagine that its main purpose is as a key light. But you don’t have to use the light just in this way. Here are a few uses that I was able to think of off the top of my head.
- Key light
- Fill light
- Rim or hair light
- Top light
- Background light
- Backlight for translucent subjects, such as flowers and leaves
- Accent light in product photography
- Macro photography light
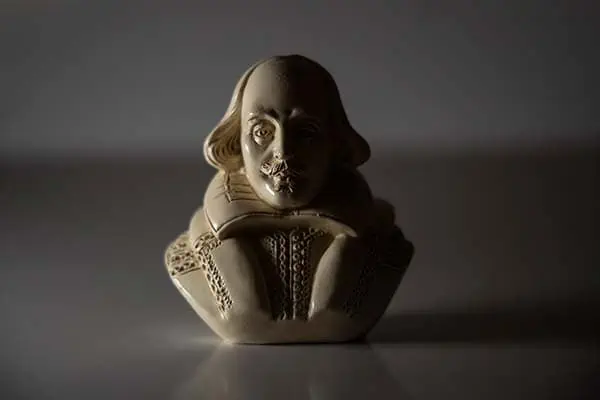
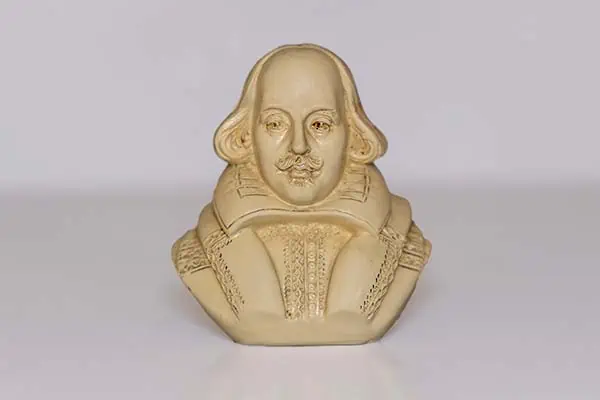
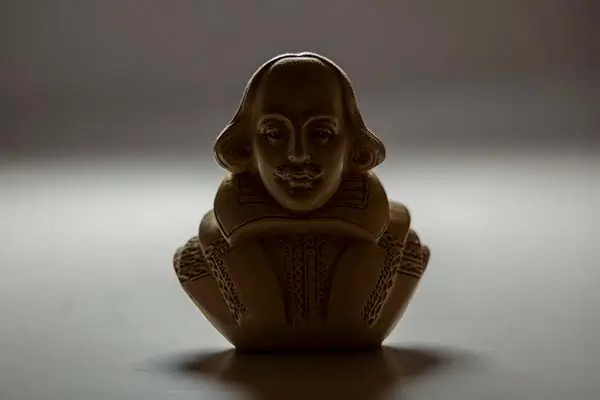
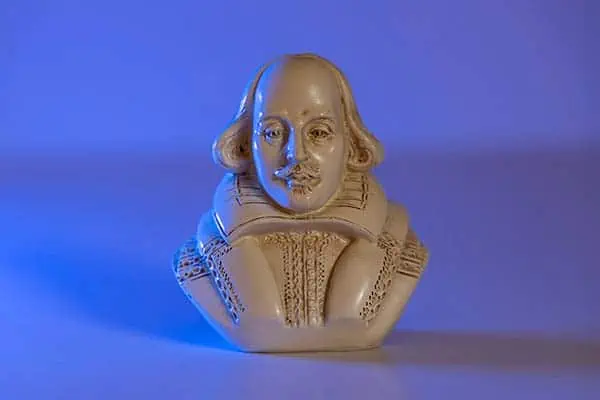
I’m sure you can find other uses for this panel light. Here are a few sample images of a bust of William Shakespeare that I shot using the Panel Pro 2.0. However, I could just as easily use the light with a human subject instead of the ceramic bust.


Diffusion Lens included with the Panel Pro 2.0
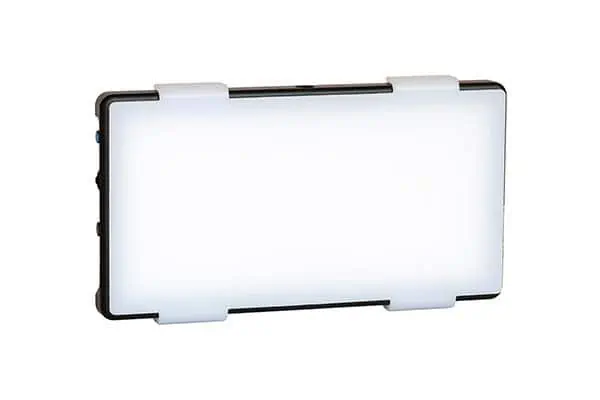
Although the panel light already includes a frosted lens over the LEDs, further diffusion is possible by attaching the white plastic diffusion lens that’s included in the box.
Your Panel Pro 2.0 will probably come with the diffusion lens already attached, but if not, simply slide the diffuser onto the panel light. The four side clips will keep it in place and the diffusion lens will help soften things up a bit.
Battery life and charging
The battery upgrade on the Panel Pro 2.0 means the battery life has been extended by 20%. But what does that mean in the real world?
At 50% power, the battery will power the light for up to 4 hours, and up to 2 hours at 100%. You can also use the light for as long as you need by plugging it into a USB power source, like an AC adapter or power bank.
In the top right of the LCD screen, you’ll see a little battery icon, this is the battery indicator. But to the left, you’ll see the estimated remaining battery life, or the time you have available until the light turns off. If you change the power setting the battery life estimate intelligently adapts and will display a revised figure. The remaining battery life is also displayed in the Lume Control App, so you don’t need to check the screen on the rear of the light.
To charge the RGB Panel Pro 2.0 battery, simply plug the included USB-C to USB-A power cable into a power source and plug the USB-C end of the cable into the USB-C port on the light.
Once charging begins, the bars on the battery indicator will animate. When the battery is fully charged, the appearance of the battery icon will change to the number 100 displayed inside the outline of a battery.
In my tests using the USB-C PD output from an Anker PowerPort PD 2 charger, it took 1hr 48m to fully charge the internal battery on the Lume Cube Panel Pro 2.0.
Improved Battery and added Power Bank functionality
The Panel Pro 2.0 isn’t just a lighting marvel; it’s also a power bank. It delivers a 3.85V output, has a capacity of 4000mAh and a power rating of 10W. That means it has power to spare.
Below all the controls you’ll find a USB-C port. This is used for both charging and as a power bank output. The white text printed beside it says USB-C PD, so I’m guessing it’s Power Delivery. To check whether this is the case, I connected my Canon EOS R, which requires Power Delivery for the camera battery to charge internally. Sure enough, the Canon LP-E6NH battery started charging.
This upgrade to the Panel Pro solves a problem many smartphone video creators have had to deal with in the past. If you’re using your smartphone to record your video, you don’t have to worry about your phone running out of juice. The Lume Cube Panel Pro 2.0 can charge your phone on the fly.
Setting Up Wireless Control from the Lume Control App
The Panel Pro 2.0 includes Bluetooth, allowing you to wirelessly control the light from your smartphone. You need to turn on Bluetooth both on the light and your smartphone and download the Lume Control app. A card with QR codes for iOS and Android versions of the app is included in the box.
Scan the correct one to download the version for your phone, then turn on Bluetooth on your phone.
Next, check whether the light has Bluetooth turned on.
Look at the top line of the LCD screen. Bluetooth is turned on if a Bluetooth icon is visible between the battery life estimate and the battery indicator. If the Bluetooth icon is not showing, you’ll need to turn Bluetooth on. To do that, use the blue mode button to select the item in yellow. If it is CCT/FX, go ahead and use the adjustment dial to change from CCT/FX to HSL/SET. You can now use the blue button again to select BT and change OFF to ON with the adjustment dial.
Make sure you leave the Panel Pro 2.0 is turned on, then open the Lume Control app on your smartphone. You will see three buttons, tap the Bluetooth pairing button, and look for your device in the Available Devices list. To the right of the device name, you will see a light icon, tap it and after a slight delay the light and your phone will connect.
Using the Lume Control App
Once your light and smartphone are connected, open the Lume Control app and tap on the Device List button. You’ll see that the Panel Pro 2.0 has been added to the list. The radio button to the right of the device name lets you turn the light on and off from the app (provided the power switch is in the ON position on the Panel Pro 2.0).
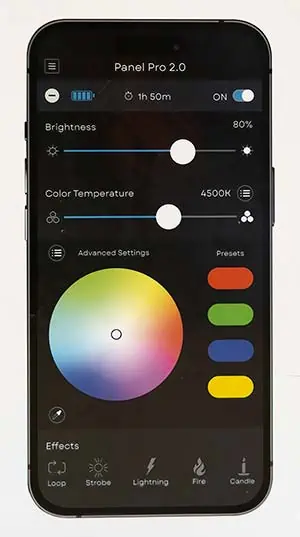
Tap the plus sign, or the name of the light, to open the control screen. This is where you can adjust the Brightness, Color Temperature, access the preset effects, and open the Advanced Settings.
You will see a menu icon to the right of the Color Temperature slider. Enter this menu for additional controls, including Color Temperature, Brightness, and Green/Magenta tint.
To enter the Advance Settings, tap the menu icon to the left of Advanced Settings to gain access to controls for the RGB Hue, Saturation, and Brightness.
How to match the colors in the scene
With this RGB light, you’ve got the entire rainbow of colors available to you. Well, technically speaking, you’ve got over 16 million colors. That raises the interesting prospect of matching the color of the light to the scene you are filming.
Lume Cube has made this easy to do. You don’t have to eyeball the color because they’ve included a user-friendly color picker so you can match the color exactly as it appears to your smartphone’s camera.
Here’s how to match the light color to the scene color. Open the Lume Control App, choose the Panel Pro from the device list, then tap on the color picker to the bottom left of the color wheel.
The view from your phone’s camera will appear with a small target in the center. Point this at the object in the scene you want to match and tap Pick Color. Immediately the camera screen will be filled with the sampled color and the color of the output from the Panel Pro 2.0 light will match it.
After changing the color you’ll have the option to add this color to one of the user-defined color presets by tapping the SAVE button. This will open the Advanced Setting screen. Press and hold the plus sign of one of the preset boxes to save the color as a color preset.
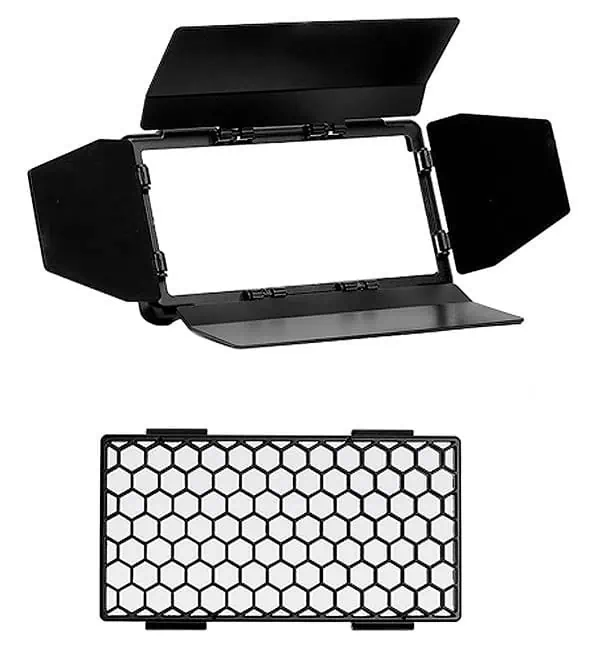
RGB Panel Pro Accessory Pack
When you’re creating a lighting set up with the Panel Pro 2.0 there are times when you need a different type of control. You can already adjust the brightness, color temperature, etc., but Lume Cube has also made it possible to be more precise with where the light falls in your scene.
The RGB panel Pro Accessory Pack enables precise, controlled lighting with your light and includes Barn Doors and a Honeycomb Grid. They simply clip onto the front of the Panel Pro 2.0 in the same way you attach the included Diffusion Lens. The Barn Doors are panels on each side of the light that can be folded in or out to control the direction and spread of the light. The Honeycomb Grid is like the grids you more commonly get on soft box lights. Think of a black honeycomb material that protrudes from the front of the light. Each honeycomb cell prevents any sideways spill of the light, making the light a more focused and directional light beam.
Final Thoughts
Having used the Lume Cube Panel Pro 2.0 for a few weeks now, I think it’s the perfect lighting accessory and deserves the attention of every content creator. Its compact size, superb brightness, durability, and enhanced features have made it an invaluable addition to my camera bag.
The wireless control from my smartphone using the Lume Control App lets me craft the lighting I want and lets me check the remaining battery power. That’s an important consideration for me since I’m usually the presenter, camera operator, and sound guy all rolled into one.
Finally, the ability to use the light as a PD power bank is the cherry on the cake.
You might also like…
Can you help? If you liked this article, please share it.
It will mean a great deal to me if you share this post because a few seconds of your time will seriously help my blog grow. The share buttons are below the “About Author” section.
Thanks. 🙂

About the author: Tosh Lubek is a multi-award-winning broadcaster, writer, and video producer, with 40 years of experience in professional broadcasting and has been using Canon video and stills cameras since 2010. He has worked with radio and TV broadcasters, advertising agencies, and direct clients on a variety of projects including radio and television advertising, online video production, corporate videos, award ceremony motion graphics, and theme park sound design. Tosh has won numerous awards, including a Radio Academy Awards Gold Sony, a Gold, Silver, and Bronze World Medals in the New York Festivals International Advertising Awards. Since about 2007 he has been creating YouTube videos. Tosh has been a sponsor of the “video booth” at HashTag Business Events across the UK.
Recent Posts
Most people use sandbags the wrong way. Here’s how to hang them properly on a light stand for maximum stability and safety — plus what to fill them with.
You're Using the Canon RF 50mm f/1.8 WRONG! Here’s How to Fix It
If you’ve recently picked up the Canon RF 50mm f/1.8 STM—affectionately known as the Nifty Fifty—you might be confused by that strange switch on the side of the lens. It doesn’t say AF/MF...