Author: Tosh Lubek Published: 22nd January 2024
DIY Video Studio is supported by its readers who use the affiliate links or ads on this site. As an Amazon Associate, I earn from qualifying purchases. Thank your support if you use any of the links.
USB to XLR cables, also known as XLR to USB cables, allow you to connect an XLR microphone to your desktop or laptop computer. They have an XLR connector at one end and a USB connector at the other, which includes some electronics, such as an analog-to-digital converter. A USB to XLR cable is effectively an audio interface in a cable.
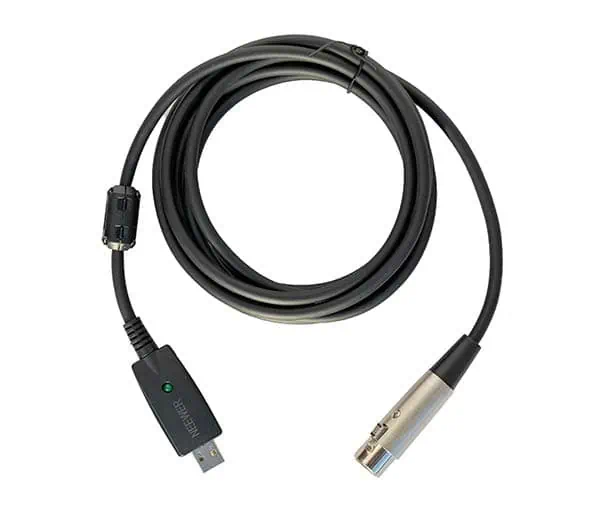
This is not a sponsored review, nor did any manufacturer provide me with a sample of this cable type. I bought and tested the NEEWER USB to XLR cable, which cost me about $20. However, I also found other examples on Amazon that looked almost identical but cost even less. Although I can’t be sure, I suspect many of them were the same product but rebranded. Here is the cable I own and used in my tests.
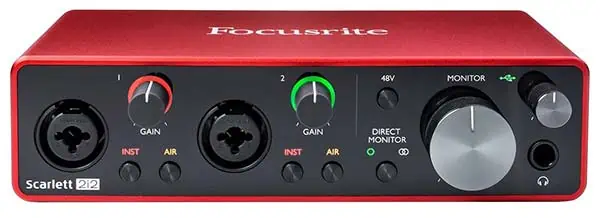
I compared the Neewer cable against a Focusrite Scarlett 2i2 3rd Gen audio interface. Again, Focusrite did not provide me with the interface, it is the one I own and use in my office studio.
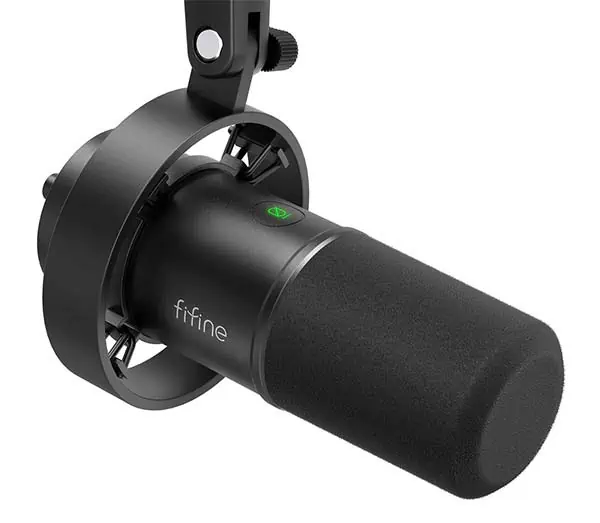
So that the comparison was fair, I used the same microphone in my test. It was a Fifine K688 dynamic mic. You can use the following links to read my review of the Fifine K688 or watch my YouTube review.
- [Clean Sound Quality] Featured with durability and adaptability, the metal-build XLR dynamic…
- [Upgrade XLR Output] XLR interface enhances the sense of audio space for immersive podcast audio….
- [Convenient USB Output] Provided with both USB and XLR connections, the USB dynamic microphone for…
- [Mute and Gain Control] Tap-to-mute on the USB mic front panel is handy to mute instead of pushing a…
Last update on 2025-07-04 / Affiliate links / Images from Amazon Product Advertising API
I’ve included audio samples from my tests in this article.
How the microphone was connected to my computer
To compare the NEEWER USB to XLR cable vs the Scarlett 2i2, I connected the Fifine microphone to a laptop in three ways. The three configurations used the following gear:
- Focusrite Scarlett 2i2 audio interface
- Neewer USB to XLR cable
- Neewer USB to XLR cable + CODA MB Stealth inline mic preamp
Scarlett 2i2: When using the Scarlett 2i2 with my laptop, I had the gain dial turned all the way up on the audio interface, and in the Windows 11 sound settings I had the input volume slider at 50%. After connecting the Fifine dynamic mic and speaking normally, my audio peaked around -6dB in Adobe Audition.
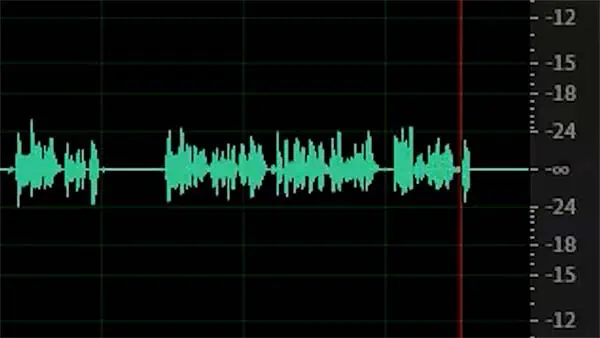
Neewer Cable: Switching to the Neewer USB to XLR cable, the computer recognized it and automatically set it up. However, the audio level in Adobe Audition was very low. Since there is no gain control on the Neewer cable, I moved to the Windows 11 sound settings mic input slider up to 100%. Even at maximum level, my voice was peaking in the region of around -24dB or lower.
Here is a screenshot of part of the recording where I zoomed in to illustrate how low the audio level was. The scale on the right-hand side of the image is in dB.
I was able to boost or normalize the audio in Adobe Audition so that the level matched the audio level when using the Scarlett 2i2. Unfortunately, this also boosted the noise produced by the built-in electronics of the USB to XLR cable.
Neewer Cable + Mic Preamp: By adding a mic preamp between the dynamic mic and Neewer USB to XLR cable I was able to a clean boost of 28dB to the mic output. To make the peak level comparable to that of just using the Scarlett 2i2 I reduced the microphone input level in my Windows sound settings to about 90%.
The mic preamp I used was the Imperative Audio FETpre. In the USA it is sold as the CODA MB Stealth.
The mic preamp requires phantom power, which is something USB to XLR cables cannot provide. Consequently, I had to include a phantom power supply between the Neewer cable and the mic preamp. The output of the FETpre/MB Stealth was plugged into the INPUT socket on the phantom power supply and the XLR connector on the Neewer USB to XLR cable was plugged into the OUTPUT socket of the power supply. You can see the INPUT/OUTPUT sockets in the following image.
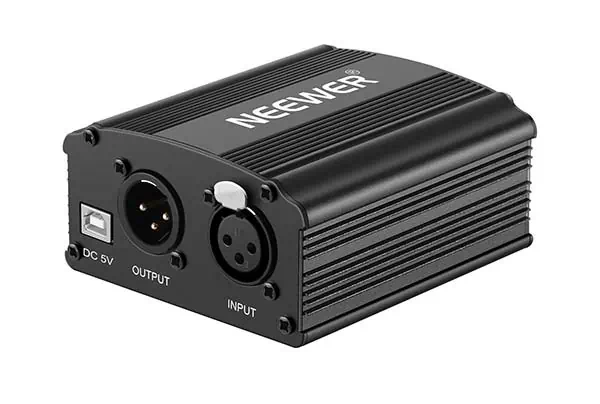
The setup was now as follows. The in-line preamp into the microphone. Then connect the phantom power supply to the preamp with a standard XLR cable. Next, use the USB to XLR cable to connect the audio output from the phantom power supply to your computer.
More simply, the sequence of connections was as follows:
Dynamic mic > Mic preamp > Phantom Power Supply > USB to XLR Cable > Laptop’s USB port.
Last update on 2025-07-03 / Affiliate links / Images from Amazon Product Advertising API
Audio Test Samples
I recorded a nursery rhyme using the three setups. As my reference level, I took the average peak level of the audio recorded using the Scarlett 2i2. This was about -6dB. The audio recorded with the Neewer USB to XLR cable and the Neewer USB to XLR cable + Mic Preamp was then normalized to match the audio from the Scarlett 2i2.
Here are the audio samples of the nursery rhyme.
At the same time as I recorded the three speech tests, I also recorded some “silence” where I kept quiet and let the recordings run. I later saved these “silent” sections to separate files to judge the noise in the recordings.
Here are the noise audio samples.
Self-Noise Peak Audio Level Results in Numbers
Unless you significantly crank up your headphone volume, you probably won’t hear much in the noise samples for the Scarlett and the USB to XLR cable with the Mic Preamp. However, when I used the USB to XLR cable on its own, the noise should be obvious.
That is the amount of noise you could expect after boosting the audio so that the voice recording is at a usable level. Furthermore, the “noise” in each file is the sum of the self-noise from the mic/interface/cable plus the ambient noise background noise in the room. Fortunately, the ambient noise in the room was low.
I used the Amplitude Statistics tool to get some numbers results from the noise files and the results are in the following table.
| Setup | Avg. RMS peak amplitude | Peak amplitude |
|---|---|---|
| Scarlet 2i2 | -54.83dB | -63.48dB |
| Neewer USB to XLR Cable (normalized to match Scarlett) | -42.45dB | -56.05dB |
| Neewer USB to XLR Cable + Mic Preamp (normalized to match Scarlett) | -56.99dB | -68.37dB |
As expected, the numbers show that the noise when using the Scarlett 2i2 (-54.83dB Avg. RMS peak) is lower than with the Neewer USB to XLR cable (-42.45dB Avg. RMS).
The result from using the Neewer cable with the inline mic preamp suggests that the noise floor is even better than that of the Scarlett 2i2 (-56.99dB vs -54.83dB Avg. RMS peak). However, this fails to recognize that the performance of the Scarlett 2i2 could also have been enhanced by using the audio interface along with a mic preamp.
If I had included the inline mic preamp with the Scarlett 2i2, I wouldn’t have needed to have the gain knob on the 2i2 turned to max and the input level slider in Windows sound settings at 50%. From experience, I know I could have turned the gain knob down to somewhere between the 12 o’clock and 3 o’clock positions. This would have further minimized the self-noise. Remember, the inline mic preamp provides a 28dB clean boost in the mic level.
Audio quality and conclusion
When I used the cable on its own, by the time I’d boosted the audio level of the recording the audible self-noise made the audio pretty much unusable. However, after adding the mic preamp I felt the result was OK, but I certainly wasn’t getting excited about it. I’m not saying it is so bad that I wouldn’t consider using the cable + preamp setup to record audio for YouTube video. But after listening to my recordings, for me, the Focusrite Scarlett 2i2 audio interface would be my first choice.
To get a more objective comparison between the Neewer cable and Scarlett 2i2, I did a simple frequency response test. I used a tone generator app on my phone and recorded the tones from 50Hz through to 20kHz with the same mic and the Scarlett 2i2 and Neewer cable. I then measured the average RMS amplitude of the recording in Adobe Audition and plotted the results in the following chart.
The red curve represents the data for the Scarlett 2i2 and the blue curve is for the Neewer USB to XLR cable.
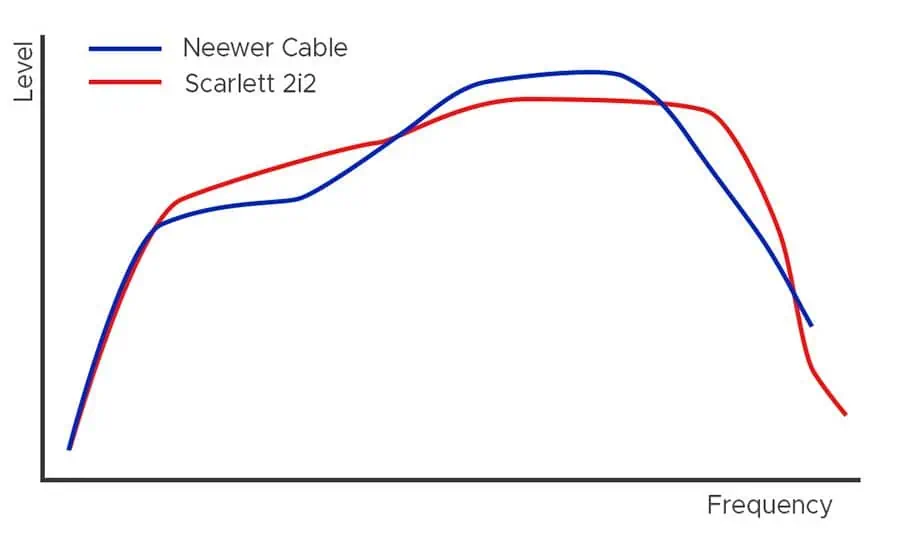
Now it’s important to note that the microphone and the tone generator were the same in both cases. So, any idiosyncrasies of the mic, the tone generator app, and the phone would be the same in the two sets of data. With that said, you can see that there are some differences between the two curves.
With the Scarlett 2i2 the curve is “flatter” across the range of frequencies. Meanwhile, the Neewer showed a peak in the mid to upper mid frequencies and then a gradual fall in amplitude through the higher frequency range. In other words, it’s losing some of the low and high end of the audio.
Furthermore, my test recording with the Neewer cable showed that at some frequencies the amplitude would steadily decline from its initial level over several seconds before becoming steady. This was either not observed with the Scarlett 2i2 or the phenomenon was very small. In other words, the response of the Neewer cable seemed to vary.
The results back up my impression when I listen to recordings of my voice made with the Scarlett 2i2 and the Neewer cable. I think the Focusrite audio interface produces a more pleasing result, at least to my ear.
So, is an inexpensive USB to XLR cable a credible alternative to a Focusrite Scarlett 2i2? No, I don’t think so. Without enhancement of the gear, the sound quality is dreadful. Furthermore, by the time you add further equipment to get a good result, you’d spend around as much as you would have by purchasing the audio interface.
About the author: Tosh Lubek is a multi-award-winning broadcaster, writer, and video producer, with 40 years of experience in professional broadcasting and has been using Canon video and stills cameras since 2010. He has worked with radio and TV broadcasters, advertising agencies, and direct clients on a variety of projects including radio and television advertising, online video production, corporate videos, award ceremony motion graphics, and theme park sound design. Tosh has won numerous awards, including a Radio Academy Awards Gold Sony, a Gold, Silver, and Bronze World Medals in the New York Festivals International Advertising Awards. Since about 2007 he has been creating YouTube videos. Tosh has been a sponsor of the “video booth” at HashTag Business Events across the UK.
Recent Posts
You're Using the Canon RF 50mm f/1.8 WRONG! Here’s How to Fix It
If you’ve recently picked up the Canon RF 50mm f/1.8 STM—affectionately known as the Nifty Fifty—you might be confused by that strange switch on the side of the lens. It doesn’t say AF/MF...
Recently, I shot several customer testimonial videos in 4K for a client when the overheating warning on my Canon EOS R6 appeared. In fact, it appeared three times in five sessions during the day of...


