
Author: Tosh Lubek Originally Published: 29th November 2020 Updated: 13th April 2024
DIY Video Studio is supported by its readers who use the affiliate links or ads on this site. As an Amazon Associate, I earn from qualifying purchases. Thank your support if you use any of the links.
When you receive your new Blue Yeti microphone, you’ll notice that and installation disk isn’t included in the box. Nor will will you find installation files on the Blue Microphones website![]() .
.
The truth is that the Blue Yeti does not need installation drivers for Windows. The Yeti is Plug’n’Play, so use the supplied USB cable to connect the Yeti to your PC. Windows will then automatically recognize and install the microphone as a USB audio input device.
That’s it. No installation files or drivers are necessary. Just plug in your Yeti and after a few seconds you can start using the microphone for online calls, streaming, or recording. But if you need a little more detail, or if things don’t work out automatically (it should) let’s read on.
Connecting a Blue Yeti to your Windows PC
To connect the Yeti to your PC, you’ll need the USB cable that came with your Blue Yeti. Insert the mini-USB plug into the socket on the base of the Yeti.
Then connect the other end, the one with the USB-A plug, into one of the USB ports on your computer. If you are using a more recent computer that only has USB-C ports, you’ll obviously need a mini-USB to USB-C cable.
Once connected to your computer, since the Yeti is a Plug’n’Play device, Windows will detect the microphone and install it as one of your available audio input devices. You probably will now be able to start using your Blue Yeti as your sound input in whatever app you’re going to run, such as Audacity, Adobe Audition, or Zoom.
Setting your Blue Yeti as the default audio input device
Although Windows may automatically set the Blue Yeti as your default input audio device, it may not do that if you have another device already selected, such as the microphone on a webcam. If that’s the case, here’s what to do.
To select the Blue Yeti as your microphone you need to do that in Windows Sound settings. There are two easy ways to open the Sound settings window.
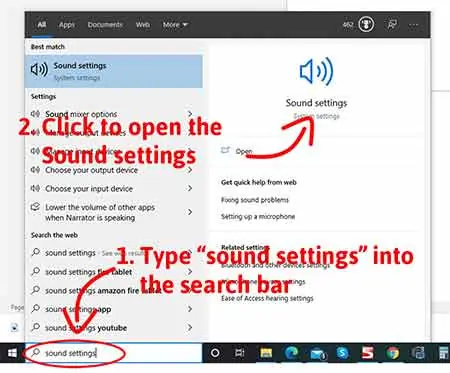
(1) Type “sound settings” in the Windows search bar. Then in the results list that opens, click on Sound Settings.
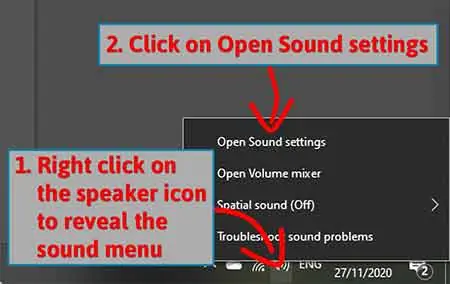
(2) Right-click on the Speaker icon in the bottom right of the Windows 10 task bar. A small panel will open. Then click on “Open Sound settings”.
Whichever method you use, you should now see the Sound settings window open.
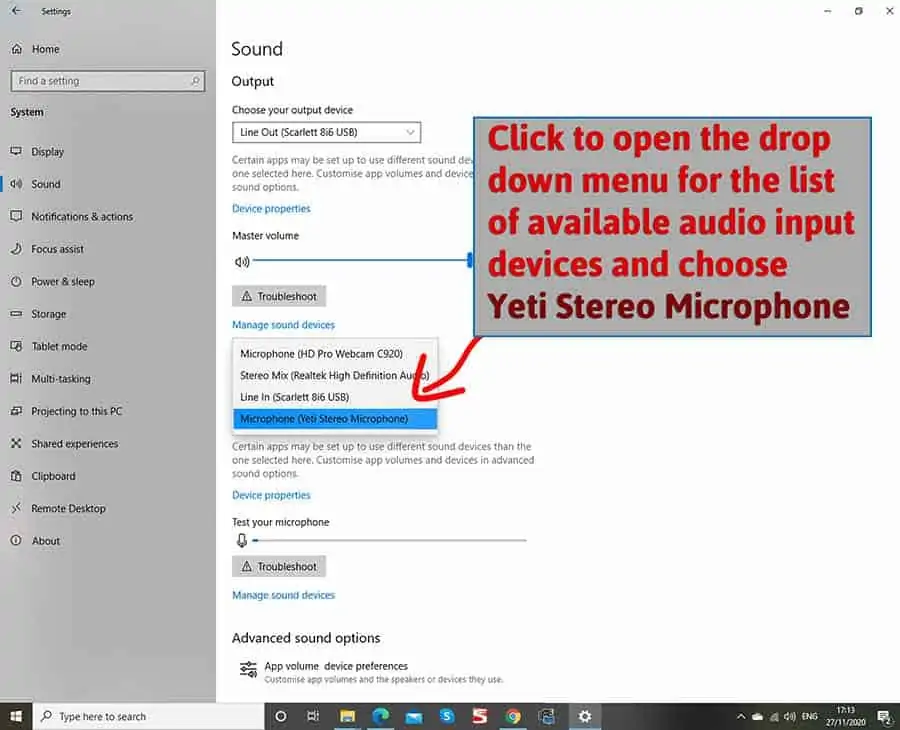
Under Sound you will first see a section titled Output. Below this there is another section called Input. This is where you can choose your input device.
If you already have another microphone installed, perhaps if you have a webcam, it might be set as your default audio input device.
To change to the Yeti, click on the box beneath “Choose your input device”. Then select the Blue Yeti from the drop-down list of available audio input devices.
Once you’ve selected the Yeti as your input device, its entry in the list will turn blue, and you’re done. The Blue Yeti will now be your selected default audio input device.
Blue Yeti USB device not recognized
If your Blue Yeti does not show up Windows, you may need to dive into the Windows Sound System settings and Device Manager, but you can try a few other things first.
If the mic doesn’t appear as an audio device in Windows, before you do anything else, make sure it is plugged into your computer’s USB port. I know, it sounds stupid advice, but I’ve done this myself and found the USB cable is loose.
[i] Check the USB cable
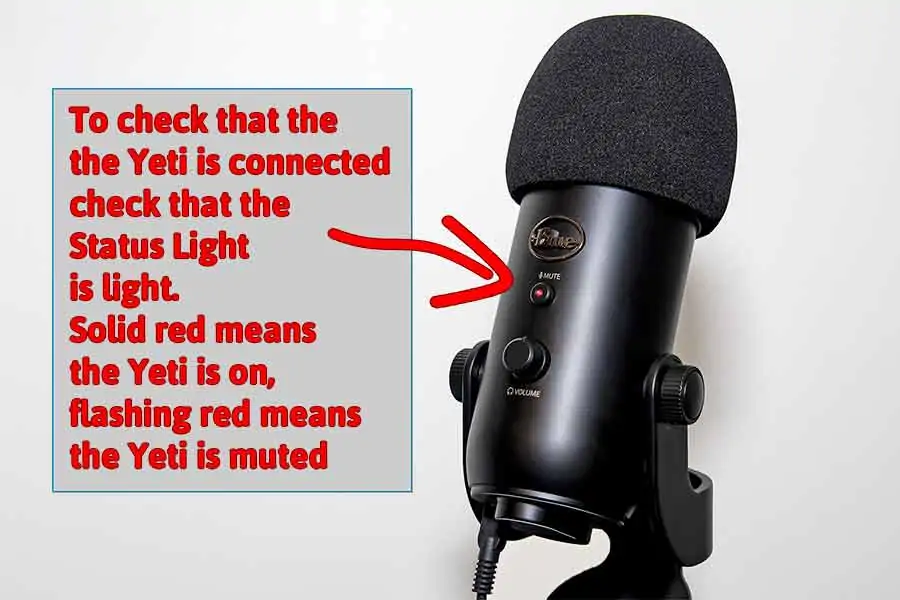
The simplest test of all is to visually check the status light in the middle of the Yeti’s mute button. The microphone does not have an on/off switch, so if the mic is properly plugged connected to your PC the status light will be lit up red. If you have muted the Yeti by pressing the mute button the status light will flash red. Either way, you will know whether the mic is receiving power from your computer.
If the status light does not come on when the mic is connected properly. Is USB cable connector fully inserted? Try unplugging and plugging in again. If the Yeti’s status light still doesn’t light up, try another USB port on your computers or try using a different USB cable that you know works.
[2] Check the Yeti on another computer
Still no luck? Try using the Blue Yeti on another computer.
If the Yeti’s status light comes on and everything appears fine, then the USB socket on your original computer may be faulty. But if the status light doesn’t come on and you have tried a couple of USB cables, then the Yeti may be faulty.
[3] Reinstall your Blue Yeti as an audio device
If the Yeti’s red status light is lit but you’re still getting the “Blue Yeti not recognized” error you can try uninstalling and then reinstalling the Yeti.
You’ll need to go into your computer’s Device Manager and delete the Blue Yeti as an audio device and then connect the microphone again, so Windows reinstalls it. To do this, follow these steps.
Step 1: Ensure the Blue Yeti is connected to a USB port on your computer. You should see the red LED on the mic’s mute button lit up.
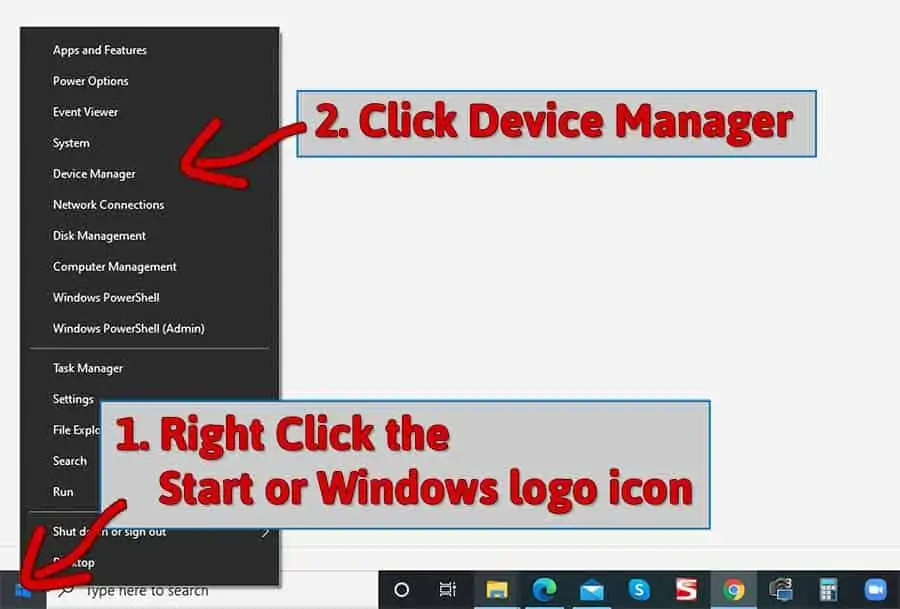
Step 2: Right-click on the Windows logo icon on the left corner of the taskbar to open the pop-up menu. You should see “Device Manager” as approximately the fifth entry from the top. Click on it to open the Device Manager.
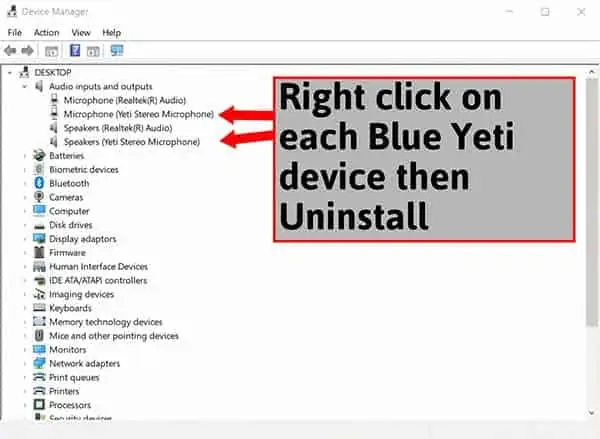
Step 3: With the Device Manager open, expand Audio inputs and outputs. You should see Yeti Stereo Microphone listed as both a microphone and speakers. Right-click on each Blue Yeti device and choose “Uninstall”.
Step 4: With the Yeti uninstalled you can now unplug the Yeti’s USB cable from your computer.
Step 5: Reboot the computer. Once the PC has rebooted and you’ve logged back into Windows, connect the Blue Yeti microphone using the USB cable and wait for Windows to install the microphone again.
Hopefully the Yeti will now be detected, and you can go ahead and use it in the app of your choice. But if you’re still experiencing problems you can try updating the Blue Yeti’s drivers.
[4] Update the Blue Yeti microphone driver
If the Yeti is still not being detected it may be that the drivers may have become corrupt and are stopping the microphone from functioning.
You’ll again need to open the Device Manager, so the initial steps are much the same as in uninstalling and reinstalling the Yeti as an audio device.
Step 1: Ensure the Blue Yeti is connected to a USB port on your computer. You should see the red LED on the mic’s mute button lit up.
Step 2: Right click on the Start or Windows logo icon on the left corner of the taskbar to open the pop-up menu.
You should see “Device Manager” as approximately the fifth entry from the top. Click on it to open the Device Manager.
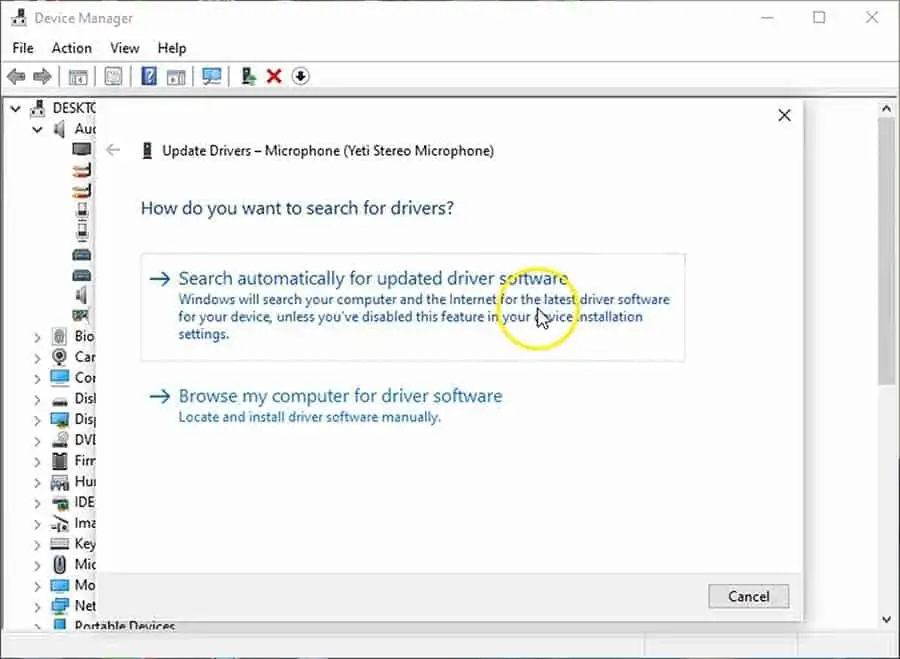
Step 3: With the Device Manager open, expand Audio inputs and outputs. You should see Yeti Stereo Microphone listed as both a microphone and speakers. Right-click on each Blue Yeti device and choose “Update Driver”.
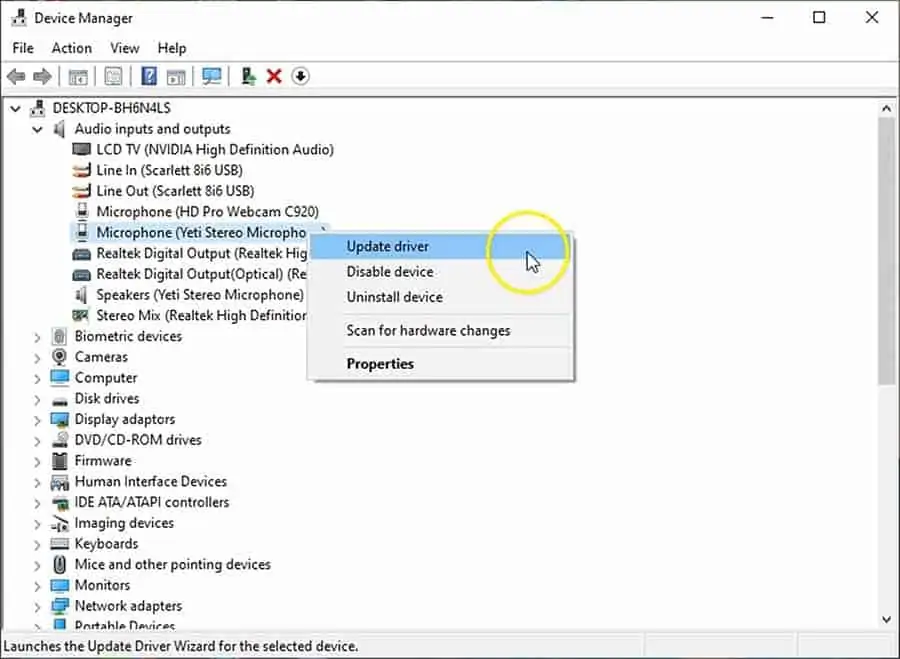
Step 4: Windows will ask you; how do you want to search for drivers? Choose the first option of Search automatically for updated driver software.
Device Manager will search for the required driver and update it, but it may also report that the best driver is already installed.
Step 6: If all went well, restart your computer and log into Windows. Hopefully this will have fixed the problem and you’ll no longer have the problem of “Blue Yeti not recognized Windows 10”.
[5] Avoid using a Blue Yeti with a USB hub
If you use a lot of USB devices, be aware that Blue Microphones does not recommend plugging the Yeti into a USB hub.
Normally, you should not share a USB hub with other high-data throughput devices. This could lead to problems such as the Blue Yeti producing choppy audio, clicks, or stuttering. Using a USB hub may also cause problems with the Yeti not being recognized.
This has not been a problem for me when I’ve tried using a USB. I tried using my Yeti with a USB hub but did not experience any problems. But I know of others who have. If that’s the case for you, try bypassing the USB hub and plugging the Yeti directly into one of your computer’s USB ports.
Tosh Lubek runs an audio and video production business in the UK and has been using the Canon EOS R since it was released in the Autumn of 2018. He has used the camera to shoot TV commercials for Sky TV, promotional business videos, videos of events and functions, and YouTube creator content. He has also won international awards for his advertising and promotional work. You can meet him by visiting his “video booth” at HashTag business events across the country.
Recent Posts
Most people use sandbags the wrong way. Here’s how to hang them properly on a light stand for maximum stability and safety — plus what to fill them with.
You're Using the Canon RF 50mm f/1.8 WRONG! Here’s How to Fix It
If you’ve recently picked up the Canon RF 50mm f/1.8 STM—affectionately known as the Nifty Fifty—you might be confused by that strange switch on the side of the lens. It doesn’t say AF/MF...