DIY Video Studio is supported by its readers. Please assume links on this site are affiliate links or ads, and that I get commissions for purchases made through these links. As an Amazon Associate, I earn from qualifying purchases. Thank you if you use any of the links.
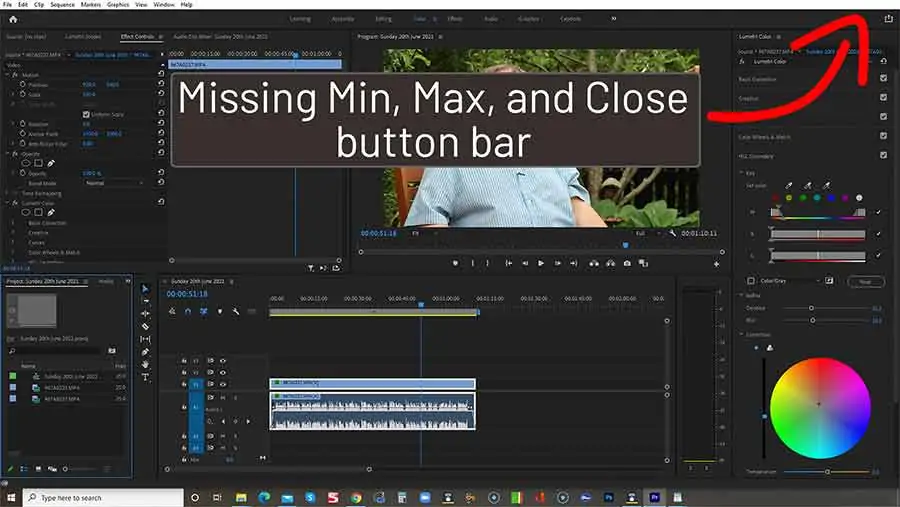
If you’re missing the Minimize, Maximize, and Close button bar, also known as the Top Bar, in Adobe Premiere Pro CC or if the Adobe After Effects minimize button has gone, don’t worry, it’s easy to recover the buttons with the stroke of a few keys.
To recover the missing Minimize, Maximize, and Close button bar, or Top Bar, in the Premiere Pro CC or After Effects user interface, use one of three keyboard shortcuts. One example is to use Ctrl + \ on Windows or Cmd + \ on Mac.
But as I mentioned in the opening, this is just one of three keyboard shortcuts you can use if the Premiere Pro top bar is missing. There’s also another method that involves deleting a folder. So, stick with me and I’ll cover all the methods to fix the Minimize and Maximize bar in Premiere Pro.
Keyboard Short cut methods to
There are several ways you can get back the Minimize, Maximize, and Close button bar by using keyboard shortcuts. Some relate to Adobe Premiere (and After Effects), while others are Windows keyboard shortcuts. This means some of the following keyboard shortcuts will work on both Windows and Mac, while others are specifically for Windows.
There are other keyboard shortcuts that will ultimately have the same effect, however, I’ve only mentioned the ones that are the easiest to use.
Method 1: Toggle the button bar using keyboard shortcut
As stated, you can toggle the Minimize, Maximize, and Close button bar on and off using the keyboard shortcut Ctrl + \ on Windows or Cmd + \ on Mac.
This is by far the quickest and easiest method to use but I would point out one thing that you need to be careful of. Some users have reported that this keyboard shortcut does not work. This is probably because they have used the forward-slash key instead of the backslash key. Indeed, Ctrl + \ will not toggle the button bar, so make sure you use Ctrl + \.
On a Windows keyboard, the backslash key is immediately above and to the right of the Ctrl key on the left side of the keyboard. On a Mac keyboard, the backslash key is usually on the right, next to the Return key.
I have also seen someone suggest using Ctrl + Shift + \ as a keyboard shortcut. Although this combination of keys will work the inclusion of the Shift key is unnecessary. It’s the Ctrl + \ that is important.
Method 2: Restore the button top bar with keyboard shortcut and Maximize

This is another way of fixing the missing Minimize, Maximize, Close button problem in Adobe Premiere Pro or After Effects. It takes slightly longer than Method 1, but not by much, and it’s just as easy to do.
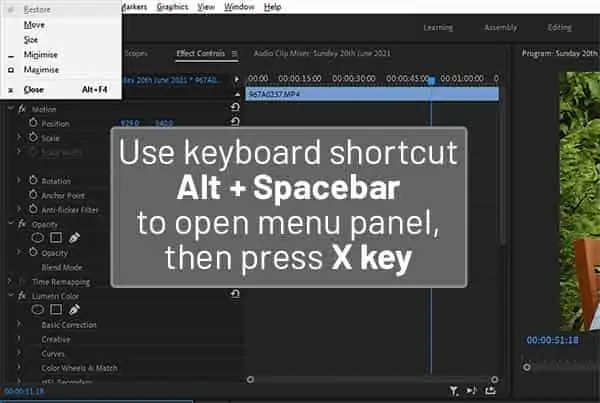
First, use the keyboard shortcut Alt + Space Bar. This will open a small panel with Restore, Move, Size, Minimize, Maximize and Close.
Click Maximize in the panel. This will restore the normal mode in the Premiere Pro or After Effects user interface.
Method 3: Use the Windows keyboard shortcut to Maximize the selected window
Strictly speaking, this method does not use Premiere Pro keyboard shortcuts, but the result will be the same, you’ll get back the Minimize, Maximize, and Close button bar.
Use the Windows keyboard shortcut of the Windows key + Up arrow. This will maximize the selected window, effectively restoring the Minimize, Maximize, and Close button bar.
Using the Windows key + Right arrow will also restore the button bar, although Premiere Pro may also be resized to fit the right-hand side of your display. To maximize the program window, click on the newly recovered Maximize button.
I summarize these keyboard shortcut methods in this short YouTube video. However, I give details of one more method you can try after the video.
Folder deletion method
I would recommend you proceed with caution if you decide to use this solution.
With that warning, to recover the missing Minimize, Maximize, and Close button bar in Adobe Premiere Pro you can delete the version folder. A new version folder will be created the next time you launch the program, effectively resetting the program’s settings.
These instructions are specifically for installations on Windows computers. I cannot say for sure whether the method can be adapted for a Mac computer.
First, you need to know the version number of your copy of Premiere Pro. Unfortunately, the version number is different from the name of your installed version. For instance, Premiere Pro CC 2021 is really Premiere Pro v15.0. To check the version number, click on Help in the menu bar of Premiere Pro. Then click on About Premiere Pro… in the dropdown menu. You will see the version of the program at the start of the scrolling credits.
Now that you know the version number you can look for the program’s version folder. On a Windows machine use File Explorer to navigate the following path.
C Drive: > Windows > Users > UserName > Documents > Adobe > Premiere Pro
Note that you should also use your username for UserName in the path above.
Now that you are in the Premiere Pro folder you will see one or more folders, depending on which versions of the program you have installed. For instance, if you are using Premiere Pro CC 2021 installed (that’s version 15.0) you will see a folder with the name 15.0.
You can now remove the folder that relates to the version of Premiere Pro where you have lost the button bar. I don’t advise deleting the folder, instead, change the version folder’s name. As far as Premiere Pro is concerned the folder will be missing, so a new version folder will be created, however, you’ll still have the original version folder should you need it.
When the new version folder is created, the settings will be put to the default values. Hence, the missing Minimize, Maximize, and Close button bar will be visible again in Premiere Pro.
As I mentioned, be careful with this method if you have stored any projects in the default folder. If you have, then you’ll lose your settings and project file saves if you delete the version folder. By changing the folder’s name, you can always change it back if necessary.
Conclusion
As you can now see, there are several ways of recovering the missing button bar. The easiest way is to use the keyboard shortcut of Ctrl + \. However, other keyboard shortcuts will also achieve the same result. Another effective method is to reset the program’s settings by either deleting the Premiere Pro version folder or renaming it.
You might also like…
Tosh Lubek runs an audio and video production business in the UK and has been using the Canon EOS R since it was released in the Autumn of 2018 and the Canon EOS R6 in 2020. He has used both cameras to shoot TV commercials broadcast on Sky TV, promotional business videos, videos of events and functions, and YouTube creator content. He has also won several international awards for his advertising and promotional work. You can meet him by visiting his “video booth” at HashTag Business Events across the country.
Recent Posts
You're Using the Canon RF 50mm f/1.8 WRONG! Here’s How to Fix It
If you’ve recently picked up the Canon RF 50mm f/1.8 STM—affectionately known as the Nifty Fifty—you might be confused by that strange switch on the side of the lens. It doesn’t say AF/MF...
Recently, I shot several customer testimonial videos in 4K for a client when the overheating warning on my Canon EOS R6 appeared. In fact, it appeared three times in five sessions during the day of...


