
Author: Tosh Lubek Published: 6th March 2023
DIY Video Studio is supported by its readers who use the affiliate links or ads on this site. As an Amazon Associate, I earn from qualifying purchases. Thank your support if you use any of the links.
When I first got my Zoom H4n Handy recorder I assumed the way to transfer my audio recordings would be similar to the way I worked with older portable recorders in radio stations. I would take the recording media out of the recorder and take it into the studio. So, when I got my Zoom H4n digital recorder it seemed natural to remove the SD card when I needed to transfer audio files to my computer.
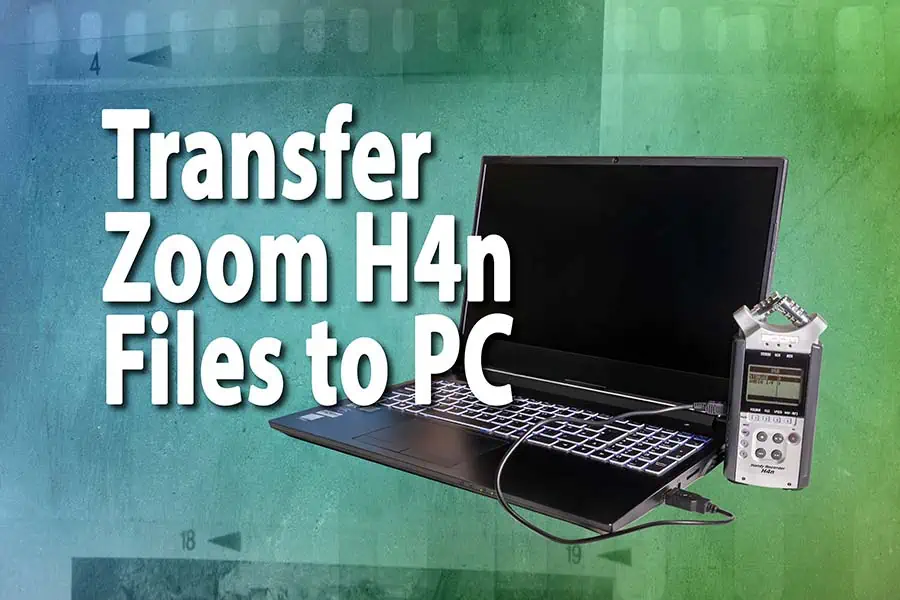
You can transfer Zoom H4n files to your computer by either removing the SD card and inserting it into your computer’s card reader or connecting your Zoom H4n to your computer with the USB cable to use the H4n itself as a card reader.
In this article, I quickly cover both methods of transferring H4n files to a computer, as well as summarize where you will find your files on the SD card.
The location of your H4n files
In almost all cases your audio files will have been saved to the SD memory card in your H4n. The only exception would be if you had been using the Memory Record mode, where audio can be saved to the H4n built-in memory. For more details, you can read my article on using Memory Record mode.
When using STEREO, 4 Channel mode, and Multitrack mode the audio is saved to the SD card in one of three folders. The folder where your audio is saved depends on the recording mode you were using.
- 4CH folder contains audio created in 4 Channel mode.
- MTR folder contains audio reacted in Multitrack mode.
- STEREO folder contains audio created in Stereo mode.
The default recording mode is STEREO, where you can record 1 or 2 audio inputs to a single stereo file. Unless you changed the recording mode in the recorder’s menu system, your audio files will most likely be in the STEREO folder.
Note that the STEREO and 4CH folders contain 10 subfolders called FOLDER1 to FOLDER10. Each of these folders can contain multiple audio files. However, the MTR folder contains project folders starting with PROJ000. Files for each of the four tracks will be contained in an individual project folder.
Moving Zoom H4n files by removing the SD Card
If you need to transfer your audio files, this method is straightforward and reasonably intuitive.
You’ll find the SD card slot on the right side of the H4n recorder. The gray plastic clover has a small slot at the top. Insert a thumb or fingernail into the slot and pull open the cover, which is hinged at the bottom. You will see the edge of the SD card.
To eject the memory card, press the middle of the edge of the card. You’ll notice that the H4n body curves inward at this point, allowing you to press the card further in than the surrounding flat surface of the case. Once the card has been pushed inward, let go and the card will pop out enough for you to grab it or lever it out with your fingernail.
Once you have removed the card from the recorder, insert it into your computer’s card reader. Your operating system should recognize that a memory card had been inserted and a window will open showing the three recording mode folders in the card’s root directory.
Navigate to the folder where your audio is located, then copy the required file to a location on your computer. This can be done by dragging and dropping the file or by right-clicking on the file, selecting Copy, and then pasting it to the new location.
Transfer files from your H4n to a computer over USB
With this method of transferring an audio file, the SD card remains inside the H4n’s SD card slot and the H4n is used as a USB card reader.
You do not need to power up the H4n recorder to use it as a card reader since it will draw 5V power from the computer’s USB bus. Using the USB cable that came with the Zoom H4n, plug the mini-USB connecter into the USB port on the left side of the Zoom recorder. Then, plug the other end of the cable, the USB-A connecter, into a USB port on your computer.
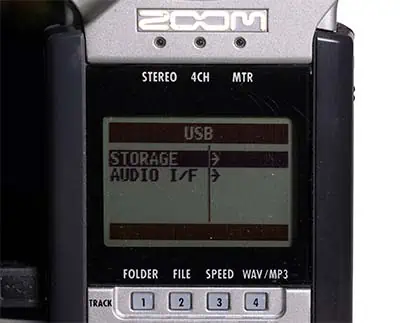
The Zoom H4n will receive power from the computer’s USB port, causing it to turn on and boot up to the USB menu screen. Two options are available, STORAGE and AUDIO I/F.
Choose Storage and press the Dial wheel inwards to enable USB STORAGE. After a short wait, the H4n’s screen will display USB STORAGE at the top, the USB symbol, and an image of the recorder and a laptop computer passing data between each other.
Your computer will also recognize the H4n as an external drive and a window will open showing the three recording mode folders in the card’s root directory.
Navigate to the folder where your audio is located, then copy the required file to a location on your computer. This can be done by dragging and dropping the file or by right-clicking on the file, selecting Copy, and then pasting it to the new location.
Conclusion
Wrapping up, transferring Zoom H4n files to a computer can be done in two ways: by removing the SD card and inserting it into the computer’s card reader or by using the H4n itself as a card reader through a USB cable. The location of the audio files depends on the recording mode used, and the process of transferring files using either method is simple and intuitive. Whether you choose to remove the SD card or use the USB cable, both methods will allow you to easily transfer your audio files from the Zoom H4n to your computer.
Here’s a big ask from me: If you liked this article, please share it.
It will mean a great deal to me if you share this post because a few seconds of your time will seriously help my blog grow. The share buttons are below the “About Author” section.
Thanks. 🙂

About the author: Tosh Lubek is a multi-award-winning broadcaster, writer, and video producer, with 40 years of experience in professional broadcasting and has been using Canon video and stills cameras since 2010. He has worked with radio and TV broadcasters, advertising agencies, and direct clients on a variety of projects including radio and television advertising, online video production, corporate videos, award ceremony motion graphics, and theme park sound design. Tosh has won numerous awards, including a Radio Academy Awards Gold Sony, a Gold, Silver, and Bronze World Medals in the New York Festivals International Advertising Awards. Since about 2007 he has been creating YouTube videos. Tosh has been a sponsor of the “video booth” at HashTag Business Events across the UK.
Recent Posts
Most people use sandbags the wrong way. Here’s how to hang them properly on a light stand for maximum stability and safety — plus what to fill them with.
You're Using the Canon RF 50mm f/1.8 WRONG! Here’s How to Fix It
If you’ve recently picked up the Canon RF 50mm f/1.8 STM—affectionately known as the Nifty Fifty—you might be confused by that strange switch on the side of the lens. It doesn’t say AF/MF...