
Author: Tosh Lubek Published: 1st March 2023
DIY Video Studio is supported by its readers who use the affiliate links or ads on this site. As an Amazon Associate, I earn from qualifying purchases. Thank your support if you use any of the links.
You might think that if you don’t have an SD card in your Zoom H4n Handy recorder you won’t be able to record any audio. Well, that’s not correct. The Zoom H4n has a small amount of internal memory, and you can record audio to it.
You can use the MEMORY REC function to record up to 35sec of audio to the Zoom H4n internal memory. The feature can be enabled by pressing the MENU button, going to TOOL, then selecting MEMORY REC, and finally choosing REC&PLAY. The available record time shown on the screen will change to 00:00:35.
This is an overview of how to enable the MEMORY REC function, so I’ll go through the process in more detail and with screenshots. You can go directly to that section by clicking on SKIP AHEAD.
Although the Memory Record function was an added feature in the July 2010 Ver 1.60 firmware update, you may not have been aware of it. This is because you won’t find “MEMORY REC” in the index of the recorder’s manual.
The limitations of using the Memory Record function
The memory record function can be used whether you have an SD card in the recorder’s card slot or not. However, there are certain limitations to its use.
The memory record function can only be used in Stereo mode, i.e., when using the built-in XY microphones. Due to the size of the available internal memory, the audio will be saved to a 96kbps mp3 file. Although the built-in memory can accommodate up to 35 seconds of audio, only one file can be saved.
So, if you have previously recorded to the built-in memory, that recording will be overwritten when you make a new recording.
Enabling Memory Record mode
Enabling the Memory Record mode on the Zoom H4n is a straightforward process that requires you to enter the recorder’s menu. Don’t worry, it’s simple to do, just follow these steps.
1
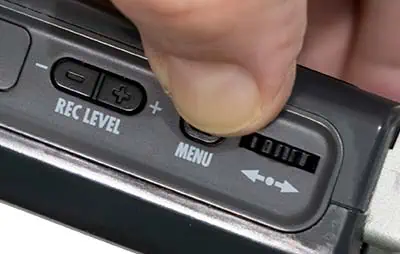
Press the MENU button on the side of the Zoom H4n recorder to open the MENU screen.
2
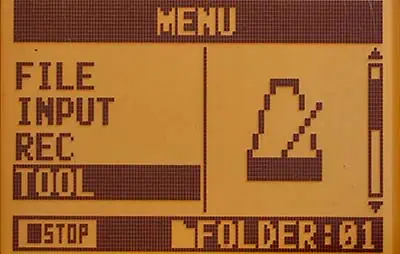
Scroll down the MENU screen until you have selected TOOL, then press the scroll dial.
3
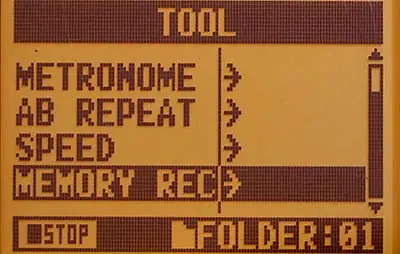
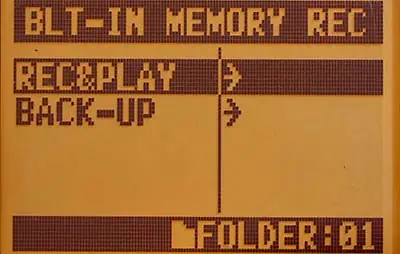
On the TOOL screen scroll down until you have selected MEMORY REC, then press the scroll dial to open the BLT-IN MEMORY REC screen.
4
On the BLT-IN MEMORY REC screen you should see that REC&PLAY is selected, if not select it. Now, press the scroll dial to change the Zoom H4n to MEMORY REC mode.
The Zoom H4n screen will exit the menu system and return to the normal record screen. However, there is a slight difference.
In the bottom right of the screen, you will notice that the available record time has changed and is displayed as M000:00:35.
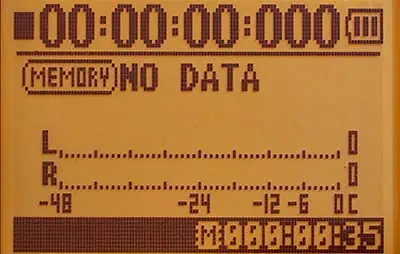
Also, below the main time indicator, contains the word “MEMORY” instead of the sampling frequency and bit depth. This indicates that the H4n is ready to record to the built-in memory.
Recording to the Zoom H4n Built-in memory
You can now record your audio to the internal or built-in memory. Remember, you only have 35sec of available recording time and the recording bitrate will be 96kbps.
Record and playback your audio in the usual way you would do when using an SD card.
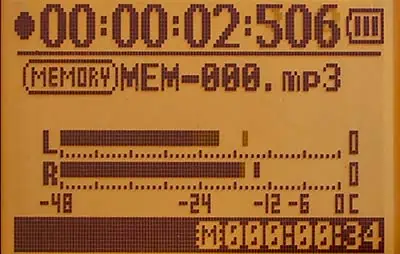
Be aware that you can only record one file, even if your recording does not use the full 35sec of available space. If you try recording a second file, it will replace your original recording that is already saved to the built-in memory.
With your recording completed, you can turn off the H4n recorder and the recording will remain in the built-in memory.
Transferring your mp3 recording to an SD card
When you have inserted an SD card into the recorder’s card slot, you can transfer your recording from memory to the SD card. This is not a complicated procedure, but you do need to return to the BLT-IN MEMORY REC screen.
1
Press the MENU button to enter the MENU screen on the recorder.
2
On the MENU screen scroll and select TOOL, then press the scroll dial to enter the TOOL menu screen.
3
On the TOOL menu screen scroll to MEMORY REC and press the scroll dial to enter the BLT-IN MEMORY REC screen.
4
On the BLT-IN MEMORY REC screen use the scroll dial to select BACK-UP and then press the scroll dial to enter the BACK-UP FILE screen.
5
On the BACK-UP FILE screen, you have three choices. You can use NAME to rename the file. Select FOLDER to change which folder to transfer the file to. Finally, use the scroll dial to select EXECUTE to proceed with the file transfer and be taken to the confirmation screen.
6
On the Confirmation screen, select YES and then press the scroll dial to complete the transfer and erase the file from the built-in memory.
7
Finally, press the MENU button three times to exit the menu and return to the normal play/record screen. You will see the mp3 file you transferred to the SD card as being ready to play.
When would the Memory Record function be useful?
As I have stated earlier, the memory record function is limited by the amount of available built-in memory. Only one file can be recorded in stereo mode, and it must be a 96kbps mp3 file. This isn’t going to be a high-quality recording, but it would be OK for spoken notes or where you need to capture a short recording in a hurry.
As I have shown in an article about faster Zoom Handy recorder boot-up times, the Zoom H4n recorder is not instantly available as soon as it has been powered up. Depending on the size of your SD card, the H4n can take from 13 to 43 seconds to boot up. If you need to capture a short burst of audio in a hurry, you might consider using the Memory Record function.
With an empty SD card slot, I can be recording to my H4n’s memory in as little as 20 seconds. That’s faster than the boot time alone of my Zoom H4n when using a 16Gb or 32Gb SD card.
Final Thoughts
To round up this post, if you do not have an SD card for your Zoom H4n Handy recorder, you can still record audio using the built-in Memory Record function. Enabling this feature is a straightforward process of going to the TOOL menu and selecting MEMORY REC, and then REC&PLAY. However, the Memory Record function has some limitations such as only being available in stereo mode and recording to a 96kbps mp3 file. Additionally, only one file can be saved, and it will overwrite any previously recorded file. The Memory Record function can be useful in situations where you need to capture a short recording quickly, but it is not recommended for high-quality recordings.
Here’s a big ask from me: If you liked this article, please share it.
It will mean a great deal to me if you share this post because a few seconds of your time will seriously help my blog grow. The share buttons are below the “About Author” section.
Thanks. 🙂

About the author: Tosh Lubek is a multi-award-winning broadcaster, writer, and video producer, with 40 years of experience in professional broadcasting and has been using Canon video and stills cameras since 2010. He has worked with radio and TV broadcasters, advertising agencies, and direct clients on a variety of projects including radio and television advertising, online video production, corporate videos, award ceremony motion graphics, and theme park sound design. Tosh has won numerous awards, including a Radio Academy Awards Gold Sony, a Gold, Silver, and Bronze World Medals in the New York Festivals International Advertising Awards. Since about 2007 he has been creating YouTube videos. Tosh has been a sponsor of the “video booth” at HashTag Business Events across the UK.
Recent Posts
Most people use sandbags the wrong way. Here’s how to hang them properly on a light stand for maximum stability and safety — plus what to fill them with.
You're Using the Canon RF 50mm f/1.8 WRONG! Here’s How to Fix It
If you’ve recently picked up the Canon RF 50mm f/1.8 STM—affectionately known as the Nifty Fifty—you might be confused by that strange switch on the side of the lens. It doesn’t say AF/MF...