
DIY Video Studio is supported by its readers who use the affiliate links or ads on this site. As an Amazon Associate, I earn from qualifying purchases. Thank your support if you use any of the links.
Author: Tosh Lubek Published: 21 November 2023
For full disclosure, Maono provided me with a sample of their PD400X dynamic cardioid microphone for testing. However, they have not paid for this article, nor have they any control over my opinion of the microphone.
If you’re about to get or have recently got the Maono PD400X dynamic podcasting microphone, you’re in for a treat. First, you really must get and use the Maono-Link software. It’s a free download, by the way. But if you install the software without reading ALL this article, there’s a good chance you’ll make the same mistake that I did. You see, there’s an extra step to the standard Maono Software setup that’s necessary if you want to access the microphone’s Custom EQ settings. But don’t worry, it’s a simple five-minute process that will make your podcasting voice sound individual and awesome on the PD400X.
Before we start, here are the things you need:
- Maono PD400X microphone
- USB-C cable that came with the Maono PD400X mic
- Computer (Windows or Mac)
- Internet access

Software and Firmware Updates to access Custom EQ Settings
Step 1: Ensure Software and Firmware Compatibility
To access the Custom EQ settings in the Maono Link software it’s vital that both your Maono-Link software and PD400X microphone firmware are up to date. The Maono-Link software you’re running needs to be version 2.2.1 or above. But it’s not just the software that needs to be up to date, your Maono PD400X microphone’s firmware should be at least version 1.2.0. Unfortunately, when my brand new PD400X microphone arrived recently, the installed firmware was still 1.1.0. So, even though I had installed the latest version of the Maono Link software, I couldn’t access the Custom EQ settings.
Step 2: Download and Install Maono Link Software
If you already have the Maono Link software installed, you can skip to step 3. If you don’t already have the Maono Link software, head over to the Maono website and navigate to the download page. You can use this link![]() . Scroll down the page and you’ll see the following.
. Scroll down the page and you’ll see the following.
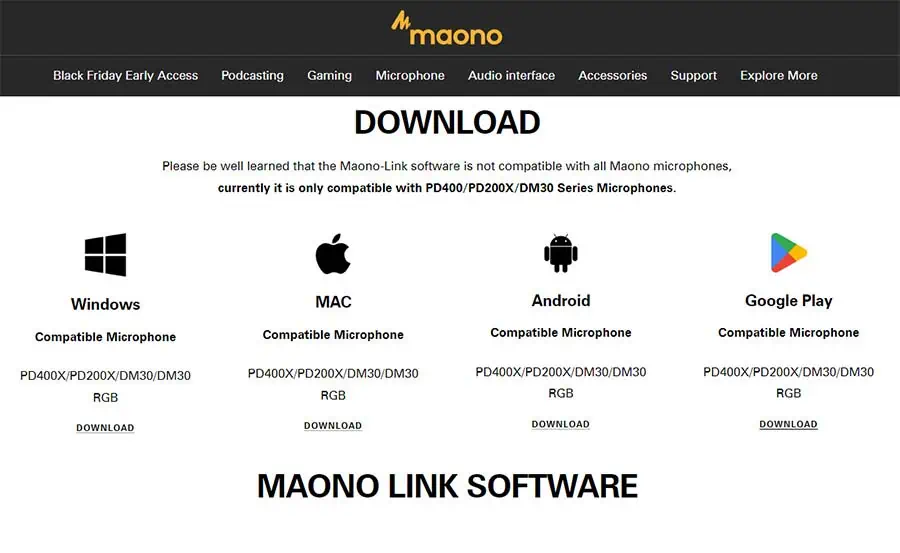
You’ll see that the software is available for Windows, Mac, and Android. Choose the appropriate version for your computer’s operating system (windows or Mac), download the software, unzip the folder, and run the executable file to install it. The software is also available for Android devices, use the links to install the app normally. The software version available for download should be the latest, so should be version 2.2.1 or later.
Step 3: Confirm your Maono-Link Software Version
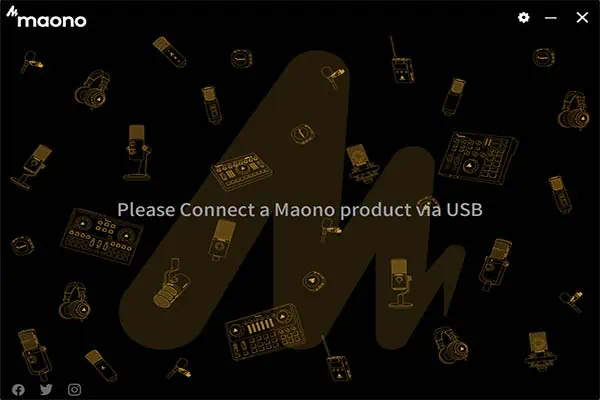
If you’ve already downloaded and installed the Maono Link software, you need to confirm that it is version 2.2.1 or later. To do this, it’s not necessary to have the microphone connected. Run the Maono Link software to open the initial screen. If the microphone is connected to your computer, you will see an image of the microphone, otherwise, you’ll see a generic screen with the message, “Please connect a Maono product via USB”. Do not worry about the message, just click the gear wheel icon in the top right of the Maono window.
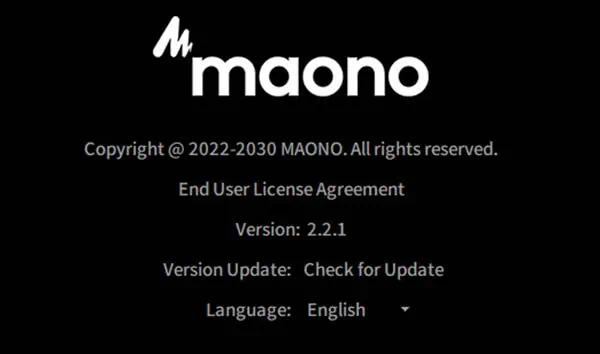
The window that opens will include the software version. If it is displayed as version 2.2.1 or later, you’re good to proceed, so click the return icon in the top left of the window. If you need to update, click on Check for Update, and follow the prompts to download the latest version.
Step 4: Check the PD400X Microphone Firmware
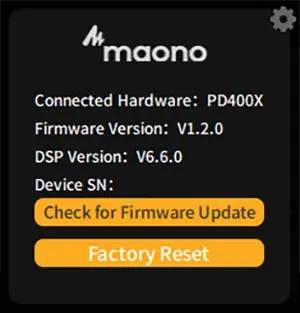
For this step, ensure that your Maono PD400X microphone is connected to your computer using a USB cable. Then open the Maono Link software and click on the image of the microphone to open the settings screen. Now click on the gear wheel icon in the top right corner of the window. Note that this is NOT the same gear wheel icon in Step 3. Check the firmware version of your PD400X. If it’s not version 1.2.0 or above, proceed to the next step.
Step 5: Update Microphone Firmware
On the small panel that opened in Step 4, click on “Check for Firmware Update.” If your microphone’s firmware was version 1.1.0 an update should be available (version 1.2.0 or above), select “Update Now.” Allow the software to download and update the microphone’s firmware. Ensure you do not disconnect the microphone or close the software during the update process. Once the firmware update is complete, disconnect and then reconnect your microphone.
Step 6: Access Custom EQ Settings
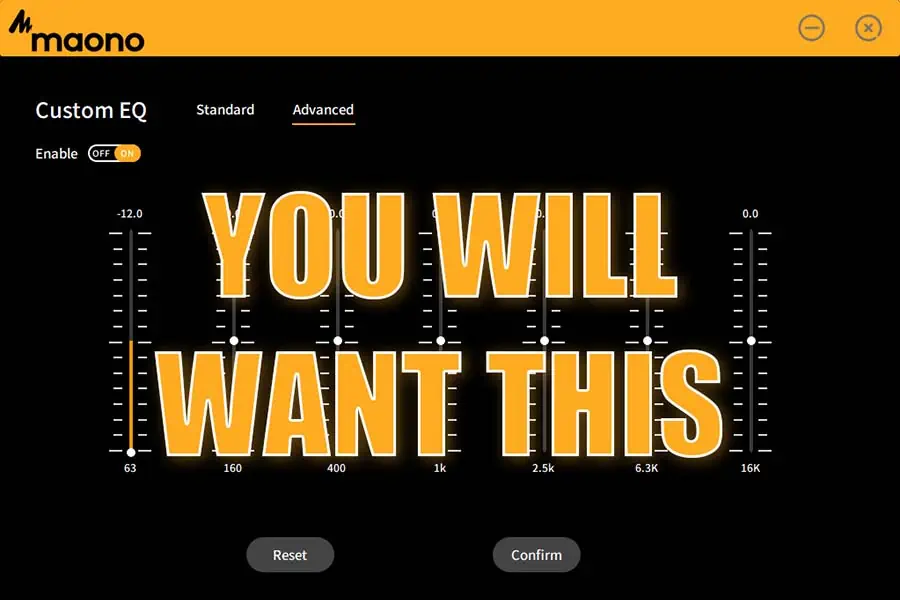
Once you are running version 2.2.1 of the Maono Link software and have updated the firmware on the Maono PD400X microphone you will see there is a change in the Advanced panel of the Maono Link software. The EQ section now also includes a “Custom” button, when you click on it you will be able to choose between Standard and Advanced versions of the Custom EQ settings.
Step 7: Customize Your EQ
Choose the version of the Custom EQ settings that match your needs. The Standard option lets you adjust the EQ in three bands: 100Hz, 1kHz, and 10kHz. The Advanced option lets you make changes in seven frequency bands for more precise EQ customization. The bands are 63Hz, 160Hz, 400Hz, 1kHz, 2.5kHz, 6.3kHz, and 16kHz.
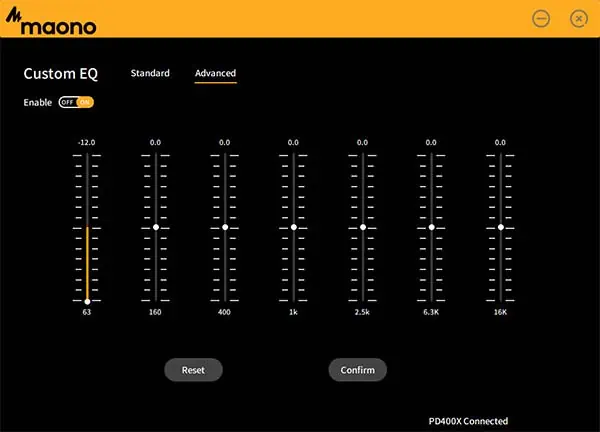
The sliders in each band can be adjusted by plus or minus 12dB. I recommend wearing headphones while making your adjustments so you can properly monitor the sound. After making your adjustments, click “Confirm” to save the custom EQ setting to the microphone and to be returned to the normal Advanced panel of the software. You can now enjoy the tailored EQ experience on your PD400X microphone.
Quick Tip 1: If you have a problem with background noise like the rumble of traffic or fan noise, reduce the 63Hz band by -12dB and then bring down the 160Hz band slightly to effectively create a Low Cut/High Pass filter.
Quick Tip 2: To brighten and boost the presence try increasing the 6.3kHz band.
Final Thoughts
Congratulations! You should have successfully set up your Maono PD400X and Maono-Link software with Custom EQ settings. After creating a custom EQ setting, it will be saved to your microphone as a fifth EQ preset. You can toggle through the presets by pressing the small button on the base of the microphone. The custom EQ setting is selected when all three green LEDs are lit.
I have other articles about the Maono PD400X dynamic mic and Maono-Link software, I’ll include links to them below. If you found this guide interesting or helpful, please share it by linking to it. Thank you for visiting my site, and until next time, keep creating!

About the author: Tosh Lubek is a multi-award-winning broadcaster, writer, and video producer, with 40 years of experience in professional broadcasting and has been using Canon video and stills cameras since 2010. He has worked with radio and TV broadcasters, advertising agencies, and direct clients on a variety of projects including radio and television advertising, online video production, corporate videos, award ceremony motion graphics, and theme park sound design. Tosh has won numerous awards, including a Radio Academy Awards Gold Sony, a Gold, Silver, and Bronze World Medals in the New York Festivals International Advertising Awards. Since about 2007 he has been creating YouTube videos. Tosh has been a sponsor of the “video booth” at HashTag Business Events across the UK.
Recent Posts
Most people use sandbags the wrong way. Here’s how to hang them properly on a light stand for maximum stability and safety — plus what to fill them with.
You're Using the Canon RF 50mm f/1.8 WRONG! Here’s How to Fix It
If you’ve recently picked up the Canon RF 50mm f/1.8 STM—affectionately known as the Nifty Fifty—you might be confused by that strange switch on the side of the lens. It doesn’t say AF/MF...