
DIY Video Studio is supported by its readers. Please assume links on this site are affiliate links or ads, and that I get commissions for purchases made through these links. As an Amazon Associate, I earn from qualifying purchases. Thank you if you use any of the links.
Recording in a noisy room
Getting good audio when recording in a noisy room can be a problem, especially if it is a public space. But you will get a much better recording if you use a cardioid microphone, get as close to the talent as possible and avoid pointing the mic at obvious noise sources
- Use an external microphone but NOT one that is attached to or next to your camera
- Get the microphone as close to your talent’s mouth
- If the room isn’t too noisy try using a shotgun mic
- In a medium noisy room try a lavalier or clip mic
- In noisier rooms use a handheld interview mic, such as a dynamic cardioid or super-cardioid microphones
- Point directional microphones at your talent in a way that avoids noise sources
- If all else fails, clean up your recording with a de-noise tool
What is an external microphone for a camera?
First, let me explain what I mean by an external microphone in the context of recording in a noisy environment.
Although many video cameras, DSLRs, and smartphones have built-in internal microphones an external microphone will usually give you much better audio quality.
Strictly speaking, any microphone that plugs into your camera is an external microphone. However, having an external microphone that sits on or next to your camera will not necessarily give you great audio, although it may be an improvement on the built-in camera microphone.
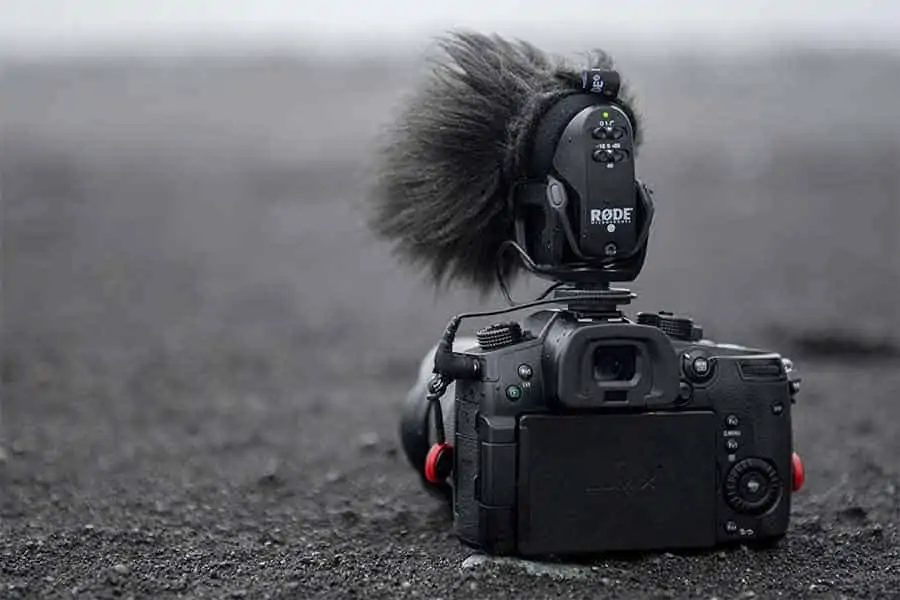
External microphones on your camera, like the Rode VideoMic on this DSLR, maybe an improvement over the camera’s internal mic, but they are not the solution to recording in a noisy room. You need to get the microphone away from the camera and close to your talent.
Get as close as possible

Conventions and trade shows are noisy events. In the example above Andrew from Hashtag-Events![]() is using a handheld cardioid radio mic and is being filmed on a smartphone.
is using a handheld cardioid radio mic and is being filmed on a smartphone.
The proximity of the microphone to his mouth ensures his voice is much louder than the crowd noise in the hall. The audio and video recordings will be synchronized in the video editor.
Good sounding audio is frequently a result of getting the microphone as close to your talent as possible.
When using a camera’s internal microphone there will be times you do not want to get close to your talent because the composition of the shot may be completely wrong. With an external microphone, you are free to compose the shot the way you want it while still being able to record excellent quality sound
- Still with the best-in-class Rycote Lyre suspension system onboard, the VideoMic Pro improves on the...
- Automatic Power Function (with plug-in power availability) is perfect for the run-and-gun shooter,...
- Built-in Battery Door makes replacing the battery a breeze - plus it won't get lost.
- Power options the VideoMic Pro can be powered by the all-new and included RØDE LB-1 Lithium-Ion...
Last update on 2025-10-20 / Affiliate links / Images from Amazon Product Advertising API
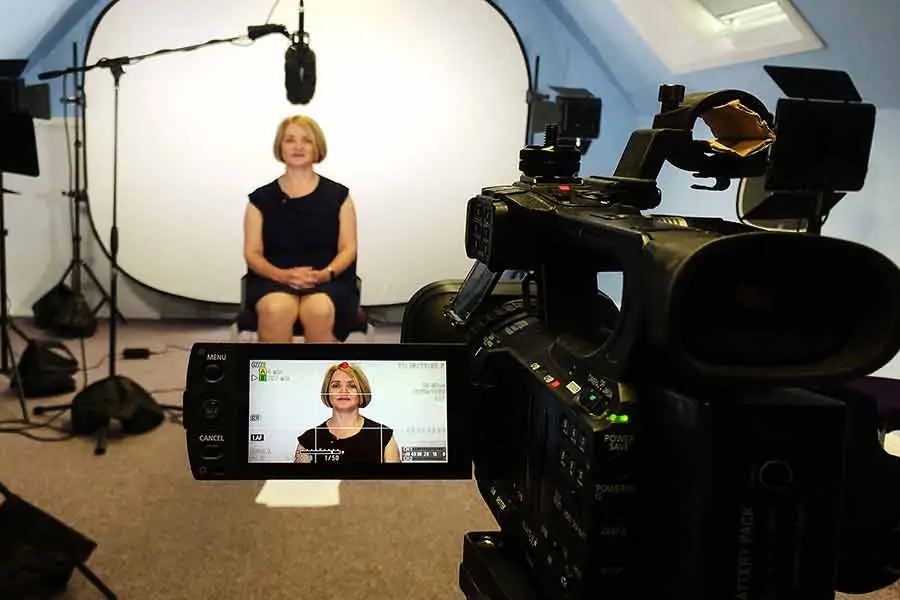
In this set up I was recording interviews with my Canon XF100 and wanted to blur out the tiny wrinkles on the collapsible backdrop. This would be easy to do with a fast lens on a DSLR but is harder to do with the zoom lens on a video camera.
To get the effect, I had to zoom in using the XF100 that was 13ft (4m) from the interviewee. The speaker was in focus, but the background was nicely blurred. For more details of this technique see my article on using depth of field to remove muslin backdrop wrinkles.
In such circumstances, the internal microphones on the Canon video camera would be too far from the subject to record good audio. However, the external microphone above and in front of the interviewee captured the voice perfectly.
Although this room was reasonably quiet, under noisy room conditions an external microphone is important for recording good audio because it can get close to the talent. The closer you can place the microphone to the talent the better.

- AC Adapter/Charger - Power Cord - DC Cable - BP-970G Battery - Lens Hood - Lens Cap - USB Cable -...
- Canon's adaptation of MPEG-2 for the XF100 Professional Camcorder, named the Canon XF Codec, ensures...
- 4:2:2 Color Sampling: 4:2:2 color sampling provides twice the color resolution of HDV and other...
- Record to Compact Flash Cards: The camcorder features two CF card slots and offers versatile...
Last update on 2025-10-11 / Affiliate links / Images from Amazon Product Advertising API
If the room is not too noisy use a shotgun microphone
Although shotgun microphones are often used for outdoor recordings, I have had a great deal of success with a Sennheiser ME66 in noisy environments.
The ME66 is a condenser shotgun mic with a super-cardioid pickup pattern, so it rejects sounds that are off-axis. However, if the room produces an echo or reverberation, my ME66 recordings have needed post-processing to remove or reduce the reverberation.
A microphone that has worked well under the same conditions is the Samson CO2 pencil condenser microphone. It also has a super-cardioid pickup pattern and is much cheaper than the Sennheiser.
Position the microphone so that your talent is on-axis but the room noise is off to the side or behind the microphone. Having the microphone above (as in the previous image) or below the talent normally works well.

- Small-diaphragm pencil condenser microphones packaged as a stereo pair (matched within ±0.5dB...
- Cardioid pickup pattern
- Up to 134dB SPL
- Gold-plated XLR connectors
Last update on 2025-10-11 / Affiliate links / Images from Amazon Product Advertising API
To record decent quality audio, I placed a directional microphone as close to the talent as possible while keeping it out of frame. Normally I attach the shotgun mic to a boom stand and have the microphone above the talent.
However, if the ceiling is relatively low and has acoustic ceiling tiles, I will lower the mic stand and have the boom arm down by the floor, with the microphone point up and towards the talent’s face.
If you do not have a microphone stand available use let the talent hold the microphone just out of shot and pointing up towards their mouth. If possible, have the microphone on a pistol grip with shock mount it should.
In a medium noisy room try a lavalier microphone
The beauty of lavalier microphones is that they can get close to your talent while remaining quite discrete. Most lavalier mics have sub-miniature microphone capsules, so although they are not invisible, they are small.
Most lavalier microphones are omnidirectional, meaning they will record sound equally from all directions. Initially, you may wonder why you would use an omnidirectional mic when recording in a noisy room
When you reduce the gain to bring the voice back to a normal level, you’ll also reduce the noise level. Although the room noise has not gone away the voice will be clearly above the background room noise.
Typical omnidirectional lavalier microphones for use in video production include the Sennheiser ME2 if you want to spend a bit more, or the Audio Technica ATR3350, MOVO LV1, or Power DeWise Lav Mic at the budget end of the price scale.
When miking the talent, the microphone capsule is placed about 6 to 10 inches (15cm to 25cm) from their mouth. This can be on a tie, jacket lapel, or neckline of a T-shirt, dress, or blouse. If you wish to hide a lavalier microphone the mic capsule can be placed beneath light clothing.
A good example of a cardioid lavalier microphone would be the Sennheiser ME 4. Because of the tighter pickup pattern, it would work well in noisy conditions. Watch out for large movements of the talent’s head that may cause their voice level to appear to rise and fall.


Last update on 2025-10-11 / Affiliate links / Images from Amazon Product Advertising API
Use a handheld dynamic cardioid or supercardioid microphone when recording in a noisy room
A handheld dynamic cardioid microphone is frequently used as a vocal or reporter microphone. A handheld mic I have used in noisy environments is the Audio Technica PRO 31 (now updated to a PRO 41) and the Shure PG58. Both look like the popular Shure SM58 but are cheaper. All these mics are normally used for close-up vocals but can also be used for voice recording in a noisy room.
The mics are directional,
If you require even more rejection of off-axis sound you could opt for a super-cardioid microphone. However, such a mic would be more difficult to use in an interview situation.
A typical cardioid dynamic handheld mic for noisy environments would be the Shure SM58. It is probably the world’s most popular live vocal microphone and is very robust. Cardioid mics are frequently used for vocals, street interviews, and red-carpet events.
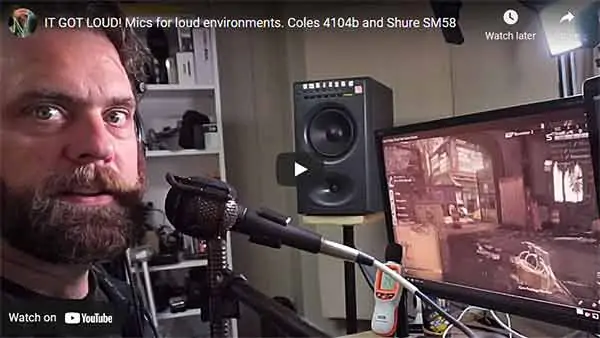
Hear how much background noise the Coles 4104b and Shure SM58 reject in Mike Delgaudio’s video. Mike has set up the two mics in front of a construction site with a noise level of 70-80dB A. You’ll be amazed at how well both mics reject background noise.
Examples of super-cardioid microphones would include the Aperture Deity, Sennheiser ME66, and Samson CO2. Super-cardioid mics are frequently used to record dialogue on film and television sets. They are useful when you want to “zoom in” on the dialogue without capturing the nearby sound. So super-cardioids would be good when recording at sporting events, business shows, and conventions.
Think about what is behind your speaker
If you are using a directional microphone, think about how you are going to point it towards your talent. If they are standing a few feet in front of a noise source, don’t point the microphone horizontally at them. By doing so you will also be pointing your directional microphone at the noise source.
In such circumstances, point the mic down from above the subject, or up from below. This is because fewer noise sources are likely to be above or below your speaker.
However, watch out for ceiling mounted air conditioning vents that could be a noise source. Your best bet is to do a test and determine the best way to angle your microphone.
Another concern about how you point your microphone at your speaker is the pickup pattern of your microphone. When using a shotgun, super-cardioid, or hyper-cardioid microphone it may also pick up some sound from the rear. When this is the case, you obviously do not want a noise source behind your microphone.
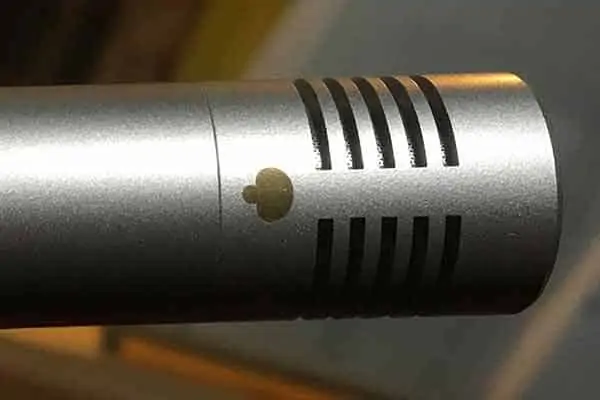
If you are unsure of the pickup pattern of your microphone, check the documentation that came with it. Many microphones will show a small graphic on their body of their pickup pattern.
The image below is of my Samson C02 microphone, showing a super-cardioid polar pickup pattern printed on its side. Although this microphone will pick up most of the sound from in front it will also pick up a small amount of sound from the rear. For more details about microphone polar pick-up patterns check out this article.
De-noise your recording
Although the above techniques will help you reduce the amount of room noise in your recording, you probably will not eliminate all of it.
If you need your audio to be as noise-free as possible you can try processing your recordings in your favorite digital audio workstation (DAW). For instance, Adobe Audition has some built-in tools you can use but there are several plugins you can also try
The one I am particularly impressed by is iZtope’s RX7 for Post. Check out the Dialogue Isolate and De-Rustle tools from RX7 on the iZotope website![]() . iZotope have introduced AI into their RX7 audio repair tools and they do a fantastic job, but the full software is not cheap.
. iZotope have introduced AI into their RX7 audio repair tools and they do a fantastic job, but the full software is not cheap.
A cheaper alternative is to use RX Elements. When I last looked it cost $129, however it was $29 in their Christmas/New Year sale. RX Elements includes De-Click, De-Clip, De-Hum and Voice De-Noise elements from their full package. You can install them as VST plugins or use the RX Editor, that’s included in the purchase
Open your audio in the RX Editor. If your camera produces mp4 or QuickTime files you should be able to open them directly. You can then use the Voice De-Noise option manually.
An easier way to repair your audio is to use the built-in AI. Click on Repair Assistant in the top right corner and choose the type of material you wish to clean up. The options are Dialogue, Music, and Other. Choose Dialogue and then Start Analysis. The software will produce three repair previews (light, medium, and heavy). Choose the one that you like the most and then render the repair.
If you do not want to splash out on RX Elements and have access to Adobe Audition, try the included noise reduction filters. A free alternative is Audacity. Go to the Effects menu and use the Noise Reduction plugin. The results may not be as good as you will get in RX Elements, but at least the software is free.
Can you get too close to the microphone?
The answer depends on…
- The sound style you are aiming for
- Do you mind if the microphone
appears in the shot - What type of microphone you are using
Some microphones exhibit what is known as a proximity effect. This is where low frequencies are accentuated when you get right up to the microphone. This is often exploited by radio presenters, announcers, and vocalists.
As Neumann says of the proximity effect, “You can use it to make things big, fat and sexy”. That is why the proximity effect is frequently thought of as being something desirable by voice-over artists. But it does not necessarily sound natural and can make the voice sound “muddy”.
Furthermore, a close-mic technique is not easy to maintain on camera without it looking as if you are having a love affair with the microphone.
You could use the proximity effect to your advantage if you have a voice booth and intend to record a voiceover. It may also apply if you are going to be presenting from behind a desk with a large-diaphragm microphone clearly in shot
Here is an example of the proximity effect on a Samson C02 super-cardioid microphone, with speech record at about 5-6 inches and 12 inches from the microphone.
However, when recording a piece-to-camera, or interviews, the proximity effect is unlikely to be a feature of your videos.
The proximity effect is typically associated with directional microphones. However, directional microphones like the Electro-Voice RE20 can compensate for the proximity effect and eliminate it. The RE20 achieves this using their Variable-D™ technology. Essentially this uses multiple slots cut into the side of the microphone body.
Apparently high frequencies enter nearest to the microphone’s diaphragm. Mid frequencies enter about halfway down the microphone body. Finally, lower frequencies enter farthest from the diaphragm. The result is that the proximity effect is eliminated.
Some mics tackle the proximity effect by including a high pass switch that rolls off bass frequencies. This can also help reduce low-frequency rumble from nearby sound sources, such as roads and industrial plants.

- Multifaceted Microphone: The RE20 dynamic cardioid microphone is truly an industry standard, a firm...
- Venturing into Music: Its popularity also extends into music production as a premium grade...
- Smartly Built: Its Variable-D design and heavy-duty internal pop filter excel for close-in voice...
- Voice Changer: The RE20 Microphone can create the classic sound of FM radio voices
Last update on 2026-03-01 / Affiliate links / Images from Amazon Product Advertising API
My Favorite Content Creation Kit
Thank you for taking the time to read this article. Hopefully, you found it helpful in creating your own content for your social media and YouTube channels. I have listed some of the gear I use as a YouTuber and online course creator and hope you’ll also find it useful. I have recommended this equipment to my readers and my own family and friends.
Audio Recorder: I use Zoom digital recorders to capture good quality audio for videos, podcasts, and radio/TV advertising. Unlike SLRs the Zoom Handy recorders can record from multiple sources simultaneously, ideal if you have two or more people speaking. I’ve used the H4n![]() , H5
, H5![]() , and H6
, and H6![]() and would recommend them to anyone.
and would recommend them to anyone.
Camera: You can use your smartphone when starting out, but I’d recommend getting a Mirrorless Camera. I use both the Canon EOS R![]() and EOS R6
and EOS R6![]() . Both can shoot Full HD or 4K, and the Eye AutoFocus will keep you sharply in focus even if you move around. If your budget is smaller, I would recommend the Canon M50 MkII
. Both can shoot Full HD or 4K, and the Eye AutoFocus will keep you sharply in focus even if you move around. If your budget is smaller, I would recommend the Canon M50 MkII![]() .
.
Video microphone: Arguably, sound quality is more important than video quality, that’s why I use a Deity V-Mi![]() c D3
c D3 ![]() Pro super-cardioid shotgun microphone on my mirrorless cameras. It automatically powers on when I turn on my camera and powers down when I switch off the camera. But I also like the versatility of the mic. It automatically senses what device it is connected to ensuring it works with SLRs, camcorders, smartphones, Handy recorders, laptops, and bodypack transmitters.
Pro super-cardioid shotgun microphone on my mirrorless cameras. It automatically powers on when I turn on my camera and powers down when I switch off the camera. But I also like the versatility of the mic. It automatically senses what device it is connected to ensuring it works with SLRs, camcorders, smartphones, Handy recorders, laptops, and bodypack transmitters.
Video Lighting: Although daylight is my favorite lighting, I use LED lighting for all the videos I shoot indoors because good lighting can make a tremendous difference to the visual appeal of a video. For video calls on Zoom or Teams, I use the Lume Cube Broadcast Lighting Kit![]() . For YouTube videos and creating video tutorials for online courses, I love the Lume Cube 18″ Cordless Ring Light Kit. Both these lights are excellent, and I wouldn’t hesitate in recommending them.
. For YouTube videos and creating video tutorials for online courses, I love the Lume Cube 18″ Cordless Ring Light Kit. Both these lights are excellent, and I wouldn’t hesitate in recommending them.
Teleprompter software: I use the iCue teleprompter![]() app on my iPad when using it with a traditional beam-splitter teleprompter and control it remotely with the iCue Remote
app on my iPad when using it with a traditional beam-splitter teleprompter and control it remotely with the iCue Remote![]() app on my iPhone. On my PC I use Teleprompter Pro
app on my iPhone. On my PC I use Teleprompter Pro![]() from the Microsoft Store.
from the Microsoft Store.
Teleprompter hardware: Teleprompters help you present to the camera without needing to learn your script. When I need more screen space and the durability of an all-metal build, I like the Glide Gear TMP100![]() beam-splitter teleprompter. It works with my mirrorless cameras and uses an iPad or tablet to run the teleprompter software.
beam-splitter teleprompter. It works with my mirrorless cameras and uses an iPad or tablet to run the teleprompter software.
Tosh Lubek runs an audio and video production business in the UK and has been using the Canon EOS R since it was released in the Autumn of 2018 and the Canon EOS R6 in 2020. He has used both cameras to shoot TV commercials broadcast on Sky TV, promotional business videos, videos of events and functions, and YouTube creator content. He has also won several international awards for his advertising and promotional work. You can meet him by visiting his “video booth” at HashTag Business Events across the country.
Recent Posts
Most people use sandbags the wrong way. Here’s how to hang them properly on a light stand for maximum stability and safety — plus what to fill them with.
You're Using the Canon RF 50mm f/1.8 WRONG! Here’s How to Fix It
If you’ve recently picked up the Canon RF 50mm f/1.8 STM—affectionately known as the Nifty Fifty—you might be confused by that strange switch on the side of the lens. It doesn’t say AF/MF...