
DIY Video Studio is supported by its readers. Please assume links on this site are affiliate links or ads, and that I get commissions for purchases made through these links. As an Amazon Associate, I earn from qualifying purchases. Thank you if you use any of the links.
It’s always better to record a voiceover for your video without background noise, but sometimes it’s unavoidable.
I don’t mean background noise like recording under the flight path of a busy airport or on a construction site. I mean those constant background sounds like a fan, air-conditioning unit, refrigerator, or computer fan. Audacity allows you to remove static, hiss, hum, and other constant background noises from your audio recordings.
If you already have audio software it may include a noise reduction or noise removal effect, if so, you can follow along since the noise reduction process will be similar.
To remove the background noise, you will need to do the following.
- Ensure your recording includes a section with just the background noise.
- Select a few seconds of the background noise from the audio waveform.
- Use the Noise Reduction effect to sample the noise and generate a Noise Profile.
- Select the section of audio to be filtered.
- Use trial and error to find the best amount of Noise Reduction to apply.
- Apply the Noise Reduction effect.
- Save / Export your cleaned audio.
That’s the basic process for noise removal in Audacity but I’ll now go through the process step by step.
Remove background noise in Audacity
Preparation for noise reduction
The most important part of the noise reduction process is ensuring you have a good sample of the noise you want to remove. Audacity will use this to learn about the noise and create a noise profile. The sample of noise must last a reasonable length of time and be free of any other sounds
The Noise Reduction effect needs a minimum of 2048 data samples to create a noise profile. This is equivalent to about five-hundredths of a second for a sound file with a sample rate of 44.1kHz. Remember this is the minimum amount of audio that Audacity requires to create a noise profile, but Audacity will usually do a much better job of creating a good noise profile if you provide a longer sample of the noise. Therefore, always try to record a few seconds of ambient noise.
The easiest way to do this is to set your recording level and record some “silence” before you start speaking. Alternatively, leave your camera/recorder rolling for a few seconds after you have finished speaking. Whilst recording the ambient noise, don’t shuffle around or make any noises and listen out for any other sounds. You just want to record the background noise on its own, two to five seconds should be plenty.
Noise reduction in audacity step-by-step
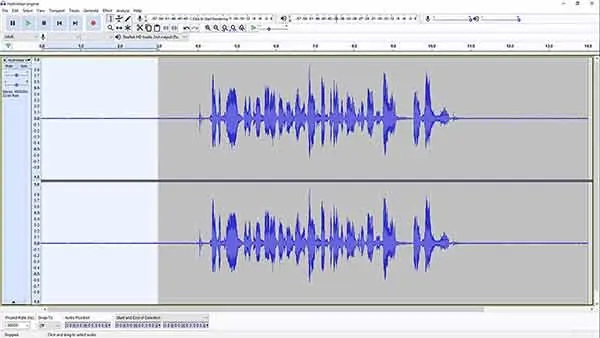
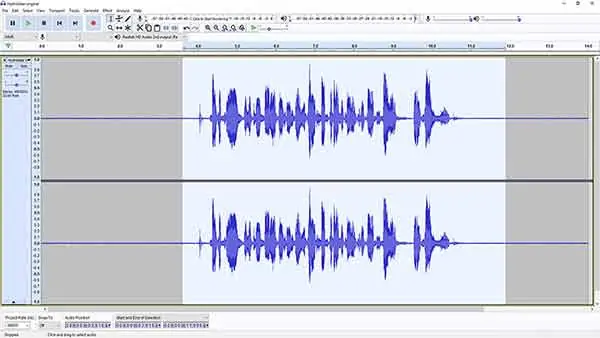
Step 1: Select a few seconds of the noise on your recording. Avoid any section of noise that also includes other sounds.
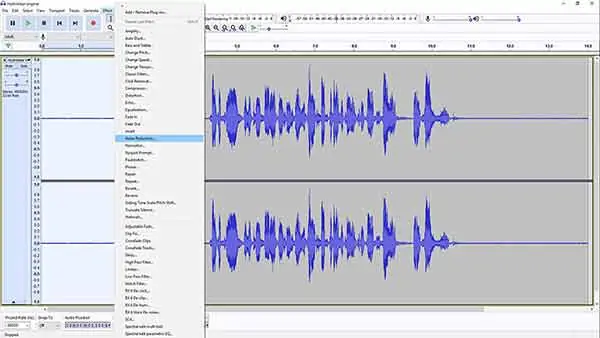
Step 2: Click on Effect > Noise Reduction.
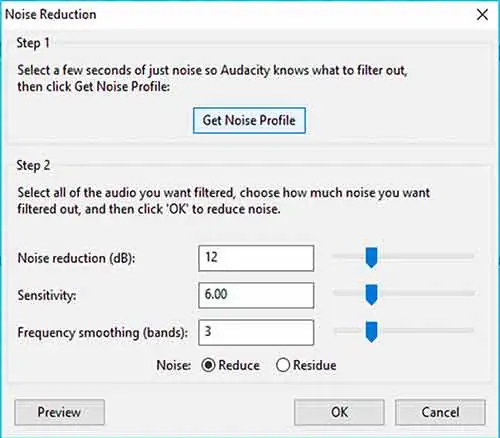
Step 3: When the Noise Reduction effect panel opens click on the Get Noise Profile button.
Step 4: Select all the waveform or just the part to which you wish to apply the noise reduction.
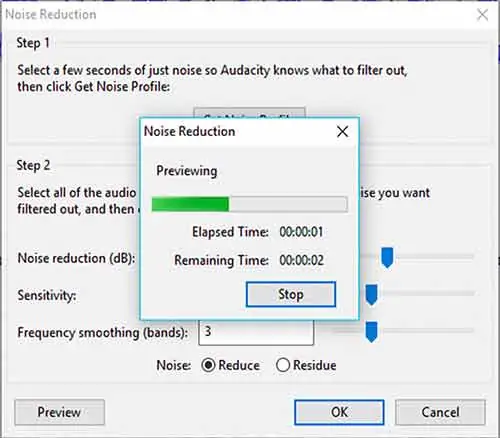
Step 5: Click on Effects > Noise Reduction to open the Noise Reduction effects panel. Gradually increase the amount of noise reduction and preview the effect. Depending on the amount of noise reduction you dial in, the quality of your recording and Noise Profile, the Noise Reduction effect may generate some noticeable artifacts when you preview the result. The artifacts may appear as chirps and whistles. If you hear any artifacts try dropping down the amount of noise reduction. When you are happy with the result in the preview click OK to apply the noise reduction.
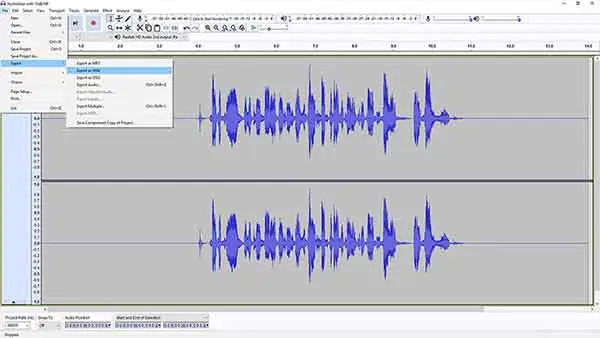
Step 6: Save the result by going to File > Export. Audacity you do not save audio files by choosing the option Save Project, you need to choose Export. Choose the file type you want to save to and the location where you want to save the file. Give the file a name and click on Save. Note that in
Example of Noise Reduction in Audacity
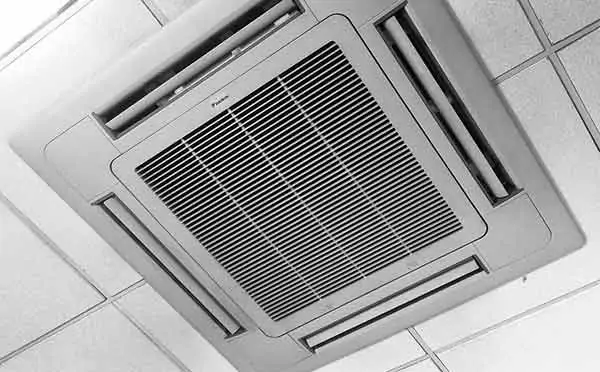
As you can hear, the microphone picked up the constant background noise from the air conditioning vent in the ceiling.
Using the Noise Reduction effect in Audacity I removed almost all the noise from the air conditioning vent by selecting the first two seconds of the audio to create the Noise Profile. I then previewed the result of the effect as I gradually increased the amount of noise reduction from the default value of 12dB to a value of 18dB. I could have gone higher with the amount of noise reduction but apply higher levels of the effect can introduce artifacts. However, this recording can stand a higher level of noise reduction.
Here is the recording with 18dB of noise reduction. I left the sensitivity and frequency smoothing at their default values of 6.00 and 3 respectively. Note that the reverb on the recording has not been removed since the Noise Reduction effect is not intended to deal with echo or reverberation.
Audacity noise reduction not working
If you find the Noise Reduction effect is not helping in the clean-up of your recording it may be because your audio is unsuitable for the effect
The key to success with Audacity’s Noise Reduction effect is for the noise to be constant and not irregular or variable
For instance, the Noise Reduction effect will not help if your recording was done in a noisy location where the background consists of distinct sounds like background speech, random traffic sounds, or a crowd in an exhibition hall or gallery.
Generally, the Audacity Noise Reduction effect will struggle under the following conditions.
- The noise is very loud.
- When the noise is not constant but irregular or variable.
- The level of the speech is similar to or quieter than the noise.
- When the noise and speech are similar in terms of frequencies.
- The noise is an individual click or pop.
- Where there is variation in the noise.
- Individual noise in the background, such as traffic or crowds.
Noise Removal Software – Audacity Download
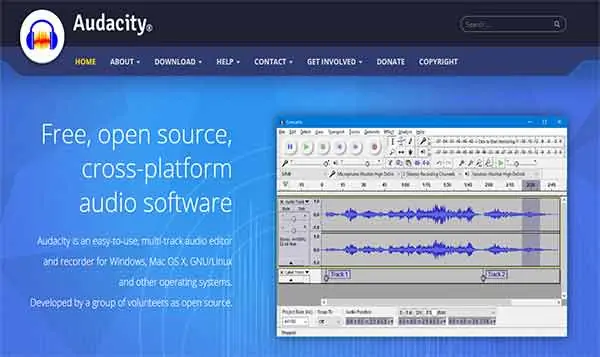
Audacity is a free, open source and cross-platform audio program that allows you to record, process and mix audio for your videos. Although it has been created by volunteers it packs quite a punch. It will allow you to do many of the things paid for software does. And of course, you can remove background noise in Audacity. Which after all, is the subject of this article.
There’s no catch, no annoying advertising, just great software that lets you record, edit, apply many of the latest effects and plugins, create multitrack sessions, and export your finished audio.
Get your copy of Audacity from the Audacity Team website![]() .
.
Audacity is available for Windows, Mac OS X, and GNU / Linux. You can even download the source code if you want to compile the program yourself.
What can you do with Audacity?
Record audio from a microphone, line input. The software supports 16, 24, and 32-bit samples, so it can handle quality audio files.
Import and export WAV, AIF, AU, FLAC, and OGG files. By downloading a few free plug-ins, you will also be able to import and export various other formats, including mp2 and mp3.
Various effect plug-ins are supported, and you can run “chains” of effects on a project. To install your VST plug-ins use the Plug-in Manager. If you can use the Nyquist programming language you can also write your own effect plug-ins or edit Nyquist plug-ins.
For more details of what you can do in Audacity check out the documentation page![]() on the audacity team website.
on the audacity team website.
My Favorite Content Creation Kit
Thank you for taking the time to read this article. Hopefully, you found it helpful in creating your own content for your social media and YouTube channels. I have listed some of the gear I use as a YouTuber and online course creator and hope you’ll also find it useful. I have recommended this equipment to my readers and my own family and friends.
Audio Recorder: I use Zoom digital recorders to capture good quality audio for videos, podcasts, and radio/TV advertising. Unlike SLRs the Zoom Handy recorders can record from multiple sources simultaneously, ideal if you have two or more people speaking. I’ve used the H4n![]() , H5
, H5![]() , and H6
, and H6![]() and would recommend them to anyone.
and would recommend them to anyone.
Camera: You can use your smartphone when starting out, but I’d recommend getting a Mirrorless Camera. I use both the Canon EOS R![]() and EOS R6
and EOS R6![]() . Both can shoot Full HD or 4K, and the Eye AutoFocus will keep you sharply in focus even if you move around. If your budget is smaller, I would recommend the Canon M50 MkII
. Both can shoot Full HD or 4K, and the Eye AutoFocus will keep you sharply in focus even if you move around. If your budget is smaller, I would recommend the Canon M50 MkII![]() .
.
Video microphone: Arguably, sound quality is more important than video quality, that’s why I use a Deity V-Mi![]() c D3
c D3 ![]() Pro super-cardioid shotgun microphone on my mirrorless cameras. It automatically powers on when I turn on my camera and powers down when I switch off the camera. But I also like the versatility of the mic. It automatically senses what device it is connected to ensuring it works with SLRs, camcorders, smartphones, Handy recorders, laptops, and bodypack transmitters.
Pro super-cardioid shotgun microphone on my mirrorless cameras. It automatically powers on when I turn on my camera and powers down when I switch off the camera. But I also like the versatility of the mic. It automatically senses what device it is connected to ensuring it works with SLRs, camcorders, smartphones, Handy recorders, laptops, and bodypack transmitters.
Video Lighting: Although daylight is my favorite lighting, I use LED lighting for all the videos I shoot indoors because good lighting can make a tremendous difference to the visual appeal of a video. For video calls on Zoom or Teams, I use the Lume Cube Broadcast Lighting Kit![]() . For YouTube videos and creating video tutorials for online courses, I love the Lume Cube 18″ Cordless Ring Light Kit. Both these lights are excellent, and I wouldn’t hesitate in recommending them.
. For YouTube videos and creating video tutorials for online courses, I love the Lume Cube 18″ Cordless Ring Light Kit. Both these lights are excellent, and I wouldn’t hesitate in recommending them.
Teleprompter software: I use the iCue teleprompter![]() app on my iPad when using it with a traditional beam-splitter teleprompter and control it remotely with the iCue Remote
app on my iPad when using it with a traditional beam-splitter teleprompter and control it remotely with the iCue Remote![]() app on my iPhone. On my PC I use Teleprompter Pro
app on my iPhone. On my PC I use Teleprompter Pro![]() from the Microsoft Store.
from the Microsoft Store.
Teleprompter hardware: Teleprompters help you present to the camera without needing to learn your script. When I need more screen space and the durability of an all-metal build, I like the Glide Gear TMP100![]() beam-splitter teleprompter. It works with my mirrorless cameras and uses an iPad or tablet to run the teleprompter software.
beam-splitter teleprompter. It works with my mirrorless cameras and uses an iPad or tablet to run the teleprompter software.
Tosh Lubek runs an audio and video production business in the UK and has been using the Canon EOS R since it was released in the Autumn of 2018 and the Canon EOS R6 in 2020. He has used both cameras to shoot TV commercials broadcast on Sky TV, promotional business videos, videos of events and functions, and YouTube creator content. He has also won several international awards for his advertising and promotional work. You can meet him by visiting his “video booth” at HashTag Business Events across the country.
Recent Posts
Most people use sandbags the wrong way. Here’s how to hang them properly on a light stand for maximum stability and safety — plus what to fill them with.
You're Using the Canon RF 50mm f/1.8 WRONG! Here’s How to Fix It
If you’ve recently picked up the Canon RF 50mm f/1.8 STM—affectionately known as the Nifty Fifty—you might be confused by that strange switch on the side of the lens. It doesn’t say AF/MF...