

DIY Video Studio is supported by its readers. Please assume links on this site are affiliate links or ads, and that I get commissions for purchases made through these links. As an Amazon Associate, I earn from qualifying purchases. Thank you if you use any of the links.
Do you want to learn how to start recording videos on your iPhone that look better than the rest?
Well, it’s relatively easy if you just follow a few simple steps. Even better, I’ve got those steps for you right here, so keep reading.
Imagine what it would be like if you didn’t prep your motor car before a road trip or vacation. You just wouldn’t do that. It’s obvious you would make sure everything is OK, so the motor car doesn’t let you down on the highway.
Heck, you would check… The oil, water, tires, and gas.
Right?
Well, before you start recording videos on your iPhone you need to prepare your iPhone and get the right apps.
Step 1: Ensure your iPhone fully charged
This one may seem obvious, but it’s easy to forget. That’s especially true if an opportunity arises for recording videos on iPhone and camera app. Whether that’s in the office or at an event.
I learned that lesson the hard way because I didn’t realize I was close to 20% battery power. As a result, I missed most of what I was trying to film. Because FiLMiC Pro stopped recording when the 20% battery power warning appeared on the screen. So before starting to record on your iPhone, top up the battery. You need to have plenty of battery life, especially if you are going to be filming outdoors in the cold.
If you want to learn how to reduce your iPhone battery drain click here![]() .
.
Step 2: Check your iPhone storage capacity
Videos will be some of the largest files on your iPhone. Therefore, make sure you check your available storage to avoid the iPhone storage full message.
If you do not have enough iPhone storage capacity, you will need to free up some space. You can do this manually or download an iPhone storage cleaner from the App Store.
I’ve gone into detail about managing iPhone storage in another article, you can find it here![]() .
.
Step 3: Make sure your lens is clean
This tip may seem obvious, but I’ve seen too many examples where footage has been spoiled because the videographer forgot to do it.
Fingerprints, smears, and dirt will degrade the quality of your image. Since we’re trying to get the most out of your iPhone, so a dirty lens will only lead to a poor-quality blurry image.
Use a clean, soft cloth to wipe away grease and dirt. Don’t use any cleaning liquids or abrasive cleaners as they could damage your device. If you have your iPhone in a case, take it out so you can get to the lens and clean it properly.
Step 4: Close any background apps
Generally, background apps don’t eat up your battery power and system resources, but that’s not always true. To close your background apps double-press your home button to open the app switcher. Then swipe upwards on the apps you want to close until you’ve flicked them off the screen. Once you’re done, press the home button to excite the app-switcher.
Step 5: Turn on Airplane mode
Make sure your iPhone into airplane mode. Go to your settings and slide across the switch to engage airplane mode. Alternatively, swipe up from the bottom of the screen and tap the airplane icon.
Putting your iPhone into Airplane mode will stop notifications, texts and incoming calls interrupting you. That’s something you will appreciate if you’re in the middle of that perfect take. If you are using your iPhone in a professional shoot, Airplane mode might even save your blushes.
Step 6: Remove the phone case
Obviously, a phone case will provide extra protection for your iPhone. But in iPhone videography, it is potentially going to be a pain. It’s best to remove the case if you intend to mount your iPhone on a tripod/gimbal or if you intend to use various iPhone video accessories, such as lenses and filters.
Step 7: Get a good video camera app
If you are serious about recording good quality video with your iPhone, you need to use the best video camera app. Although the native camera app is OK, it’s not really designed to squeeze the available quality out of your iPhone’s camera.
There’s no question in my mind that the video camera app to choose for iPhone videography is FiLMic Pro. It also happens to be the choice of many professional film and video makers. In 2017 the BBC made a full-length documentary![]() using the iPhone 7 Plus and FiLMiC Pro.
using the iPhone 7 Plus and FiLMiC Pro.
FiLMiC Pro allows you to fully control your camera’s focus, exposure, frame rates, shutter speed and a lot more. It also includes support for external microphones, lens adapters,
You can download FiLMiC Pro from the App Store or from iTunes![]() .
.
For a few dollars more, you can download FiLMiC Pro and FiLMiC Remote as the FiLMiC Pro Camera Kit. Put the camera app on your iPhone and Remote on an iPad. You then effectively have a powerful combo of a camera on your iPhone and live monitor on your iPad, that also controls the camera app. You can get the Camera Kit from the App Store or from iTunes![]() .
.
Step 8: Use an external microphone
Superior quality sound on your productions will mark you out as a quality video creator. You will be able to
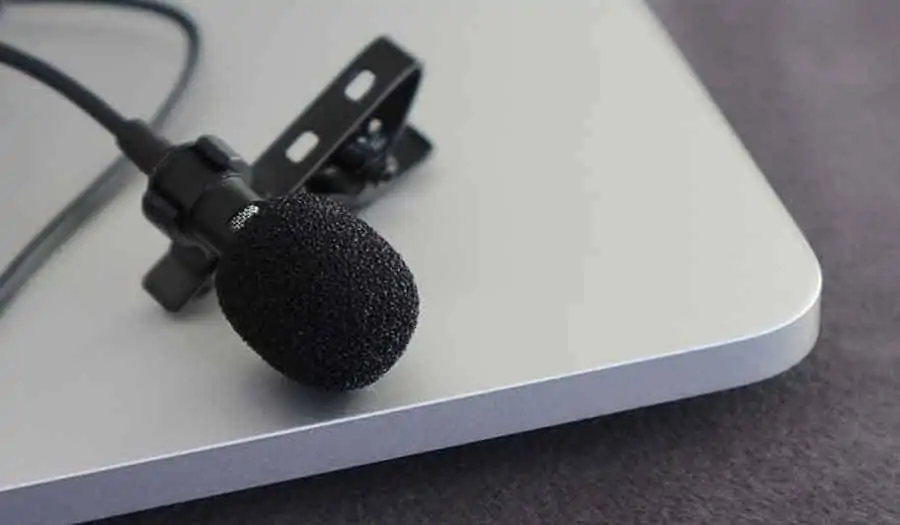
Recording quality sound requires getting the microphone close to whoever is speaking. Normally that means using a lavalier microphone clipped on to clothing, such as a lapel, neckline of a top, or a shirt. Lavalier microphones are small so do not look as distracting as a handheld microphone.
By placing the microphone between 6 to 12 inches from the
Step 9: Turn on stabilization
Shaky footage is another hallmark of amateur video, so, unless you are aiming for a grungy/urban look, you should try to avoid it. The easiest way to make your video clips look rock-solid is to keep your iPhone fixed. That’s appropriate for a piece-to-camera shot or many b-roll shots, however, you might wish to include some movement.
Dynamic handheld shots can add visual excitement and pace into your video story. However, camera movement that looks classy, just like the curves on prestige motor cars, should look smooth.
The least expensive method to make your video clips look smooth and steady is to turn on Stabilization in FiLMiC Pro. Do this by tapping the gear wheel in the bottom right of the FiLMiC Pro screen, then tap Stabilization. For added steadiness use both hands and tuck your elbows into your sides.
Step 10: Get uber-steady with a tripod
If you want to place your iPhone at more than arm’s length and keep the shot rock-solid turn to a simple tripod. For around $15 the Amazon Basics 50-inch tripod offers terrific value. You will also need an iPhone tripod mount adapter, but that should come in at under $10.
You will find a tripod (with mount adapter) one of your most useful video recording accessories for iPhones. Your video clips will appear sock solid and enable you to easily conduct interviews without worrying about the camera. You can frame the shot as required, start recording, and then move round to be in front of the camera.
If you want steady shots but more freedom of movement, consider a monopod. I use one where a tripod would take up too much space or if I need to move quickly between different angles.
If perfectly balanced and correctly held the monopod and iPhone combo can mimic clips taken with a Steadicam. They won’t be as good as shots taken using a gimbal but, considering you need to spend less than $20, the results will be much better than just holding the iPhone in your hand.
Now you have the 10 practical steps to start recording videos on iPhone you may also like to learn how to reduce battery drain and shoot for longer with FiLMiC Pro.
Bonus Step 11: Every great video starts with a great idea
Just turning on your iPhone, hitting the record button and hoping you’ll film something your audience wants to see is seldom a route to success.
Before you start shooting you need to sit down and come up with some ideas, hone them, and develop a plan. To learn how to think of countless video ideas check out my article about generating YouTube video ideas![]() .
.
If you have recently taken up iPhone videography using the FiLMiC Pro camera app you probably have found it difficult to get your clips off your phone. Don’t worry, you can check out this article![]() that will explain how to do it.
that will explain how to do it.
If you are going to film yourself and are struggling with seeing yourself on the iPhone’s screen, try using my gray card hack![]() .
.
In the meantime, you might like to read my article about filming yourself with an iPhone when you can’t see the iPhone’s screen. I give five methods you can use to film yourself with the rear-facing camera and still get the framing and exposure right. Click here to read the post.
Tosh Lubek runs an audio and video production business in the UK and has been using the Canon EOS R since it was released in the Autumn of 2018 and the Canon EOS R6 in 2020. He has used both cameras to shoot TV commercials broadcast on Sky TV, promotional business videos, videos of events and functions, and YouTube creator content. He has also won several international awards for his advertising and promotional work. You can meet him by visiting his “video booth” at HashTag Business Events across the country.
Recent Posts
Most people use sandbags the wrong way. Here’s how to hang them properly on a light stand for maximum stability and safety — plus what to fill them with.
You're Using the Canon RF 50mm f/1.8 WRONG! Here’s How to Fix It
If you’ve recently picked up the Canon RF 50mm f/1.8 STM—affectionately known as the Nifty Fifty—you might be confused by that strange switch on the side of the lens. It doesn’t say AF/MF...