Author: Tosh Lubek Published: 15 November 2023
DIY Video Studio is supported by its readers who use the affiliate links or ads on this site. As an Amazon Associate, I earn from qualifying purchases. Thank your support if you use any of the links.
Here’s a fascinating photography experiment. Look through a vintage Olympus Zuiko lens and you’ll see the aperture blades are in the fully open position. Now set the aperture ring to the highest f-number, or smallest aperture setting, and look again. The aperture blades are still fully open.
Next, with the aperture ring still set to a high f-number, press the depth of field preview button on the side of the lens. This time the aperture blades immediately close to the aperture set by the aperture ring.
This prompts an intriguing question if you plan to use a vintage Olympus Zuiko lens on a mirrorless camera, like a Canon EOS R.
Do you need to press the DOF preview button when using a Zuiko lens on a mirrorless camera?
After watching my YouTube video “How To Use Vintage Lenses on Canon EOS R Mirrorless Cameras,” @stefanoromanello
asked in the video comments, “Do you need to keep the depth of field preview button on the Zuiko lens pressed if you don’t want to shoot fully open?“

 on one of my YouTube videos
The answer is no. When using a vintage Olympus Zuiko lens on a Canon EOS R system camera, pressing the depth of field button is unnecessary to shoot at a smaller aperture than fully open. Good lens adapters, like the K&F Concept OM-RF lens adapter that I use, take care of this automatically.
In fact, pressing the depth of field button has no effect in this situation. That’s because the lens adapter is effectively pressing the button for you. To understand why that’s the case, we need to understand the way in which the depth of field preview button works on a vintage Zuiko lens.
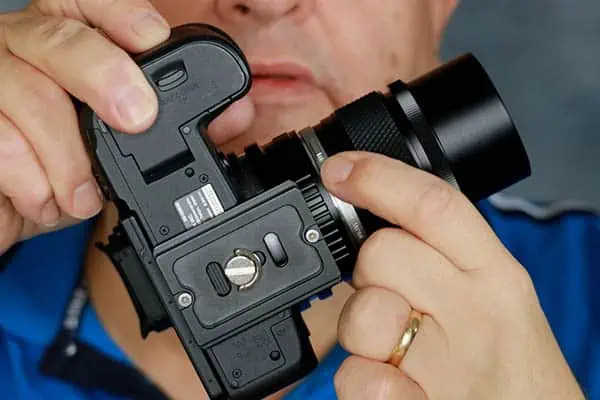
How does the depth of field button work on a vintage Olympus Zuiko lens
If you look at the rear of a Zuiko lens, you’ll see two metal posts or blades protruding from two short slots running around the edge of the lens.
If you press the depth of field preview button, you’ll see one of the posts move to a new position. When you let go of the button, the post snaps back to its original position. If you have the aperture ring at an aperture setting that’s smaller than fully open, you’ll also see the aperture blades close down.
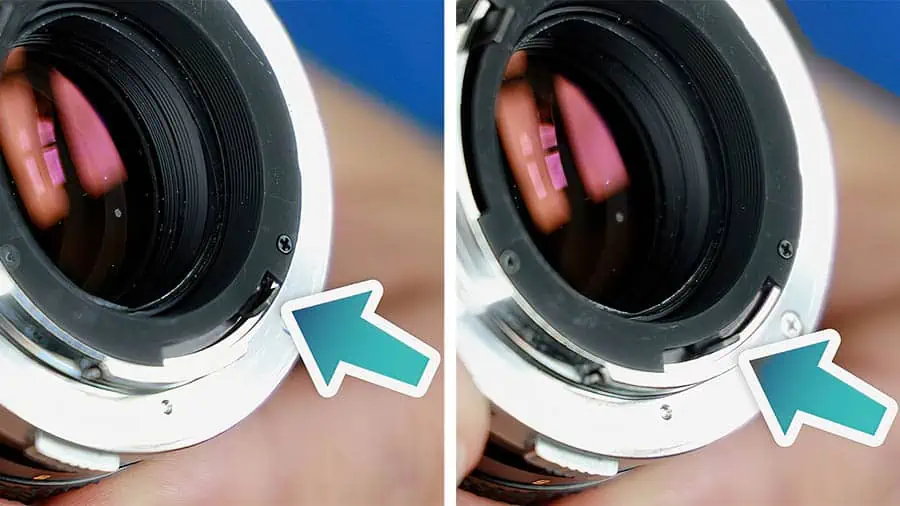
Therefore, the depth of field preview button and the post are connected in some way. When the post is moved forward, the aperture blades will be released to take up the position dictated by the aperture ring. So, you could just push the metal post forward with your finger, and this alone will again release the aperture blades from the fully open position.
This post is used to allow an Olympus OM film camera to control the release of the aperture blades when a photograph is taken. Pressing the shutter button causes a mechanism in the camera to push the post forward on the lens. So as the shutter fires, the aperture blades will have closed down to the value set on the aperture ring.
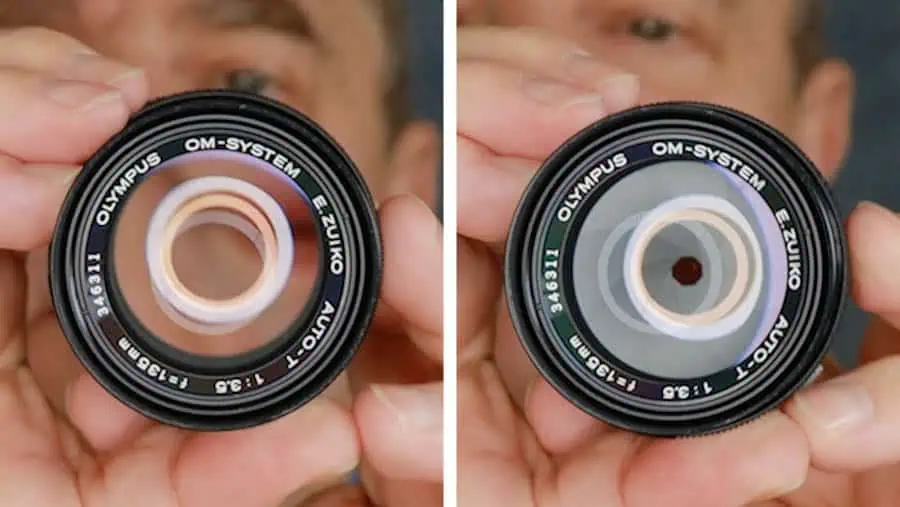
This is an entirely mechanical way of the camera body communicating with the lens. Whereas on modern digital cameras, the communication is completely electronic.
So, if the Zuiko lens uses a mechanical system of communication, how does a modern camera tell the lens to release the aperture blades when a shot is taken?
The truth is that it doesn’t. Instead, the OM-RF lens adapter pushes the depth of field post forward so that the aperture blades can close down to the required position.
How does the lens adapter release the aperture blades?
Look at the lens adapter from the side where the lens attaches.
On my K&F Concept OM-RF lens adapter, there is a metal post on the inside of the barrel, just below the front of the adapter. When you attach the lens to the adapter, as you twist it, the post on the adapter pushes the post on the lens until it is in the correct position to release the aperture blades. This has the same effect as permanently holding down the depth of field preview button.
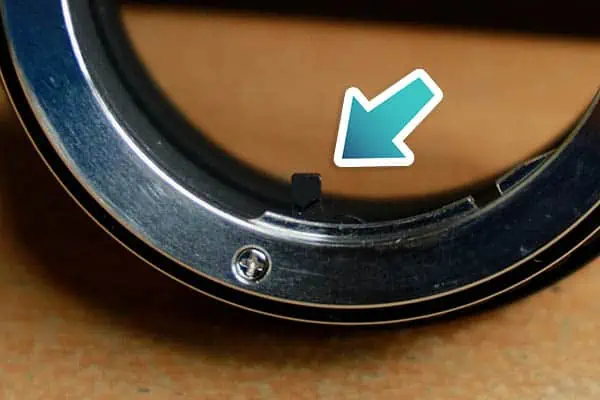
With the lens mounted on the adapter, the depth of field preview post is held in the forward position. This releases the aperture blades, allowing them to close to the correct size, based on the aperture ring setting. Since the aperture blades are now in the correct position, the camera does not need to “tell” the lens to release the aperture blades when a photo is taken.
If you’re looking for a lens adapter to allow you to use vintage Olympus OM Zuiko lenses on a Canon EOS R camera, this is the one I use from K&F Concept.
- 【 Material】High-quality copper and aluminum alloy ;High precision and durable.
- 【Features】Red dot mark, accurate alignment, Install and remove smoothly;
- 【Manual Focus】Full manual control, Diaphragm control of the lens is set manually. Supports…
- 【Please note】 when using the adapter ring for the first time, please turn on the “release…
Last update on 2024-08-04 / Affiliate links / Images from Amazon Product Advertising API
Why do Zuiko lenses have a depth of field preview button
Why do you need to preview the depth of field on an old film camera? And if previewing the image is important, why isn’t it available all the time?
Previewing the depth of field in the viewfinder lets you check that everything looks as you expect. You will see whether enough of your subject is in focus, or that your background is blurred.
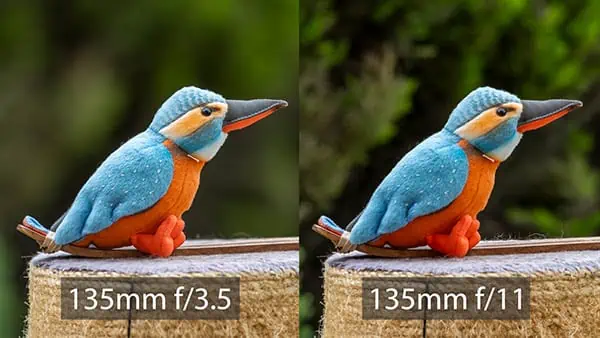
In the film era of SLR cameras, there were no LCD screens on the back of the camera. You could only look through the viewfinder and the brightness of the image was determined by the amount of light entering through the lens. So, the larger the aperture, the brighter the image.
When the lens aperture is fully open, the image in the viewfinder looks bright while you’re framing your composition. But if you choose an aperture of f/11 or f/16, a lot less light will be let through the lens and the image in the viewfinder will be much dimmer.
So, on film cameras, it makes sense to keep the lens aperture fully open until the moment the shot is taken. But it is also sensible to have a way of previewing the depth of field, otherwise, you would need to wait until the film has been developed before you can see the result. Being able to preview the shot therefore lets you judge whether everything looks good before taking the shot.
Why don’t mirrorless cameras need the lens to be fully open before taking each shot?
Using a digital camera lets you see the result immediately, giving you the opportunity to take a shot, check it, make any necessary adjustments, and finally retake the shot. Or you can take several shots, each at a slightly different setting. That’s because unlike using film, taking multiple digital shots doesn’t cost you any money, while using film is expensive.
However, when you use a vintage lens on mirrorless cameras the main reason you don’t need to keep the lens aperture fully open is different. No matter what your aperture setting is, a digital camera can deliver a bright image to the LCD screen or viewfinder. This is especially true if you disable Exposure Simulation in the camera’s settings.
For example, when I disable Exposure Simulation on my Canon EOS R6 and attach an Olympus Zuiko 28mm lens, the screen image is just as bright at f/22 as it is at f/2.8.
Conclusion
I explained that when using a vintage Olympus Zuiko lens on a mirrorless camera you don’t need to hold down the depth of field button if you don’t want to shoot with the lens aperture fully open. You can use any aperture setting available on the lens by using a high-quality lens adapter, such as the K&F Concept OM-RF lens adapter. It will automatically push one of the metal posts on the rear of the lens into the correct position to release the aperture blades, so they match the setting on the aperture ring.
Vintage film cameras would keep the lens aperture fully open until the photo was taken to get a brighter image in the viewfinder. Modern mirrorless cameras overcome this issue by brightening the image electronically, irrespective of the size of the aperture. The operation of vintage lenses with modern mirrorless cameras is basically like using a modern manual lens on the camera. You use the aperture and focus rings on the lens to adjust focus and aperture. The camera takes care of displaying a clear image on the LCD screen or in the viewfinder.
About the author: Tosh Lubek is a multi-award-winning broadcaster, writer, and video producer, with 40 years of experience in professional broadcasting and has been using Canon video and stills cameras since 2010. He has worked with radio and TV broadcasters, advertising agencies, and direct clients on a variety of projects including radio and television advertising, online video production, corporate videos, award ceremony motion graphics, and theme park sound design. Tosh has won numerous awards, including a Radio Academy Awards Gold Sony, a Gold, Silver, and Bronze World Medals in the New York Festivals International Advertising Awards. Since about 2007 he has been creating YouTube videos. Tosh has been a sponsor of the “video booth” at HashTag Business Events across the UK.
Recent Posts
Fix Blue Yeti Corrupted Firmware or USB Advanced Audio Device Issue in Windows
Author: Tosh Lubek Published: 2nd October 2024 "Help! My Blue Yeti Isn't Working Right!" That was the urgent message I received from one of my readers who was facing a frustrating issue...
Premiere Pro Editors STOP Dragging Clips WRONG! Edit 10x FASTER
Hey there, Premiere Pro users! If you're dragging your video clips from the project panel to the timeline listen up, there's a better way! The program monitor holds some hidden editing superpowers...


