

DIY Video Studio is supported by its readers who use the affiliate links or ads on this site. As an Amazon Associate, I earn from qualifying purchases. Thank your support if you use any of the links.
Best self-tape ring light
The best ring light for tape auditions will make a dramatic difference to the quality of your video audition.
A ring light is a circular light, literally a ring. Fluorescent tube ring lights are still popular, but they are being overtaken by LED ring lights. LEDs use little power, will last for years, they can be battery powered and LEDs are more robust than fragile glass fluorescent tubes.
Ring lights are easy to use, and they can do the same job as two or three ordinary photography or video lights. So they are ideal for self-tape auditions that you film on your own.
Normally you mount your camera or smartphone close to the center of the ring. This means light effectively comes from all directions around the camera’s point of view, producing a soft lighting effect that’s even and almost shadowless.
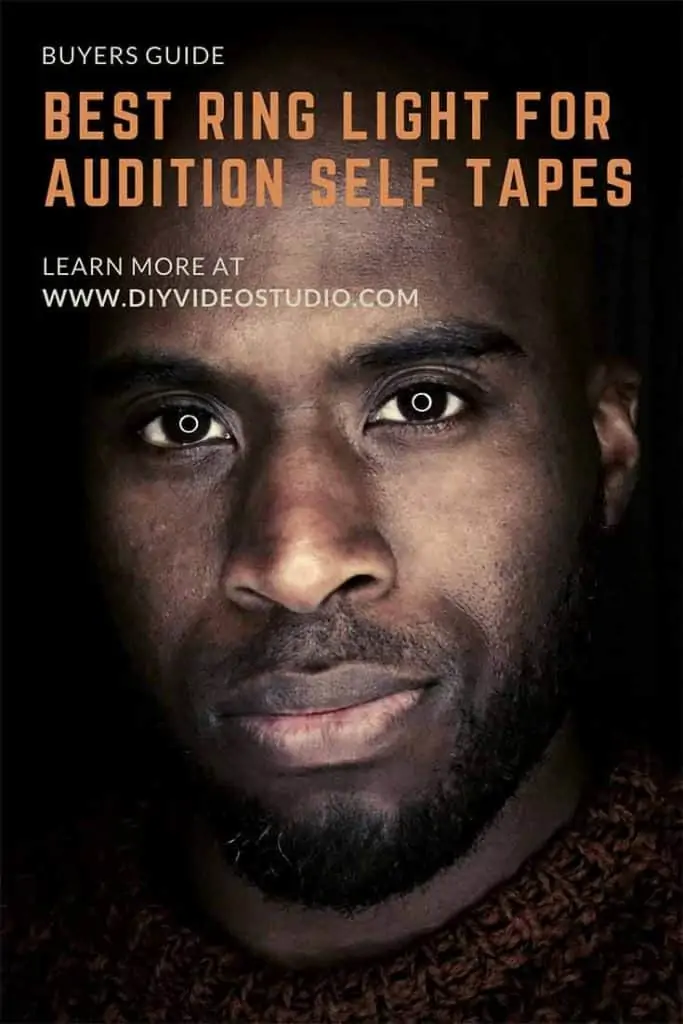
So, a ring light produces a soft flattering light that tends to get rid of shadows that would normally draw attention to wrinkles, blemishes, and other skin imperfections. But at the same time, the ring light is good at showing the details you want to be seen.
Understandably, ring lights are popular with professional photographers, videographers, and vloggers. Fortunately, because they are easy to use, you don’t need much skill to use them to make your self-tape audition videos look better.
I have spent two weeks researching which ring lights are best suited for home filming of audition self-tapes. This has been a mixture of applying my own personal experience with video lights, long conversations with actor friends who use their own ring lights, and hours of pouring over information on the internet and YouTube.
The result is four ring lights that vary from the professional level to a budget model. Each will allow you to light yourself well in your video audition and literally allow your performance to shine. The best ring light for you depends on your exact needs and your budget.
IN A HURRY? Here is a comparison table of the 4 Ring Lights. My choice, based on all aspects of the lights, is the Ivisii 60W 19″ Bi-Color LED Ring Light.

Last update on 2025-10-21 / Affiliate links / Images from Amazon Product Advertising API
Diva Nebula 18″ dimmable ring light

Diva is undoubtedly one of the leading brands in the market. In fact, it would be fair to describe them as a premium brand that has a large following among makeup artists and YouTube beauty vloggers. Both love the soft and almost shadow-free lighting these lights produce, while still showing details well. Users also love how these lights can help enhance their appearance and make skin tones look so more vibrant.
The company has three ring lights in its range that would enhance any self-tape studio. These are the Nova, Supernova, and Nebula. While the Nova and Supernova use a fluorescent tube lamp the Nebula is more modern in its use of LEDs which also provide more control over brightness levels.
Of the three Diva ring lights the one we like the most is the Diva Nebula.
Although a tripod stand is not included the Nebula ring light comes with a light stand mount, tripod mount, and diffusion cloth.
If you’ve previously tried out the Diva Ring Light Supernova you’ll find the Nebula similar in many ways. The significant difference is that the Nebula uses 640 daylight-balanced LEDs instead of a fluorescent tube lamp. Not only does this make the Nebula 15% brighter than the Diva Supernova ring light but you’ll find it’s also more robust and less likely to break.
Other advantages are that the LEDs on the Nebula are much cooler in operation than the fluorescent tube of the Supernova, which does get hot. The lifespan of the LEDs on the Nebula is also an impressive 50,000 hours. If you choose the Diva Nebula ring light for your self-tape lighting you can probably expect the LEDs to last for many years to come.
The white ring of LEDs is set into an 18-inch diameter black plastic housing, which is durable, feels like its quality made, but isn’t too heavy. There are plenty of ventilation slots on the base of the ring light, helping to keep the unit cool even if you’re filming for a long time.
The Nebula ring light is dimmable through the full 0% to 100% range.
Also included with the light is a white diffusion cloth that can be fitted on to the ring. This does provide an extra amount of diffusion. But if you like those big ring catchlights that only a ring light can produce, the diffusion cloth takes away the individual dots of the LEDs and simulates the classic solid ring you get when using a fluorescent tube ring light. Yep, it helps to add the unique sparkle to your eyes.
The last extra parts in the box are a light stand gooseneck arm and a tripod Z bracket, giving choices in how to use the Diva Nebula light. For self-taping lighting, you’ll probably attach the tripod Z bracket. The gooseneck is more appropriate for makeup artists or product photographers where the light needs to be angled so it’s pointing downwards.
Although the Diva Nebula ring light works off an adapter it can also be battery powered. You need to use a D-Tap cable and V-Mount or Anton Bauer Battery. If necessary, these can be bought separately, but I don’t think you’ll need them for your tape auditions.
What you will need is a tripod. If you’ve already got one try using that but if you need to buy one you don’t need a fancy fluid head, but I would recommend avoiding a lightweight tripod.
What’s in the box?
- 18” Diva Nebula ring light
- White diffusion cloth
- AC adapter and cable
- Light stand gooseneck arm
- Tripod Z bracket
Pros and Cons
| What we like… | What we don’t like… |
| Professional quality | Pro price point |
| Robust build | No light stand included |
| Very bright | |
| Dimmable |
Diva Nebula 18″ LED ring light summary
- 640 individual LED's - 5500K Daylight balanced
- Dimmable feature allows for softer light options (dims from 0% to 100%)
- Comes with 3,200k diffusion plate, diffusion cloth, tripod mount, and light stand mount
- Low power usage
Last update on 2025-10-21 / Affiliate links / Images from Amazon Product Advertising API
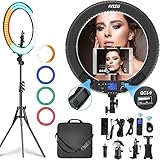
Ivisii 60W Bi-Color LED Ring Light

Invisii![]() is a brand name of Danzze, a Chinese company based in Shenzhen that makes and sells photography and video lighting aimed at the professional photo and video sector. The company’s products include indoor and outdoor flashes, continuous ring and panel lights, speedlight power packs, plus flash triggering and control systems.
is a brand name of Danzze, a Chinese company based in Shenzhen that makes and sells photography and video lighting aimed at the professional photo and video sector. The company’s products include indoor and outdoor flashes, continuous ring and panel lights, speedlight power packs, plus flash triggering and control systems.
Danzze’s aim is to provide high quality photo and video products at a competitive price. That certainly seems to be the case with the Invisii 60W bi-color LED ring light.
This is one of the larger ring lights that you can buy, with an overall diameter of 19 inches. So that certainly puts it at the pro end of the size spectrum of ring lights that are available to videographers.
What doesn’t feel so professional is the plastic construction. It just doesn’t feel as robust as a pro photographer or videographer would demand, but to be honest, I’ve not had any problems with the light.
High Color Rendering Index for great looking skin tones.
What’s impressive is how much you get for the money and the bi-color LEDs that have been used in the light. They have a high CRI rating of ≥97. If you don’t know what that means it really doesn’t matter. What’s important is that this light renders colors well, so they look like they ought to. Your skin tones will look rich and natural rather than having an unnatural tint.
So, as well as the light the kit includes a light stand that extends from 20” to 74”. So, with the light on top, you could use it for full height shots if necessary. A carry bag is included, and 4 plastic diffusion filters snap onto the front of the light. I would only use the white filter, but the red, green, and blue filters may come in handy if you need some atmospheric lighting effects.
Three cold shoe mounting points included on the top of the control panel.
Just above the control panel of the light there are three camera cold shoe mounting points, so in theory you could mount three gadgets within the ring. You could mount a DSLR, a video mic and a smartphone, provided they were the right size. To help with mounting you get three camera mounting brackets plus an iPad holder and a phone holder.
In fact, there is enough room within the ring to mount any iPad horizontally, which is what you want for self-tape auditions. But if necessary, the ring can accommodate up to a 9.7-inch iPad mounted vertically.
However, you’re not done yet with what’s included.
The box also contains a Bluetooth remote to control the camera app shutter on your iOS or Android device plus a wireless Remote that does everything that all the buttons and dials do on the control panel. So, you can adjust all the light settings without having to go back and forth to the ring light.
So that’s everything in the box? No, there’s more.
You get an AC/DC adapter that accepts 100-240V, drawing 1.5A. The output is 15V/4A. Also included are two cables, one with a US-type plug and one with a European-type plug. So, if you need to take your self-tape kit with you when you travel around the world, this Ivisii light has you covered.
This last item is interesting. Although you’ll probably use it to power the ring light from your wall outlet, you could leave it off altogether. The Invisii will let you work on battery power. It has two battery slots on the back of the ring that take any Sony NP rechargeable battery. The recommended batteries are either NP-F750 or NP-F970. Two NP-F750 batteries will give you around 80 minutes of power while two NP-F970 batteries will keep you going for about 3-4 hours. Note that the batteries are not included.
This 60W ring light has a control panel on the back that includes an LCD display that shows the brightness & color temperature of the light. Both are adjustable. Brightness from 0%-100% but you also have a brightness quick adjust button. Each press of the button changes the brightness by 25%.
The Ivisii ring light provides good illumination from close-up to at least a distance of 10-12ft at a range of brightness levels. Of course, your video equipment will also play a part. If you are using a DSLR or mirrorless camera with an f/1.8 lens, then you will get even better performance.
The color temperature is also adjustable from 3000K to 5800K. In other words, from a tungsten home light bulb yellow/orange to the white of daylight.
Charge your smartphone camera or tablet from the included QC 3.0 USB port
A useful extra feature of this light is that it has a Quick Charge QC 3.0 USB socket on the control panel. So, if you’re using a smartphone, tablet, or another USB device for your filming you can plug it into this QC 3.0 USB port and power/charge your device while filming so you don’t run out of battery power.
What a genius idea. In the past, I’ve had to use power banks (power bricks) for extended use of my iPhone for filming or powering my iPad as a teleprompter. That’s all in the past with the QC 3.0 USB port on Ivisii ring light.
If there’s something I don’t like about the light is the plastic hinged light stand mount. I would prefer a ¼”-20 mounting point so that the ring light could be secured directly onto a tripod or on a gooseneck mount.
Although I’ve never broken a plastic hinged mount on a video light, I’ve always thought it must be a weak point. Plus, since this light is in the mid to upper price range, I think it should be a bit more robust, especially since it has features that clearly support taking it on the road where it may experience some rough handling.
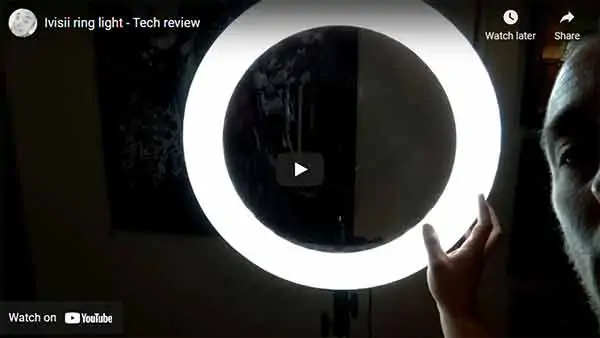
Watch a user unboxing and review video
What’s in the box?
- 1x 19″Ring Light
- 1x 20-74 inch light stand
- 1x Carrying bag
- 1x Wireless remote
- 1x Bluetooth remote
- 4x Clip-on diffusion filters (White/Blue/Red/Green )
- 1x iPad holder
- 1x Phone holder
- 3x Camera mounting brackets
- 1x AC power adapter
- 1x US Plug
- 1x Europe Plug
Pros and Cons
| What we like… | What we don’t like… |
| You get a lot for your money | Bit of a plastic feel |
| Can be used with rechargeable batteries | Lack of ¼”-20 mounting point |
| Dimmable | No gooseneck mount |
| Supplied with US and EU plug |
Ivisii 19″ LED ring light summary
- 【Package included】1x 19"Ring Light, 1x 74.8 inches/188cm Light Stand, 1x Carrying Bag, 1x...
- 【Colorful filters & Adjustable brightness】The LED light with 4 different color filters(...
- 【Fashion design】Smart LCD display shows the brightness & color temperature accurately; Ultrathin...
- 【HIGH COLOR RENDERING/MULTIPLE COMPATIBLE】- CRI ≥97 and TLCI ≥ 99, high color rendering...
Last update on 2025-10-21 / Affiliate links / Images from Amazon Product Advertising API
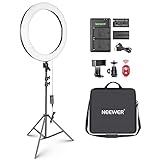
Neewer 20” Dimmable LED Ring Light Kit

Neewer![]() has been around for over a decade providing photo and video gear that satisfies the needs of all types of users, not just the pros. They offer decent quality gear at sensible prices for ordinary people posting to their personal social media accounts or for media content creators and photographers.
has been around for over a decade providing photo and video gear that satisfies the needs of all types of users, not just the pros. They offer decent quality gear at sensible prices for ordinary people posting to their personal social media accounts or for media content creators and photographers.
If you’re looking to set up your own home or office video studio, Neewer will be able to provide all you need. From LED ring and panel lights to stands backdrops, batteries, and audio gear.
This Neewer’s upgraded 20-inch diameter ring light. It’s also one of the largest you will find at an affordable price. It’s made of black plastic with 176 white and 176 yellow LEDs, which are covered with four snap-on white plastic diffusers.
With the ring being larger you can be a little further away from the light and still have those large circular catch lights sparkling in your eyes.
Control is simple. On the rear of the ring, just above the light stand mounting point, there are two control dials. The one on the left is for changing the color temperature and the one on the right controls the brightness.
Above the controls, on the inner part of the ring, there’s a cold shoe mount point for the small billhead, which is then used to mount your camera or the phone adapter.
Two Sony NP-F compatible batteries and USB charger included
Like the Ivisii light the Neewer 20” has dual-power options. You can use the supplied AC/DC adapter or drop in a pair of Sony NP-F type Li-ion batteries. The battering slots are on the rear of the ring at 3 and 9 o’clock positions.
I’m not keen on the cheap plastic mounting bracket used to seat the light on the light stand. Although it’s OK on smaller lights I’d like to see metal used on such a large light. However, overall, this is a good lighting kit for recording self-tapes, even if the design and construction seem a little flimsy.
Considering the price, it must be fair value. You get everything you need in this one kit to brighten up your filming. Remember to look at the bottom of the box where you’ll find the light stand that comes with the light. It’s not difficult to set up and the results look beautiful.
The kit includes the 20-inch ring light with a total of 352 SMD LEDs with adjustable color temperature and brightness. The color temperature can be adjusted from 3200K to 5600K, which is equivalent to going from a tungsten room light to white daylight.
The brightness can be evenly increased from 0% to 100%. Note that the output of this light is 44W, so considering it is the largest ring light its power rating is lower than the 18” and 19” models in our review. Despite this, you can still use the light for full height shots if necessary.
A light stand that can be extended to a height of 36”-79” is included in the kit for the light to attach to. The stand can take a maximum load of about 17.5lbs or 8kg
The kit also includes a ball head adapter and a rotatable phone holder. The ball head goes into the cold shoe mounting point that’s on the inner part of the ring above the control knobs. A camera can be mounted on the ball head. When using a smartphone, the smartphone holder is screwed onto the ball head. If you’re an iPad or tablet user, you’ll need to buy a separate tablet holder and mount it on the ball head.
Easily mount a smartphone, DSLR or Mirror camera. Tablet requires an additional tablet holder.
There’s plenty of room within the ring to mount your devices. The inner diameter is 16”, so you can mount pretty much anything here. The phone holder also can accommodate most smartphones, such as the iPhone X, 8, 7 Plus, 7, 6 Plus, Samsung S8 S7 S6.
DUAL POWER OPTION: AC adapter or Li-ion battery power.
A feature I really do like with this ring light is the dual power option. You can use it with the AC wall outlet adapter, or you can use battery power. Two Sony NP-F550/970 compatible Li-ion batteries are included and will power the light for about three-quarters of an hour. If you don’t need full power (which probably you won’t), you’ll get about 3-5 hours out of the two batteries running at around half power. However, the power output of the light will drop to 10W, about a quarter of the light power you get when using the AC adapter.
The kit also includes a USB dual battery charger so you can recharge the batteries from a USB adapter or even a power bank.
You also get a Bluetooth selfie remote to control your smartphone camera’s start/stop button. It works with both iPhone/iPads and Android. Last of all a carrying case for the ring light is included.
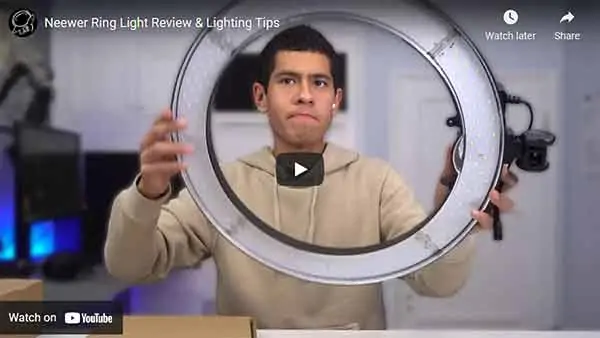
Watch a video showing the unboxing, assembly, and use of this ring light
You of course want to see a hands-on video of the Neewer 20” light. Although this video is not in English that doesn’t really matter. The important thing is that you’ll see an unboxing, exactly how all the parts go together (yes, it’s easy) and you’ll also see examples of the nice illumination it produces on skin tones and the circular catchlights in the eyes.
Note that the light in the video is slightly different from the current model in that the two control knobs adjusted the “warm” and “cool” LEDs individually. These have been updated to a color temperature adjustment dial on the left and a brightness level dial on the right.
What’s in the box?
- 1x 20-inch dimmable LED Ring Light
- 1x Light Stand
- 1x Ball Head Adapter
- 2x Li-ion Battery
- 1x USB Battery Charger
- 1x Rotatable Phone Holder
- 1x Power Adapter with US plug
- 1x Bluetooth Selfie Remote
- 1x Carrying Case
- 1x Instructions
Pros and Cons
| What we like… | What we don’t like… |
| Bright, even at 44W | Plastic construction could be more robust |
| Large diameter | Lack of ¼”-20 mounting point |
| Dimmable | No gooseneck mount |
| Large inner space for mounting devices | |
| Dual power system | |
| Batteries & charger included |
Neewer 20″ LED ring light summary
- KIT INCLUDES: (1)20-inch SMD LED Ring Light, (1)Light Stand, (1)Ball Head Adapter, (2)Li-ion...
- 20" 44W LED RING LIGHT: This is an ENLARGED NEEWER Ring Light designed with 20" diameter and 352...
- 2 POWER OPTIONS: Support DC power adapter or Sony NP-F550/F970 replacement Li-ion Battery; 2 Li-ion...
- COMPLETE ACCESSORIES: Pro heavy duty metal light stand with adjustable height 36-79 inches/92-200...
Last update on 2025-10-21 / Affiliate links / Images from Amazon Product Advertising API
Neewer 18″ Dimmable LED Ring Light

This is the second ring light from Neewer that I’ve included in my list but at 18” it’s a little smaller than it’s big brother. It’s also only fitted with one color of LED but it’s still a capable light for self-tapes. If you’re on a smaller budget and don’t mind getting an older model this could be the ring light for you.
Like the other lights in this group, it’s constructed from black plastic and consequently can feel a little flimsy. Be careful not to overtighten the securing screw knobs on the light and stand as you could damage the screw threads. But if you handle the light with care, it will serve you well.
The ring’s outer and inner diameters are 18 and 14 inches, respectively. There is a cold shoe mounting point at the bottom of the inner part of the ring. You can use the cold shoe ball head adapter to mount a camera or add the included phone holder on top of the ball head to mount your smartphone. If you want to make your camera more secure, mount it on a separate tripod and have it poking through the center of the ring light.
Although the Neewer 18” ring light has a stepless dimming knob (0%-100%) there is no dial to change the color temperature because all the LEDs have a color temperature of 5,500K. To get a warm color temperature of 3,200K you need to snap on the orange plastic filters over the LEDs.
It’s BRIGHT! This light has 240 LEDs and at maximum brightness a total power of 55W.
The light is bright, so if you already have some ambient light in your room, you probably won’t need to turn the brightness knob all the way up. If you’re using a DSLR or Mirrorless camera this light will mean you can film with an ISO of 100 and f/2.8 with professional-looking results.
The color rendering index of the LEDs is 83, which, although not the highest in this selection of ring lights, will produce an acceptable rendering of skin tones.
You’ll find a light stand is included. If you don’t at first see it, check the bottom of the packaging for a separate box. The maximum height of the stand is 61 inches. The flexible gooseneck, or soft tube as Neewer calls it, goes between the stand and the ring light, allowing you to twist the light into any position you like.
If you’re going to use a smartphone for your filming, you’ll find the Bluetooth selfie remote useful. It works with iOS and Android and will start/stop your phone’s camera app recording.
Yes, this light is made from cheap plastic, but if you treat it with respect, it’s great for budget level self-tape lighting.
The following video demonstrates what a difference Neewer’s 18” ring light can make. The video also shows why only having daylight LEDs is fine for home taped auditions.
You will also see that a room light is equivalent to adding the orange filter to this ring light (an effect I’m not keen on). You’ll also see how this one light can not only illuminate you well but also cast a lot of light on the background in an almost dark room.
What’s in the box?
- 1x 18″ Dimmable Ring Light
- 1x 61″ Light Stand
- 1x 10″ Soft Tube (Gooseneck)
- 1x White color filter set
- 1x Orange Color Filter Set
- 1x Hot Shoe Ball Head
- 1x Smart Phone Holder
- 1x Universal Power Adapter
- 1x Bluetooth Remote
- 1x Carrying Bag
Pros and Cons
| What we like… | What we don’t like… |
| Low price | Could be more robust |
| Bright 55W light | No battery option |
| Dimmable | Older design |
| Gooseneck included |
Neewer 18″ LED ring light summary
- Please note: 1. The light stand is packed in a separate box inside the big package box (under the...
- Kit includes: (1)18"/45cm Outer 55W 5600K LED Ring Light+(1)61"/155cm Light Stand+(1)Soft...
- Dimmable 18"/45cm Outer 55W 5600K 240 Pieces LED bulbs with a wide dimming range from 1%-100%....
- 61"/155cm light stand is constructed from aluminum alloy, giving it exceptional strength; The soft...
Last update on 2025-10-17 / Affiliate links / Images from Amazon Product Advertising API
Why use a ring light?
OK, I can’t guarantee that a ring light is going to make you look like the leading actors from the latest summer blockbuster, but it will produce a flattering appearance. The near-shadowless nature of the light helps to hide lines and blemishes.
These lights are also good at showing detail while at the same time flattering your looks.
Using a ring light ensures it is easy to be evenly lit without needing to learn fancy lighting techniques. You’ll also save money because you won’t need multiple pieces of lighting equipment, your ring light will probably be enough.
One of the reasons people like using ring lights is the unique ring catchlight or sparkle in the eye. If you want that effect, you’ll need a ring light since no other type of light will produce the same effect.
Ultimately, a self-tape ring light will allow you to look good on video auditions, allow you to work faster without much lighting knowledge, and you won’t need to spend a large amount of money just on lighting.
Choosing the right ring light for self-taped auditions
Even if you decide that my selection of the best ring lights for self-tapes is not right for you, it’s worth knowing what to look for when choosing a light. I’ve provided in-depth notes below to help you get the best light for your self-tape recording.
What is the best size ring light for self-tapes?
Whether you are using a webcam, smartphone, tablet, camcorder, DSLR, or mirrorless camera you need to know that for the best effect, your camera should be placed within the ring of your ring light. This ensures you’re evenly lit because the light appears to come from all directions around the camera lens.
So you need a ring light that is large enough to accommodate your camera and microphone (if you are going to mount your microphone on the camera). But to get that wraparound light effect you also need the ring light to be close to you and, relatively speaking, large.
When choosing your ring light do not consider anything smaller than a 14″ diameter. The best size ring light for video auditions at home would be 18″, 19″, or 20″ diameter.
However, be careful when it comes to the size you see in an advertisement. As well as the outside diameter you should also look for the inside diameter. Usually, the difference between the inside and outside diameters is 4″. Just make sure the inner diameter of the ring is big enough to take your recording device.
All the examples in my Best Ring Light list are big enough to work with almost any kind of camera you are likely to use as a self-taper.
Why choose a dimmable ring light
Depending on your choice of ring light it may or may not be dimmable. If it is dimmable, it may only offer preset brightness levels or offer a limited dimming range. For instance, the Diva Supernova ring light uses a fluorescent tube that has a dimming range of 20% to 100%. However, the Diva Nebula ring light that uses LEDs has a dimming range of 0% to 100%.
Having a ring light that is bright, but which is dimmable through the full 0% to 100% range is particularly useful since it gives you more flexibility. For instance, if you only need a little extra light because there is already plenty of ambient light you might find a light level of 20% is too much. Your only option would be to move further from the light.
If you also need to illuminate the background as well as yourself, you can turn the brightness up and move away from the light. But if you want those big round catchlights in your eyes that only ring lights can produce, turn down the brightness and get close to the light ring.
The Colour Temperature and CRI of the ring light
Many ring lights offer color adjustment. This may be with bi-color or RGB LEDs, or by attaching snap-on color filters or diffusers. However, are these of any use to you?
In almost all your tape auditions you will want to use the “Daylight” or 5,400K setting on the ring light.
Many LED ring lights will use white Daylight LEDs, and that’s useful because they will match the daylight coming in through your window. But if you require a warmer color temperature many lights provide snap-on orange filters. These will simulate the warm light of a tungsten bulb that has a color temperature of 3,200K.
However, there may be one or two occasions when you might want to use “atmospheric lighting” to enhance your performance. Modern ring light will give you this flexibility, and if you think the effect is necessary then you will have it available to you. But most times stick with colder 5,400K Daylight. This closely matches the color of natural daylight, which is useful if you have daylight coming in through a window.
The CRI value of the light is also something you should consider carefully before buying.
CRI stands for Color Rendering Index and refers to how good the colors of your subject appear under that light. In your case, this all relates to how well your skin tones are represented. If the CRI value is close to one hundred then you’re rocking, and your skin tones will look true to life and vibrant. If the CRI is down at around eighty that’s just about passable. Ideally, look for a CRI value of about 90. Ideally, buy LED lights with a CRI of 95 or 97.
Fluorescent tube Vs LED Ring Lights
You can choose between fluorescent of LED renege lights, but which one is best?
Many professional ring lights still use fluorescent tubes, for example the Diva Supernova ring light. Although many people may consider fluorescent tubes to be old technology there are some pros and cons to consider.
I personally prefer LEDs, even though I still have more fluorescent lights in my lighting gear store. LEDs are more durable and will withstand a certain amount of rough handling. Fluorescent tubes, being made of glass, are naturally more fragile. They also contain a small amount of mercury to make them work, which is toxic. So, if you break a fluorescent tube ensure there’s plenty of ventilation. You also need to dispose of old tubes carefully at recycling centers.
Unless you have a permanent studio space, I would choose an LED light. Not only are fluorescent tube lights more fragile they also get hot. Depending on the size of your room, the fluorescent tube ring light might work just as much as a heater as it does light.
Although fluorescent tubes can last a long time their performance does degrade with age, plus they can start to buzz and even flicker. You will need to buy replacement tubes from time to time. Although this sounds like a negative point it’s also where a fluorescent tube ring lights beats it’s LED sibling.
LED ring lights use surface-mounted diodes (SMD), although some use LED beads. Neither of these types of LEDs can be replaced when they fail. So, if you have a lot of LEDs on your ring light that has failed you have no option but to buy a completely new ring light. Meanwhile, with a fluorescent tube light, you just need to replace the tube.
If you are a fan of the distinctive ring catchlight that ring lights produce in your eyes, then you may also debate whether you want fluorescent or LED. With the fluorescent tube, the reflected catchlight in your eyes will be a solid ring but if you’re close to the camera and using an LED ring light you may see the catchlight ring as dots.
Power or brightness of the ring light
The maximum brightness of the light is important, and it’s normally given in Lumens (Lm). Although the advertisement may just state the light’s power as a wattage, which isn’t necessarily as useful.
This wattage is likely to be the amount of electrical power the light draws and is only useful as a rough guide. The wattage will also suggest completely different brightness levels depending on whether you are dealing with a fluorescent tube or LED light. For example, a 50W LED bulb would be much brighter than a 50W fluorescent tube.
But we can say that if you choose a brighter ring light (more lumens) your image quality is likely to be better. You’ll get less or no video noise in the image because you won’t have to push the ISO on your camera to higher levels.
Talking of brightness, look for a ring light where the brightness is adjustable. This will give you more flexibility when you come to set your exposure. Also, the closer you are to the light the less light you’ll need. So, an adjustable brightness control will be particularly useful.
DIY Ring Light – Is it worth making one?
You might be good with your hands or perhaps you’re on a tight budget, either way, a “Do It Yourself” ring light project might seem appealing.
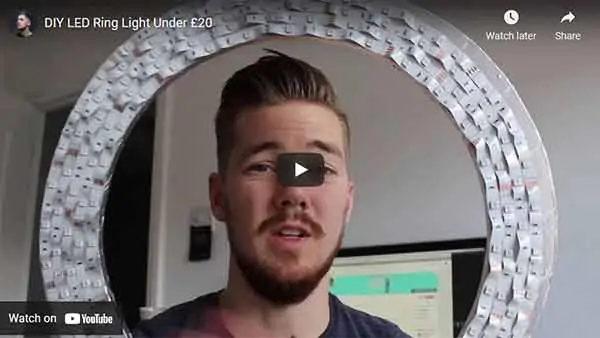
If you search on YouTube, you’ll find many videos of DIY ring light projects.
Here’s an example that seems to work and looked a lot safer than many of the other projects I found.
But no matter how much the YouTubers try to convince you that a home build is a clever idea, is it worth it?
Of course, if it’s the challenge you enjoy then go for it. But if you want a ring light that’s easy to use and produces the visual results you want hold off the DIY project for a moment.
The reason you are looking for a ring light is that they’ll make you look good in your self-tape, they are safe, and they are extremely easy to use. A home-built ring light on a tiny budget is unlikely to deliver on all those points.
Getting hold of the right components is going to take time and cost more than you initially imagined. Forget about using fluorescent tubes, the type you’ll find at a reasonable price will not render your skin tones faithfully. Finding circular tubes will also be a challenge, plus, for the average person, glass fluorescent tubes are difficult to work with. The sensible alternative is to use LEDs.
You’ll have two options with LEDs for your DIY ring light. You could use long strips of LEDs stuck to a circular base plate or you could use lots of household LED bulbs in bulb holders mounted on the circular base plate.
Reels of white light LED strips can be picked up cheaply, but they are unlikely to make you look good. They would render colors properly, especially skin tones. Cheap LEDs will have a low Color Rendering Index (CRI). For a good light, you need a CRI of at least 90+. Ideally, you should buy LEDs with a CRI of 95+ or 97+. The thing is, the higher the CRI value, the higher the price. So, the cost of your components for your DIY project is going to be higher than you thought.
If you’re going to use household LED bulbs set in a ring, you’ll probably need about 12-16 bulbs. I did a search online and the cheapest options would mean spending about $30-$50. That doesn’t consider getting the bulb holders, wiring, or any of the other hardware.
Unless you’re a qualified electrician and have enclosed all the wiring, how safe will the light be? Also, professional lights are easy to mount on a stand and can be tilted to any angle securely and safely. A homemade ring light using a plywood mounting ring will be heavy and difficult to use in the same way as a professional light.
Honestly, the DIY ring light option would not be my choice. The savings, if any, will be heavily outweighed by the time it’ll take to build, and it won’t be as easy to use as a bought light.
Self-Tape Tips – How to make better audition tapes
So, what do you need to do to make a successful self-tape?
These days knowing how to create a good self-tape is an important part of any actor’s skillset. That’s because it’s not always possible to have a face-to-face audition. It could be because the people involved are already in production and too busy, or the job is going to be in the next few days, or the casting director or producer might want to consider actors from across the whole country, or even a few countries, without having to set up multiple auditions. This last point is important, with today’s technology and people’s willingness to use it, the world really can be your oyster!
So how do you look good on your self-tape? I don’t mean your performance; I mean the technical side.
Don’t worry, you don’t need to be a gaffer, sound engineer, and director of photography all rolled into one. But you do need to have some basic knowledge and more importantly, to do some preparation.
Prepare some space in your home for a studio (a studio makes it sound grander than it really is), then make sure you have the right equipment to shoot, edit, compress, and upload the video. And finally, you need to prepare for your audition and then record it. Break the workflow down into smaller steps and it’ll all seem far less intimidating.
1: Use equipment you’re familiar with
If possible, shoot with the equipment you already know how to use so that you can concentrate on the important bit, your performance.
So, if you’ve got a camera or camcorder that you know how to use, you should film with that. If you’re happier using a cell phone that’s OK too.
Whatever camera you decide to use, keep the technology as simple as possible. There will be less to go wrong, fewer buttons to press and adjustments to be made. You don’t want the tech to get in the way of your audition.
2: Use a tripod
No matter how good your camera’s stabilization is don’t hand-hold it when shooting your self tape, and that includes someone else filming you.
Put your device, whatever it is, on a tripod to keep it steady. A camera can end up feeling heavy after a while, especially with your arm outstretched. That’s going to become distracting, irritating, and ruin your performance.
Mount your device on a tripod. If you’re using a camera or camcorder, it’ll have a threaded mounting hole on the base that you can use with the screw on the top of the tripod. If you’re using a mobile or tablet, you’ll need an inexpensive tripod adapter.
Adjust the height of the tripod so that the lens is at about your eye level. You don’t want to have the camera either tilting down or up at you.
3: Shoot landscape video
If you’re using a phone camera, I know it seems natural to hold it upright and shoot vertical video.
Don’t do that.
As I said above, put the phone on a tripod, or at least stand it on something. But critically, don’t have it standing upright. Unless you have specifically been told to do so DO NOT shoot vertical or portrait video for your self-tape.
I don’t have anything against vertical video but there’s a time and place for it and a self-tape is neither the time nor the place. Shoot in landscape format, just like you’re used to on TV and in movies. For the near future landscape is the format you’ll be working in so if your phone isn’t already set up that way change it right now.
4: Frame yourself in medium close up
In all likelihood, your self-tape will be watched on a phone. Even on a larger cell phone, the screen is still relatively small, so you need to maximize your ability to be seen properly.
Use a medium close-up for your framing, that’s just your head and top of your shoulders. Also, make sure you have some headroom between the top of your head and the top of the frame. That doesn’t mean having your head halfway down the screen. Just leave a small gap between your head and the top edge of the frame.
But don’t overdo the close-up. Don’t go into extreme close-up territory, that’s going to look plain scary!
5: The correct self-tape eye line
Now that the framing is OK it’s time to sort out your eye line.
Generally, if it’s a dialogue, do not look directly into the camera lens. Your audition self-tape is not a YouTube video, Skype call, or a remote interview where you’re trying to engage directly with the viewer.
If you can audition with a reader, you will find the scene much more natural. You will be able to interact much more convincingly with the other character if you work with another person to whom you can react. You need to be able to focus on that other person.
If it’s not possible to work with another person in your self-tape audition, try to imagine there is a real person present that you are talking to. You may find that it is easier if you have something physical to represent the other character. A photo of someone’s face is good since it’s easier to imagine it’s another person, especially since there are eyes for you to lock onto. But any object will do. For example, when lockdown restrictions were lifted in the UK “soap” actors had to observe social distancing. To allow them to do this they acted opposite tennis balls that had been put on the end of boom mic poles.
Although generally, you should appear to be looking at the reader, sometimes you’ll be asked to read looking straight into the camera. In those instances, in the absence of further instructions, think of the lens as the reader in the scene. It does help to imagine that there is a real person behind that lens. If necessary, even imagine it’s someone you know.
6: What’s the best backdrop for self-tapes?
Make sure you cut the clutter that’s visible in the shot, it’ll distract the viewer from your performance. The director does not need to see your apartment, your clothes lying around, nor your cat or dog wandering in and out of shot. Furthermore, make sure there’s nothing innapropriate in the background!
If possible, hang a neutral backdrop behind you. It can be a photographer’s paper background, a muslin photography backdrop or cloth, a collapsible backdrop, or even a plain painted wall.
Gray or blue backdrop colors tend to work well since these will not “jump out” at the viewer and be a distraction. Instead, blue and gray backgrounds will help the viewer to concentrate on you and your performance.
If you do use a muslin cloth as a background, make sure you iron or steam out any wrinkles. Visible wrinkles and creases will distract the eye and won’t allow the casting director to concentrate on you. They want to see you, your performance, and your interpretation of the character.
So, make sure you stand out for all the right reasons and not because of distractions and failures. Your tape must be good from the get-go. You only have a few seconds to make a good impression and keep the director watching. Get that wrong and they’ll move on to the next tape.
7: Use flattering self-tape lighting equipment
If you’ve got a room with a large window letting in plenty of daylight, especially from an overcast sky, you can use that. But if you take control of the lighting by using a video light your self tape can look a whole lot better.
If you know what you’re doing, go ahead and get some softboxes and create a three-point lighting setup. However, it’s usually much better to keep things nice and simple by using one ring light. If you do want to fill any side shadows use a second ring light or an LED light panel off to the side of the main ring light.
8: Don’t rely on your camera’s microphone
The casting director and director don’t just want to see your performance clearly, they want to hear it clearly as well. After all, how your performance sound is just as important as how it looks. For this reason, you should use an external microphone but don’t just mount it on top of your smartphone or DSLR.
You can buy a good lavalier mic from about $30, Clip it onto your clothes somewhere around the chest area. If you feel you need to hide the mic capsule, you can use gaffer tape to stick it to the inside of a shirt or blouse. You could even stick it underneath a collar and run the cable around the back so that it’s out of sight.
If you have a bigger budget, consider getting a shotgun video mic such as a Deity V-Mic 3 Pro![]() or Rode VideoMic Pro+
or Rode VideoMic Pro+![]() . These are meant to be mounted on top of a DSLR or camcorder, but you will get far superior results by following the practice of professional sound recordists. Mount the video mic on a boom stand a little above and in front of you and point it down at your mouth/chest area. Make sure the microphone is just out of shot.
. These are meant to be mounted on top of a DSLR or camcorder, but you will get far superior results by following the practice of professional sound recordists. Mount the video mic on a boom stand a little above and in front of you and point it down at your mouth/chest area. Make sure the microphone is just out of shot.
By getting the microphone as close to your mouth as possible the sound you will record will be clear and includes a minimum amount of distracting background noise and room echo (or reverb). A decent-quality mic will capture the sound of your voice more authentically, whereas cheap mics can make your voice sound “thin” and unnatural. Buying cheap can be a false economy compared to what you are trying to achieve with your Self Tapes.
9: Choose a suitable environment
Make the most of using a good quality microphone by shooting your self tape in an appropriate location. Avoid somewhere noisy, and make sure you ask other people in your appartment to be quiet while you’re shooting.
Avoid using the bathroom, hallways, and basements. They all have the same characteristic, they’ll add reverberation or echo to your voice. The echo will mask your true voice, and that’s one of the things the casting director will want to hear.
10: Don’t let your appearance ruin the moment
You might not be filming what’s going to appear in the final movie, TV show, or commercial but it’s important to get your appearance right. So, consider your hair, clothing, and makeup.
Don’t let your hair cover your face and make sure it looks good.
For your clothes pick something neutral rather than trying to look like the character unless you’ve been asked to do that. What you could do is let your clothes be suggestive of the character. So, if the character is a car mechanic choose something casual, like a T-shirt rather than a suit.
Your makeup should also be neutral but again check your instructions. If you’re feeling hot or are bald you might want to apply a little powder to prevent any shine. You’re going to be using ring lights to show off your looks, you don’t want them to also cause any hotspots on your face or top of your head.
Everything you do regarding your hair, clothes, and makeup should be done with the intention of not distracting the viewer from concentrating on your performance.
11: Use a reader for your self-tape audition
When you’re ready to record you’ll find it helpful to get someone to read in the other lines. But make sure they know what they are doing and when they should read the other lines. They don’t have to sound stunning but for you to perform well they do need to read well.
If you can’t find someone, either leave gaps for those lines or record those lines yourself on a smartphone with a voice recorder app and play them in. Either way, you should react to the lines as if you are playing against another actor.
Whichever method you use, remember it’s your performance that’s important. The casting director does not want to hear the other lines, so keep the volume down on the smartphone or digital audio recorder so that it’s not picked up much by your microphone.
12: Test your gear before you start for real
You’ve got all your equipment set up and you’re eager to start recording. Well, stop.
Before you start recording your self-tape you need to know that everything is working properly, and the settings are correct.
Do a test to get your audio level right. You don’t want it so high that your recording will be ruined because the sound is distorted. Just as important is that the level shouldn’t be too low otherwise it’ll be difficult for the viewer to hear you. Check the audio level meter on your camera or audio recorder. You want it peaking in the green and yellow sections and only very occasionally in the red. If it’s consistently in the red, adjust the input level until it looks and sounds good.
Also, test that you’ve nailed the exposure and that you look good. If you’re not sure what you’re doing use the autofocus and exposure control on your camera.
You do this test recording before going ahead with your actual takes to save time and yourself a great deal of aggravation. I’ve seen plenty of people set up their equipment and go into recording straight away only to discover later that something didn’t work. So, record a short test, watch it to check everything is good, then go ahead with your audition takes.
Finally, once you’re happy with your performance, quickly check that everything is recorded. It’s easy to press the record button on your camera and assume it is recording when in fact it has not. Check that it is recording and then check again after you’ve finished.
13: Should you slate your video audition
There has been a trend to not include a slate at the start of your taped audition. But you should always check the instructions you’ve received from the casting director. If a slate is required deliver it straight into the camera lens and you can add it to the end of your audition tape.
If you want to save yourself a little time and effort you can pre-record the slate and use it over. However, you must make sure the slate is current. If your weight has changed or if you’ve grown facial hair etc. you’ll need to redo your slate. Certainly, a three-year-old slate is much too old, keep it up to date.
14: Practice, practice, practice
It’s a well-known phrase that “practice makes perfect” but it happens to be true. So, once you have your home self-tape studio ready practice doing self-taping yourself. If you know exactly how to set up your gear and what buttons to press the technical stuff no longer becomes an issue. You can just concentrate on getting the job done.
The more you practice, the more comfortable you will be when a self-tape request comes in. That’s especially true if you find yourself up against a tight deadline.
15: Can you edit a self-tape audition?
Hopefully, you’ve recorded a few takes of the piece you’ve been given. Now is the time to go through them and pick the ONE that’s best.
You can edit your self-tape to trim off excess time at the beginning and end and to add a slate, but don’t edit together the best bits from several takes. Just work with one take of the whole scene.
You don’t need fancy software to edit your audition self-tape. Macs and Windows computers come with video editors, so you could use them. If you’re editing on a smartphone or tablet it’s easy to trim the start and end of a video without an extra editing app. If you plan to edit on an iPhone or iPad download iMovie, it’s free and has all the editing capability you’ll need.
16: What should my self-tape file size be?
Check your instructions for details of the file size that you are expected to deliver. If you didn’t get instructions, it is a safe bet that the file size should be under 70MB and probably around 50MB.
If your self-tape is larger than this, you can do one or two things. First, reduce the resolution. Your smartphone or mirrorless camera may be able to shoot in 4K or even 8K but your self-tape will most likely be watched on a phone. So, when you export your video choose either 720p or 1080p as your resolution. The smaller the resolution the smaller the file size.
The other thing you can do to reduce your file size is to compress it when exporting the file. Sometimes editing software will refer to compression as a quality setting. Alternatively, you may be able to set the bitrate of your video. The higher the bitrate the better the visual quality, but also the larger the file size.
If you cannot make your video file small enough when exporting it from your video editor don’t worry. You can transcode your video using a free program called Handbrake![]() . You can download it for Windows, Mac, and Linux computers. It will let you transcode your videos from any format to mp4, change the resolution to 720p, and compress the file without losing too much visual quality.
. You can download it for Windows, Mac, and Linux computers. It will let you transcode your videos from any format to mp4, change the resolution to 720p, and compress the file without losing too much visual quality.
Use Handbrake to create a 720p mp4 video that is about 50MB.
A quick warning. Just as you don’t want files that are too large neither do you want them to be too small. In the US small video files will oftentimes be considered too low a quality for consideration.
17: The correct way to send an audition self-tape
Do not send multiple takes of your audition unless you have been asked to do so. Pick the take you think is best and send that.
Once you’ve chosen the best take you need to submit it as instructed. But if you didn’t get specific instructions don’t try submitting the video as an email attachment. The video file size will be too big, and even if you manage to send it you risk filling up the casting director’s inbox. They’ll not be pleased, to say the least.
Nor should you upload the video to YouTube. It’ll be difficult for them to download and if you made the upload public you may have broken the confidentiality required by the company. Again, you will not appear professional.
Instead, you can use services such as Dropbox or WeTransfer. Don’t use Google Drive since this can cause problems.
You might also like…
- How to avoid glare on your glasses on Zoom calls
- Why is my zoom video grainy and how to avoid it
- Best microphone for better Zoom calls: Buyers Guide
- How can I improve my Zoom audio settings quality
- How do I disable the video camera on Zoom meeting
- How to make webcam video look better
- The Best Green Screen for Home Office Video Conferencing
- Best Ring Light for Zoom Calls, Meetings, and Video Conferencing
- How to use a webcam to record video on Windows 10
Here’s a big ask from me: If you liked this article, please share it.
It will mean a great deal to me if you share this post because a few seconds of your time will seriously help my blog grow. The share buttons are below the “About Author” section.
Thanks. 🙂
Tosh Lubek runs an audio and video production business in the UK and has been using the Canon EOS R since it was released in the Autumn of 2018. He has used the camera to shoot TV commercials for Sky TV, promotional business videos, videos of events and functions, and YouTube creator content. He has also won international awards for his advertising and promotional work. You can meet him by visiting his “video booth” at HashTag business events across the country.
Recent Posts
Most people use sandbags the wrong way. Here’s how to hang them properly on a light stand for maximum stability and safety — plus what to fill them with.
You're Using the Canon RF 50mm f/1.8 WRONG! Here’s How to Fix It
If you’ve recently picked up the Canon RF 50mm f/1.8 STM—affectionately known as the Nifty Fifty—you might be confused by that strange switch on the side of the lens. It doesn’t say AF/MF...
