

DIY Video Studio is supported by its readers who use the affiliate links or ads on this site. As an Amazon Associate, I earn from qualifying purchases. Thank your support if you use any of the links.
Although the Blue Yeti is a USB microphone and normally connects directly to your computer, in this article I’ll show you how you can connect a Blue Yeti to an audio interface.
It’s quite simple to do and only requires one additional piece of equipment, an inexpensive auxiliary audio cable.
What accessories do you need?
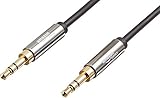
In addition to your Blue Yeti and an audio interface, you will need an auxiliary audio cable. If the Blue Yeti is in cardioid, omnidirectional, or bidirectional mode, the signal is effectively mono so you can use an auxiliary cable with a 3.5mm TRS male jack at one end and a 6.35mm TRS male jack at the other.
If you have a standard aux cable with male 3.5mm TRS jacks at either end, you can convert it into the cable previously mention by adding a 3.5mm to 6.35mm adapter to one end. But note that this introduces a mechanical connection and therefore a potential point of failure.
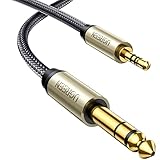
If you are using the Blue Yeti’s stereo mode you will need an auxiliary cable with a 3.5mm TRS (stereo) male jack at one end, splitting into two cables, each with a 6.35mm TS (mono) male jack.
Here are the two that I use.

Last update on 2026-03-01 / Affiliate links / Images from Amazon Product Advertising API
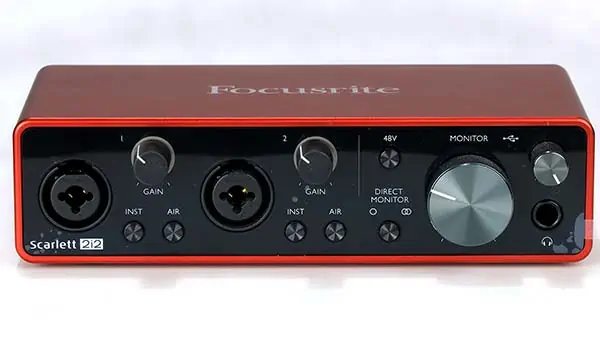
And here is the Focusrite Scarlett 2i2 (3rd gen) audio interface I use.
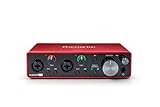
- Pro performance with great pre-amps – Achieve a brighter recording thanks to the high performing mic…
- Get the perfect guitar and vocal take with – With two high-headroom instrument inputs to plug in…
- Low-noise for crystal clear listening – 2 low-noise balanced outputs provide clean audio playback…
- Studio quality recording for your music & podcasts – Achieve pro sounding recordings with Scarlett…
Last update on 2025-10-20 / Affiliate links / Images from Amazon Product Advertising API
How to connect Blue Yeti to an audio interface
To connect a Blue Yeti to an audio interface, connect the Yeti to a computer. Then connect the Yeti’s headphone socket to an audio interface input with an aux audio cable that has a 3.5mm jack at one end and a 6.35mm jack at the other. In the computer’s audio settings, select the audio interface as the sound source.
Do not have the Yeti’s gain, headphone volume, and audio interface input level too high.
In steps, this can be summarised as follows:
- Connect the Blue Yeti to your PC
- Connect your audio interface to your PC
- Connect the audio interface to power
- The mode you choose will determine which aux cable to use
- Connect the Yeti’s headphone output to the audio interface input
- Select the audio interface as the sound input
- Set the levels
Full Step by step instructions
In this step-by-step guide, I will connect a Blue Yeti to the combi XLR/Jack inputs of a Focusrite Scarlet 2i2 (3rd gen). However, the process should be the same on any other audio interface with ¼-inch (6.35mm) jack inputs, such as the Focusrite Scarlet Solo.
Step 1: Connect the Blue Yeti to your PC
Ensure the Blue Yeti microphone is connected to our computer using the USB microphone cable that came with the microphone. The USB cable ensures the Blue Yeti is receiving power and that the headphone socket, on the base of the Yeti, is activated and provides an analogue audio signal.
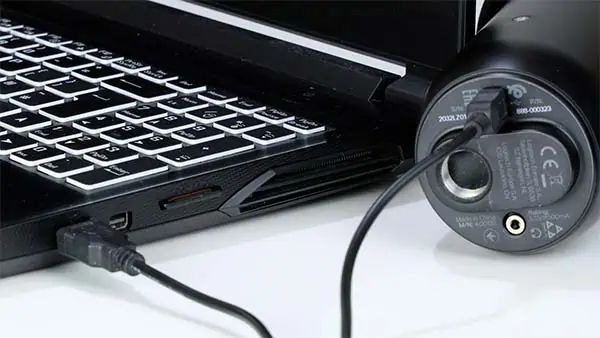
If your computer has a USB-C port, use a suitable mini-USB to USB-C cable, I explain more in my article on upgrading a Yeti to USB-C.
Step 2: Connect your audio interface to your PC
Use the USB cable that came with your audio interface to connect the interface to your computer. This will let your computer and software use the interface as an audio source.
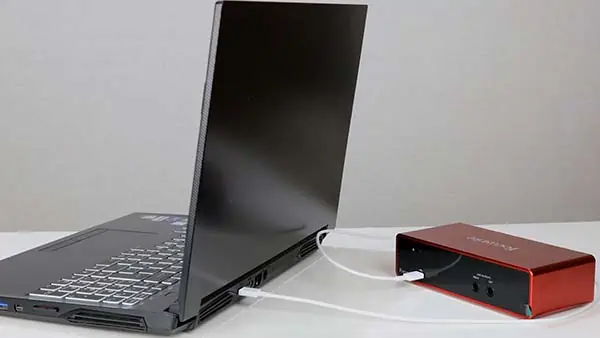
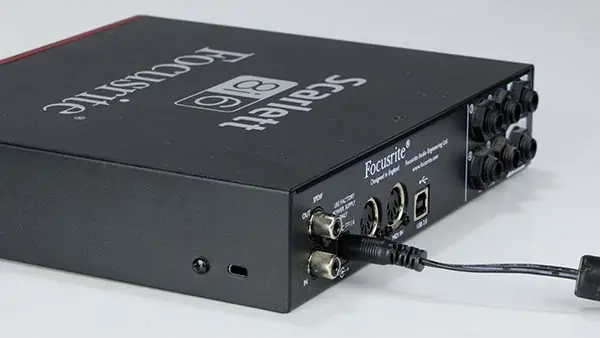
Step 3: Connect the audio interface to the power supply
Most audio interfaces require an external power source. Some, like the Focusrite Scarlett 2i2, get power from the computer’s USB port. If your interface is like that, you don’t need anything since it’s already connected to your computer.
But other audio interfaces, like the Focusrite Scarlett 8i6, get power from a DC power adapter. If your interface is like this, plug the DC adapter into a wall outlet and plug the DC power connector into the interface.
Step 4. The mode you choose will determine which aux cable to use
If you’ll be recording with one of the polar patterns that is mono (cardioid, omnidirectional, bidirectional) you’ll need an auxiliary audio cable with a 3.5mm TRS male jack at one end and a 6.35mm TRS male jack at the other.

If you’ll be recording with the stereo polar pattern, you’ll need an auxiliary cable with a 3.5mm TRS (stereo) male jack at one end, splitting into two cables (a Y-Splitter), each with a 6.35mm TS (mono) male jack.
NOTE: You do not need to buy both cables mentioned if you sometimes intend to record in mono and sometimes in stereo. You could buy the Y-splitter cable and only use one branch with a 6.35mm jack.
Step 5. Connect the Yeti’s headphone output to the audio interface input
If recording with a cardioid, omnidirectional, or bidirectional polar pattern, plug the 3.5mm jack into the headphone socket on the base of the Blue Yeti. Then plug the 6.35mm into Input 1 on the audio interface.
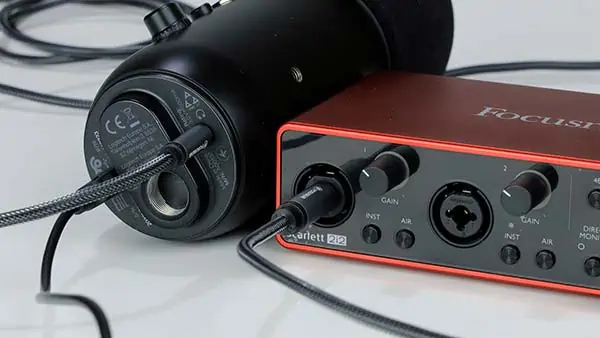
If recording with the stereo polar pattern, plug the 3.5mm jack into the headphone socket on the base of the Blue Yeti. Then plug the 6.35mm jack with the white ring (left audio) into Input 1 on the audio interface and the 6.35mm jack with the red ring (right audio) into Input 2 on the audio interface.
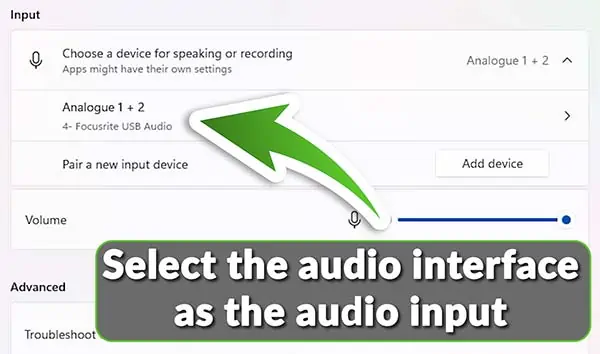
Step 6. Select the audio interface as the sound input
Go into your computer’s system settings, go to the section for Sound and ensure your audio interface is selected and the audio input and not the Blue Yeti microphone.
Step 7. Set the levels
When using standard XLR microphones with your audio interface, you adjust the level of the microphone using the input level dial on the audio interface. However, when connecting a Blue Yeti to an audio interface, there are four controls that will determine the microphone level. These are
- Yeti’s gain dial
- Yeti’s headphone volume dial
- Audio interface input level dial
- Input control in your computer’s sound settings.
I will discuss the level settings in the next section.
Setting the level
Although you have connected the Yeti to the audio interface, there is one further step you need to take, and that is setting the level.
Apart from the obvious one of speaking more loudly or quietly, you have three dials with which to control the microphone’s level. They are the…
- Yeti’s gain dial
- Yeti’s headphone volume dial
- Input level dial on the audio interface
In addition, there is also an input volume control in your computer’s sound settings.
I ran a test with the Blue Yeti connected to a Focusrite Scarlett 2i2 audio interface. The input level in my Windows 11 sound settings was set to 100%. I recorded my voice into Adobe Audition, trying to be as consistent as possible in every take.
The results are presented in the following table, with the settings presented from loudest to quietest.
| Mic Gain dial position | Headphone Vol dial position | Interface input gain dial position | Peak audio level in Adobe Audition |
|---|---|---|---|
| Max | Max | 9 o’clock | 0 |
| 12 o’clock | 12 o’clock | 11 o’clock | -5.3dB |
| 3 o’clock | 3 o’clock | Min | -6.7dB |
| Max | Max | Min | -7.7dB |
| 12 o’clock | 12 o’clock | 10 o’clock | -9.7dB |
| 12 o’clock | Max | Min | -12.5dB |
| 12 o’clock | 12 o’clock | 9 o’clock | -12.7dB |
| 12 o’clock | 12 o’clock | Min | -22.4dB |
Bear in mind that the results you will have will likely be slightly different to mine. This is because your voice may be louder or quieter than mine. And since there are no position markers on the dials of the Blue Yeti and Scarlett 2i2, it is difficult to set the dials precisely.
For the best results, I suggest having the Blue Yeti gain and headphone volume no higher than at the 12 o’clock position (i.e. at 50%). This will ensure the pre-amp noise from the Yeti is kept to a minimum.
Since the Yeti is a “hot” mic, you will not need to turn the input level dial on the audio interface as high as you normally would when using an XLR microphone, especially a dynamic XLR microphone. The maximum input level you will need on the Scarlett 2i2 is likely to be somewhere between 12 o’clock and 3 o’clock. Any higher will probably cause clipping and lead to distorted audio.
My preference was to have both the Yeti’s gain and headphone dials at 12 o’clock positions (i.e. at 50%) and the Scarlett 2i2 input level dial between the 10 and 11 o’clock positions. This gave a peak level in Adobe Audition of around -8dB. This gave me plenty of headroom for odd rogue high audio peak, especially when recording at a bit depth of 32.
Why connect a Blue Yeti to an audio interface
Although you can connect a Blue Yeti to an audio interface, the question is, why would you want to?
If it’s because you already had a Blue Yeti, recently bought an audio interface, and are waiting to get a quality XLR microphone, then fair enough. But if it’s because your audio interface has a superior analogue to digital converter and includes a compressor/expander, or because you can add a low-noise inline pre-amp, then it’s debatable whether you are going to hear much of an improvement.
To explain what I mean, let’s consider what’s happening to the audio signal in the Yeti.
The three condenser microphone capsules convert the sound of your voice into a varying electrical signal. That signal is fed into the Yeti’s onboard analogue to digital converter (ADC) to produce a digital signal. In a normal setup of the Blue Yeti, that digital signal undergoes some processing, like gain adjustment, before being fed, via a USB port on your computer, into your recording software. So, that’s one conversion from an analogue signal to a digital signal.
However, it’s a different story when we consider using the audio from the Yeti’s headphone output.
Again, the sound of your voice is converted into a varying electrical signal. That signal is fed into the Yeti’s onboard analogue to digital converter (ADC) to produce a digital signal. Inside the Yeti the digital audio might need to be mixed with your computer’s audio, and then converted back to an analogue signal before being fed to the headphone socket. So, at this stage, we have two conversions. Analogue to digital audio and then digital back to analogue audio.
But we’re not finished. We’re connecting the headphone output to the audio interface, where the analogue signal will get converted back again to a digital signal and sent to your computer’s recording software.
In total, the audio has undergone three conversions. Analogue to digital, digital to analogue, and analogue back to digital audio.
Compared to using the direct USB link, the chance of your audio being adversely affected has significantly increased because of those two additional conversions.
Furthermore, even if your audio interface has a superior ADC, by the time the signal gets to it, it’s too late. The Blue Yeti’s ADC has already converted the signal twice. Furthermore, it’s possible some extra noise has been added due to an inferior aux cable or the connectors.
With all that said, I can imagine situations where you might want to connect a Blue Yeti to an audio interface. You might want to include a specific pre-processor to the signal, or need to simultaneously record from multiple microphones.
But generally, keeping things as simple as possible will yield the best results.
Source: 1![]()

About the author: Tosh Lubek is a multi-award-winning broadcaster, writer, and video producer, with 40 years of experience in professional broadcasting and has been using Canon video and stills cameras since 2010. He has worked with radio and TV broadcasters, advertising agencies, and direct clients on a variety of projects including radio and television advertising, online video production, corporate videos, award ceremony motion graphics, and theme park sound design. Tosh has won numerous awards, including a Radio Academy Awards Gold Sony, a Gold, Silver, and Bronze World Medals in the New York Festivals International Advertising Awards. Since about 2007 he has been creating YouTube videos. Tosh has been a sponsor of the “video booth” at HashTag Business Events across the UK.
Recent Posts
Most people use sandbags the wrong way. Here’s how to hang them properly on a light stand for maximum stability and safety — plus what to fill them with.
You're Using the Canon RF 50mm f/1.8 WRONG! Here’s How to Fix It
If you’ve recently picked up the Canon RF 50mm f/1.8 STM—affectionately known as the Nifty Fifty—you might be confused by that strange switch on the side of the lens. It doesn’t say AF/MF...