DIY Video Studio is supported by its readers who use the affiliate links or ads on this site. As an Amazon Associate, I earn from qualifying purchases. Thank your support if you use any of the links.
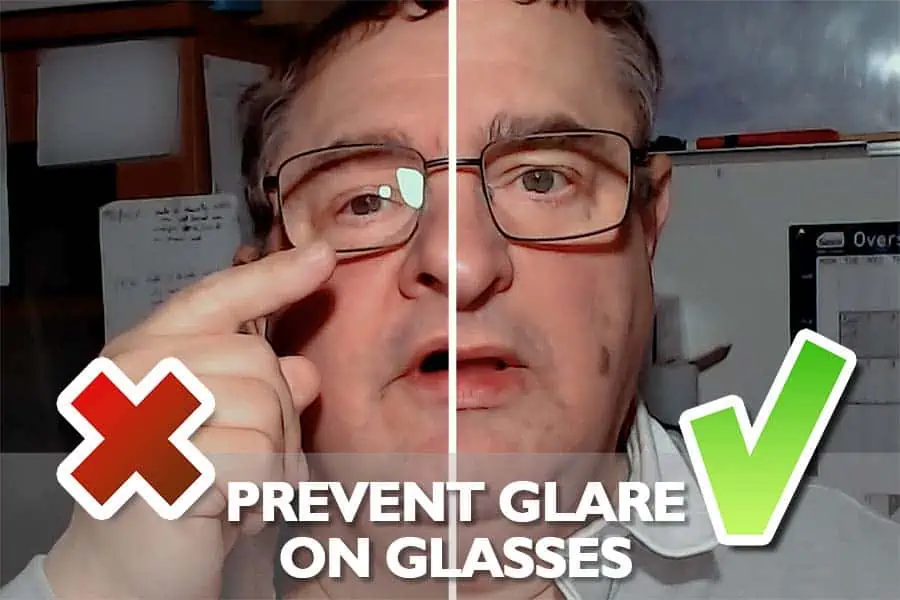
If you wear glasses, you will know it can be a struggle to deal with glare on your lenses during Zoom calls. It can be frustrating for others when your video light is reflected straight into your webcam. But don’t worry. There’s a simple solution to prevent glare on glasses in Zoom conference calls – you just need to use a PlexiCam.
In this blog post, I will explain what a PlexiCam is, and how to use one to instantly prevent glare on your glasses during Zoom calls.
By using a PlexiCam webcam hanger and LED light kit, you can increase the angle between the video light, your glasses, and the camera. By also placing the webcam slightly below eye level and ensuring you look at the lens, you will maintain eye contact with the viewer and avoid light glare on your glasses.
So, if you’re ready to say goodbye to glare and hello to clear Zoom calls, let’s get into this.
Why use a video light on Zoom calls
It’s important to use a video light when on a Zoom call, or when recording any video at your office desk with a webcam or smartphone.
Using a video light can help reduce video noise on a webcam by allowing more light to illuminate the person taking part in the Zoom conference call. When the camera’s sensor receives more light, it produces a stronger video signal that requires less gain to be applied by the camera.
In the following pair of images, you can see how boosting the video gain of a poorly lit scene (left) produces much more noise and reduced image quality compared to when a small LED video light is used (right). In the right image, I used the Ulanzi VIJIM VL66 LED Video Light included in the PlexiCam LED Light Kit.

If you’re a photographer, you can think of changing the gain in a video camera to be like changing the ISO on a DSLR or mirrorless camera stills camera. Using a high ISO will produce a noisy image while using a low ISO will produce a noise-free image. It’s the same with a video camera, like a webcam or smartphone camera. When the camera applies a lot of gain to a weak video signal, it can boost the visibility of video noise, which appears like “dancing dots of grain”, especially in the shadow areas. This reduces the overall video quality and visual resolution. By using a video light, the camera can produce a stronger signal with less noise. With a stronger signal, much less gain will need to be applied, resulting in improved video quality.
How to prevent glare on glasses in Zoom calls
So, we now know why it’s important to use a video light, especially in a poorly lit work or home office, or even a hotel room. But what is it about using a video light that causes glare on glasses?
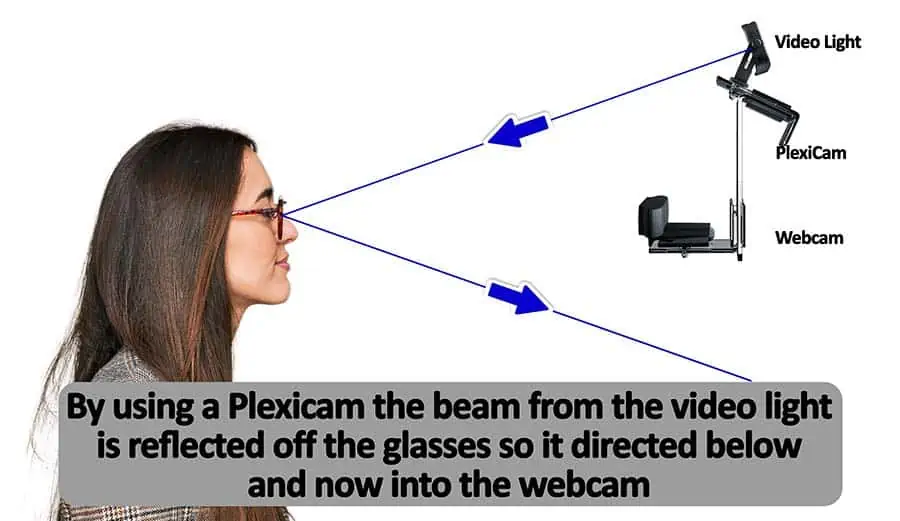
The basic problem is that the video light is placed too close to, or even next to, the webcam or camera. By placing a video light and webcam close to each other the beam from the video light will travel forwards and be directly reflected off the lenses of your glasses. Because the video light is close to the webcam, the angle between the video light, the front of your glasses, and the webcam will be very small. This allows the light to be reflected off the glasses and straight into the webcam. In the recorded video footage, the light will appear as a glare on the glasses.
To prevent the appearance of this glare, you need to widen the angle between the video light, your glasses, and the camera, but also place the webcam at about eye level. This will result in the light beam reflected off your glasses passing harmlessly beneath the camera. So, you need to move the video light and the webcam apart by a greater distance, which will increase the angle between the light, the glasses, and the camera, reducing the likelihood of reflections and glare.
I covered this extensively in my article, How to avoid glare on glasses in Zoom Video, where I talked about moving the video light or lights off to the sides. However, this isn’t always possible when working in a confined work area. This is where using a PlexiCam can help you because it allows you to move the video light and webcam apart in a vertical direction.
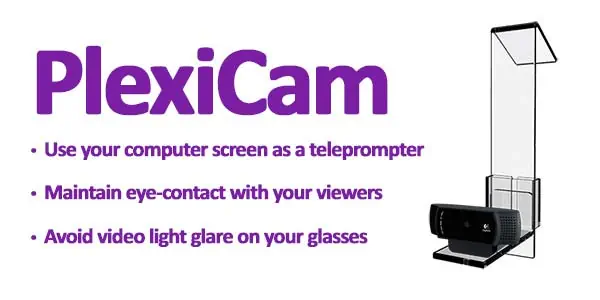
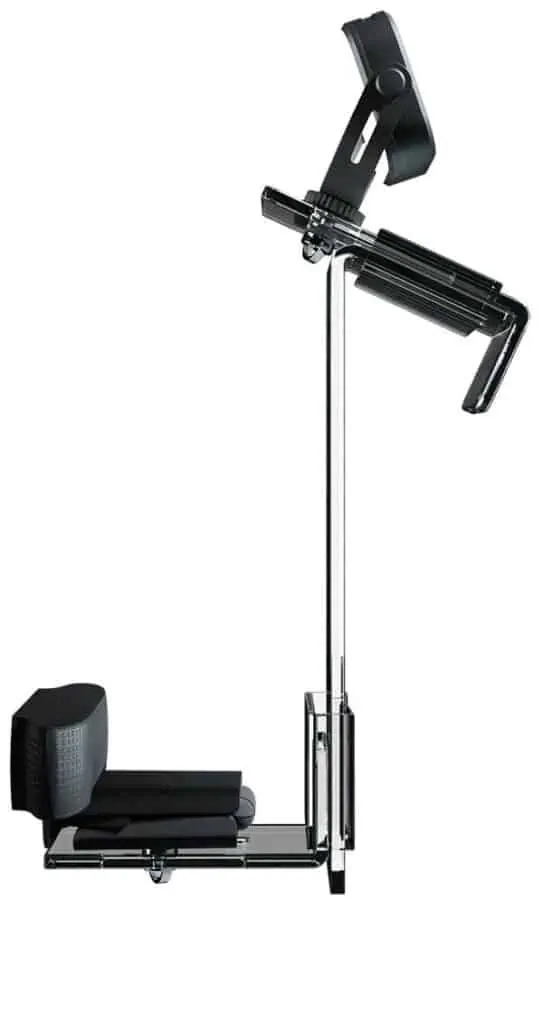
A PlexiCam, which is a transparent acrylic webcam mount that hangs from the top edge of your computer screen. The hanger has a moveable shelf for the webcam, and some models also have a shelf that lets you mount an LED video light at the top of the hanger. PlexiCams are normally used to allow you to place the webcam in front of scrolling text on your computer screen, turning your computer into a teleprompter. But by keeping the light and webcam apart on the PlexiCam’s hanger, you are increasing the angle between the light, your glasses, and the webcam. The greater the distance, the greater the angle, and the less likely the glasses will reflect light back into the camera lens as glare.
Ensure you have one of the PlexiCam models that has two mounting shelves. If yours does not, order the PlexiCam LED Light Kit. It contains a shelf, friction sleeve, and LED video light.

How to set up a PlexiCam to avoid glare
Watch this video as I demonstrate using the PlexiCam to avoid glare on my glasses.
To set up a PlexiCam to use a video light and webcam, follow these steps:
- Slide a friction sleeve onto the “hook” at the top of the hanger.
- Push the slotted part of the shelf into the friction sleeve.
- Use the D-Screw and nylon washer to secure the light to the slotted part of the shelf.
- Slide the light to the end of the slot and tighten the D-Screw.
- Slide the other friction sleeve onto the bottom of the PlexiCam hanger. Ensure the side with the gap is facing forward.
- Insert the plain end of the webcam shelf from underneath into the gap between the friction sleeve and the hanger.
- Attach your webcam to the shelf with the supplied D-screw and nylon washer.
- Hang the PlexiCam on the front side of your computer’s screen.
- Adjust the video light to point down toward your face.
- Adjust the position of the webcam on the hanger so it’s approximately at eye level (you may need to raise your screen a few inches.

Before joining your Zoom meeting turn on the light and make any necessary adjustments to the brightness and color temperature. Remember to look at the webcam and not up to the light to avoid reflections or glare on your glasses.
Summary of how it works

Once set up, this is what should be happening. The light will be just above the top of the monitor, on the top shelf of the PlexiCam. The light beam comes down toward your face, hits your glasses, and is reflected downward rather than straight back. Provided you look straight into the camera, the reflection of the video light off your glasses should go down and miss the camera altogether. The result will be that your glasses appear free of any reflections and glare.
Source: PlexiCam
About the author: Tosh Lubek is a multi-award-winning broadcaster, writer, and video producer, with 40 years of experience in professional broadcasting and has been using Canon video and stills cameras since 2010. He has worked with radio and TV broadcasters, advertising agencies, and direct clients on a variety of projects including radio and television advertising, online video production, corporate videos, award ceremony motion graphics, and theme park sound design. Tosh has won numerous awards, including a Radio Academy Awards Gold Sony, a Gold, Silver, and Bronze World Medals in the New York Festivals International Advertising Awards. Since about 2007 he has been creating YouTube videos. Tosh has been a sponsor of the “video booth” at HashTag Business Events across the UK.
Recent Posts
Premiere Pro Editors STOP Dragging Clips WRONG! Edit 10x FASTER
Hey there, Premiere Pro users! If you're dragging your video clips from the project panel to the timeline listen up, there's a better way! The program monitor holds some hidden editing superpowers...
Conquer Your Next Media Interview Like a Pro! (With 15 Actionable Hacks)
Feeling anxious about your upcoming interview? Don't worry, we've got you covered! Whether you're a seasoned professional or a first-timer, mastering the art of the media interview can be daunting....


