

DIY Video Studio is supported by its readers. Please assume links on this site are affiliate links or ads, and that I get commissions for purchases made through these links. As an Amazon Associate, I earn from qualifying purchases. Thank you if you use any of the links.
Almost anyone with a video camera wants to try using a green screen. It’s understandable. Green screen is a little piece of Hollywood magic that’s accessible to anyone. All you need is a green background, that’s your screen, a camera, and some chromakey software to remove the green background.
Pretty much any video software includes a green screen effect. You can even do green screen in video conferencing software like the Zoom desktop client.
So why do most people do such a bad job of green screen?
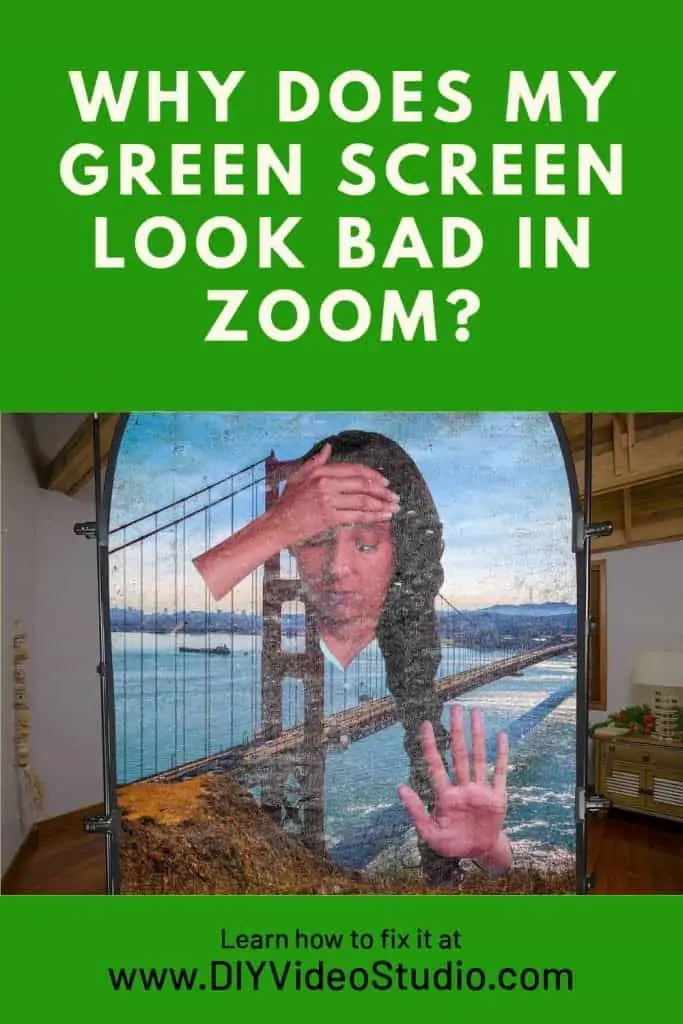
Don’t worry, I’m not pointing any fingers. When I started out my first attempts at green screen didn’t look good either. But learning from experience and tips from video professionals now means my green screen work looks good. So, I’m going to share what I’ve learned so you don’t have to go through all the trial and error I had to. Although this applies to Zoom, you’ll also gain many useful tips for your green screen work in other software. So let’s move on.
How do you make a green screen look natural in Zoom? Partly it’s about choosing the best green screen for video conferencing but it’s also about how you use it. I’ve put together 10 top tips for using a green screen in Zoom that will make you look great in your next Zoom video conference call.
- Get a large enough green screen to fill the image
- Keep your green screen square on to your camera
- Don’t wear green clothes or accessories
- If you wear eyeglasses, move your lights up and to the sides
- Ensure your green screen is flat and wrinkle-free
- Don’t cast your shadow on the green screen
- Light the green screen uniformly
- Do not overdo the lighting on your green screen
- Match your lighting to that in the background image
- Invest in a good quality green screen
This is obviously an overview, so let’s get into the details.
Green screen tips for Zoom
1. Get a large enough green screen to fill the image
Don’t underestimate the size of green screen you need. Just because you are about 2ft (60cm) from the edge of one shoulder to the other doesn’t mean a green screen that’s 1m wide is going to be big enough.
In the image below I’ve set up a 1m x 1.5m green screen behind the presenter. Because I have the green screen in portrait mode it isn’t wide enough to fill the video frame.
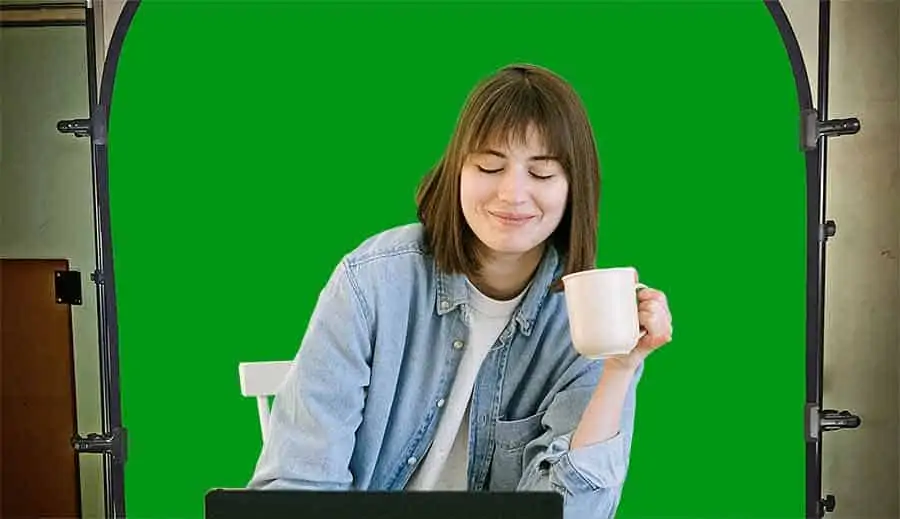
If I turned on the green screen feature in Zoom only the green would be replaced by a virtual background. The right and left edges of the image, the black stands, clamps, and the black edge of the green screen would all remain visible. Obviously, that doesn’t look good.
The green screen must be large enough to cover all the video frame.
You could calculate the necessary green screen size by knowing the angle of view of your camera and where you’ll set up the green screen. But who wants to do the math!
Instead, turn on your webcam or DSLR. Decide how far back you’ll put the green screen and mark out a line on the floor that would be flat on to your camera. Starting on the left side, move your hand (or a stick) along the line until it appears in the shot. Mark that point on the floor with some tape. Do the same on the right-hand side. The distance between the two tape marks is the minimum horizontal size you’ll need for your green screen. To be on the safe side you might want to add a little to your measurement.
You can now decide how big should a green screen be for Zoom in your office. But remember, the further back you move the green screen the wider it will need to be to fill the video frame.
2. Keep your green screen square on to your camera
If you have a collapsible green screen it can be tempting to lean it up against a wall or chair. The trouble with that is that the fabric will be leaning at an angle that makes it a little more difficult to light the screen.
If the green screen is made from a man-made fabric it may have a shiny rather than matt finish you may also find lighting hotspot reflect more easily into your camera’s lens. Another lighting issue is that if you have the screen at an angle, the part closest to the light will appear brighter than the part that’s a little further away. By eye you may not notice any difference, however, your camera probably will.
If you normally lean your green screen against a wall fix it flat by using thumbtacks, pins, or tape. Another option is to buy a couple of light stands and clamp the screen between the stands.
3. Don’t wear green clothes or accessories
This may seem obvious but it’s easy to forget. If you’re using a green screen, everything that’s green will be removed from the image and replaced with the virtual background.
That’s fine if it’s just the background that’s green, but if you’re wearing any clothing or jewelry that’s green, that will also become transparent and show the virtual background. For example, if you wear a green jade bead necklace and green broach, you’d have an arc of transparent holes underneath your neck and a hole on your chest. That’s not really the way you might want to draw attention to yourself in a business conference call.
4. If you wear eyeglasses, move your lights up and to the sides
If you wear eyeglasses, they may reflect the glare of your video lights into the camera. Unfortunately, many glasses that have had special coatings applied to the lenses can cause additional problems. These coatings often add a green or blue tint to the reflection. So not only will your webcam or camera pick up glare from your glasses, but the green screen software will try to remove that area to allow the background to show through.
One solution is to not wear your eyeglasses, but clearly that’s not always going to be possible. So, what you need to do is position your video lights in such a way that they don’t cast reflections into your camera’s lens.
Instead of having your video light in front of you, move it up and off to one side. If you’re using two video lights, place each one off on opposite sides of the camera. I explain more fully in my article How To Avoid Glare on Glasses in Zoom Video.
5. Ensure your green screen is flat and wrinkle-free
The green screen software in Zoom works best when there’s one or just a narrow range of green shades to remove. That’s why there’s a color picker in Zoom so you can choose the color for the software to remove.
When your green screen has fold marks, creases, and wrinkles you’re introducing extra shades of green into the image. When you light the green screen, the wrinkles will cause shadows. Even though the green screen is the same green where those shadows fall, it’s now a different shade. That means there are a lot more color values of green that you’re asking Zoom to remove, and it just can’t do it.
Therefore, it’s important to learn how to get wrinkles out of backdrops and keep your green screen flat so that you don’t create any shadows.
6. Don’t cast your shadow on the green screen
Above I said you need to avoid shadows from creases and wrinkles on the green screen. That advice also applies to you. You don’t want to cast a shadow on the screen that Zoom will find difficult to remove.
There are three things you can do to cut down on those shadows. Use a soft light, raise up the light, and increase the distance between yourself and the screen.
Soft light is a broad light, like a softbox or umbrella light. The light comes from a large area, which has the effect of helping to smooth shadows.
If you mount your soft light so it is angled down and pointing at you, any shadows will fall low down on the green screen, hopefully where they won’t cause any problems.
By increasing the distance between the green screen and yourself, your shadow will fall even further down and out of sight.
7. Light the green screen uniformly
In the same way that you don’t want shadows on your green screen, nor do you want any hot spots. That’s where your lights produce an extra bright area on your background or green screen.
Ideally, you want your green screen to be uniformly illuminated across its whole area. Just like avoiding shadows, uniform lighting cuts down the range in green shades across the screen. With fewer shades of green, Zoom will do a cleaner job of removing the green background.
To get uniform lighting across the green screen you’ll need to use separate lights for the green screen and yourself. You can use one or two lights to illuminate yourself. Then use a couple of lights, one on each side, for the green screen.
8. Do not overdo the lighting on your green screen
You do not need to make the green screen too bright. In fact, I try to get the green screen to be a little darker than the subject. If you are lighting the subject (you) and the green screen separately you should find it easy to control the balance between the two.
By having the green screen a little darker you will reduce the amount of green reflected light spilling onto you. If that were to happen you might find that the green screen software tries to remove part of you in error.
You can also reduce the green spill on you by simply moving forward, so you increase the distance between you and the green screen.
9. Match your lighting to that in the background image
One big giveaway that the shot is faked is to have a mismatch in lighting in the virtual background image and on you.
Say the virtual background photo was taken during the so called “Golden Hour”, which is 1-hour after sunrise and 1-hour before sunset, then it will have a warm light quality. If you then use cold daylight LED bulbs to illuminate yourself, your video will not look as if it’s being shot under the same conditions as the background.
So, try and match the color temperature of the Zoom background image or video clip. If you have bi-color LED video lights or RGB video lights you should be able to match the color temperature well and hence make the green screen effect look much more natural and convincing.
10. Invest in a good quality green screen
Does Green Screen Quality Matter?
Sometimes you can get away with buying cheap. But often buying cheap results in buying twice. Although there are many different types of green screen you can buy, from chromakey paint for your wall to pop-up screens, it’s worth getting a good one.
If you’ve never bought a green screen before, check out some green screen reviews. Alternatively, make sure you read the online ads carefully, and compare the details from a few different products. For example, my first collapsible green screen was green on both sides. That’s OK, but I also have another that’s green on one side and blue on the other. That allows more flexibility in what I want to wear in a Zoom meeting.
Some green screen fabric is also better quality than others. For instance, polyester fabric might be hard-wearing and cheap but it’s also reflective, showing up any hotspots. But specially textured fabric appears properly matt but is more expensive.
The final decision on what to buy is yours, but my experience is that really cheap video gear is a false economy.
You might also like…
- Best Ring Light for Zoom Video Conferencing
- How to Get the Best Sound for Zoom Music Lessons
- How to hide your messy room in Zoom

- How do I disable video camera on Zoom meeting
- Best Green Screen for Home Office Video Conferencing
- How to get wrinkles out of backdrops
- How to make webcam video look better
- Can I use my Canon camera as a webcam
- How To Avoid Glare on Glasses in Zoom Video
Tosh Lubek runs an audio and video production business in the UK and has been using the Canon EOS R since it was released in the Autumn of 2018. He has used the camera to shoot TV commercials for Sky TV, promotional business videos, videos of events and functions, and YouTube creator content. He has also won international awards for his advertising and promotional work. You can meet him by visiting his “video booth” at HashTag business events across the country.
Recent Posts
Most people use sandbags the wrong way. Here’s how to hang them properly on a light stand for maximum stability and safety — plus what to fill them with.
You're Using the Canon RF 50mm f/1.8 WRONG! Here’s How to Fix It
If you’ve recently picked up the Canon RF 50mm f/1.8 STM—affectionately known as the Nifty Fifty—you might be confused by that strange switch on the side of the lens. It doesn’t say AF/MF...
