
DIY Video Studio is supported by its readers who use the affiliate links or ads on this site. As an Amazon Associate, I earn from qualifying purchases. Thank your support if you use any of the links.
The Canon EOS R and EOS RP can both record HDR movies, but it can be frustrating trying the enable Canon HDR movie mode. The truth is that you can only use the mode under certain conditions. You need to make sure you have disabled certain settings and selected the correct video recording quality and size.
To enable Canon EOS R HDR Movie mode shooting you have to do the following:
- Set your movie recording quality to FHD 29.97p IPB or FHD 25.00p IPB
- Ensure Movie Cropping is disabled
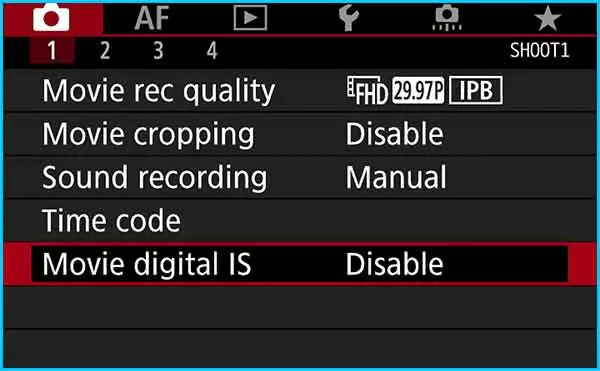
- Disable Movie digital IS
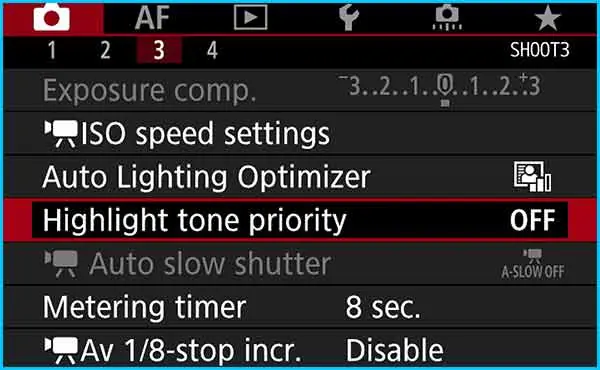
- Set Highlight tone priority to OFF
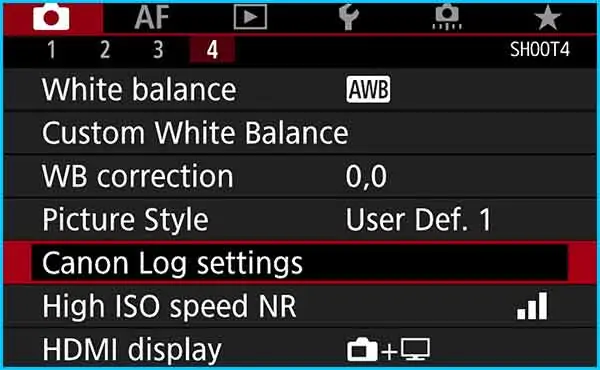
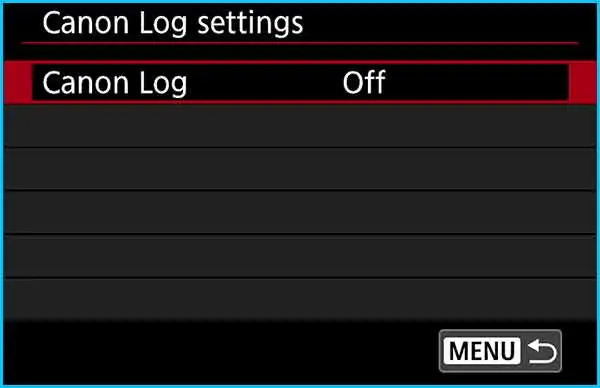
- Turn off Canon-Log
But consider what shooting in HDR on your EOS R or EOS RP actually means.
- You CAN’T shoot in 4K
- You CAN’T shoot at 24fps for a more cinematic look
- You CAN’T shoot FHD 50p/60p for smoother FHD
- You CAN’T use ALL-I higher bitrate encoding
- You CAN’T shoot a Time-lapse movie
- You CAN’T shoot FHD 25p/29.97p with EF-S lenses (only HD available)
- You CAN’T use digital stabilization
- You CAN’T shoot in C-Log for a wider dynamic range
- You CAN’T use Slo-Mo
- You CAN’T use ISO Expansion
WHOA! Is it even worth shooting in Canon HDR Movie mode?
Depending on your workflow, shooting in HDR movie mode can be useful. That’s especially true if you’re shooting a high contrast scene, such as outdoors with a bright sky, and need a quick way to capture the details in the bright highlights without shooting “flat” footage.
But first, let’s understand what HDR movie mode is on the Canon EOS R and EOS RP.
IN A HURRY? If you don’t have much time use the link to jump ahead to our step-by-step guide (with images) to set up HDR movie mode shooting on the Canon EOS R/RP.
What is HDR movie shooting on Canon EOS R and RP?
With HDR photography it’s a little bit like the story of the three bears. When you press the shutter to take a photo three images are taken: one that’s underexposed, one that’s overexposed, and one that’s exposed exactly right.
Where it differs from the story of the three bears is that your HDR photo is a combination of all three images. Between them, they have the perfect exposure for the highlights, mid-tones, and shadows. The camera then does some HDR voodoo magic and combines the three images to produce a single image that retains details from the dark to bright areas.
A similar thing is happening when you shoot HDR movies on the EOS R or EOS RP, but this time only two images are being combined.
On the R and RP, you can only shoot HDR movies when you’ve selected Full HD IPB video at either 25 or 29.97fps. But why not 50 or 60fps, the highest framerates for full HD video on these cameras?
Although the final recorded video clip is 25 or 29.97fps, in HDR movie mode the camera is shooting at twice that figure, which is the maximum available framerate on the camera (at FHD).
What’s really happening is that the camera is simultaneously shooting two differently exposed videos, a normally exposed video (that gets the dark and mid-tones) plus an underexposed video (that captures the bright highlights). These are then automatically combined into an HDR video clip that has a wider dynamic range to protect the highlights.
So, to record the HDR clip, the camera needs to use the maximum framerate the camera is capable of at Full HD.
This also explains why HDR isn’t available when shooting at 4K. At that resolution, only one framerate is available. So, the camera can’t do the trick of shooting at double the framerate to get two different exposures that can be combined into a 25/29.97fps clip.
Setting up HDR movie shooting on the Canon EOS R
If you want to enable Canon EOS R HDR mode, there are several settings that will have to be disabled in the camera’s menu system.
Don’t worry, it’s easy to do and some of the settings you may not have to touch because they’re already disabled because you don’t use them. So, let’s get started; just follow the steps.
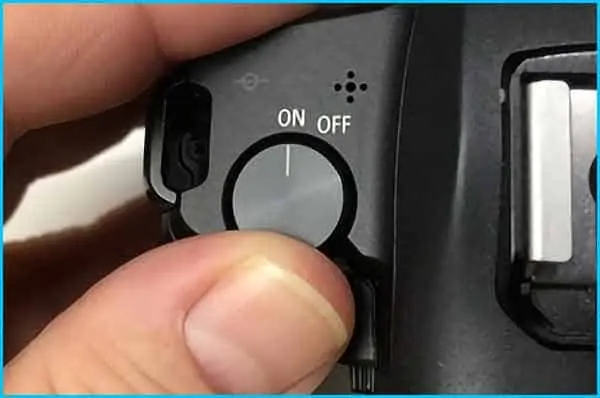
Step 1: TURN ON THE CAMERA
If your camera isn’t already powered up, turn the ON/OFF dial to the ON position.
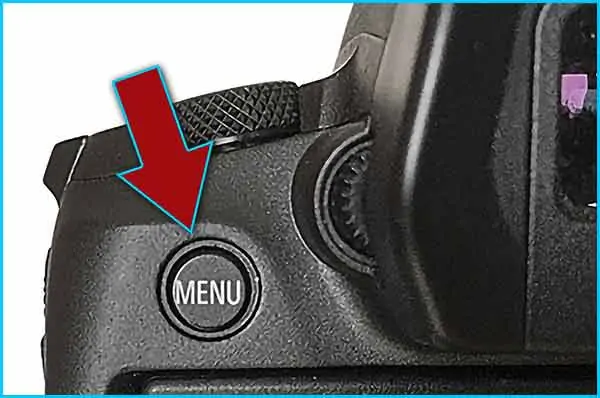
Step 2: OPEN THE CAMERA’S MENU
Enter the camera’s menu system by pressing the MENU button that’s near the top left on the back of the camera.

Step 3: SELECT MOVIE REC QUALITY
On the first tab of the RED Camera menu choose Movie Rec Quality and press the SET button on the back of the camera.
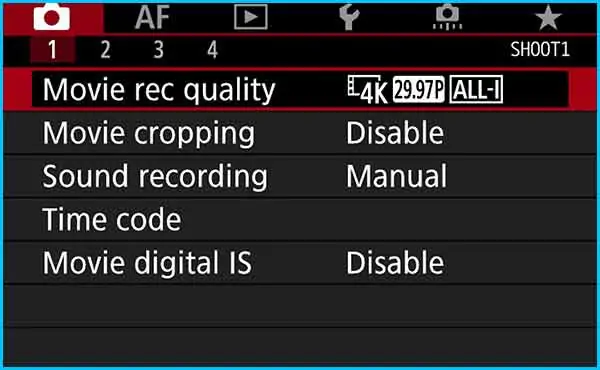
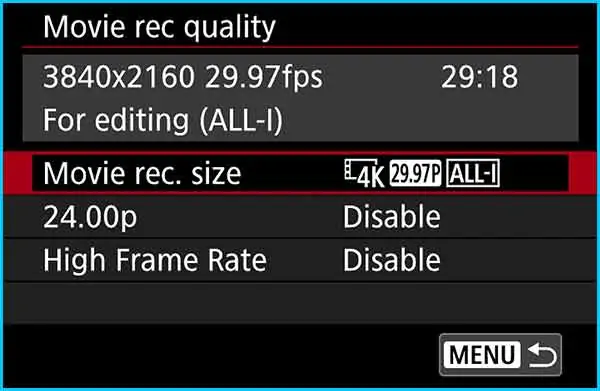
Step 4: CHOOSE MOVIE REC. SIZE
Choose Movie Rec. Size and press the SET button on the back of the camera.
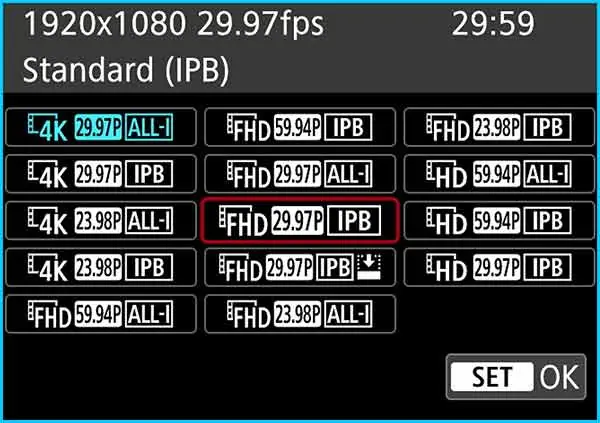
Step 5: CHOOSE FHD 25.00p/29.97p IPB
Use the UP/DOWN and RIGHT/LEFT keys to select FHD 29.97p IPB or FHD 25.00p IPB. Press the SET button for OK.
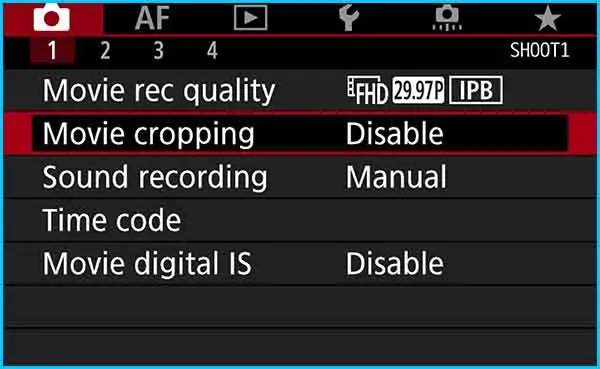
Step 6: RETURN TO TAB ONE OF THE RED MENU
Press the MENU button once to return to first tab of the Red Camera menu.
Step 7: DISABLE MOVIE CROPPING
Check that Movie Cropping is disabled. If it’s enabled press the SET button to enter the screen and make the changes.
Step 8: DISABLE THE DIGITAL IS
Make sure Movie digital IS is disabled. If it’s enabled go into the screen and disable the digital image stabilization.
Step 9: TURN OFF HIGHLIGHT TONE PRIORITY
On tab 3 of the RED CAMERA menu make sure Highlight tone priority is turned OFF.
Step 10: Make sure CANON LOG IS OFF
In tab 4 of the RED Camera menu go into the Canon Log Settings.
Make sure that Canon Log is set to OFF.
All your settings should now be good to give you access to HDR Movie mode.
EXIT the menu system by pressing the MENU button twice.
Shooting an EOS R or RP HDR Movie
Now that you have your EOS R or RP set up to shoot HDR footage you just need to switch to HDR movie mode.
In the past, you may have noticed the HDR icon on your camera’s screen but been frustrated that it’s always “grayed out”.
Now that you have your camera set up correctly, you’ll be able to tap on the HDR icon and toggle between standard and HDR mode. If you’re unsure how it’s done here’s what you need to do.
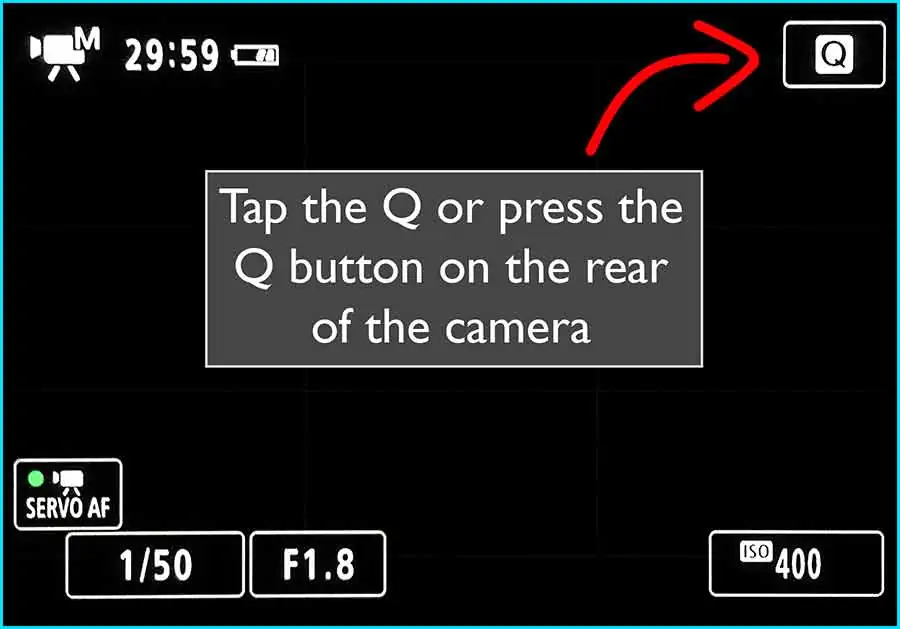
Step 1: Press the Q/SET button on the back of the camera.
If the Q icon is visible in the top right corner of your camera’s display you can tap it. If the Q icon isn’t visible press the INFO button until the Q appears.
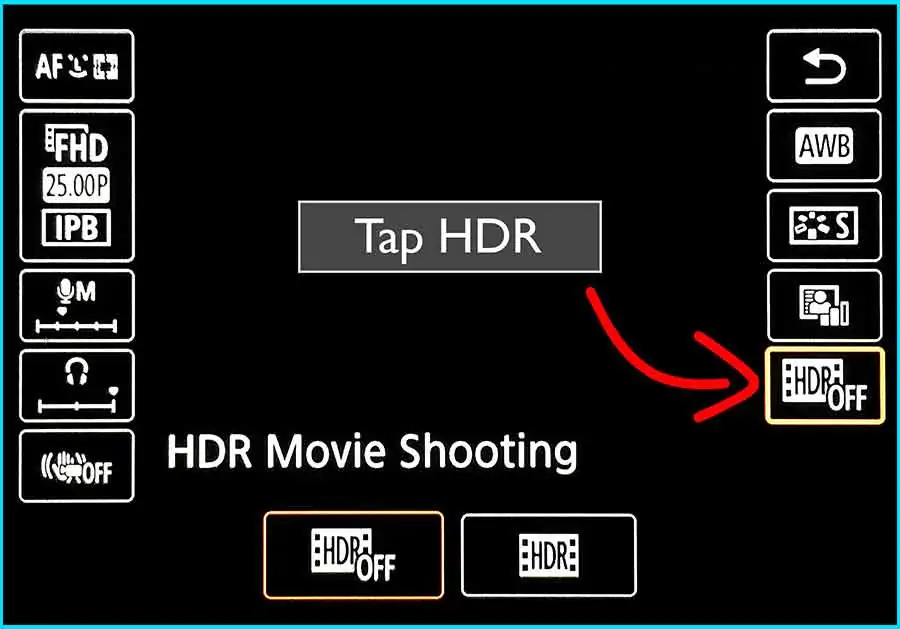
Step 2: Select the HDR Off icon.
Either tap the HDR Off icon at the bottom right or use the navigation keys and SET button to select the HDR icon.
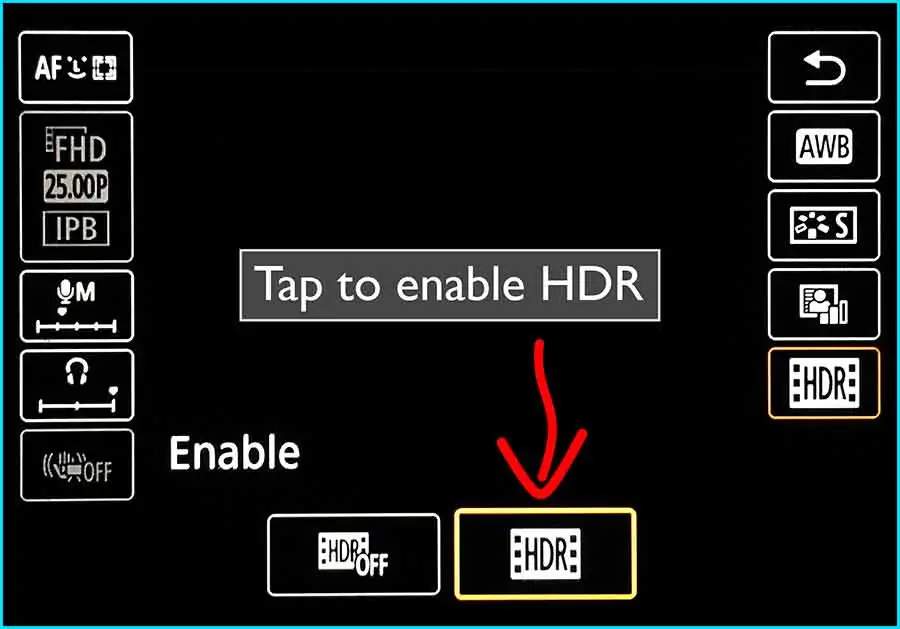
Step 3: Tap the HDR icon that appeared at the bottom edge of the screen.
The original icon in the right-hand column will change to indicate the chosen state.
Step 4: Exit the control screen.
Either tap the return icon or use the navigation keys to highlight the icon and then press the SET button on the rear of the camera.
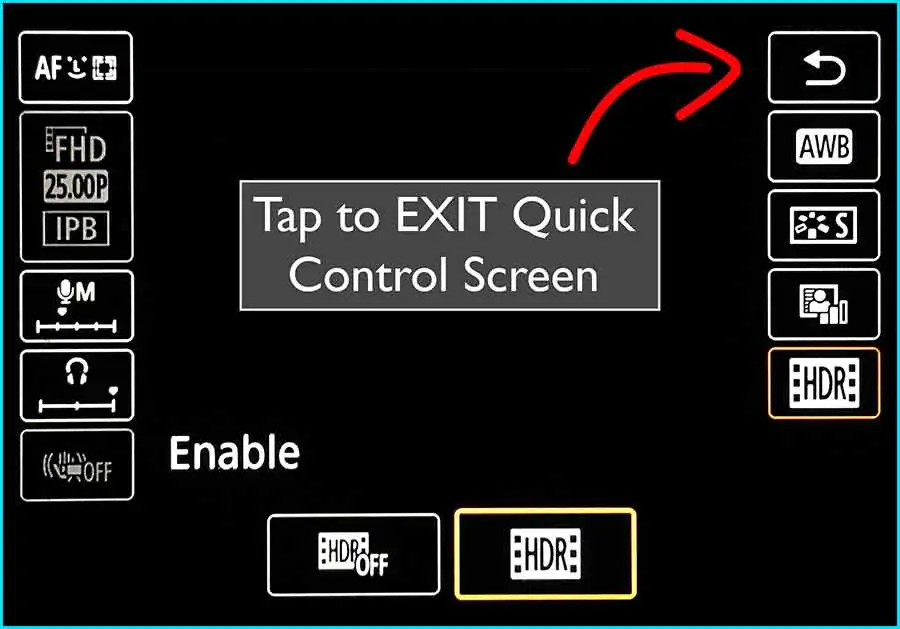
The camera will now be in HDR movie mode when you start recording.
Although you are limited to FHD 25.00p/29.97p IPB etc. you still can have a choice of picture styles. If you really like shooting in Canon C-Log you obviously can’t do that in HDR mode, but you can install custom picture styles that, like C-Log, allow you to film in a flat picture style. The footage can then be corrected on your computer by using an appropriate S-curve or LUT.
Well known options are…
- Prolost Flat
 , which is easily set up because it’s based on the existing Neutral picture style.
 - Technicolor’s Cinestyle, which is free but needs to be installed using Canon Utility 3.
- EOSHD C-LOG and Film Profiles pack is a paid-for picture style.
However, there are plenty more you can find online. Just Google it.
When should I use HDR movie mode?
Both the Canon EOS R and Canon EOS RP allow you to shoot HDR movies. But why would you want to?
Canon says enabling HDR movie mode will help protect the highlights by increasing the contrast range from the brightest highlights to the darkest shadows.
So HDR movie mode comes into its own if you’re shooting a high-contrast scene and wish to protect those bright highlights.
That could be when you’re recording a vlog beside a window, or you’re outdoors in a shady spot but the background is in full sunshine. The correct exposure for you will be different than that for the background, maybe so much so that the background will be blown out.
The one situation where you’ll find HDR movie mode most useful will be where you’re shooting outdoors and want to avoid a blown-out sky. You’ll have seen it many times, the scene is correctly exposed for everything but the sky. Since it’s way too bright, it’ll appear white with no recorded detail.
Is HDR movie mode really worth it?
But why not record in C-Log. You’ll get a wider dynamic range to save those highlights.
Although Canon’s C-Log is available on the EOS R but not the RP, do you always need it?
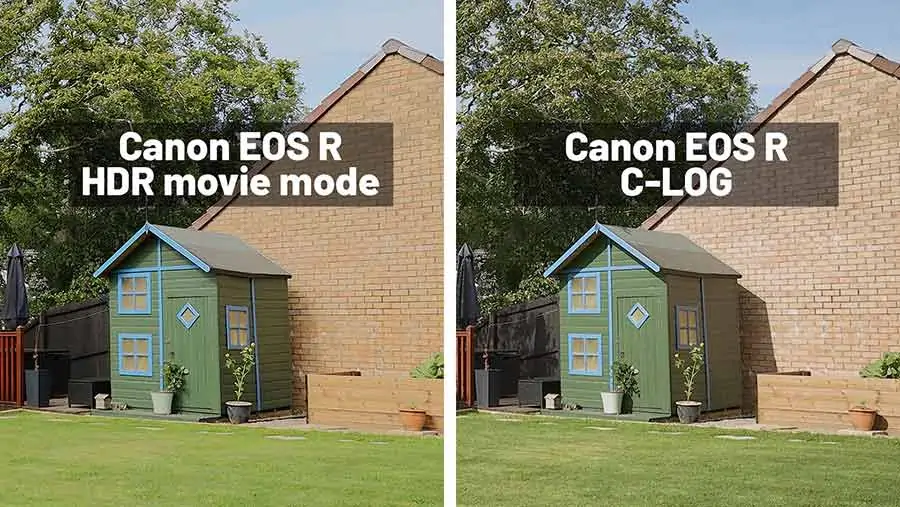
I did a test in my back yard shooting on my EOS R. All three shots were Full HD 29.97p IPB clips, the requirement for Canon HDR movie mode on the EOS R/RP. The picture style setting in all three cases was “Standard”.
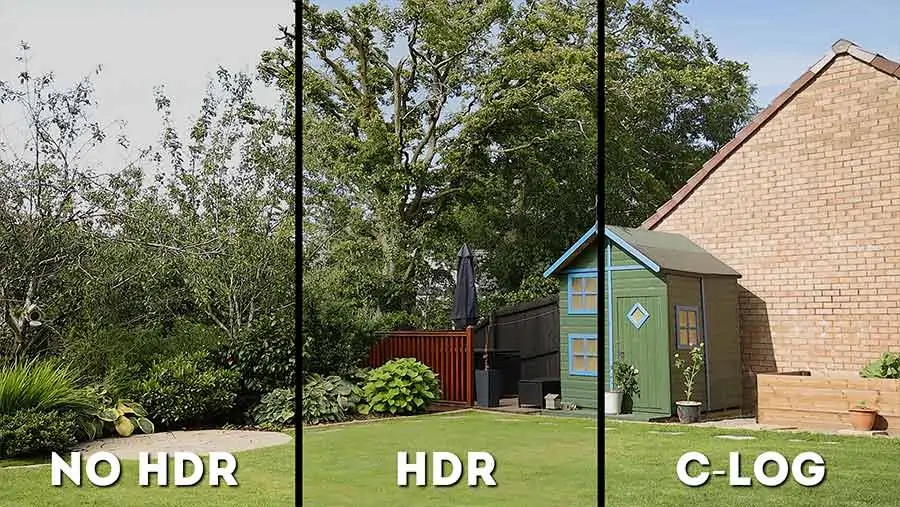
It was a sunny day with a little cloud, so there was a wide contrast range from the shadows within the foliage of the shrubs and trees, through to the highlights in the sky.
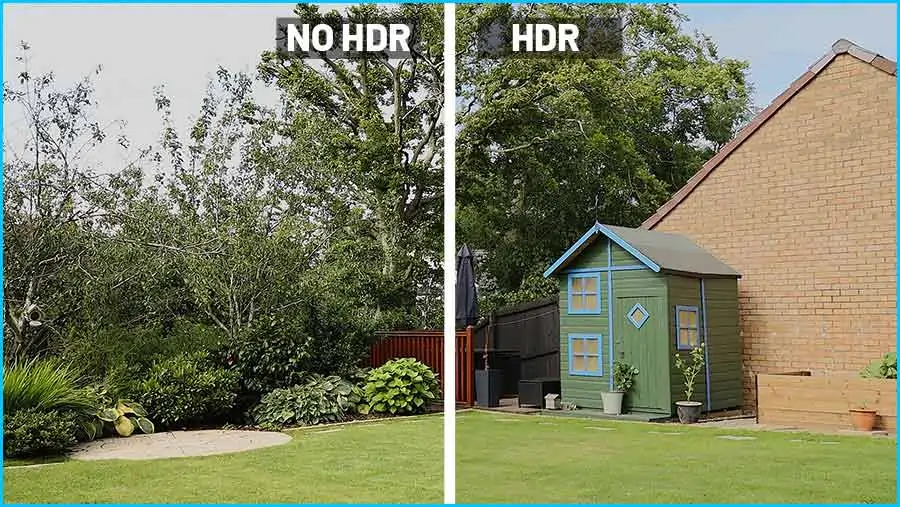
You can see on the left image, with no HDR, the correct exposure for the lawn and plants has blown out the sky. There’s virtually no detail in the sky and the leaves and thinnest branches are beginning to blend into white background.
In the shot with HDR enabled, the color of the sky and details in the cloud have been retained and there’s good contrast between the bright sky and the leaves and twigs.
In my opinion, HDR movie mode has done a rather good job of recording detail in the bright sky areas of the image. It’s also separated the fine details, such as the leaves and twigs, from the much brighter sky. With little effort, the result looks much more professional than using the standard settings.
Why not use C-Log to save more detail?
So why not use C-Log instead of HDR movie mode? At least with C-Log you can shoot Full HD or 4K and even use ALL-I encoding to get a much higher bitrate that will help with color grading.
But here’s the thing. Color grading isn’t for everyone. It takes time, it requires a new skillset, and many people just want footage they can edit straight out of the camera. If you don’t want to use Canon C-Log, don’t want to do any color grading, but do want a simple tool that can save your highlights, then Canon HDR movie mode could be the tool for you.
It’s a quick and straightforward way to make your video clips look more professional when you’re shooting video clips of a high-contrast scene. The HDR process will allow you to correctly expose for the mid-tones and shadows in your videos and HDR mode will pull back some or all the highlights that you would have otherwise lost.
You’ll be able to transfer your clips to your computer for editing without having to do any significant color grading, except for minor corrections for slight exposure errors.
If you’re an EOS RP user, you’ve got an extra reason for considering HDR movie mode. Your RP doesn’t come with C-Log. So, if you want to recover the highlights of a bright sky you’ll need HDR movie mode.
Well, that’s not quite true. You could load a flat picture style on your Canon EOS RP and then grade your footage, as mentioned earlier on.
you may also like…
- How to format an SD card on a Canon EOS R: Step-by-step with images
- Can I use my Canon camera as a webcam: Canon Webcam Software
- Canon EOS R External Power: Adapters & Power Banks
- Canon EOS R USB-C Charging Problems, and How To Make it Work
- Canon EOS R Specs (video): What you need in one place
- Canon EOS R: Turn off eye sensor to avoid blank screen
What’s the difference between HD and HDR?
The HD in HD and HDR refer to different things and aren’t really related.
HD is short for High Definition. That’s 720p video, or 1280pixels across, and 720 pixels vertically. However, these days we often mean 1080p video when talking about HD video. But strictly 1080p (1920×1080 pixels) is Full HD (FHD).
So, HD refers to the resolution of the image, being a certain number of pixels horizontally and vertically.
HDR stands for High Dynamic Range and has nothing to do with the number of pixels on the screen. High Dynamic Range, in the EOS R and EOS RP, refers to images or video that combines different exposures into one final image or clip. This image or video clip will show more detail in the highlights (and shadows for an image).
Tosh Lubek runs an audio and video production business in the UK and has been using the Canon EOS R since it was released in the Autumn of 2018. He has used the camera to shoot TV commercials for Sky TV, promotional business videos, videos of events and functions, and YouTube creator content. He has also won international awards for his advertising and promotional work. You can meet him by visiting his “video booth” at HashTag business events across the country.
Recent Posts
Most people use sandbags the wrong way. Here’s how to hang them properly on a light stand for maximum stability and safety — plus what to fill them with.
You're Using the Canon RF 50mm f/1.8 WRONG! Here’s How to Fix It
If you’ve recently picked up the Canon RF 50mm f/1.8 STM—affectionately known as the Nifty Fifty—you might be confused by that strange switch on the side of the lens. It doesn’t say AF/MF...
