

DIY Video Studio is supported by its readers who use the affiliate links or ads on this site. As an Amazon Associate, I earn from qualifying purchases. Thank your support if you use any of the links.
You already know that Premiere Pro can auto-transcribe the audio in your video sequence. But you probably also know that it’s pretty good at doing it, at least most of the time. But sometimes the app makes mistakes.
But here’s the thing. It’s not all the fault of the app. Some of the time it’s our fault. You see, Premiere Pro will produce better auto transcription results if we give it better material to work with. So, what does that mean?
Basically, we need to provide Premiere Pro with dialogue that is as clear as possible and with as little distracting background noise as possible. That way, the app won’t be distracted and confused by non-dialogue sounds. In essence, if the input is poor, your results will be poor, but if the input is good, so will the output.
Therefore, to get the best results from Premiere Pro’s auto transcription we need our recorded dialogue audio to be as high quality as we can manage, and as clear as possible.
Tip #1: Speak clearly or work with clear speakers

This one isn’t always possible to control because you might be recording a client or a member of the public who won’t speak as clearly as a professional voiceover artist. But a rule of thumb is that the clearer the dialogue, the more easily Premiere Pro will understand what is being said.
Obviously heavy accents may cause problems for auto-transcription in Premiere Pro, as will local dialects. That’s not a criticism of the speaker, it’s just that software transcription cannot cover every situation, although it is likely to improve in the future.
To help the auto transcription your speaker should speak as clearly as possible and not too quickly.
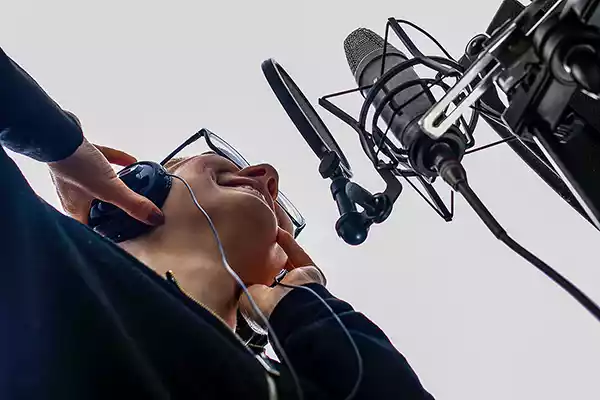
Tip #2: Get the microphone close to your subject
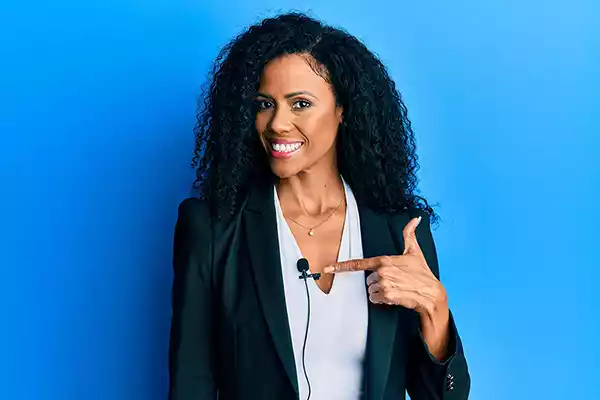
When you get the microphone on or near to your subject, you’ll record much cleaner dialogue than by having the microphone further away. That’s especially true if there is some noise in the background, like other people speaking, fan or aircon noise, or nearby traffic. By having the mic close to the subject’s mouth, their voice will seem quite loud, so you can turn down the input level.
That will also have the effect of making background noises quieter and less likely to confuse Premiere Pro.
Using lavaliere mics and unidirectional microphones on boom arms are good solutions. But if freedom of movement is important, and you don’t have an assistant, use a wireless microphone system where the mic and transmitter are on the presenter, and the receiver is on the camera. If you don’t have a wireless mic, plug your mic into a smartphone and record the audio with a sound recording app. You can later sync the audio with the video in Premiere Pro.
Tip #3: Set the record levels before you start shooting
Assuming your equipment allows you to adjust the microphone input level, it’s important that you set it correctly. Why is it important?
If your audio recording level is too low, you will have to boost it in post-production. If it were just your voice that you would be boosting then that would be OK, but as you raise the volume of the recording you will also boost the unwanted noise in the background.
So, you’re not actually making the recording any clearer, it’ll just be louder.
Setting the input level too high is bad in another way, you run the risk of clipping the audio, which can result in distortion because there’s more signal than the recorder can describe as a digital signal. Not only will the audio sound bad, but since the speech is no longer clear, Premiere Pro will now find it more difficult to recognize and transcribe.
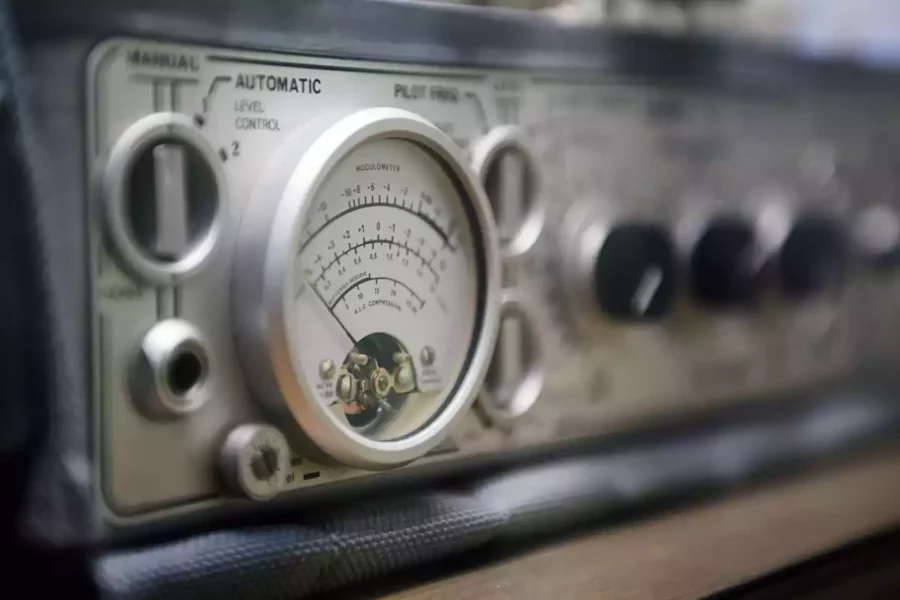
So how do you know if the level is correct?
Look at the audio meter on your recording device. If the meter is way down here, the level is too low. If the bars are consistently at the top end, often shown in red, then you’ll have audio clipping. The ideal level is to have normal speech peak at around -12dB on the meter. That gives you plenty of headroom should the speaker suddenly speak more loudly without clipping.
If it’s you who is speaking and you’re confident that you’re not suddenly going to get loud, you could set the level higher, and peak between -6 and -3 dB. Essentially your aim is to capture the maximum information that you can work with later.
Note that on an audio meter, 0dB is the maximum level and large negative numbers represent quiet sounds. Because there is a maximum level of 0dB, all sounds that are louder than this cannot be described in detail because all that extra detail is cut off, hence the term “clipped audio”.
Tip 4: Use one microphone for each person speaking
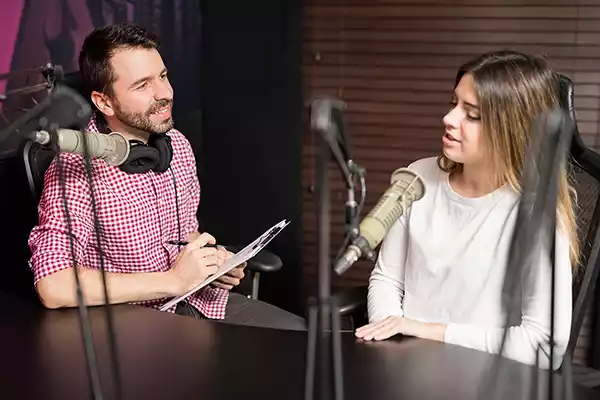
If you ever get the opportunity to visit a professional broadcast or recording studio, you’ll notice that each person speaking, or singing has their own microphone. Usually, the only time a microphone is shared is when a “man in the street” interview is recorded using a handheld mic. Even then, the interviewer will move the microphone between themselves and the other person.
You will seldom see a single microphone placed in the middle of two or more people. That’s because it is very difficult to place a single microphone where it can pick up good sound from everyone taking part in the recording. Some people naturally have louder more assertive voices while others are more softly spoken. If you record two or more people, whose voices differ in loudness, you will have to constantly adjust the input level. Something that is difficult to do in practice, unless you have a sound mixer and recording experience.
I have seen some dual lavaliere microphones that at first glance seem to solve the problem. They have two mic capsules, one for each speaker. But the cables then merge into one and plug into a single input socket. The trouble with this arrangement is that you cannot control the level of each speaker, because the two mic inputs have been merged before you can adjust the recording level.
To get a good level on each person speaking, they need individual microphones where the input level can be set on each one.
Tip 5: Avoid recording wind noise
Wind can be a real problem when you’re recording outdoors. Those wind gusts that hit the microphone contain more energy than the microphone can convert into a detailed signal. So, what you get is a blasting sound, as the microphone element is literally impacted by the fast-moving air mass, which we call wind.
That wind noise can mask what your subject is saying, making it difficult for both your viewer or listener and Premiere Pro to hear what is being said. If Premiere Pro can’t hear the speaker, it won’t be able to transcribe the speech.
So, you need some wind noise protection for your microphone. Commonly that’s what’s known as a furry dead cat or wind muff. The smaller ones are sometimes described as dead kittens. You can also get ones for lavaliere mics. For the thin lavaliere mics, you can get stick-on microphone fur wind covers called Rycote Overcovers that stick the microphone onto clothing or skin.
All these wind muffs do the same thing, they disrupt the wind and prevent that high-energy airflow from hitting the mic element while only minimally affecting the sound from the speaker.
As a last resort, you can switch on the wind-cut filter on your camera or audio recorder, assuming it has one. Since most of the wind noise is low frequency, wind-cut filters typically cut the low frequencies from the microphone. The trouble is that you also lose the low frequencies in the speaker’s voice.
Tip 6: Avoid recording vocal pops and blasts
Vocal pops and blasts can also mask what’s being said.
Plosives caused by words starting with the letters P and B, sound like blasts in the recording. These words transmit a lot of energy in the air that can overwhelm the microphone element. Effectively, these are mini wind blasts that are caused by speech.
Like wind noise, plosive pops and blasts can be eliminated by using a furry dead cat, but in a recording studio, we normally use a pop filter or pop shield. This can be a disc of metal mesh-like material or a hoop that has one, two, or three layers of nylon mesh.
If you don’t have a furry cover or pop shield you can change the way you use the microphone. Professional voiceover artists know how to speak across the mic so that the air blast doesn’t hit the microphone element.
If you are using an omnidirectional lavaliere mic, and most lav mics are omnidirectional, you can pin it to a lapel or shirt, so it is pointing downward. This has the effect of any blasts from the speaker’s mouth passing by the mic element, but the speech will still be picked up.
Tip 7: Clean up noisy audio before transcription
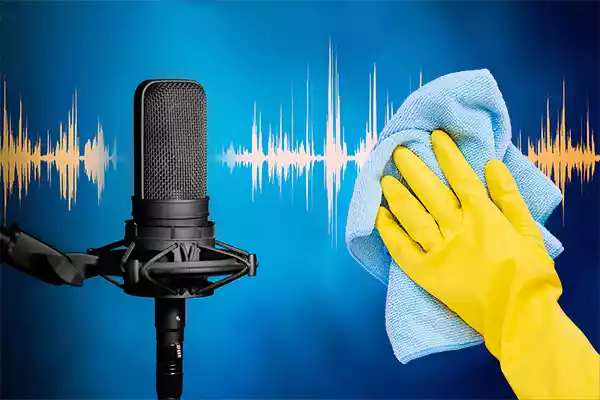
Sometimes you can’t avoid recording noisy audio. After all, capturing some audio, even if it’s noisy, is often better than not getting any audio at all.
If this is the case, before transcribing the dialogue, consider cleaning up your noisy audio. If you are using Adobe Premiere Pro, I’m guessing you have an Adobe Creative Cloud subscription.
So, you will most likely also have access to Adobe Audition. You can use Audition’s noise removal feature to remove the background noise.
If you don’t have access to Adobe Audition, there is a similar filter in Audacity, which is a free cross-platform audio recording and processing app.
However, if you have the budget, consider a professional audio noise removal plugin, such as Izotope’s RX Elements. It includes useful tools from the RX9 audio repair tool kit. It includes tools such as De-hum, De-click, De-clip, and Voice De-noise. The RX9 Advanced edition includes more industry-standard audio repair tools, but at 10x the cost of RX Elements, it’s really intended for audio professionals in the movie and TV industries.
Tip 8: Remove room echo from your recording

When you record in an empty space, such as an empty room, hall, or church, room echo will be apparent. The problem is that echo, or more correctly reverberation, on your recording will make it more difficult for Premiere Pro to hear the dialogue clearly and produce an accurate transcription.
One way to minimize the reverberation on the recording is to get the microphone closer to the speaker’s mouth. Their voice will now seem louder and dominate the background sounds, including the reverberation. To avoid the chance of audio clipping and distortion, you will need to lower the mic input level. In doing so, the speech will sound OK, but the reverb in the background will appear quieter and less pronounced.
But there’s a limit to how far you can reduce the reverberation by adjusting the microphone position. Fortunately, it is now possible to remove most or even all the reverberation on a voice. Audio plugins, like DeVerberate 3 from Acon Digital, can do a great job of removing reverberation from recordings made in an echoey room.
DeVerberate 3 is a VST plugin, so if your audio editor can use VST plugins, such as Adobe Audition, DeVerberate 3 should be compatible. However, Adobe Premiere Pro can also use VST plugins, so this plugin can be used directly in Premiere Pro to remove the room reverberation from your recordings.
Tip 9: Analyze the original audio instead of the audio mix
By the time you have come to the end of building your project in Premiere Pro, it might include interviews, voiceovers, a piece-to-camera, music, background atmosphere recordings, and sound effects.
If possible, only get Premiere Pro to analyze the clean dialogue and not the finished mix.
Background sound effects and music behind the dialogue will make the job of auto-transcription more difficult and increase the likelihood of errors.
When you open the transcription window and choose Transcribe sequence, do not let Premiere Pro analyze the Mix, instead, choose audio clips that have been tagged as dialogue or choose the tracks that only contain dialogue. Otherwise, mute the non-dialogue tracks.
Tip 10: Choose the correct language in Premiere Pro

Setting the language correctly when transcribing the audio will improve the transcription accuracy.
When you hit the Transcribe sequence button, the settings window that opens lets you choose the language of the person speaking. In fact, depending on the language, Premiere Pro may offer you variations of that language.
For instance, if it is English, you will be able to select the type of English. Although I am now normally given a choice of English or English (UK), when I first used Premiere Pro’s auto transcription it gave me a long list of different geographical English options. I suspect I no longer get the long list because Premiere Pro is recognizing the audio I add.
If the person or people in your clips are not English speakers there are various other language options. These include various European languages, simplified and traditional Mandarin plus traditional Cantonese.
You Might also like…
- How to Transcribe Audio in Adobe Premiere Pro
- How to Create Subtitles or Captions in Premiere Pro
- How to make your video captions look good in Premiere Pro
- Auto Transcribe Video to Text Free of Charge: 7 methods tested
- How to export subtitles or captions in Premiere Pro
- How to repurpose videos into audio & text content with Premiere Pro
Tosh Lubek runs an audio and video production business in the UK and has been using the Canon EOS R since it was released in the Autumn of 2018 and the Canon EOS R6 in 2020. He has used both cameras to shoot TV commercials broadcast on Sky TV, promotional business videos, videos of events and functions, and YouTube creator content. He has also won several international awards for his advertising and promotional work. You can meet him by visiting his “video booth” at HashTag Business Events across the country.
Recent Posts
Most people use sandbags the wrong way. Here’s how to hang them properly on a light stand for maximum stability and safety — plus what to fill them with.
You're Using the Canon RF 50mm f/1.8 WRONG! Here’s How to Fix It
If you’ve recently picked up the Canon RF 50mm f/1.8 STM—affectionately known as the Nifty Fifty—you might be confused by that strange switch on the side of the lens. It doesn’t say AF/MF...