
DIY Video Studio is supported by its readers who use the affiliate links or ads on this site. As an Amazon Associate, I earn from qualifying purchases. Thank your support if you use any of the links.
Unless you’re a professional videographer or audio engineer, understanding how to use a wireless microphone with your video camera can puzzling. It would be easy if there was only one type of microphone, one type of wireless system, and one type of video recorder. With so few options it would be easy-peasy-lemon-squeezy to fit everything together and get it working. But we all know life’s not like that. So, if wireless mic audio isn’t intuitive for everyone, why should we bother with it?
By using wireless mic audio, we can record good quality sound and video together, without the need for a cable connection between the microphone and camera. The freedom of movement this allows is something many filmmakers appreciate. That is especially true when recording with a physically active presenter, such as an exercise class teacher, who demonstrates while explaining.
Now stay with me and I’ll explain how wireless mic audio works and how you can put it to good use, even if you’re not a yoga teacher.
LOOKING FOR A WIRELESS MIC SYSTEM? Here are our recommended systems for vloggers, filmmakers, and places of worship. You can be assured we only choose the best products…

Last update on 2025-10-20 / Affiliate links / Images from Amazon Product Advertising API
How do wireless microphones work?
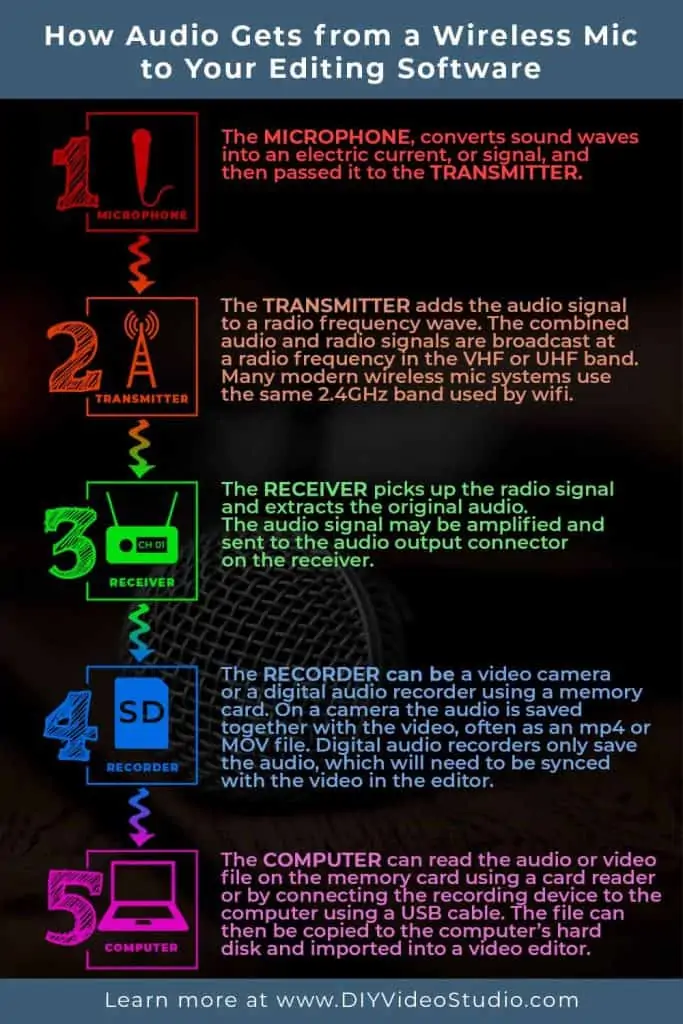
A wireless microphone works is by capturing sound with a microphone, encoding the audio signal, before broadcasting it using a small radio transmitter. The radio signal is picked-up and the audio decoded on a radio receiver that is connected to a video camera, where the audio is added to the video footage and recorded to a memory card as a video file.
The video file can be copied to a computer and then imported into an editing program.
The above scenario assumes you are using a wireless microphone with a video camera, but if you are using a wireless microphone for a video event, such as a concert, seminar or business presentation, the wireless receiver will plug directly into a sound mixing desk or PA system.
That’s an overview of how a wireless mic works, but we’ll take a closer look, at each stage in the wireless microphone process and then the hardware used for each stage.
STEP 1: Microphone captures the sound
The sound we hear is the result of pressure waves in air striking our eardrums and making them vibrate. The same process happens in a microphone. The sound waves strike a diaphragm, causing it to vibrate. This vibration is converted into an electrical signal.
The most popular microphone types of microphones are Dynamic and Condenser. Both types produce a varying electrical current, or signal, that represents those pressure waves we hear as sound. However, they create the audio signal is two different ways.
In a dynamic microphone a coil of thin copper wire is attached to the diaphragm and sits in a magnetic field that’s produced by a permanent magnet. As the diaphragm vibrates so does the coil. Now since a wire, in this case the coil, moving in a magnetic field generates a small electric current that current matches the sound vibrations, which can be passes on to an amplifier in the transmitter.
In a condenser microphone, the diaphragm forms part of an electrical capacitor. In fact, a condenser is an alternative name for a capacitor. As the sound waves vibrate the diaphragm, the capacitance changes in line with the vibration. It’s that changing capacitance that’s used to create the electrical signal that represents the sound.
STEP 2: Transmitter converts and broadcasts the signal
The electrical signal generated by the microphone may be amplified and then digitized into a digital signal of ones and zeros. The signal is then broadcast in a specific part of a VHF or UHF spectrum.
Some transmitters may also use 128-bit or 256-bit encoding to make the signal secure. This ensures that if anyone else picks up the signal they will not be able to access the audio.
STEP 3: Receiver picks up and converts radio waves into an audio signal
The incoming radio waves cause a varying current in the receiver’s antenna or antennas. This electrical signal contains the digital information, and the receiver “decodes” it, turning it back into a regular audio electrical signal. This signal may be amplified before being sent to the receiver’s audio output. The output is then connected to the device we want the audio signal to go. In our scenario, we would plug in a recording device (STEP 4), but if you are streaming you would connect the receiver to a computer using an audio interface.
STEP 4: Recording device saves the audio signal to memory
The output from the receiver will be recorded onto the device you’re using for the sound. It’s likely to be the same device where you’re recording the video. It could be a DSLR/Mirrorless camera, smartphone, camcorder, or even a computer. On these devices the audio and video will be recorded to the same file, often an mp4 or MOV.
Alternatively, the audio could be recorded separately from the video using a digital audio recorder, such as Zoom’s H1n, H4n, or H6 recorders. Typically, they save the audio as mp3 or wav files. For the highest quality, uncompressed wav files are used.
STEP 5: The audio files are transferred to a computer for editing
A Computer is normally where we want to put the video and audio files. This allows us to edit and combine clips.
This could be just to tidy up our clips by trimming the beginning and end. Or the editing can involve removing sections, moving around certain parts, or combining parts from several recordings.
In all cases we get the video and audio files onto the computer by either connecting the recording device to the computer using a USB file or inserting the devices memory card into the computer’s card reader. In some cases, you can transfer the files over wifi, but quality audio and video files can be large and wifi transfer impractical.
Once the media files are on the computer’s hard disk, they can be imported into editing software.
The following infographic summarizes the five-step process.
Parts of a wireless microphone audio system
Now we know how a wireless microphone system works, let’s take a closer look at the individual component parts.
Microphone
Wireless microphones are most frequently of two types: lavalier/headset mics and handheld mics.
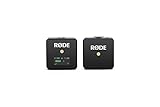
Lavalier and Headset microphones are small and light. The mic capsule, the part that converts sound waves into a small electrical signal, can be a few millimetres to about a centimetre or two in size. This means they can easily be hidden on the speaker’s body/clothing or worn on their head. The big advantage lavalier and headset mics offer is that they allow the presenter to speak to the camera hands free.
Lavlier and headset mics use condenser mic capsules, this type of microphone may need power. On larger condenser microphones it’s called phantom power.
Handheld wireless microphones look like regular microphones, with a ball grill or mesh over the top, under which a large microphone capsule is located. It is not unusual for the grill to be detachable. This allows them to be cleaned (don’t try cleaning the mic capsule).
Handheld mics normally use dynamic mic capsules. Since the moving coil in a dynamic mic generates an electrical current these mics don’t need power to produce the sound signal but, as you will see, handheld wireless mics do need batteries for the built-in transmitter. This explains why a handheld wireless mic is much larger and heavier than it’s lavalier counterpart, it also contains the radio transmitter and batteries.
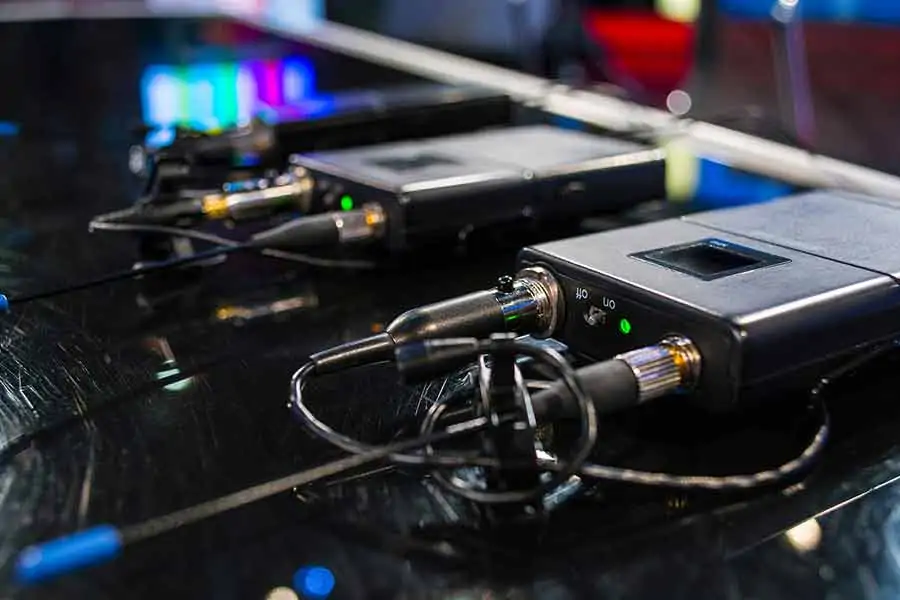
Transmitter
The transmitter in a wireless microphone kit can be built into the mic (handheld), a separate part (lavalier/headset), or a clip-on cube that attaches to a regular professional XLR microphone. In each case the transmitter requires power.
The power on a wireless mic transmitter is provided by batteries. These can be rechargeable lithium-ion batteries that are sealed in the transmitter unit. Alternatively, they can be rechargeable or conventional AA or PP3 batteries. I prefer the AA or PP3 type since they can quickly be swapped over if necessary, in the middle of a shoot. Transmitters with internally sealed Li-ion batteries must be put on charge, making them unusable for while they charge.
On a handheld wireless microphone, you can slide open or unscrew the outer housing to reveal the controls. These can include the channel or frequency selector, an audio level control, and an RF (radio frequency) power selector. The ON/OFF switch is usually on the base of the mic for easy access.
Lavalier and headset mics are small, so the transmitter must be a separate unit. This unit is called a body pack or belt pack. These are clipped on to the presenter’s belt or hidden on their body or clothing.
Because the mic and transmitter are separate, they are connected using a thin cable and connector. In more expensive and professional systems the connector screws or clicks onto the transmitter’s “audio-in” socket. This ensures the mic stays in place and won’t become disconnected due to the presenter’s movements.
Clip-on Cube transmitters are a more recent innovation. As the name suggests, they look like a cube with an XLR connector sticking up from the top. This allows it to be used with professional XLR microphones, whether handheld reporter types or shotgun mics that are usually used on boom poles in filmmaking and broadcast TV. However, any other type of XLR mic can also be attached. So, if you want to use a vintage mic, no problem. Plug in a cube transmitter and you’ve got a cool looking wireless microphone.
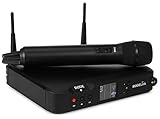
Receiver
Wireless receivers come in a couple of forms. These are large and mains outlet powered desktop or rack mounted units, and small battery-operated belt pack or camera mounted units.
The desktop or rack mounted receivers are really for live venues, corporate conventions, places of worship, etc. In other words, places where the setup is permanent or semi-permanent.
Belt pack and camera mounted receivers give the camera freedom of movement, while recording the video and audio to the same file.
Depending on the wireless system, the receiver can be as much as 100m (328ft) from the radio transmitter. Provided nothing has caused any interference, the signal should be the same as the signal leaving the transmitter.
Recording device
Your recording device is probably going to be your camera. In most cases, this would be your ideal choice because the sound will be recorded to the same file as the video footage, just like your regular video clips.
You can use many different types of camera to record your video and wireless mic audio together. These include camcorders or video cameras, DSLR/Mirrorless cameras, and even your smartphone.
But there is a caveat here. Your camera must have an audio input socket.
In this era of hybrid shooters, it’s surprising how many expensive DSLR and mirrorless cameras don’t have audio in and mic out sockets. Some, like the Canon M50 have mic in sockets but no headphone socket to allow you to monitor the quality of the audio. There are solutions to the problem, but they add an extra complication to the setup.
Professional filmmakers often record sound on a separate recorder to the camera, and that’s also an option for you. You don’t need hugely expensive digital recorders. I use a Zoom H4n or H6 recorder mounted on top of my camera. This allows me to record from multiple microphones with the audio from each mic on a separate track. However, you can get digital audio recorders for around one hundred dollars (such as the Zoom Handy Recorder) that takes 3.5mm jack.
If you do record your audio and video separately, i.e. the video on a video recorder and the sound on a digital audio recorder you will need to sync the audio and video together in your editing software.
Whatever recording device you use it will probably record to a memory card.
Computer and editing software
The first step to editing video on your computer involves getting the video footage onto your hard disk. You can usually do this by either connecting your recording device to your computer using a USB cable or by putting your memory card into your computer’s card reader.
Whichever method you use be prepared for the transfer to take a little time, especially if you have been recording 4k or 8K files. Your video files will be large, especially if they are longer than 20 or 30sec.
Once on your computer try to put your video project on the fastest drive you have. If you have a choice between an SSD and a conventional hard disk, choose the SSD. Your read and write speeds will be much faster, so your project will load more quickly in your editing software and the video previews will be smoother. All in all your editing experience will be better.
If you are not using Adobe Premiere Pro CC or Apple’s Final Cut and want to save yourself money without cutting your creative opportunities, there are two video editing apps you should consider. Both are cross-platform apps, powerful, and they’re also free. What’s not to like! They are HitFilm Express![]() and DaVinci Resolve 16
and DaVinci Resolve 16![]() .
.
Are wireless mics better than wired?
Wireless mics are better than wired mics if you need freedom of movement and to lessen the on-stage trip hazard.
Typical examples where these factors may be desirable would be a concert or theatrical performance, a lecture, business seminar, product demonstrations, exercise classes, and in video production.
Wireless mics are also a good choice if you need to conceal the microphone on the presenter. In this case a lavalier microphone can be attached underneath to the presenter’s clothing and the cable feed through to the transmitter body pack, which can be worn on a belt.
However, the microphones used in some wireless microphone systems are not as high a standard as though you might expect in a voiceover studio. This isn’t to say they are in anyway bad, it’s just that high-quality condenser microphones are not robust enough to be used outside of a studio environment. None-the-less, you can expect wireless microphones not to have as good a frequency response as wired microphones. But to be honest, this isn’t much of a problem.
Another downside of wireless mics is that they may suffer from radio interference or there may not be enough frequencies available to run the number of mics you need.
In truth, the answer to whether wireless mics are better than wired mics is down to what are your requirements and budget. Both wireless and wired mics have their pros and cons, so you must choose the type of mic that is right for your recording situation. It’s a case of picking the right mic for the job.
Tosh Lubek runs an audio and video production business in the UK and has been using the Canon EOS R since it was released in the Autumn of 2018. He has used the camera to shoot TV commercials for Sky TV, promotional business videos, videos of events and functions, and YouTube creator content. He has also won international awards for his advertising and promotional work. You can meet him by visiting his “video booth” at HashTag business events across the country.
Recent Posts
Most people use sandbags the wrong way. Here’s how to hang them properly on a light stand for maximum stability and safety — plus what to fill them with.
You're Using the Canon RF 50mm f/1.8 WRONG! Here’s How to Fix It
If you’ve recently picked up the Canon RF 50mm f/1.8 STM—affectionately known as the Nifty Fifty—you might be confused by that strange switch on the side of the lens. It doesn’t say AF/MF...